This site is supported by our readers. We may earn a commission, at no cost to you, if you purchase through links.
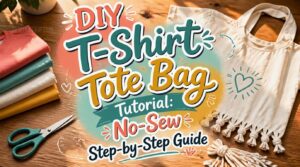
That drawer full of concert tees and free work shirts you’ll never wear? Grab one and skip the trash bag entirely. No needle, no thread, no sewing machine humming away on the kitchen table.
This diy tshirt tote bag tutorial turns a stretched-out cotton shirt into a sturdy grocery hauler in under an hour, using nothing but scissors and your own two hands. The trick lies in the knot: tie the fringe right, and the fabric grips itself tighter than any stitch could.
Grab a shirt with some life left in it, clear off a flat surface, and let’s turn that closet clutter into something you’ll actually reach for.
Table Of Contents
Key Takeaways
- Choose a pre-washed, thick jersey cotton shirt with no weak spots, since fabric quality determines how well your knots hold and how much weight your tote can carry.
- Cut the neckline, remove the sleeves for handles, then fringe the bottom hem and tie double knots (cross-tying adjacent strands) to seal the base without any sewing.
- A finished tote typically holds 10 to 15 pounds (up to 20 with sturdier jersey) and can be customized with fabric paint, patches, or iron-on letters once it’s assembled.
- The entire no-sew project takes about 20 to 40 minutes and turns leftover fabric scraps into extra zero-waste items like pouches, charms, or cleaning cloths.
Choose The Right T-Shirt

Not every t-shirt is cut out for tote bag duty, and that’s okay. The right shirt makes cutting, tying, and knotting way easier on you. Here’s exactly what to look for before you grab those scissors.
If your fabric choice checks out but the collar still feels too tight or worn out, this guide on how to cut a t-shirt neckline walks you through reshaping it before you turn to the rest of the shirt.
Adult Cotton Shirts
One old shirt from your closet is really all this no sew tshirt tote bag needs. Look for 100% cotton, ideally ring spun for a smoother, softer feel. Combed cotton resists pilling too.
Any adult size works, but bigger shirts mean roomier bags. Upcycling old clothes has never been this satisfying!
Thick Jersey Fabric
Thick jersey fabric makes a big difference here. That tightly knitted structure adds real weight capacity, so your groceries won’t bust through the bottom.
Here’s why it matters:
- Denser knit means better durability and snag resistance
- Stretch recovery keeps straps from sagging
- Breathable cotton blends stay comfy even loaded up
You might consider using interlock jersey types for added thickness and insulation.
Grab a heavier shirt for your no sew tshirt tote bag project.
Washed and Dried Shirts
Washed and dried shirts save your tote from turning into a lopsided mess later. Skip pre-washing and cotton can shrink 2 to 5 percent on that first load, warping your careful cuts.
Pre-washed fabric also softens the hand feel, making knots easier to tie.
| Shirt Type | Shrinkage Risk | Best For Totes |
|---|---|---|
| Unwashed cotton | High | Not ideal |
| Pre-washed cotton | Low | Great |
| Cotton-poly mix | Minimal | Great |
Avoid Holes and Weak Spots
Give that shirt a once-over before you cut anything. Hold it up to the light and check fabric stress points—armpits, hems, collar seams—for thin spots or snags.
Inspecting seam integrity now beats discovering a hole mid-tote later. Skip shirts with existing wear; upcycling projects work best on sturdy cotton.
Reinforcing handle junctures matters too, since that’s where your no-sewing-required tote takes the most strain.
Best Sizes for Tote Bags
Ever notice how the shirt size decides the whole project?
A regular tee makes a small tote, roughly 10×10 inches, perfect for daily errand needs or small gift dimensions.
Grab an XL shirt and you’re looking at laptop storage capacity for work.
For grocery hauling limits or travel bag utility, size up.
No sewing required, just smart shirt shopping.
Gather Your No-Sew Supplies

No sewing machine, no needle, no problem. Before you make a single cut, let’s round up everything you need so you’re not digging through drawers mid-project. Here’s your simple supply list to get started.
Sharp Fabric Scissors
A dull pair of scissors will fight you the whole way through this DIY tshirt bag tutorial. Look for blade steel quality around 60-66 HRC, since no sewing required also means no room for jagged cuts.
- Curved blades follow fabric grain
- Ergonomic handle design fights hand fatigue
- Long tips reach tight corners
- Thin stock glides through jersey
- Regular oiling keeps pivots smooth
Washable Marker or Chalk
Grab a washable marker or tailor’s chalk before you cut a single line in this no-sew tshirt tote bag tutorial. Chalk shows up better on dark shirts, while markers offer bolder saturation on light ones.
| Tool | Best For | Cleanup |
|---|---|---|
| Fine tip marker | Detail lines | Rinses off skin fast |
| Broad tip marker | Bold tracing | Washes from cotton easily |
| Chalk | Dark fabrics | Brushes away, no stain |
Both meet non-toxic safety standards.
Bowl Neckline Template
Why eyeball a curve when you can trace one? A bowl or large plate gives you an instant symmetrical neckline, no freehand guessing.
- A cereal bowl for a snug, narrow neck
- A dinner plate for a wide, relaxed opening
- A mixing bowl for scaling radius between sizes
Trace along the fabric grain, keep knits’ stretch in mind, and your no-sew tote will look shop-bought.
Flat Cutting Surface
A wobbly table can wreck an otherwise perfect cut. For this DIY tutorial, work on a hard, smooth, flat surface—an old cutting board or countertop works great.
Surface flatness quality keeps your old tshirt from shifting mid-cut, so edges stay straight instead of skewed. A stable, sturdy setup means your tshirt tote bag turns out clean, professional, and totally upcycled-chic.
Optional Decorating Supplies
Plain totes are fine, but decorated ones? Way more fun. If you want yours to stand out, grab a few extras before you start cutting.
- Washable marker or chalk pen for sketching designs
- Fabric paint (check the paint heat setting)
- Iron on letters or patches
- Stencils for clean layering
- Glitter glue for durable sparkle
Small craft supplies, big personality upgrade for your DIY accessories.
Cut The Shirt Into Shape
Alright, scissors in hand? Good, because this is where your old t-shirt actually starts looking like a bag. We’ll go step by step, from that first flat lay to the final snip that shapes your straps and opening.
Lay Shirt Flat

Flip your shirt inside out and smooth it onto a clean table—this is your Surface Preparation step before any cutting happens in this nosew DIY tutorial.
Line up shoulder seams for edge alignment, then press out wrinkles by hand for quick wrinkle removal. Run a symmetry check by comparing both sides.
Getting this tshirt tote bag foundation flat now saves headaches later when you turn a tshirt into a bag.
Cut The Neckline

Now that your shirt lies flat, grab a bowl and trace your neckline curve—this shapes your whole tote’s opening.
- Round necklines: 8-10 inches for classic totes
- V-shapes: triangular, easy shoulder access
- Boat necks: wide, shallow, fits chunky straps
- Start shallow, then widen by small increments
- Check cutting symmetry on both layers before finishing
Cut slowly for clean, stable edges—no fraying surprises later!
Remove Both Sleeves

Time to tackle those sleeves. Cut just inside the shoulder seam on each side—this keeps your armhole symmetry intact and preserves fabric for later.
| Cut Style | Edge Result | Best For |
|---|---|---|
| Flush cut | Clean, minimal fray | Bag straps |
| Wide cut | Looser drape | Roomy totes |
| Curved cut | Rounded shape | Comfort |
Jersey won’t fray, so skip binding entirely. Save scraps for repurposing into future straps.
Create Even Handles

Now that your sleeves are off, look at those armholes—those become your grip points. Aim for 1.5 to 2 inches wide on each side, checking both match by folding your shirt in half. Straight cuts beat curvy ones for symmetry here.
For length, 18 to 22 inches keeps things comfortable. Thicker shirts? Stick closer to 2 inches for extra strength.
Adjust Opening Size

Want a bigger mouth on your tshirt tote bag? Cut the neckline deeper. Neckline shape impact matters here—scoop cuts open wider than crew necks. Watch fabric stretch properties though; thin jersey stretches more than thick.
Test opening stability factors by loading books before committing. This is one of those no sew ideas where a quick fix (light stitching) boosts edge reinforcement. Always run capacity testing first!
Tie The Bottom Closed

Now for the part that actually turns your shirt into a bag: the bottom. No sewing machine, no glue gun, just some fringe and a little knot-tying know-how. Here’s exactly how to make that base sturdy enough to hold your stuff.
Mark The Bag Depth
Grab your tape measure, because this step decides how much your tshirt tote bag can actually hold. Measure 4 inches up from the bottom hem and mark a straight line across—that’s your depth guide.
This standardized depth keeps volume predictable and weight balanced once you load it up. Deeper isn’t always better; think about what you’ll actually reach for, then mark with confidence before cutting.
Cut Matching Fringe Strips
Cut vertical strips from the hem up to your depth line, spacing them 1 to 1.5 inches apart. Cut through both layers together for perfect symmetry—no measuring twice.
Want subtle fringe? Keep it short. Bold and swingy? Let strips run longer. Either way, uniform intervals now mean tidy double knots later, and zero wasted t-shirt scraps.
Tie Secure Double Knots
Now the fun part: matching up strands, front to back, and tying each pair into a secure double knot. Pull both ends snug before the second throw locks it flat.
Good tension keeps friction high and knots from slipping. Test a few by tugging straight down—if they hold, you’re building a sturdy, zero waste tshirt tote bag with real muscle at the base.
Cross-tie for Fewer Gaps
Ever noticed little openings between your knots? Cross-tie strands from adjacent pairs to bridge these gaps, just like a structural gap seal for your no-sew tote. This move distributes the load, keeps your bag’s base aligned, and makes sure nothing sneaks out.
Precision here means fewer holes, sturdier storage—think zero waste DIY meets practical, upcycled clothing magic.
Check The Base Strength
Before you call your tshirt tote bag done, put it through a mini load test. Fill it with cans or books and check for sagging.
- Base stays flat, no bulging
- Knots hold tight, no slipping
- Fabric resists stretching under 2-3 pounds
A sturdy base means your handmade tote bag is ready for real work, not just decoration.
Finish and Customize Your Tote

Your tote is knotted up and ready to hold its shape, but you’re not quite done yet. This is where the bag stops looking like a chopped-up t-shirt and starts looking like something you actually made on purpose. Here are a few easy ways to put your own stamp on it.
Turn Knots Inside
Flip your knots inward and you’ll trade a lumpy bottom for a smooth finish. Tucking fringe inward reduces base bulk and boosts knot placement stability, so your no-sew tshirt tote bag sits flat.
This upcycling clothing trick spreads weight evenly across the base—one more zero waste win for your DIY collection, before you stretch those handle edges next.
Stretch Handle Edges
With your knots tucked in, grab those handle edges and pull them, gently, lengthwise. This stretches the jersey knit, curling edges naturally so you skip hemming entirely—true no-sew magic.
Knits deform a bit under tension, which actually helps here, rounding edges for comfier carrying.
Repurposing old clothes rarely feels this satisfying: one honest tug transforms floppy straps into a tote ready for real zero waste hauling.
One honest tug turns floppy straps into a tote built for real zero waste hauling
Add Fabric Paint
Now that your straps have that perfect curl, let’s talk color. A plain tote is fine, but paint makes it yours.
Water-based fabric paint stays flexible and won’t crack. Test on a scrap first, then heat-set with an iron once dry.
- Wash and iron the shirt flat
- Slide cardboard inside to block bleed
- Apply thin coats with a flat brush
- Let dry, then heat-set per instructions
Attach Patches or Letters
Paint dry? Good, now let’s talk patches and letters. Iron-on letters work best on cotton blends, and your tshirt tote bag qualifies. Knits sometimes pucker, so add light interfacing first.
| Method | Best For | Care Tip |
|---|---|---|
| Iron-on | Cotton | Avoid high heat |
| Velcro | Easy swaps | Skip dryer |
| Glue | Quick fixes | Hand wash |
Space patches evenly for balance.
Use Leftover Scraps
Don’t toss those cut-off strips! Your tshirt tote bag leftovers still have plenty of life:
- Stuff scraps into small pouches for seed insulation
- Braid strips into charms or zipper pulls
- Wipe stains with scrap cloths (add coffee grounds for stubborn spots)
- Sew tiny pockets for cards or keys
- Patch worn corners for extra durability
That’s zero waste DIY at its finest, no sew, no waste, just creativity.
Frequently Asked Questions (FAQs)
How to turn a T-shirt into a tote bag?
That old shirt buried in your drawer? It’s one snip away from a sturdy tote. Just cut the neckline, remove sleeves for straps, fringe the bottom, and knot it closed—zero waste, all reward.
How to make a tote bag step by step for beginners?
Grab a jersey tee, cut the neckline and sleeves, snip bottom fringe, then double-knot each strip. Cross-tie for strength, flip right-side out, and decorate freely. It’s zero-waste, no-sew, and perfect for upcycling clothing into everyday totes.
How to make a tote bag out of a shirt without sewing?
Turns out the least "sewing" you’ll ever do makes the sturdiest bag you own. Just cut, knot, and stretch jersey knit fabric using scissors and a marker—no needle required, no thread, no drama. Upcycling clothing rarely feels this satisfyingly simple.
How to make an own tote bag from scratch easy with a zipper?
Pick sturdy canvas, add a coordinating lining, and install a 9-12 inch zipper with a zipper foot. Strengthen straps with backstitching, secure zipper teeth carefully, then add an interior pocket—simple, sturdy, and totally your own reusable creation.
How much weight can a t-shirt tote hold?
Your basic tshirt tote can hold 10 to 15 pounds comfortably, sturdier jersey stretches that to Watch sharp objects and wet items though—they stress seams fast, so distribute weight evenly and skip the punctures for long-lasting reusable bags.
Can I make this bag without any cutting mistakes?
Mistakes happen, even to crafters who’ve made a dozen tshirt sleeve drawstring bags before.
Precision cutting tools, a bowl template, and pinned symmetrical handle alignment keep errors rare. Double-check lines before cutting, and you’ll craft a sturdy, fray-free tote confidently.
How long does this no-sew project usually take?
Start to finish, expect 20 to 40 minutes total. Beginners might lean longer while accuracy beats speed here—rushing causes wobbly fringe. This easy DIY project fits any zero waste plans, turning one old tee into a sturdy tote fast.
Is it safe to machine wash the finished bag?
Yes, on gentle cycle with cold water using mild detergent. Skip bleach and softeners, air dry when possible to prevent shrinkage, and your washable tshirt tote bag stays sturdy wash after wash.
Can I resize this tote for kids or groceries?
Absolutely, and it’s easy: pick a bigger, heavier shirt with a wider base for groceries, or trim height for shorter kids handle length. Just adjust fabric weight and strengthen the bottom for extra load.
Conclusion
So much for that gym membership promising to fix your clutter—turns out scissors and an old tee solved it in under an hour.
That’s the quiet genius behind this diy tshirt tote bag tutorial: no machine, no expertise required, just fringe, knots, and grit.
Each knot you tie is proof you can build something useful with your own two hands.
Skip the store bags. Your closet just handed you a sturdier one, free of charge.
- https://totebagfactory.com/blogs/news/tote-bag-out-of-a-shirt
- https://mommypotamus.com/no-sew-t-shirt-tote-bag-tutorial
- https://happiestcamper.com/how-to-make-a-no-sew-t-shirt-bag
- https://resources.pepsicorecyclerally.com/resources/make-a-tote-bag-from-a-t-shirt
- https://www.instructables.com/No-Sew-10-Minute-T-Shirt-Tote