This site is supported by our readers. We may earn a commission, at no cost to you, if you purchase through links.
That concert tee from 2009 still smells faintly like the venue if you squint hard enough and use your imagination. It’s stretched out, the print’s cracking at the edges, and you’d never wear it in public again. Yet tossing it feels wrong, like throwing away the memory itself.
That’s the itch this project scratches. When you repurpose graphic tees into pillows, you’re not just recycling fabric, you’re rescuing a story and giving it a new job on your couch.
Grab your scissors and that box of shirts you can’t quite part with. What comes next turns closet clutter into something you’ll actually want to keep around.
Table Of Contents
- Key Takeaways
- Choose Graphic Tees for Pillows
- Prepare Shirts Before Cutting
- Sew a T-Shirt Pillow
- Make No-Sew Tee Pillows
- Top 10 Pillow Customizing Supplies
- 1. Tatuo Heat Press Accessory Kit
- 2. White cotton DIY pillow covers
- 3. Tatuo Heat Press Tool Kit
- 4. Sarcastic Quote Iron On Transfers
- 5. Motivational DTF Iron On Transfers
- 6. Heat Press Pillow and Tool Kit
- 7. Bright Stripes Print Making Studio
- 8. Multi Function Fabric Paint Pens
- 9. Green Heat Transfer Iron On Numbers
- 10. Baby Theme Heat Transfer Decals
- Frequently Asked Questions (FAQs)
- Conclusion
Key Takeaways
- Choose graphic tees with strong sentimental value and bold, legible graphics, checking for stains or holes beyond 1/4 inch before cutting.
- Prep work like washing in cold water, ironing flat, and stabilizing stretchy knit fabric with interfacing prevents shrinkage and crooked seams later.
- Sew panels right sides together with a zigzag stitch and a generous 1-inch seam allowance to accommodate knit fabric’s natural stretch.
- No-sew options using fringe strips and double knots let you create a t-shirt pillow with just scissors, no sewing machine required.
Choose Graphic Tees for Pillows
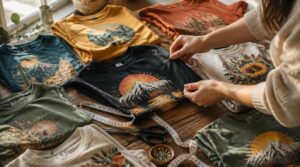
Before you pick up your scissors, you need to choose the right shirt for the job. Not every graphic tee in your closet will make a great pillow, so it helps to know what to look for. Here are five things worth checking before you commit to a shirt.
Pick Meaningful Shirt Graphics
Which shirt deserves new life as a pillow? Start with graphics that hold real memories—concert tees, team logos, or travel souvenirs work best. Nostalgic imagery and personal passion themes give keepsake t-shirt pillows genuine sentimental value.
Before you cut into that beloved tee, take a few minutes on prewashing and squaring fabric for a cleaner seam so your pillow keeps its shape wash after wash.
The best pillows start with shirts that hold real memories—concert tees, team logos, and travel souvenirs full of sentimental value
Choose bold iconography with strong visual message clarity; high-contrast designs stay legible and meaningful long after you upcycle a shirt into something you’ll actually cherish.
Check Stains and Holes
Before you fall in love with that graphic, flip the shirt inside out and hunt for trouble. Stains and holes change everything about how a panel behaves once cut.
Water-based marks often lift with pretreatment, but oil stains on jersey may never fully release. Holes past 1/4 inch weaken the panel, so mark defects with chalk and plan your cut around them.
Choose Soft Cotton Tees
Once you’ve cleared out the stained and torn shirts, judge what’s left by feel. Ring spun and combed cotton feel noticeably softer since processing removes short fibers and impurities. You might also find tri-blend fabric options that offer a silky feel due to rayon content.
If tags mention Supima or Pima cotton, grab those first—longer fibers resist pilling and hold up through repeated washing, keeping your DIY pillow soft for years.
Plan Pillow Size
Grab a measuring tape before you cut a single seam. If this tshirt pillow is joining your bed, match it to sleeping position needs: standard size suits back or stomach sleepers, queen works for side sleepers.
- Standard: 20×26"
- Queen: 20×30"
- King: 20×36"
- Body: 20×54"
- Check bed width matching first
Standard size benefits include easier pillowcase slack for future covers.
Match Front and Back
Line up the graphic dead-center before cutting so your symmetry alignment stays intact front to back. Use notch positioning at the shoulder seams as reference points, keeping grain direction consistent across both panels.
This preserves pattern continuity on graphic tshirts, giving your tshirt pillow better visual balance—a small step that makes any DIY tshirt pillows sewing project, or repurpose effort, look genuinely polished.
Prepare Shirts Before Cutting
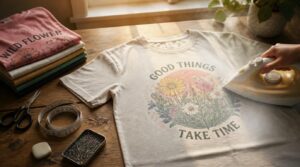
Once you’ve picked out the perfect shirt, don’t grab your scissors just yet. A little prep work now saves you from crooked seams and puckered fabric later. Here’s exactly what your shirt needs before it’s ready to become a pillow.
Wash and Dry Shirts
Before your tee ever meets scissors, it needs a proper wash — this single step prevents that dreaded post-sewing shrinkage. Check the garment care label first, then wash in cold water on a gentle cycle to protect graphics and color.
For drying, air dry when possible; if using a machine, choose low heat and pull shirts out slightly damp for best results.
Iron Wrinkles Flat
Once your shirt’s dry, smooth out every wrinkle before cutting begins — this keeps your pattern accurate and your finished pillow looking sharp.
- Set your iron to high heat with steam for cotton
- Press a protective cloth over any printed graphic
- Use steady, vertical strokes to avoid new creases
- Work deep creases from multiple directions
- Let fabric cool flat before moving on
Stabilize Stretchy Fabric
Knit fabric loves to stretch where you least want it, so tame it before cutting. Apply knit stay tape or fusible interfacing across shoulder seams and curves, this prevents seam waviness later.
| Stabilizer | Best Use |
|---|---|
| Stay tape | Shoulder seams |
| Fusible fleece | Panel body |
| Interfacing | Graphic areas |
| Starch | Cutting edges |
| Ballpoint needle | Stitching prep |
Mark Cutting Lines
Ever tried cutting fabric without a visible guide? You’ll end up with crooked panels every time. Grab tailor chalk or a washable fabric pen for clear, contrasting lines on your tee.
Before cutting your pattern:
- Check pattern alignment accuracy
- Confirm lines stay visible after handling
- Pin layers to prevent fabric shifting
- Verify symmetry against your sewing pattern
Redraw faded lines immediately during this DIY project.
Add Seam Allowance
Cotton knits stretch more than woven fabric, so give yourself a generous 1-inch seam allowance instead of the standard 1/2 inch. Measure out from your marked lines using a ruler, then re-trace with chalk.
That extra bulk management room accommodates zigzag stitching and leaves space for future alterations, which matters since stretchy tees shift during sewing more than you’d expect.
Sew a T-Shirt Pillow
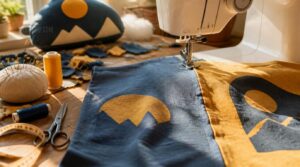
Once your shirt is prepped and stabilized, it’s time to turn those panels into an actual pillow. Sewing gives you a sturdy, lasting seam that holds up to years of couch time, even with knit fabric’s natural stretch.
Here’s exactly how to cut, pin, and stitch your way to a finished pillow, step by step.
Cut Matching Panels
Two identical panels make or break your finished pillow, so cutting them together matters more than you’d think.
Lay your traced pattern on the shirt, checking grain direction stays consistent, then cut front and back layers simultaneously for exact symmetry.
Quick checklist:
- Verify graphic alignment before cutting
- Square off rounded hems
- Confirm panel symmetry by folding
That’s the foundation of a solid DIY project.
Pin Right Sides Together
Once your panels are cut, lay them right sides together so graphics face inward, edges flush from corner to corner.
| Step | Technique | Why It Matters |
|---|---|---|
| Align edges | Match grain lines | Prevents distortion |
| Pin placement | Perpendicular, 1-2" apart | Stops shifting |
| Mark notches | Fabric pen | Keeps pieces matched |
| Check allowance | 1/4"-1/2" | Ensures even seams |
Consistent spacing keeps your tshirt pillowcase project shift-free before stitching begins.
Use Zigzag Stitching
Now that your panels are pinned, swap to a zigzag stitch for sewing knit tees—straight stitches crack under stretch. Set width 2.0-3.0mm, use a ballpoint needle, and check tension to prevent puckering.
This classic DIY crafts trick, perfect for repurposing old t-shirts and jeans, keeps seams flexible while making a shirt pillow that survives daily squishing and washing.
Leave Stuffing Opening
Before you sew that final side shut, leave a 3-inch gap along the bottom seam—the least visible spot on your pillow. Backstitch both ends to strengthen the opening edges and stop fraying.
This small pause matters: rushing straight to a closed seam is how repurposing old t-shirts and jeans into pillows ends up lumpy instead of plump.
Hand-stitch Final Seam
Grab a needle and thread that matches your fabric color, then close the gap with small, even backstitches for a nearly invisible finish. Overlap each stitch slightly for backstitch reinforcement, keeping tension consistent to avoid puckering. Knot the thread inside the seam allowance and trim tails close.
This handsewn closure usually withstands 6-8 pounds of pull—sturdy enough for years of cozy, repurposed use.
Make No-Sew Tee Pillows
If a sewing machine isn’t in your toolkit, you’re still in good shape, because these tees can become pillows with nothing but scissors and your own two hands.
This no-sew method relies on fringe and knots instead of thread, giving you a cozy, textured finish that’s forgiving of imperfect cuts.
Here’s how to turn a plain square of fabric into a knotted, no-sew pillow cover, one simple step at a time.
Cut Equal Fabric Squares
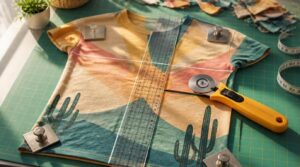
Precision here is what separates a lumpy pillow from one that actually looks store-bought. Use a rotary cutter and clear ruler for true edges, checking fabric grain alignment so your upcycled tee doesn’t twist after stuffing.
Pin pattern weights along the line, calibrate measurements at each corner, and keep your cutting mat lint-free. That accuracy matters most when repurposing old t-shirts into anything symmetrical.
Create Fringe Strips
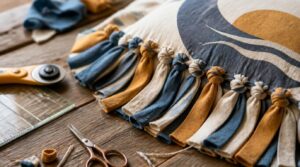
Snip your way around the pillow’s edge, cutting 1-inch wide strips about 3 to 4 inches long for that classic knotted fringe look.
- Rotary cutters give the cleanest, most uniform edges on jersey
- Measure each strip before cutting to maintain consistent width
- Sharp embroidery scissors reduce fraying on raw edges
Keep strips even—uniformity makes upcycling old t-shirts look genuinely polished, not accidental.
Tie Double Knots
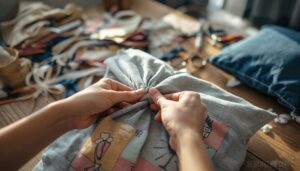
Now the fun part: knotting. Pair strips from front and back panels, then tie a double knot at each point for extra knot security.
| Fabric Type | Knot Behavior |
|---|---|
| Cotton jersey | Bulkier, secure hold |
| Silk blends | Slips due to low fabric friction |
| Thick denim | Stiffer knot silhouette |
| Knit tees | Best for nosew knotted pillow projects |
| Woven cotton | Balanced tension |
Insert Pillow Form
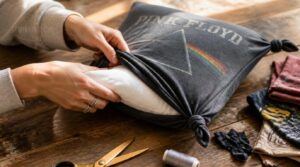
Now that your knots are tied, it’s time to fill things out. Slide a pillow form through the opening, choosing between polyester stuffing or a down-alternative mix for softer loft.
Quick sizing check:
- Match form size within one inch of your pillow
- Fluff before inserting for instant volume
- Avoid overstuffing knit seams
- Choose machine-washable fills for easy care
Trim Uneven Edges
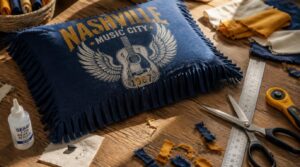
Even a well-tied fringe pillow can look sloppy if the strips don’t match up. Grab your fabric scissors and clean up any stray threads, checking symmetry from all sides before calling it finished.
For crisper results, swap in a rotary cutter along a ruler edge, and dab liquid seam sealant on fray-prone corners to lock fibers in place permanently.
Top 10 Pillow Customizing Supplies
Once you’ve got your basic pillow made, the real fun starts with making it truly yours. From heat transfers to fabric paint pens, the right supplies can turn a plain tee pillow into something that shows off your personality. Here are ten customizing tools worth adding to your craft stash.
1. Tatuo Heat Press Accessory Kit
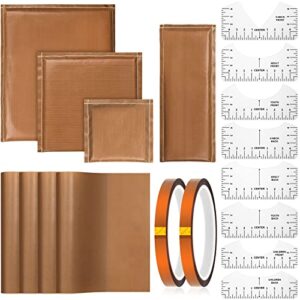
Pressure problems disappear once you bring an 18-piece Tatuo kit into your setup, since those eight PVC alignment rulers help you center graphics on tricky curves like collars and sleeves.
The high-density fire-resistant foam pillows (in 5×5, 10×10, 12×15, and 5×15 inch sizes) push even pressure over buttons and seams, while the PTFE transfer sheets protect your table from scorch marks.
For sublimation or HTV work on t-shirt panels, this bundle solves alignment headaches before they start.
| Best For | This kit is best for DIY crafters and small business owners doing sublimation, HTV, screen printing, or canvas bag projects who need precise alignment and even pressure on tricky spots like buttons, zippers, and curved collars. |
|---|---|
| Material Type | PTFE/PVC/Foam |
| Heat Application | Heat press |
| Pillow Compatible | Yes |
| DIY Customization | Yes |
| Design Variety | Rulers/Sheets |
| Skill Level | Beginner-Pro |
| Additional Features |
|
- Eight PVC alignment rulers make it easy to center designs on round or V-neck shirts
- Four multi-size foam pillows ensure uniform pressure across buttons, zippers, and thick seams
- PTFE transfer sheets protect your heat press table from scorching and residue buildup
- Manual measurements can still lead to slight sizing errors
- Colors may look different in person than they do on screen
- Should be kept away from small children due to winding risks
2. White cotton DIY pillow covers
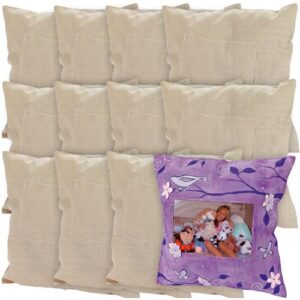
Once your alignment tools are sorted, you’ll still need a blank canvas to work with, and that’s where a 12-pack of white pillow covers comes in handy. Made from polycotton with a built-in 6×4 photo pocket and zipper enclosure, each 12×12 inch cover accepts fabric markers, paint pens, or acrylic paints.
They’re a practical alternative when your graphic tee stash runs short, though keep in mind inserts aren’t included, so you’ll need to grab those separately.
| Best For | These pillow covers are best for crafters, parents, and teachers looking to personalize home decor or create handmade gifts and party projects. |
|---|---|
| Material Type | Polycotton |
| Heat Application | N/A |
| Pillow Compatible | Yes |
| DIY Customization | Yes |
| Design Variety | 12 covers |
| Skill Level | All ages |
| Additional Features |
|
- Comes with 12 blank covers, giving plenty of room for group projects or multiple gift ideas
- Built-in 6×4 photo pocket lets you display personal keepsakes alongside custom designs
- Works with a variety of art supplies, including fabric markers, paint pens, and acrylic paints
- Pillow inserts aren’t included, so you’ll need to purchase those separately
- The 12×12 inch size is fairly small and may not match every decor style
- Product details list the material as plastic, which conflicts with the polycotton description
3. Tatuo Heat Press Tool Kit
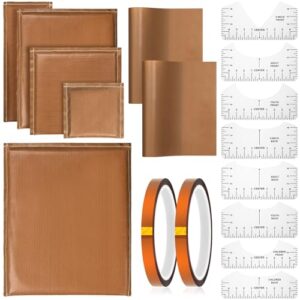
Blank covers only get you halfway there, so a proper heat press kit fills the gap. Tatuo’s 17-piece set includes PTFE covering sheets, heat-resistant tape rated to 450°F, a silicone mat, and a magnetic T ruler for precise placement.
You’ll also get spare pads, a lint brush, and a digital thermometer for checking platen temps. It’s built for sublimation, vinyl, and screen printing, making it a solid all-purpose companion for your pillow-making toolkit.
| Best For | This kit is best for crafters and small business owners doing sublimation, vinyl, or screen printing projects who need reliable, protective accessories for consistent heat transfers. |
|---|---|
| Material Type | PTFE/Foam |
| Heat Application | Heat press |
| Pillow Compatible | Yes |
| DIY Customization | Yes |
| Design Variety | Rulers/Sheets |
| Skill Level | Beginner-Pro |
| Additional Features |
|
- Comprehensive 17-piece set covers multiple pillow sizes and project needs
- Non-stick PTFE coating plus fire-resistant foam construction protects both substrates and work surfaces
- Waterproof, reusable materials with 8 T-shirt alignment rulers for accurate placement
- Manual measurements can still lead to slight sizing errors
- Requires heat-resistant handling for safe operation
- Screen colors may not perfectly match the actual product appearance
4. Sarcastic Quote Iron On Transfers
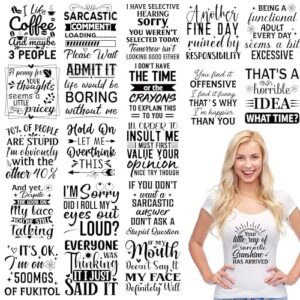
Once your press kit is dialed in, the fun part starts: picking designs that actually make people laugh. A 20-pack of sarcastic quote transfers gives you enough variety to mix and match across pillows without repeating a joke twice.
Vinyl construction keeps colors vibrant and resists fading or cracking, even after repeated washes. Apply at 280°F–300°F for 12–15 seconds, and you’ve got a pillow that’s equal parts sarcasm and durability.
| Best For | Anyone who wants to DIY their own witty home decor or gifts, this pack is perfect for crafters looking to add a bit of humor to pillows, tote bags, and apparel without repeating the same joke twice. |
|---|---|
| Material Type | Vinyl |
| Heat Application | Iron/Heat press |
| Pillow Compatible | Yes |
| DIY Customization | Yes |
| Design Variety | 20 designs |
| Skill Level | Beginner |
| Additional Features |
|
- 20 unique sarcastic designs offer plenty of variety across multiple projects
- Durable vinyl resists fading, cracking, and repeated washing
- Simple application with just a household iron or heat press
- Requires precise heat settings (280°F–300°F) and timing (12–15 seconds) to apply correctly
- Items can’t be washed for 24–48 hours after application, which requires some planning
- Care instructions are strict—no bleach or fabric softener, and cold, inside-out washing is a must
5. Motivational DTF Iron On Transfers
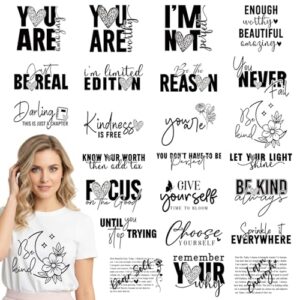
Swap sarcasm for encouragement with this 24-pack of motivational DTF transfers, covering everything from "Bloom Where Planted" to "Keep Going." The vivid, cold-peel vinyl delivers sharp gradients and fine text without cracking, even through 40+ washes.
Square (8×8") and rectangular (9×3") shapes fit different pillow layouts easily. Press at 300°F–330°F, then iron again with a cloth barrier to lock in that smooth, flexible finish your reading nook deserves.
| Best For | DIY crafters, teachers, and parents looking to add an uplifting touch to T-shirts, hoodies, tote bags, and pillows for classroom projects or personalized gifts. |
|---|---|
| Material Type | Vinyl |
| Heat Application | Iron/Heat press |
| Pillow Compatible | Yes |
| DIY Customization | Yes |
| Design Variety | 24 designs |
| Skill Level | Beginner |
| Additional Features |
|
- 24 unique motivational designs offer plenty of variety for different projects and recipients
- Durable, flexible vinyl holds up to repeated washing without cracking or fading
- Two shape options (square and rectangular) work well across various fabric items and layouts
- Requires a cold peel technique, which can be tricky for first-time users to master
- Needs precise temperature control and even pressure, leaving little room for error
- Extra step of a second ironing pass with a fabric layer adds time to the application process
6. Heat Press Pillow and Tool Kit
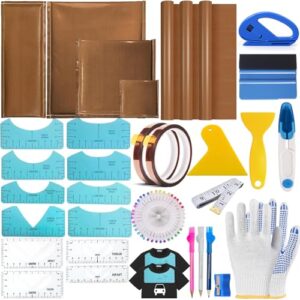
Twelve PVC t-shirt rulers make this bundle the one to grab if you’re wrestling with centering V-necks or round collars, and you’re tired of eyeballing it. You get 4 heat press pillows, 3 Teflon sheets, and 2 rolls of heat-resistant tape, all rated for up to 260°C.
The high-density foam distributes heat evenly, so seams and zippers won’t leave dents. Gloves, positioning pins, and a scraper round things out—handy for small-business sellers juggling multiple pillow orders at once.
| Best For | Home crafters and small business owners doing sublimation, heat transfers, and T-shirt printing who need precise, professional results. |
|---|---|
| Material Type | Foam/Teflon/PVC |
| Heat Application | Heat press/Iron |
| Pillow Compatible | Yes |
| DIY Customization | Yes |
| Design Variety | Rulers/Tools |
| Skill Level | Beginner-Pro |
| Additional Features |
|
- Comprehensive kit with pillows, Teflon sheets, tape, and alignment tools all in one bundle
- High-density foam and 260°C heat resistance ensure even pressing and garment protection
- 12 PVC rulers make centering V-neck and round-collar designs quick and accurate
- Manual ruler alignment is required, so it’s not fully automated or foolproof
- Many small components can be easy to misplace without organized storage
- Limited to heat press and ironing tasks, not useful for general sewing projects
7. Bright Stripes Print Making Studio
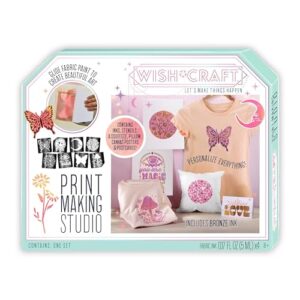
Mushrooms, moons, and butterflies aren’t your usual pillow fodder, but that’s exactly what this kit brings to your blank tee panels. The 20 reusable sticky stencils grip fabric tight, so paint won’t creep underneath and blur your edges.
You get four fabric paint colors, including a metallic bronze for a little shine, plus a squeegee and tape for clean application. It’s rated for ages 6 and up, making it a genuinely fun project to tackle alongside kids on a lazy Saturday afternoon.
| Best For | Families and beginners looking for a screen-free, hands-on craft project to customize pillowcases together. |
|---|---|
| Material Type | Fabric/Foam |
| Heat Application | N/A |
| Pillow Compatible | Yes |
| DIY Customization | Yes |
| Design Variety | 20 stencils |
| Skill Level | Kids 6+ |
| Additional Features |
|
- Sticky stencil technology keeps edges clean and sharp
- Comes with everything needed to start right away, including paints, squeegee, tape, and a pillow/pillowcase
- Nature-themed designs suit a wide range of skill levels, from kids to experienced artists
- Younger children will need supervision throughout the activity
- Limited to fabric-based projects only, so versatility is restricted
- Only four paint colors are included, which may limit customization options
8. Multi Function Fabric Paint Pens
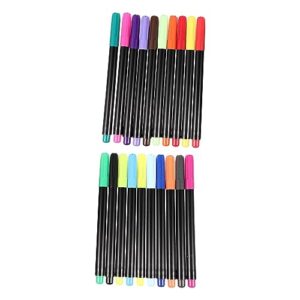
Not every design needs a stencil or transfer sheet—sometimes a steady hand and a good pen does the trick. These pens feature dual fine and bold tips, so you can outline a doodle then fill it in without switching tools.
Pigment-based ink means colors stay vibrant on cotton, and heat setting locks designs in for wash resistance. Test on scrap fabric first, since payoff varies by surface.
They’re refillable, too, which keeps your customizing kit going project after project.
| Best For | These paint pens are best for hobbyists and crafters who want to hand-customize clothing, accessories, or stationery with detailed, long-lasting designs. |
|---|---|
| Material Type | Mixed |
| Heat Application | N/A |
| Pillow Compatible | Yes |
| DIY Customization | Yes |
| Design Variety | Assorted colors |
| Skill Level | All ages |
| Additional Features |
|
- Dual fine and bold tips let you outline and fill designs without switching pens
- Long-lasting, pigment-based color that stays vibrant on cotton and other fabrics
- Refillable design makes them a cost-effective option for repeat projects
- Manual application means results depend on a steady hand
- Color vibrancy can vary depending on the surface you’re using
- Best results require heat setting and testing on scrap fabric first
9. Green Heat Transfer Iron On Numbers
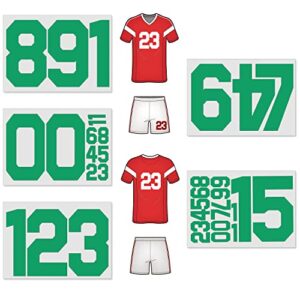
Turning a jersey tee into a pillow? Keep the number front and center with a 34-piece set covering 0 through 9, in both 8-inch and 2-inch heights for bigger cushions or corner accents.
Press at 284-320°F for 10-15 seconds using a cotton setting, no steam, and you’ll get strong adhesion that’s machine washable and fade-resistant.
Just make sure your surface is flat and hard, since manual placement can shift on anything uneven.
| Best For | DIY crafters and sports parents who want to customize jerseys, apparel, or home decor projects like pillows and bags with durable, team-ready numbering. |
|---|---|
| Material Type | Polyurethane |
| Heat Application | Iron/Heat press |
| Pillow Compatible | Yes |
| DIY Customization | Yes |
| Design Variety | 34 numbers |
| Skill Level | Beginner |
| Additional Features |
|
- Complete 0-9 digit set in two sizes (8" and 2") covers everything from jersey numbers to small accent details
- Machine washable and fade-resistant finish holds up to regular wear and laundering
- Quick application—just 10-15 seconds with a home iron or heat press
- Requires a flat, hard surface, making it tricky to apply evenly on curved or uneven items
- Manual placement means measurements can be slightly off without added care
- Heating time isn’t one-size-fits-all, since different fabrics may need adjustments
10. Baby Theme Heat Transfer Decals
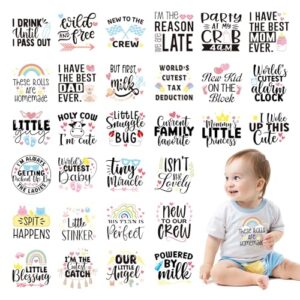
Baby shower gifts practically design themselves with this 30-piece pack, featuring cows, bears, and rabbits sized at 6×6 inches each. Made from fade-resistant, peel-proof vinyl, they’re built for onesies, bibs, and pillow fronts alike.
Press at 338°F for 10-15 seconds, then peel the protective film for a smooth finish.
Whether you’re stitching a nursery accent pillow or matching a sibling set, these decals hold color and adhesion through countless wash cycles without cracking.
| Best For | parents, gift-givers, and crafters looking to personalize baby clothing and nursery items for showers, gender reveals, or matching family outfits. |
|---|---|
| Material Type | Vinyl |
| Heat Application | Iron/Heat press |
| Pillow Compatible | Yes |
| DIY Customization | Yes |
| Design Variety | 30 designs |
| Skill Level | Beginner |
| Additional Features |
|
- 30 unique designs (cows, bears, rabbits) offer plenty of variety for different projects
- Fade-resistant, peel-proof vinyl holds up well through repeated washes
- Simple application with just a household iron or heat press
- Requires a precise 338°F heat setting, which may be tricky without a reliable iron or heat press
- Limited to one fixed decal size (6×6 inches), reducing flexibility for smaller or larger projects
- Peeling the protective film adds an extra step to get a seamless finish
Frequently Asked Questions (FAQs)
How to turn a tshirt into a pillow?
That old shirt still has stories to tell. Cut two matching panels, pin right sides together, sew with a zigzag stitch, leave a small opening, stuff firmly, then hand-stitch closed for a nostalgic, huggable keepsake.
How to repurpose old graphic tees?
Give sentimental tees new life by turning them into throw pillows, tote bags, or quilts. Cut clean panels, stabilize stretchy knits with interfacing, and stuff securely for a piece that keeps the memory wearable in your home decor.
What company turns shirts into pillows?
T Pillow claims to be the first instant, no-sew way to turn a tee into a pillow, while Shirts To Pillows and countless Etsy sellers craft custom memory pillows from jerseys, button-ups, and beloved shirts.
How many shirts to make a pillow?
Most standard 16×16 pillows need 1 to 2 shirts, depending on whether you’re using front and back panels from one tee or combining two. Larger 18×18 designs usually require three shirts for proper coverage, borders, and seam allowance.
What stuffing keeps t-shirt pillows soft the longest?
Think of stuffing like a mattress for your memories—it needs bounce, not sag. Hollow conjugated polyester fiberfill resists clumping and holds loft for years, especially when blended with recycled fibers for durable, lightweight softness that fluffs back after every hug.
How do you clean a finished t-shirt pillow?
Spot clean or hand wash in cool water with mild, dye-free detergent, then air dry flat away from sunlight. If removable, machine wash gentle cycle in a mesh bag—never bleach, since it cracks graphic prints.
Can denim or button-down shirts work instead of tees?
Funny how a fabric meant for durability makes such a soft landing spot.
Yes, denim and button-downs work great—just expect heavier seams and a denim needle. Chambray offers a lighter, breathable middle ground if stiff denim feels too bulky for cozy pillows.
How do you secure fabric edges without sewing?
Grab fabric glue or fusible webbing for a flexible, no-sew bond, or try fray check for a clear liquid seal. Iron-on hemming tape works great too, sealing edges neatly without a single stitch.
Conclusion
Worried you’ll ruin a favorite old shirt? You won’t, not if you follow these steps closely, and even a wobbly seam still tells the same story.
That’s the beauty when you repurpose graphic tees into pillows: making it look perfect was never the point, preservation was.
Your couch now holds concert nights, hand-me-downs, and shirts too worn to wear but too meaningful to trash.
Grab the next box. That faded logo deserves a second act, not a landfill.
- https://www.instructables.com/Up-Cycle-an-old-t-shirt-into-a-pillow
- https://www.allfreesewing.com/No-Sew-Projects/No-Sew-Shirt-Tie-Pillow-NSM2020
- https://www.houseofhawthornes.com/diy-no-sew-shirt-pillow-tutorial
- https://www.momtastic.com/parenting/diy-for-moms/678609-diy-no-sew-pillows-from-old-t-shirts