This site is supported by our readers. We may earn a commission, at no cost to you, if you purchase through links.

That dull, dragging blade isn’t broken—it’s just tired. One day your rotary cutter glides through four layers of quilting cotton like butter, and the next, it’s snagging threads and leaving ragged edges behind. Most sewists toss the blade and buy a new one, spending money on a problem that a few minutes of careful sharpening can fix.
Rotary blades are built from hardened steel, which holds an edge well but still dulls with every cut against pins, rulers, and mat surfaces. A blade sharpened at the right angle can outlast three or four "disposable" replacements.
Grab your gloves and a jig, because getting that edge back sharp enough to slice through denim in one clean pass takes fewer steps than you’d think.
Table Of Contents
Key Takeaways
- Sharpen a dull rotary blade at home by holding a 20-degree angle, making 15 passes per side on a stone or 400-1500 grit sandpaper, then stropping on leather to remove burrs.
- Safely remove the blade first by wearing cut-resistant gloves and safety glasses, retracting the blade fully, and tracking washer and screw order before inspecting for chips, cracks, or rust that would make it unsalvageable.
- When no stone is available, folded aluminum foil, diamond-grit sharpeners, or abrasive discs can restore an edge temporarily, but these are emergency fixes, not substitutes for real sharpening.
- Extending blade life long-term depends on cleaning off lint and adhesive after every use, cutting only on self-healing mats away from pins, storing blades dry, and dedicating specific blades to specific materials.
Safely Remove The Rotary Blade
Before you touch a single stone, you need to get that blade out safely. A rushed removal is how nicks and cuts happen, so it pays to slow down here. Here’s exactly how to set up and take the blade out, step by step.
Prepare Your Workspace
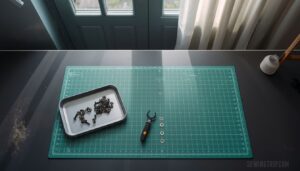
Clear off a 60 x 120 cm work area, then lay down a non-slip mat topped with a self-healing cutting mat for grip and protection.
A quality mat also doubles as a handy measuring guide, one of many beginner sewing tools worth having on hand before you start cutting fabric.
Add bright, even 4000K lighting to cut glare, plus a small tray for screws and washers. Crack a window for dust ventilation. This setup keeps things safe and organized before you disassemble the cutter.
Wear Protective Gloves
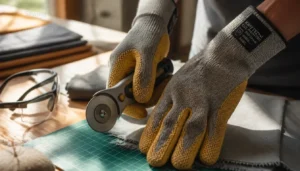
Once your workspace is set, grab a pair of cut-resistant gloves before touching the cutter. Fit matters: too loose and you lose dexterity, too snug and seams tear.
- Cut-resistant material for blade safety
- Snug, flexible fit
- Textured grip on fingertips
- Comfortable for repeated motions
Add safety glasses too. Skip old, damaged gloves, and dispose of worn ones properly. Now, on to sharpening your rotary cutter blade safely.
Retract The Blade First
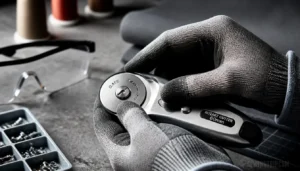
Gloves on, glasses on — now it’s time to retract blade safely. Never touch an exposed edge; engage the safety mechanism fully before disassembly.
Confirm the blade sits flush with the blade guard. Check blade tension too — if retraction feels stiff, stop and inspect for damage. Document blade condition with a quick photo. A secure work area keeps small parts from wandering once you start removing screws.
Track Washers and Screws
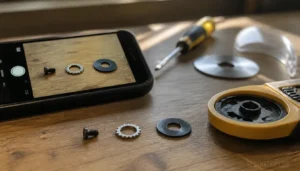
Once the blade’s retracted, turn the fastener counterclockwise to loosen it. Note the order of washers and screws as you go — a quick photo helps.
Most rotary cutters use a locking washer to resist loosening, sometimes paired with a damping washer for smoother action. Set each piece aside so cleaning and reassembling later goes smoothly, right before you inspect the blade guard.
Inspect for Blade Damage
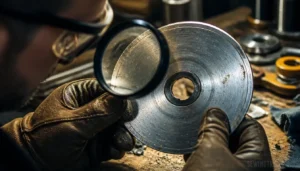
What’s hiding on that edge? Before sharpening, check closely with your safety equipment still on.
Look for nicks, pitting, or hairline cracks near the mounting hole—these signal edge wear patterns beyond simple dullness.
- Check for chips at tip and heel
- Look for rust or discoloration
- Feel for burrs along the edge
- Inspect bond lines for cracking
- Photograph damage for documentation
Worn blades with structural cracks shouldn’t be sharpened—replace them instead.
Sharpen With Stones or Sandpaper
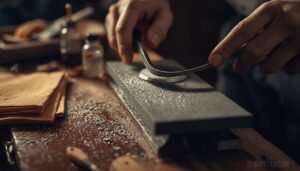
Once your blade is off and inspected, it’s time for the real work. Sharpening by hand takes patience, but it gives you full control over the edge. Here’s exactly how to do it, step by step.
Before you start sharpening, place your blade on one of these best cutting mats for quilting projects to protect both the edge and your work surface.
Hold a 20-degree Angle
Twenty degrees is a narrow wedge, tighter than you’d guess. Set your sharpening angle with a jig or guide so the blade locks in place. A digital inclinometer confirms it before each pass.
Keep pressure even along the blade, rotate it slowly, and recheck the angle every few strokes to stay consistent from heel to tip.
Sharpen Both Blade Sides
One side isn’t enough. Flip the blade and repeat your 15 passes on the other edge, keeping that same 20-degree angle. For best results, maintain a consistent 20-degree angle, as detailed in the discussion of sharpening angle range.
Balanced sharpening keeps edge thickness uniform, heel to tip
Check that the edge tip stays centered over the spine
Run quick symmetry checks by eyeing light reflections on each side
This dual side technique, on a water stone, oil stone, or sharpening block, prevents drift.
Use Fine-grit Sandpaper
Sandpaper works as a backup when stones aren’t handy. Use 400 to 1500 grit, moving finer as you go for edge polishing.
| Grit | Purpose |
|---|---|
| 400 | Removes nicks |
| 800 | Smooths edge |
| 1500 | Final polish |
Sand with light, even strokes, wiping dust between passes. This dust management step keeps grit from scratching your progress.
Remove Burrs With Stropping
Metal burrs are microscopic, but they’ll ruin clean cuts if left behind. That’s why stropping matters.
Grab a leather strop, pull the blade away from the surface (edge-trailing), alternating sides each pass. Light pressure only—pressing hard rounds the tip. Add polishing compound for stubborn burrs.
Check for burrs by feel: if the edge catches or feels sticky, strop a few more light passes before moving on.
Test on Scrap Fabric
A sharp blade should glide, not drag. Cut a scrap swatch (100 by 50 millimeters works well) and check the edges. Clean cuts with no snagging mean you’re done.
If fabric edges show fraying past 2 millimeters, strop a few more passes. This quick test confirms your rotary cutter blade is ready for precision work before you move to real projects.
Sharpen Without a Sharpening Stone

No stone on hand? No problem. You’ve still got a few solid options for getting that edge back, whether you need a quick fix or a more lasting solution. Let’s walk through them.
Use Folded Aluminum Foil
Out of stones and need a quick fix? Grab a sheet of aluminum foil and fold it into a small, dense square — this foil folding technique creates a firm abrasive pad. Draw your blade across it with light, even strokes for foil edge stabilization and quick burr control.
It’s a handy emergency blade touch-up, not a long-term sharpening technique for your rotary cutter blade.
Try Diamond-grit Sharpeners
Foil works in a pinch, but for real edge retention, reach for a diamond-grit sharpener. These tools use bonded diamond particles, often 325 to 600 grit, and work dry or with water.
Use the coarse side for a quick edge reset on dull blades, then flip to the fine side for polish. Compact, double sided, and great for portable field sharpening on your rotary cutter blade.
Use Abrasive Sharpening Discs
Abrasive sharpening discs offer another solid option when a stone isn’t handy. Mounted on a rotary tool, they grind fast using diamond or CBN grains.
- Match disc backing to your blade contour
- Check disc speed limits before use
- Wear eye protection always
- Clean discs after each session
- Replace worn discs promptly
Diamond discs outlast aluminum oxide on hard metals, making them a durable rotary blade sharpener choice.
Know Emergency Method Limits
Discs and foil both work in a pinch, but neither replaces real sharpening. Think of them like dose rate thresholds in emergency planning: quick, practical proxies, not perfect measurements.
Discs and foil are quick proxies for sharpening, not perfect substitutes for the real thing
Once your rotary cutter blade dulls past 20 cuts on foil, or the disc glazes over, stop. Switch to sandpaper sharpening, a stone, or grab replacement blades. Wear safety glasses regardless of method.
Top 3 Rotary Blade Sharpeners
Sometimes you want a dedicated tool instead of stones or foil. A good sharpener saves time and gives you a consistent edge, cut after cut. Here are three worth adding to your sewing kit.
1. Colonial Needle Rotary Blade Sharpener
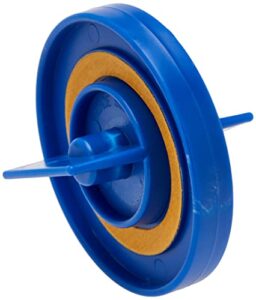
Small enough to fit in a sewing kit, this dual-sided sharpener works with both 45mm and 60mm blades with a simple twist motion. No electricity needed — just turn the handle to engage the abrasive disk against your blade’s edge.
Start with the lighter coarse side for dull blades, then switch to the darker finishing side for polish. The disk lasts up to six months with daily use, making it an economical pick for quilters who sharpen often and want minimal fuss.
| Best For | quilters and sewists who frequently use 45mm rotary cutters and want an affordable, no-electricity way to keep blades sharp at home or in the workshop. |
|---|---|
| Blade Compatibility | 45mm only |
| Sharpening Mechanism | Dual rotary surfaces |
| Operation Type | Manual twist handle |
| Origin | Made in USA |
| Weight | 1.4 ounces |
| Primary Use | Quilting and fabric cutting |
| Additional Features |
|
- Dual rotary sharpening surfaces restore a consistent, razor-like edge
- Long-lasting abrasive disk (up to six months with daily use) keeps costs down
- Compact, lightweight metal design that works with any brand’s 45mm blade
- Only compatible with 45mm blades, not other sizes
- Not suitable for decorative or specialty-shaped blades
- Manual operation takes more time and effort than an electric sharpener
2. TrueCut TrueSharp Electric Rotary Blade Sharpener
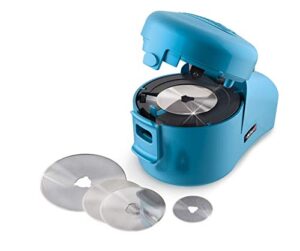
Want a hands-off option? The TrueSharp plugs into any AC outlet and does the work with a push-button cycle — no manual angling required.
Its diamond grit stones handle 28mm, 45mm, and 60mm blades, aligning each one for consistent contact. Most quilters notice sharper cuts after just one pass.
At 2 pounds and blue, it’s compact enough for a sewing room shelf, though you’ll need to stay near an outlet to run it.
| Best For | Quilters and sewists who want a fast, hands-off way to keep their rotary blades sharp without manually angling them against a stone. |
|---|---|
| Blade Compatibility | 28mm, 45mm, 60mm |
| Sharpening Mechanism | Diamond grit stones |
| Operation Type | Electric push-button |
| Origin | Not specified |
| Weight | 2 pounds |
| Primary Use | Quilting, sewing, fabric cutting |
| Additional Features |
|
- Push-button cycle sharpens blades without manual angling
- Diamond grit stones deliver consistent, near-new sharpness in one pass
- Compact and lightweight at just 2 pounds, easy to store on a shelf
- Requires a nearby AC wall outlet to operate
- Only compatible with 28mm, 45mm, and 60mm blade sizes
- Not usable in cordless or outlet-free workspaces
3. Dritz Omnigrid Rotary Blade Sharpener
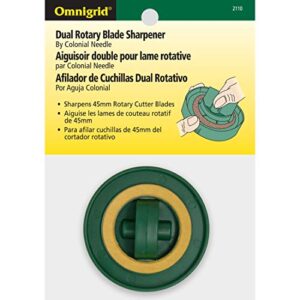
Manual sharpening deserves a spot on your workbench, and this pocket-sized twist tool delivers it. Built for 45mm blades only, it pairs coarse and fine disks in one compact housing, weighing just over an ounce.
Twist the blade back and forth against each disk, coarse first, then fine, until the edge feels renewed. A drop of oil every 10 to 20 uses keeps things smooth.
No power needed — just steady hands and a few twists between projects.
| Best For | Quilters and sewists who rely on 45mm rotary cutters and want a simple, no-power way to keep blades sharp between projects. |
|---|---|
| Blade Compatibility | 45mm only |
| Sharpening Mechanism | Dual sharpening mechanism |
| Operation Type | Manual twist and sharpen |
| Origin | Made in USA |
| Weight | 1.06 ounces |
| Primary Use | Quilting and fabric cutting |
| Additional Features |
|
- Dual coarse-and-fine sharpening disks in one compact tool
- Easy twist operation requires no batteries or power
- Lightweight and made in the USA for reliable quality
- Only works with 45mm rotary blades, not other sizes
- Needs regular fine oil application every 10 to 20 uses
- Manual process takes more effort than automatic sharpeners
Keep Rotary Blades Sharp Longer
A sharp blade won’t stay that way on its own. Good habits between sharpenings matter just as much as the sharpening itself. Here’s what keeps your blade cutting clean for the long haul.
Clean Adhesive and Lint
Sticky lint is a sharp blade’s worst enemy—it grabs fibers and dulls your cut fast.
- Wipe with 70% isopropyl alcohol on a lint-free cloth
- Scrape residue gently with a plastic scraper
- Brush stubborn lint with a soft-bristle brush
- Dry-wipe to prevent fibers reattaching
Clean after every project. This cuts buildup by 60 percent and keeps blades cutting true.
Use Self-healing Mats
Ever notice how a good cutting surface just disappears under your blade? That’s the point. A quality self-healing cutting mat uses layered PVC that reseals after every pass, protecting both your table and your edge.
| Mat Trait | Why It Matters | Watch For |
|---|---|---|
| PVC composition | Flexes, reseals cuts | Warping edges |
| Grid markings | Guides straight cuts | Faded lines |
| Surface texture | Reduces blade drag | Deep grooves |
Avoid Pins and Hard Surfaces
Pins are sharp, but they’re no match for your blade’s edge. Cutting over pinned fabric can cause nicks and edge deflection, throwing off blade geometry fast.
Hard surfaces are worse. Tables, tile, even glass send vibrations straight into the blade, risking micro-chips. Stick to soft mats. Your rotary cutter blade stays sharper, longer, when you skip pins and rigid surfaces entirely.
Store Blades Dry
Rust doesn’t care how sharp your blade is—it’ll ruin the edge anyway. Keep relative humidity below 50 percent, away from bathrooms or kitchens.
Wipe blades dry with a microfiber cloth first. Store them upright on a ventilated rack, never in sealed plastic bins. For carbon steel, add a silica gel pack and a light oil coat. Check monthly for pitting.
Match Blades to Materials
One blade can’t do it all. Cotton dulls edges slower than vinyl or leather, so assign dedicated blades per material.
- Cotton and quilting cottons
- Vinyl and laminates
- Leather and heavy canvas
- Fleece and knits
- Paper and cardstock
This preserves edge retention and cutting precision, reducing strop sessions and keeping your rotary cutter blade sharp longer overall.
Frequently Asked Questions (FAQs)
How do you sharpen a cutter blade at home?
Hold a 20-degree angle and draw the blade heel to tip on a fine-grit stone or 400-1500 grit sandpaper, 15 passes per side. Strop on leather to clear burrs, then test-cut scrap fabric before sewing.
How to sharpen a rotary cutter without sharpening stone?
Necessity is the mother of invention: folded aluminum foil works as a quick abrasive, diamond grit sharpeners need no water, and abrasive discs hone edges fast—all solid DIY blade sharpening tricks when you’re without a stone.
How do you sharpen rotary cutter blades with foil?
Fold several layers of aluminum foil for thickness, then drag your blade lengthwise across it at its natural angle. This realigns the edge and lifts micro burrs—a handy DIY trick, though it won’t replace stones on seriously dull blades.
How to fix a dull blade?
A dull blade drags like a dull pencil on rough paper—snagging instead of gliding. Fix it with stone soaking, correct sandpaper grit, or a leather strop for burrs. Skip foil for regular upkeep; it’s only a quick fix.
How often should I sharpen my rotary cutter blade?
Track cutting hours: every 15–20 hours signals sharpening time, sooner for denim or leather. Watch for fraying edges or dragging fabric. If nicks appear, skip sharpening and replace the blade for safety and longevity.
Can a dull rotary blade be replaced instead of sharpened?
Sometimes retiring a blade beats reviving one. If you spot structural damage signs—chips, cracks, or wobble—skip sharpening.
Grab replacement blades instead; they preserve original geometry, avoid regrinding risks, and minimize downtime compared to professional sharpening services.
What causes a rotary cutter blade to dull quickly?
Material hardness, dense fabrics, and metallic threads all wear down your edge fast. Layered cuts, cutting surface vibration, and adhesive residue buildup add friction too. Good blade maintenance and proper cutting edge care boost tool longevity a lot.
How do I know when a blade is unsalvageable?
Look for edge cracks, deep gouges, or structural warping—no rotary blade sharpener fixes those. Rust pits and ragged material tearing also signal trouble. If test cuts stay rough after sharpening, retire the blade instead of forcing more tool refurbishment.
Is it safe to sharpen a rotary blade at home?
Yes, with the right precautions: cut-resistant gloves, safety glasses, and good ventilation to avoid metal dust. Home sharpening works for minor dullness; deeply nicked or bent blades are safer replaced than sharpened, professionally or otherwise.
Conclusion
Picture that blade catching morning light, its edge gleaming like new steel instead of chewed tin. That’s what waits on the other side of patience.
Knowing how to sharpen a rotary cutter blade means you’ll never toss another good handle over one dull disc. Ten minutes with a stone, a steady angle, and careful strokes bring back clean, smooth cuts.
Sharp tools respect your fabric. Keep that edge honest, and it’ll keep your seams honest too.