This site is supported by our readers. We may earn a commission, at no cost to you, if you purchase through links.
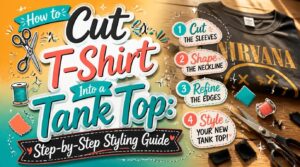
That old band tee sitting in your drawer? It’s one cut away from becoming your new favorite tank. No sewing machine, no pattern-making degree, just sharp scissors and a plan.
Every summer, thrifted t-shirts pile up faster than closets can hold them. Learning to cut tshirt into tank top shapes turns that stack into wearable, breathable pieces perfect for hot days and gym sessions. Armhole width, neckline shape, hem finish — each choice changes the whole look.
Grab your scissors. You’re about to turn a plain tee into something you’d actually pay for.
Table Of Contents
Key Takeaways
- Prep your shirt first by washing, ironing, and pinning it flat, since skipping this step throws off your fit and cutting accuracy.
- Choose your armhole style based on the look you want, from a close-fit seam cut to a relaxed muscle tank to a fully oversized drop.
- Round every cut corner instead of leaving them sharp, since curved edges resist tearing through repeated washes.
- Finish your raw edges with your preferred method, whether that’s letting jersey curl naturally, folding a hem, zigzag stitching, or sealing with no-sew fabric glue.
Tools and Prep Before You Cut
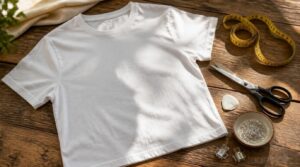
Before you make a single cut, get your setup right. A few basic tools and a couple of prep steps make all the difference in how your tank top turns out. Here’s what you’ll want on hand before you grab that old t-shirt.
You’ll also want sharp fabric scissors, pins, and a measuring tape close by, and this step-by-step wife beater sewing tutorial is worth a quick look before you start cutting.
Sharp Scissors and Chalk
Grab your gear before you cut a single thread. Sharp fabric scissors with stainless or carbon steel blades slice clean lines without fraying edges. You can identify dull fabric scissors if they begin to chew or snag your textiles.
You’ll need:
- Sharp fabric scissors
- Tailors chalk (light or dark shade)
- A cutting mat
- Straight pins
Keep blades clean, oiled, and closed when stored. Mark seam lines with chalk first—precision marking prevents crooked cuts on your DIY tshirt refashion project.
Choosing a Sizing Template
Once your scissors are ready, grab a template tank top—one that already fits how you want your finished piece to feel. Lay it over your shirt to map the armhole line and body measurements for clothes accurately.
| Sizing Standard | Measurement Focus |
|---|---|
| US | Bust/waist (inches) |
| EU | Chest/waist (cm) |
| UK | Blended sizing |
| Grading | Consistent breakpoints |
Matching your cutting template to regional standards keeps grading rule accuracy tight.
Washing and Ironing First
Before your cutting template ever touches the shirt, wash and dry it first. Prewash shrinkage can throw off your fit fast, so skip this step at your own risk.
Check the fabric care label for wash temperature, then treat any stains before ironing.
- Turn the shirt inside out
- Wash on the label’s recommended cycle
- Use steam for cotton, dry heat for knits
- Iron flat before cutting
Pinning Fabric Layers
Once your shirt is pressed flat, grab your straight pins before making a single cut.
Line up both fabric layers evenly, then pin perpendicular to the edge, spacing them 1-2 inches apart around armholes and neckline.
Use clips on slippery knits to prevent puckering. Fine pins work for thin fabric, thicker quilting pins for bulky layers.
Proper seam allowance stays true when layers won’t shift.
Pinning each layer securely before cutting prevents fabric slippage, a technique detailed in this guide on tracing sewing patterns without cutting.
How to Cut Armholes and Sleeves
Now comes the fun part: shaping those sleeves into a tank you’ll actually wear. Your scissors decide the vibe here, from barely-there trims to bold, wide cuts. Grab your shirt and let’s break down each armhole style so you can pick your favorite.
Close-Fit Armhole Seam Cut
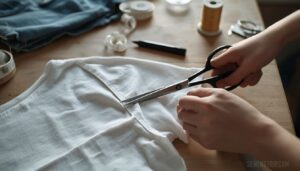
Want that sleek, custom look without buying new? Follow the original armhole seam, snipping right along the stitch line for a close-fit result that hugs your arm.
Key wins:
- Sleeker silhouette
- Less puckering
- Smooth curve shaping
- Better arm mobility
- Clean seam allowance
Keep depth shallow, cut both layers together, and this t-shirt alteration technique transforms armholes fast.
Relaxed Muscle Tank Style
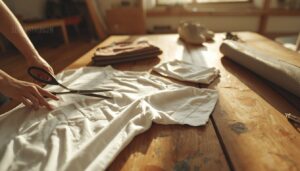
Ready to bare more shoulder? Cut just outside the original armhole seam, giving yourself 1-2 extra inches of room for that relaxed muscle tank look.
This wider armhole boosts fabric breathability and shows off your athletic silhouette. Perfect for workout tank top layering over a sports bra, or pairing with joggers for easy streetwear styling. Cotton mix comfort keeps it wearable all day, gym to hangout.
Oversized Wide Armhole Look
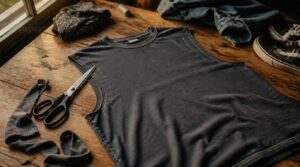
Grab a good 4-6 inches from the shoulder seam and cut for a full-on oversized armhole. This drops the opening 1-2 inches lower and adds up to 3 extra inches of circumference, perfect for layering over tanks without pulling.
Heavyweight knit holds the shape instead of sagging. Sleeves worn pushed up show off the width even more, giving you that boxy, laid-back silhouette streetwear fans love.
Rounding Armhole Corners
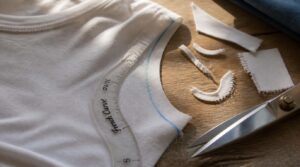
Sharp corners tear. Rounded ones don’t. That’s the whole secret to armholes that survive laundry day after laundry day.
Sharp corners tear, but rounded ones survive laundry day after laundry day
- 2mm radius for trim, light knits
- 4mm for balanced everyday wear
- 6mm on heavier cotton blends
- 8mm max for thick jersey
- Test radius on scrap first
Use a French curve for smooth shaping. This reduces seam bulk, cuts fraying, and adds comfort during overhead reaches.
Cutting Neckline and Back Styles
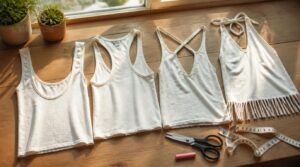
Once your armholes are done, it’s time to focus on the neckline and back. This is where your tank top really gets its personality, from sporty to flirty. Let’s break down four ways to cut that back and neckline into something you’ll love wearing.
Racerback Diagonal Cutting Method
That V-shaped back isn’t just for looks—it’s built for movement. Cut diagonally from each shoulder seam down to mid-back, keeping a 45 to 60 degree angle for balance. This racerback tank top style preserves shoulder mobility while trimming excess fabric.
| Cut Style | Back Coverage | Mobility |
|---|---|---|
| Straight | High | Low |
| Diagonal | Medium | High |
| Racerback | Low | Highest |
Keep both sides symmetrical as you go.
Open-Back Halter Style
Bare shoulder blades, full front coverage—that’s the whole appeal here. Cut a straight line across the back between armholes, then trim narrow straps for a cleaner reveal.
- Use stretchy jersey for a gap-free fit
- Keep the neckline high and structured
- Cut symmetrical strap widths
- Round edges to prevent tearing
- Save this openbacked halter tank for hot summer nights
Front-Tie Halter Neckline
Trade that open-backed halter tank for a knotted front now. Cut the neckline 4–5 inches down, leaving two straps to tie behind your neck.
| Strap Style | Support Level | Look |
|---|---|---|
| Single tie | Minimal | Boho |
| Double tie | Stable | Classic |
| Wide tie | Structured | Bold |
Keep knot placement symmetry for balanced drape and comfortable strap support stability all day.
Narrowing Boxy Shoulder Straps
Boxy straps sit too far out, adding bulk to your shoulder line. Cut a thin sliver, about a quarter inch, into each shoulder seam.
This narrows the strap width and reshapes your silhouette. Test fit before cutting more, since shoulder pressure distribution shifts as straps get thinner. A snugger strap angle balances broad frames without pinching your collarbone.
Hemming and Finishing Your Tank
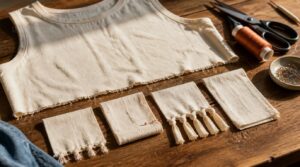
You’ve made your cuts, and now it’s time to finish things off right. The edges you’re left with can make or break your tank’s final look. Here are four ways to hem it, from zero-effort to sew-machine sturdy.
Raw-Cut Jersey Knit Edges
Skipping the sewing machine entirely? No problem! Raw-cut edges are the fastest way to finish knit fabrics for no-sew refashion projects.
- Cut sleeves off cleanly
- Let edges curl naturally toward the right side
- Wash and dry to soften the roll
Cotton jersey curls softer than spandex blends. Edge curl adds texture and holds up wash after wash.
Folded Hem Seam Allowance
Want a cleaner finish than a raw edge? Leave a 1 to 1.5 cm seam allowance before cutting. Fold it under once, press flat for precision, then fold again to hide the raw edge. This seam allowance variation keeps fraying in check and gives your garment construction a real finished hem, not just a chopped tee.
Zigzag Stitch for Stretch
Grab a ballpoint needle so you don’t tear the knit fibers, then set your machine’s zigzag width between 2 and 3.5mm.
Keep stitch length around 2.5 to 4mm for stretch. Balance thread tension so seams don’t pucker.
This combo locks your edge finish in place while letting the tank top move with you.
No-Sew Fabric Glue Hems
No sewing machine? No problem! Fabric glue creates clean, invisible hem finishes on jersey knits. Fold your raw edge, press firmly with a warm iron to activate the bond, then let it cure for several hours.
Pick a stretch fabric adhesive so hems won’t crack when you move. Always test colorfastness first. This no-sew trick makes t-shirt transformation projects fast, durable, and totally beginner-friendly.
Top Scissors for T-Shirt Cutting
Your scissors make or break this whole project, plain and simple. Dull blades snag jersey knit and ruin your clean lines fast. Check out these four picks before you make your first cut.
Singer Fabric Scissors Comfort Grip
Singer Fabric Scissors make your t-shirt transformation smoother from the first snip. The ergonomic handle design cuts hand fatigue on long projects, while stainless steel durability keeps blades sharp through layers.
- Ambidextrous grip for lefties and righties
- Textured, non-slip grips
- Precise, snag-free stainless steel blades
- Wipe blades clean after each DIY fashion project
Perfect for any clothing DIY projects on your tank top journey.
1. Premium Tailor Scissors Heavy Duty
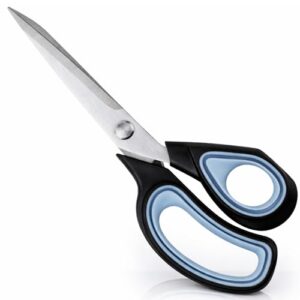
Premium Tailor Scissors earn their heavy-duty name through high-carbon steel blades that hold a razor edge for 1,000+ cuts before you’ll need to sharpen again. That’s huge for anyone slicing through multiple shirts in one sitting.
The micro-beveled edge slices through 8-12 fabric layers cleanly, so your armholes and racerback cuts stay fray-free. Large finger loops fit medium to large hands, and the adjustable pivot screw lets you dial in tension for smoother, more controlled cuts every time.
| Best For | These scissors are best for tailors, quilters, and dressmakers who need a durable, comfortable tool for cutting through fabric on larger projects. |
|---|---|
| Category | Fabric Scissors |
| Material | Stainless Steel |
| Sewing Relevance | High |
| Skill Level | All Levels |
| Portability | Medium |
| Gift Suitability | Good |
| Additional Features |
|
- Rust-resistant stainless steel blade backed by a lifetime warranty
- Soft-grip handle designed for comfort during long cutting sessions
- Ambidextrous shape works well for both right- and left-handed users
- Bulky size makes it less ideal for detailed or intricate cutting
- Only meant for fabric — not suited for paper, cardboard, or metal
- Blade needs regular sharpening to stay in top cutting condition
2. Beaditive Precision Detail Craft Scissors
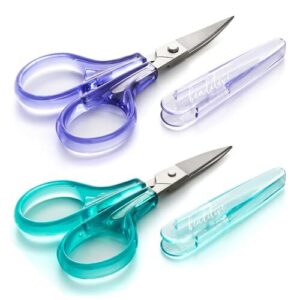
Tiny tools, big precision—that’s the Beaditive set fundamentally. This stainless steel duo includes one curved-tip and one straight-tip pair, both around four inches long with needle-sharp points for tight corners.
Use these for fringe cuts, side braids, or fixing small snags after your main cuts. The slim jaws won’t snag delicate jersey, and protective caps keep tips safe in your craft bag. Just don’t reach for these on thick seams or heavy-duty fabric—they’re built for detail work, not the whole shirt.
| Best For | crafters, embroiderers, and sewists who need precise, small-scale cutting for detail work like trimming threads, fringe, and tight corners. |
|---|---|
| Category | Fabric Scissors |
| Material | Stainless Steel |
| Sewing Relevance | High |
| Skill Level | All Levels |
| Portability | Low |
| Gift Suitability | Good |
| Additional Features |
|
- Two specialized tips (curved and straight) handle a range of detail-cutting tasks
- Durable stainless steel resists rust and corrosion for long-term use
- Compact, portable design with protective caps for safe storage in craft bags
- Not suitable for cutting heavy-duty fabric or thick materials
- Small size limits use for large-scale cutting projects
- May require a separate pair of scissors for everyday, general-purpose cutting
3. White Stainless Steel Sewing Scissors Set
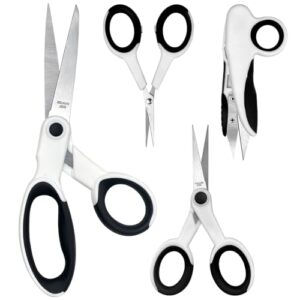
Four tools, one box, zero guesswork. This Ceemiaa set pairs five-inch and eight-inch stainless steel scissors, both rust-resistant and ground to a precision bevel for clean lines on knits.
The adjustable pivot screw lets you dial in tension, so cuts stay smooth through layered fabric. Ergonomic grips cut down on hand fatigue during long projects.
One catch: the thread snips aren’t built for lefties. Everyone else gets a solid, all-purpose kit for armholes, hems, and detail trims alike.
| Best For | This set is best for right-handed sewers, quilters, and crafters who want a reliable, all-purpose scissor kit for tailoring, dressmaking, and detail work at home, school, or in the office. |
|---|---|
| Category | Novelty T-Shirt |
| Material | Cotton Blend |
| Sewing Relevance | Moderate |
| Skill Level | All Levels |
| Portability | High |
| Gift Suitability | Excellent |
| Additional Features |
|
- High-strength stainless steel blades with a precision bevel deliver clean, accurate cuts, even on knits and layered fabric
- Ergonomic ABS handles with soft rubber inner rings stay comfortable during long stretches of cutting
- Four different sizes cover everything from fine detail trims to bigger cutting jobs
- Thread snips in the set aren’t designed for left-handed use
- Blades need regular maintenance to stay sharp over time
- Ambidextrous design applies to most, but not all, tools in the set
Frequently Asked Questions (FAQs)
How to cut a shirt into sleeveless?
Ready to break free from boring crewnecks? Fold the shirt lengthwise, mark your line with chalk, then cut along the shoulder seam and down. Use sharp fabric scissors for clean edges, and round the corners so nothing tears later.
How to cut a tee shirt to make it cute?
Cute starts with symmetric guidelines, so mark both sides with chalk before cutting. Add a diagonal racerback, round every armhole corner, and finish raw edges with a light stretch for a curled, boho-cool hem that feels totally you.
How to make a tank top from a shirt without sewing?
Skip the machine entirely: fold raw edges and seal with no-sew fabric glue for a clean, flexible bond. Jersey knit naturally resists fraying, so stretched, rolled edges hold their shape without stitching—just glue, press, and let dry.
How to cut up a tank top and make it cute?
Try fringe cuts along the bottom hem, add a side braid with three sliced strips, or punch small holes for a distressed vibe. Round every edge, then stretch raw jersey until it curls naturally.
Can you make a strapless tank top too?
Cutting the straps free is like shedding training wheels—liberating, a little wild. Yes! Trim straps and curve the neckline higher across the chest. Add stretch knit fabric with good recovery, so it holds without support.
How do you add fringe to the hem?
Finish the raw edge first, then mark evenly spaced vertical cuts every 1/4 to 1/2 inch. Pin fringe layers together, sew a stable anchor line above the cuts, and stretch each strand for a curled, unraveling-proof finish.
Whats the best way to create side braids?
Picture strands catching sunlight as you sweep hair to one side. Gather it near the hairline, split into three even strands, and braid with steady tension. Secure the end with a clear elastic, then pancake gently for fullness.
Can you turn a cut tank into a crop top?
Just plan your length first, then cut a straight or curved hem 2–3 inches above the waist. Use a bowl for a rounded edge, and always leave room for a folded seam.
How do you distress the fabric for a worn look?
Grab sharp scissors and rough up edges by hand for irregular fray, or hit hems with a pumice stone for worn-in thinning. Try a diluted bleach patch for sun-faded streaks—always test fabric first before going all in!
Conclusion
That drawer full of old tees could clothe an entire army, and now you finally know how to set them free.
Once you cut tshirt into tank top shapes, boring basics don’t stand a chance. Sharp scissors, a steady hand, and the right armhole cut turn scrap fabric into a signature style.
Your closet isn’t clutter anymore, it’s raw material waiting for a plan. Grab the next shirt. Cut bold, cut confident, and wear it like you made it, because you did.