This site is supported by our readers. We may earn a commission, at no cost to you, if you purchase through links.
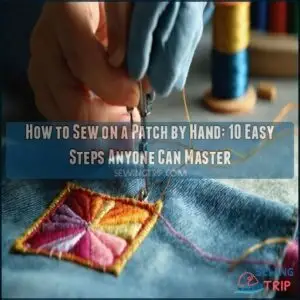
Thread your needle, knot the end, and position the patch where you want it, using pins or tape to keep it steady.
Start from underneath the fabric to hide the knot, then use a simple whipstitch or running stitch to secure the edges, keeping your stitches small and even.
Work all the way around, knot the thread firmly, and snip the excess.
The result? A patch that’s snug, stylish, and durable!
Table Of Contents
- Key Takeaways
- Sewing Patches by Hand
- How to Sew on Patches
- Patch Placement Considerations
- Hand Sewing Techniques
- Thread Selection and Management
- Sewing Around Patch Edges
- Troubleshooting Common Issues
- Customizing Patches and Designs
- Caring for Sewn Patches
- Alternative Methods and Options
- Frequently Asked Questions (FAQs)
- Conclusion
Key Takeaways
- Secure the patch first using pins, tape, or adhesive, and ensure it’s positioned exactly where you want it.
- Use small, even stitches like a whip stitch or running stitch for a durable and neat hold.
- Knot your thread securely, hide the knot under the fabric, and trim excess thread for a clean finish.
- Maintain proper thread tension and fabric stability to avoid puckering, wrinkling, or uneven stitches and ensure a durable hold.
Sewing Patches by Hand
You’ll find that sewing patches by hand gives you complete control over your stitches while also being easier than you might think.
Hand-sewing patches offers control, creativity, and durability—transforming repairs into personal, professional-looking statements with a few simple tools and techniques.
With just a needle, thread, and a few minutes of your time, you can transform that torn jacket or personalize your backpack without breaking a sweat.
Preparing Fabric and Tools
Before diving into hand sewing your patch, gather these five essential tools: scissors, pins, a thimble, an embroidery hoop, and a clean, well-lit workspace.
Fabric stabilization is vital—iron your garment to remove wrinkles and guarantee a smooth surface for patch application. Clean any dirt from the area where you’ll sew on patch.
Selecting the appropriate embroidery hoop dimensions is important for securing the fabric. Remember: proper tool maintenance and workspace setup prevent frustration later, and fabric stabilization is key to a successful patch application.
Choosing Thread and Needle
Now that your workspace is ready, let’s pick the right needle and thread.
For hand sewing patches, choose a medium-sized needle that’s sharp enough to pierce your fabric type without struggle.
Match your thread color to either your patch edge or the base fabric for a seamless look.
All-purpose polyester thread works for most projects, but consider button thread for extra durability on frequently washed items.
A patch sewing needle is designed specifically for this task.
Securing Patch Temporarily
Before diving in with your needle, you’ll need to secure your patch temporarily.
Place it exactly where you want it, then keep it from shifting using patch pins, double-sided tape, or adhesive spray.
For delicate fabrics, fabric glue works well.
If your patch has iron-on backing, use your iron to tack it in place before hand sewing the patch for perfect patch placement.
How to Sew on Patches
Now that you’ve gathered your materials, let’s get down to the actual patch sewing process. Sewing a patch by hand isn’t rocket science, but it does require some patience and attention to detail.
Sewing a patch by hand takes patience and care—turn simple stitches into something strong, stylish, and uniquely yours.
First, thread your needle with about 18 inches of thread that matches your patch colors. Double the thread and tie a secure knot at the end. Position your patch where you want it and secure it temporarily with pins or fabric tape.
Here’s what makes a patch look professional:
- Small, evenly spaced stitches around the entire perimeter
- Consistent tension that doesn’t pucker the fabric
- Hidden knots and thread ends
Working from the backside of your fabric gives you better stitch durability. Insert your needle through both the patch and fabric, pulling gently until the knot catches. Continue with your chosen stitch technique all the way around, ensuring small and evenly spaced stitches.
Patch Placement Considerations
You’ll need to carefully position your patch to guarantee it looks good and serves its purpose effectively.
Where you place your patch can make the difference between a professional-looking repair and one that draws attention for all the wrong reasons, which is why carefully considering placement is crucial.
Measuring and Marking Fabric
Precise measuring and marking fabric is half the battle when attaching patches.
Before you pick up your needle, use fabric chalk or a water-soluble pen to mark the exact spot where you’ll sew your patch.
Grab a tape measure to guarantee accurate placement and proper alignment techniques.
Don’t eyeball it! Even the most beautiful hand sewing can look sloppy if your patch positioning is off-center.
This approach ensures that your patch is securely and neatly attached, which is crucial for a professional finish, and proper alignment is key to achieving this.
Uniform Regulations and Guidelines
With your fabric marked properly, it’s time to tackle uniform regulations.
When sewing patches on uniforms, you’ll need to follow specific regulations and organizational guidelines for placement accuracy.
Use color-matched polyester or nylon thread for durability. Some military standards like AR 670-1 require precise alignment standards and might specify 16 stitches per inch.
Always wash your uniform before attaching patches to prevent puckering after laundering. Accurate patch placement relies on understanding pattern terminology for best results.
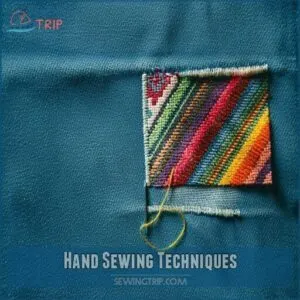
Hand Sewing Techniques
You’ll master essential hand sewing techniques with just a few simple stitches that transform any patch job from sloppy to professional.
Whether you’re fixing a torn knee or adding flair to your denim jacket, knowing how to use running, whip, and backstitch properly will make your patches last through countless washes, with techniques that are essential to a professional finish.
Running Stitch and Whip Stitch
Now that you’ve chosen your patch’s position, let’s talk about the stitches that will keep it there.
The running stitch and whip stitch are two workhorses for hand sewing patches.
A running stitch creates a dotted line pattern and works great for temporary placement. For the best results, choose a needle designed for running stitch.
The whip stitch, where you loop thread over the patch edge, provides stronger attachment for patches that need to last.
Backstitch and Blind Stitch
While whip stitches create a visible edge, you’ll want two powerhouse techniques for professional patch results.
The backstitch delivers durability that won’t quit—perfect for patches on high-stress areas.
Simply double back each stitch for extra strength.
For invisible attachment, the blind stitch (also called ladder stitch) catches just a thread or two, making your handiwork nearly disappear.
Both techniques keep your patches secure without drawing unwanted attention, using techniques like the blind stitch.
Maintaining Even Stitches
Consistency is the secret sauce for professional-looking patches.
Maintaining even stitches guarantees your patch stays secure and looks great.
- Control tension by keeping thread snug but not tight enough to pucker fabric
- Space each stitch about 1/4 inch apart for balanced appearance
- Hold your needle at the same angle for each stitch
- Count to establish rhythm—one-two-stitch, one-two-stitch
This approach ensures that your patch not only looks great but also remains secure.
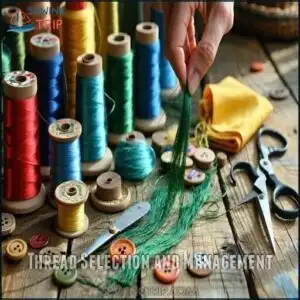
Thread Selection and Management
You’ll save yourself a lot of headaches by choosing the right thread and managing it properly before tackling your patch project.
A strong all-purpose thread that matches your patch color and a manageable 18-20 inch length will set you up for sewing success without those frustrating tangles that make you want to throw your project across the room.
Thread Length and Type
Now that you’ve got your stitching technique down, let’s talk thread. For handstitching patches, you’ll need 18-20 inches of thread for single threading or 38-40 inches if doubling up.
Choose all-purpose or button craft thread for best durability. Thread material matters—match colors to your patch or go bold with contrast.
Needle compatibility is important too—thicker thread needs larger needle eyes. Proper tension helps prevent thread breakage solutions.
Knotting and Securing Thread
Now that you’ve chosen the right thread length, let’s make sure your stitches stay put. A good knot is like the foundation of a house—if it’s weak, the whole thing might come down.
To secure your thread properly when sewing patches by hand:
- Double the thread through your needle’s eye for extra reinforcement
- Create a surgeon’s knot by looping twice for stubborn fabrics
- Pull the knot tight against the fabric, not in mid-air
- Make a tiny backstitch before starting your main stitches to ensure a good knot and prevent it from coming undone, thus providing a strong foundation.
Hiding Knots and Trimming Excess
Now that you’ve secured your thread with a strong knot, let’s make your patch look professionally finished.
Hide your knots by tucking them under the patch edge where they won’t be visible.
After securing ends, trim excess thread about 1/4 inch from the knot to prevent unraveling while keeping a clean finish.
Remember, a beginner sewing project looks polished when all your needle and thread work stays behind the scenes, and this attention to detail makes it look professionally finished.
Sewing Around Patch Edges
You’ll need to stitch completely around the patch edges to guarantee it stays secure through wear and washing.
Start with small, even stitches about 1/4 inch apart, working your way around the entire perimeter until you return to your starting point, using complete stitches to ensure security.
Starting and Ending Stitches
Begin your stitching journey by anchoring knots underneath the patch where they’ll stay hidden from view.
When starting, take small stitches close together for a secure foundation. As you near the end, create reinforcement stitches by passing your needle through previous loops.
Finish by hiding tails beneath the fabric—snip excess thread only after your knot is secure. These techniques guarantee your sew-by-hand project won’t unravel over time, ensuring a long-lasting result.
Overlapping Stitches for Reinforcement
Every reliable patch attachment needs proper reinforcement at the beginning and end of your stitching path.
When you overlap your stitches, you create a fortress of thread that won’t easily come undone.
To maximize reinforcement strength when sewing patches by hand:
- Overlap your starting and ending stitches by at least 1/2 inch
- Increase stitch density in the overlap area (4-5 stitches per inch)
- Pass through previous stitches twice for extra security against unraveling
By following these steps, you can ensure a strong and durable patch attachment, which is essential for a reliable patch.
Securing Corners and Curved Edges
Now let’s tackle those tricky spots.
Corners and curved edges need special attention when you’re reinforcing your patch.
| Patch Feature | Technique | Results |
|---|---|---|
| Sharp Corners | Mitered corners with 3 tight stitches | Lies flat, strong adhesion |
| Rounded Edges | Small, close stitches following curve | Smooth appearance, no puckering |
| Emblem Points | Corner reinforcement with backstitch | Prevents lifting, extra durability |
| Curved Badges | Blind stitch corners using curved needle | Professional finish, hidden thread |
| Unusual Shapes | Stitch pattern follows contour closely | Custom fit, secure attachment |
When sewing patch by hand, slow down at these challenging spots to maintain even tension and ensure a professional finish with smooth appearance and custom fit.
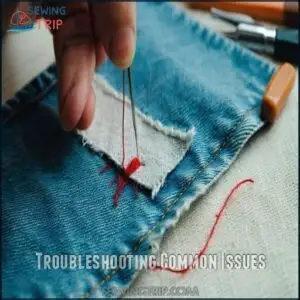
Troubleshooting Common Issues
You’ll encounter a few bumps along your patch-sewing journey, but they’re easy to fix with the right know-how.
Even when thread breaks or fabric bunches up, you can quickly get back on track without turning your mending project into a frustration fest.
Dealing With Thread Breakage
Thread breakage can stop your patch project in its tracks, but fixing it doesn’t have to be a nightmare.
When your thread snaps while sewing a patch by hand, try these quick solutions:
- Choose higher Thread Quality that matches your Fabric Type
- Switch to a smaller Needle Size to reduce friction
- Keep consistent Tension Settings as you pull each stitch
- Adjust your Stitch Length—shorter stitches break less often
- Moisten thread slightly before threading to strengthen fibers
To prevent this, make certain proper thread storage to maintain thread integrity and ensure a smooth sewing experience with proper thread handling and consistent tension.
Avoiding Fabric Distortion
Now that you’ve handled thread breakage, let’s tackle fabric distortion – the nemesis of patch sewing.
When you sew patches by hand, maintaining proper tension control is key. Pull stitches too tight and your fabric puckers; too loose and your patch won’t adhere properly.
Here’s a quick reference guide to help you achieve perfect patch adhesion:
| Issue | Cause | Solution |
|---|---|---|
| Puckering | Excessive stitch tension | Loosen grip, use even pressure |
| Wrinkling | Uneven fabric stabilization | Use embroidery hoop |
| Stretching | Improper fabric handling | Support fabric as you sew |
| Warping | Wrong needle size | Match needle to fabric weight |
| Bunching | High stitch density | Space stitches evenly (1/4") |
These guidelines will help you overcome common issues such as puckering, wrinkling, and stretching, ensuring a professional finish for your patches.
Removing Pins and Adhesives
While preventing fabric distortion is important, knowing how to safely deal with pins and adhesives is just as key when you sew patches by hand.
Remove pins one at a time as you sew along the patch edge. Pulling them out ahead of your needle prevents accidental pricks and fabric snagging.
- Take pins out at a 90-degree angle to avoid stretching the fabric
- Use a warm iron to soften stubborn patch adhesive
- Wipe adhesive residue with a damp cloth before it dries completely
- Apply rubbing alcohol on a cotton swab for tough residue, testing on an inconspicuous area first
Customizing Patches and Designs
You’ll transform ordinary patches into personal works of art with simple embroidery techniques and creative stitch patterns.
By adding your own touches like decorative stitches or combining multiple patches, you can create a unique style that makes even store-bought clothes feel custom-made.
Using Embroidery and Cross-Stitch
Now that you’ve learned to fix common issues, why not make your patches truly unique?
Embroidery designs and cross-stitch patterns offer creative options for customization.
Embroidery, the most common method for professional patches, uses thicker thread for bold designs.
Cross-stitch, an easy form of hand embroidery, works great for smaller patches on jackets or pockets.
Both techniques let you showcase team pride or personal style with colorful thread choices.
Adding Decorative Stitches and Patterns
Decorative stitches transform your plain patch into a personalized masterpiece.
Try outlining your patch with colorful embroidery floss using simple running stitches or elegant chain stitches. Add bead embellishments along the edges for sparkle, or incorporate ribbon accents for texture.
Fabric paint can highlight specific areas, while mixed media techniques combine multiple stitch patterns.
These hand sewing techniques aren’t just practical—they showcase your creativity while securing your patch firmly in place, using methods that are both functional and visually appealing, with the potential to add sparkle.
Combining Patches for Unique Styles
Crafters know that one patch is just the beginning of your personalized style journey.
Combine multiple patches for truly unique looks by following these proven techniques:
- Create depth with patch layering, placing smaller designs on top of larger ones
- Maintain theme coordination by grouping related patches together
- Mix texture contrast by pairing embroidered patches with woven ones
- Use color palettes that complement your base garment for a cohesive look
Experiment with nature-inspired designs for a unique touch, and remember that complete concepts and proper layering are key to achieving a stylish outcome.
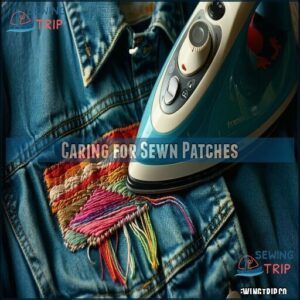
Caring for Sewn Patches
You’ll need to properly care for your hand-sewn patches to keep them looking great and lasting longer.
Gentle washing and careful ironing will protect your hard work, just like you wouldn’t throw your favorite concert t-shirt into a hot dryer after spending an hour attaching that perfect band patch, which is a delicate process.
Washing and Drying Instructions
After all your hard work sewing on patches, proper washing is essential for patch durability.
Flip garments inside out and use cold water with mild detergent—fabric softeners and bleach are patch enemies.
Place items in a washing bag for extra protection.
For drying, skip the heat and lay flat on a towel.
Hand washing with lukewarm water works best for delicate patches like sequins or beads.
Ironing and Pressing Patches
Now that your patches are washed and dried, proper ironing keeps them looking sharp. When pressing sewn patches, turn your garment inside out to protect detailed stitching from direct heat.
- Your iron should feel like a warm summer day, not a blazing furnace
- Nothing feels worse than watching your prized patch melt before your eyes
- A pressing cloth stands guard like a loyal friend between iron and patch
- The satisfying hiss when the iron meets fabric signals success
For iron on patches, set your iron to medium heat for adhesive activation. Fabric compatibility matters—test temperature on an inconspicuous area first, preventing damage to both patch and garment. This step is crucial to avoid damage and ensure a proper bond between the patch and the garment, leading to a long-lasting result.
Extending Patch Longevity
Now that your patches are properly pressed, let’s make sure they stand the test of time.
Well-made patches can last for years with proper care.
Your sewing technique plays a big role in patch longevity when you sew patches by hand.
| Material Quality | Stitch Reinforcement | Proper Washing |
|---|---|---|
| Choose patches with tight weaves | Double-stitch edges | Turn garments inside-out |
| Select colorfast materials | Reinforce corners | Use gentle cycle |
| Match thread to fabric strength | Use backstitch for high-stress areas | Avoid bleach |
| Consider fabric thickness | Add hidden reinforcements | Air dry when possible |
| Use quality needle selection | Apply seam sealant | Iron on low heat |
To ensure the longevity of your patches, consider the factors outlined in the table, including material quality, stitch reinforcement, and proper washing techniques.
By following these guidelines, you can create well-made patches that will last for years to come.
Alternative Methods and Options
You don’t always need a needle and thread to attach a patch to your favorite jacket or jeans.
From iron-on adhesives that stick with heat to professional tailoring services that save you time, there are several alternatives when your fingers are too sore from previous patch-sewing adventures, utilizing professional services.
Using Iron-on Patches and Adhesives
Iron-on patches are a quick fix! For durability, pair them with sewing.
Use a heat press or hot iron to bond adhesive backing. If permanent adhesion isn’t your goal, fabric glue offers temporary options.
Clean placement guarantees stronger no-sew applications. Adhesive types vary, so always check instructions.
Need a smoother finish? Press firmly without rushing attachment. This method is easy and effective!
Machine Sewing and Professional Services
If you’re short on time, machine sewing offers speed but requires proper needle selection to handle thicker materials.
For precision or delicate fabrics, consider sewing services like dry cleaners, seamstress, or tailor shops.
Professional costs vary, but their alteration expertise guarantees quality, and many offer service guarantees, so your patch stays put without stressing over uneven stitches.
No-Sew Options and Temporary Fixes
Sometimes, sewing’s not the only path.
Want quick fixes? Try these no-sew patch options. They’re a breeze for busy days or non-stitchers.
- Fabric glue: Bonds neatly, great for emergencies.
- Iron-on patches: Heat press for strong adhesion.
- Adhesive sprays: Keeps patches steady temporarily.
- Heat pressing: Boosts stronger patch stick.
- Temporary adhesives: Perfect for quick attachment fixes.
Frequently Asked Questions (FAQs)
How to sew on a patch?
Start by securing the patch with pins or tape.
Thread a needle, knot the end, and use a whip stitch or running stitch to sew around the edge, spacing stitches evenly for durability and neatness.
Can you sew a patch by hand?
You can definitely sew a patch by hand.
Just grab a needle, thread, and your patch.
Secure it with pins or tape, then use small, even stitches like a whip stitch for a sturdy hold.
Can you sew on patches with a machine?
You can sew patches with a machine by positioning the patch securely, using a matching or contrasting thread, and choosing a straight or zigzag stitch.
Machine sewing is quicker but requires precision to avoid mistakes.
How do you attach a patch to a sewing machine?
Position your patch carefully under the sewing machine’s presser foot, ensuring it’s flat and properly aligned.
Use a straight or zigzag stitch, adjusting the needle and thread tension for smooth, secure stitching around the edges.
How do you bind a patch on a sewing machine?
Binding a patch with a sewing machine is like framing artwork.
Use a straight or zigzag stitch around the edges, ensuring the patch stays flat.
Align precisely, go slow, and reinforce corners for security.
What are the different types of hand sewing patches?
You’ve got several options like whip stitch, running stitch, backstitch, and blanket stitch.
Each has its strengths—whip stitches secure tightly, running stitches are quick, backstitches add strength, and blanket stitches stand out decoratively.
Is it better to sew patches by hand or machine?
It depends on your goal.
Hand sewing gives you more control and precision, especially for delicate fabrics or curved edges.
Machine sewing is faster but requires precision to avoid mistakes or uneven lines, and it is particularly notable for its speed, but precision is key.
What is the best stitch for sewing on a badge?
Think of the backstitch as the MVP of sewing—it’s strong, secure, and timeless.
It easily reinforces a badge, keeps edges tidy, and holds up to wear, making it the best stitch for durability.
How do I sew on leather patches?
Use a strong needle, waxed thread, and a thimble.
Start with a secure knot, stitch close to the patch edge, and space stitches evenly.
Pull stitches snugly, but not too tight, for durability.
Can I use glow-in-the-dark thread?
You can absolutely use glow-in-the-dark thread.
It’s a fun twist that adds flair to your patch.
Just make certain the thread is strong enough for durability, and use small, tight stitches for a secure hold.
Conclusion
Wondering if you can really sew on a patch by hand? You can!
With a few simple tools and some practice, you’ll create a polished, durable finish.
The key is careful preparation—measure your placement, knot your thread securely, and keep your stitches small and even.
Whether it’s for function or style, hand-sewing a patch is a skill worth mastering.
Now grab your fabric, follow these steps, and you’ve got this—one stitch at a time, with a few simple tools!


