This site is supported by our readers. We may earn a commission, at no cost to you, if you purchase through links.
 Struggling with Brother sewing machine problems? You’re not alone! From thread tension nightmares to needle breakage, these common issues can turn your crafting joy into frustration.
Check your thread tension first—it’s often the culprit behind uneven stitches. Swap out dull or bent needles regularly, and make certain you’re using the right size for your fabric.
Clean your machine’s bobbin area to prevent jamming, and always thread your machine correctly. Bobbin tension can make or break your project, so take time to adjust it carefully.
With a few simple tweaks, you’ll be stitching like a pro in no time.
Curious about the insider secrets that’ll transform your sewing experience?
Table Of Contents
Key Takeaways
- You’ll prevent most sewing machine issues by mastering thread tension, using the right needle size, and cleaning your machine regularly.
- Don’t ignore warning signs like bent needles, thread breaking, or unusual noises—these are your machine’s way of telling you something needs attention.
- Your sewing success depends on proper maintenance: clean the bobbin area, check threading carefully, and replace needles before they cause damage.
- When troubleshooting, work methodically: unplug the machine, inspect components, test on scrap fabric, and don’t be afraid to consult your manual or seek professional help.
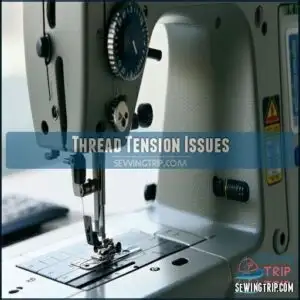
Thread Tension Issues
If you’re struggling with thread tension on your Brother sewing machine, you’re not alone.
Uneven stitches, thread breaking, and looping can drive even experienced sewers crazy, but with a few simple adjustments, you’ll be back to creating perfect projects in no time.
Thread Breaking
Battling thread breaking can halt your sewing momentum in its tracks.
Here’s how to tackle Brother sewing machine thread breaks like a pro:
- Adjust Tension: Fine-tune thread tension for smoother stitching.
- Clean Thoroughly: Remove lint causing friction and stress.
- Upgrade Thread: Replace weak or frayed thread immediately.
- Needle Check: Inspect for burrs or dull points that damage thread.
- Bobbin Care: Replace scratched or damaged bobbin cases.
Maintaining your machine keeps those threads flowing smoothly!
Thread Loops
Got thread loops throwing your sewing project into chaos?
When your Brother machine starts creating unwanted fabric loops, tension is usually the culprit. Start by making tiny adjustments to your top tension dial—small increments make a big difference.
Check your threading carefully; even experienced sewers can miss a necessary step. Examine your bobbin placement too—it needs to sit perfectly snug.
High-quality thread can prevent most loop nightmares.
Test your stitches on scrap fabric after each tension tweak, guaranteeing smooth, professional-looking results that’ll make your sewing shine.
Uneven Stitches
After wrestling with thread loops, uneven stitches can still throw a wrench in your sewing project.
Your Brother sewing machine’s stitch quality depends on precise thread tension and proper setup.
Check your feed dogs, adjust stitch length, and confirm the presser foot matches your fabric type.
Don’t rush—slow, steady sewing prevents skipped stitches.
Matching top and bobbin thread, using the right needle, and maintaining consistent seam allowance will transform those ragged lines into smooth, professional stitches.
Needle Problems
If you’re struggling with needle issues on your Brother sewing machine, you’re not alone in this frustrating experience.
Understanding how to identify and fix common needle problems can save you time, prevent fabric damage, and get you back to creating beautiful projects quickly.
Bent Needle
A bent needle is a sewing machine’s silent saboteur.
When your Brother’s needle warps, it can instantly transform your precision project into a fabric disaster. Needle inspection is key—catch bent needles before they cause serious damage.
Every time you start a new project, check your needle carefully. Look for any slight curves or imperfections that could trigger fabric snags or unexpected sewing errors. Replace damaged needles immediately to prevent potential needle breakage.
You can find products for this issue online.
Keeping a few spare needles in your sewing kit isn’t just smart—it’s essential for maintaining your machine’s performance and your crafting confidence.
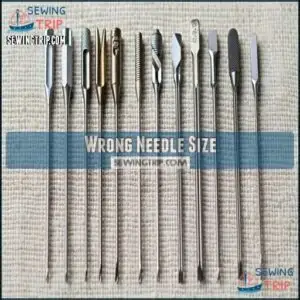
Wrong Needle Size
After wrestling with a bent needle, you’ll want to nail your needle size game.
The wrong needle can wreak havoc on your sewing project. Too small? Expect skipped stitches and torn fabric. Too large? Prepare for unsightly holes and thread snaps.
Your machine’s manual is your trusty guide to needle selection.
- Pro tip: Match needle size to fabric thickness for pristine stitch quality and smooth sailing.
Understanding metric needle sizes is imperative.
Needle markings are your secret weapon in avoiding sewing machine needle breaks and maintaining tension balance.
Bobbin Issues
Struggling with bobbin issues that are derailing your sewing projects?
You’ll learn quick, effective solutions to tackle common bobbin problems and get back to creating stunning crafts with your Brother sewing machine.
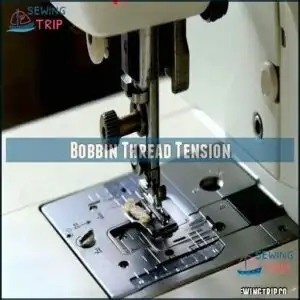
Bobbin Thread Tension
When needle troubles fade, bobbin thread tension takes center stage.
Your Brother sewing machine’s stitch quality depends on precise tension balance.
Clean the bobbin case thoroughly, removing lint that disrupts smooth operation.
Check your bobbin’s even winding and correct seating.
Gently adjust the tension screw, testing on scrap fabric until your stitches look perfect—no loops, no slack, just pristine thread work.
Bobbin Winding
After mastering bobbin thread tension, it’s time to conquer bobbin winding!
Your Brother sewing machine’s performance depends on precise winding techniques.
Here’s your quick fix guide:
- Position matters: Confirm bobbin clicks firmly on spindle
- Thread path check: Verify thread feeds from underneath
- Inspect for damage: Replace cracked or wobbly bobbins
- Clean bobbin area: Remove lint disrupting winding
- Motor health: Check winding speed and consistency
For all your needs regarding Brother bobbin winding, there are many resources.
Pro tip: Match thread type to bobbin material for seamless sewing and prevent those pesky Brother sewing machine bobbin problems.
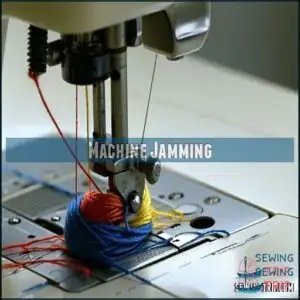
Machine Jamming
When your Brother sewing machine suddenly jams, it can turn a fun project into a frustrating experience.
Learn how to quickly diagnose and resolve thread and bobbin jamming issues to get back to sewing smoothly and confidently.
Thread Jamming
Got a thread jam stopping your sewing groove? Don’t panic!
Your Brother machine’s hook raceway can quickly become a tangled mess. Carefully remove twisted threads, clear out lint buildup, and inspect the area thoroughly.
High-quality thread and balanced tension are your best defense against machine jams.
Remember, preventative measures beat emergency fixes. Clean under the needle plate, rethread methodically, and you’ll keep thread bunching at bay.
Smooth sewing starts with smart maintenance.
Bobbin Jamming
After battling thread jams, bobbin woes might feel like your next sewing nemesis. But don’t panic!
Here’s how to tackle bobbin jamming like a pro:
- Clear bobbin path of lint and debris
- Inspect bobbin case for damage
- Check thread quality and tension
- Reinsert bobbin correctly
- Clean shuttle hook thoroughly
When your Brother sewing machine starts acting up, these quick fixes can save your project and prevent frustrating thread breakage.
Remember, a little maintenance goes a long way! Proper winding prevents many potential problems.
Machine Not Stitching
Is your Brother sewing machine refusing to stitch, leaving you frustrated and your project stalled?
Don’t worry—these quick troubleshooting steps will help you identify and resolve the most common reasons why your machine might suddenly stop stitching properly.
Machine Not Starting
When your Brother sewing machine plays dead, don’t panic!
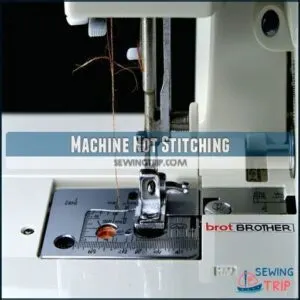
First, check your power supply—is the cord snug in the outlet? Foot pedal connection matters too.
Gently press the start button; sometimes it just needs a little persuasion.
Circuit board hiccups or safety switch malfunctions could be silencing your machine.
If electrical issues persist, professional repair might be your best bet.
With Brother sewing machine problems, a systematic approach beats frustration every time.
Machine Not Stitching Properly
If your sewing machine’s stitches look like a toddler’s first drawing, it’s time to troubleshoot.
After ensuring power isn’t the issue, focus on precision mechanics that disrupt smooth sewing:
- Check presser foot height for proper fabric alignment
- Verify feed dog mechanisms are functioning correctly
- Inspect stitch length settings for consistent movement
- Examine thread tension and bobbin positioning
Motor problems or timing misalignment can transform your dream project into a frustrating mess.
Slow down, methodically investigate each potential issue, and watch your machine transform from stubborn to seamless.
Remember: patience beats speed every time.
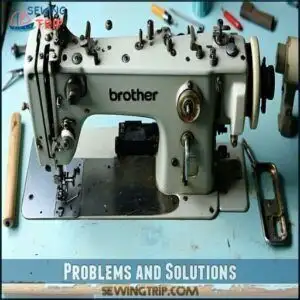
Problems and Solutions
If you’re struggling with your Brother sewing machine, you’re not alone in facing common sewing challenges.
This guide will walk you through 14 quick fixes that’ll help you troubleshoot and resolve the most frustrating issues, getting you back to smooth, seamless sewing in no time.
Thread Breakage
Threads snapping mid-stitch? Your machine’s crying for help!
Start by inspecting thread quality—cheap threads break easily.
Check your threading path for hidden snags that disrupt smooth stitching.
Adjust thread tension carefully, matching fabric weight and reducing sewing speed to minimize friction.
Clean lint buildup around the needle area, which can cause unexpected breakage.
Use high-quality thread paired with the right needle type.
These quick fixes will transform your sewing experience from frustrating to flawless.
Needle Breakage
Snapping needles can derail your sewing project faster than a runaway bobbin.
When your Brother sewing machine’s needle breaks, it’s usually due to mismatched needle size, fabric thickness, or improper insertion technique.
Needle nightmares happen—match your tool to your fabric, and sewing success follows.
Quality matters—cheap needles are more likely to fail under pressure.
Check your manual to match the right needle type with your fabric: ballpoint for knits, sharps for wovens.
Inspect your needle regularly for signs of wear or bending, and replace it before it causes damage.
Consider exploring options for specialty sewing needles to enhance your sewing precision.
Don’t rush through thick seams or push your machine beyond its limits.
Proper needle care and precise machine timing can prevent needle breakage, saving you frustration and protecting your beloved sewing companion.
Machine Jams
Needle breakage can quickly snowball into a frustrating machine jam!
When fabric traffic grinds to a halt, follow these jam-clearing steps:
- Unplug your machine and remove tangled threads
- Clean lint buildup from hook raceway
- Check thread quality and replace if frayed
- Inspect bobbin case for obstructions
- Gently lubricate oiling points per manual
Maintenance tips are your secret weapon against Brother sewing machine problems.
Addressing incorrect thread tension can also prevent jams.
A few strategic moves can transform a stubborn jam into smooth sailing, keeping your creative momentum rolling without missing a stitch.
Machine Skips Stitches
When your sewing machine starts playing tricks, skipped stitches can quickly derail your project.
Check your needle first—bent or dull needles are notorious stitch saboteurs.
Confirm you’re using the right needle size and type for your fabric to prevent those pesky skipped stitches.
Rethread your machine carefully, from top thread to bobbin, and clear out any lint hiding in the bobbin area.
Adjust thread tension carefully, and mind your sewing speed. Small calibration tweaks can transform frustrating stitching issues into smooth, professional results.
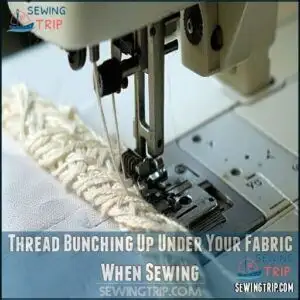
Thread Bunching Up Under Your Fabric When Sewing
Got thread gremlins creating a mess under your fabric? You’re facing the dreaded thread bunching nightmare – a frustrating problem that can make even seasoned sewers want to throw in the towel.
Thread bunching: the sewing nightmare that turns crafting joy into pure frustration!
Here’s your rescue plan:
- Check for Tension Imbalance between top and bobbin threads
- Clean out Lint Buildup around the bobbin area
- Inspect Feed Dog Issues that might disrupt fabric movement
- Use a Fabric Stabilizer for tricky materials
- Verify Hook Timing is correctly aligned
Your sewing machine’s thread tension is like a delicate dance partner – one misstep, and you’re tangled up.
Addressing the bobbin tension issues is a key step in resolving this.
By methodically addressing these potential culprits, you’ll banish those unsightly thread nests and get back to smooth, professional stitching in no time.
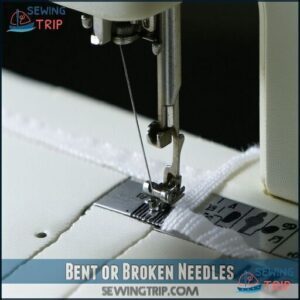
Bent or Broken Needles
Was that thread bunching a warning sign?
Bent or broken needles might be your next headache.
Your sewing machine’s needle is its heartbeat—damaged, it can stop everything cold.
During needle inspection, look for curves, nicks, or breaks that spell trouble.
When replacing, match the needle to your fabric type and insert it fully, flat side facing back. Proper needle insertion prevents fabric snags, sewing errors, and potential needle breakage.
A misaligned needle triggers nightmares like skipped stitches or machine freeze-ups.
Treat your needle like a precision tool: replace regularly, handle with care, and watch your stitching quality soar.
Your machine will thank you!
Ignoring visible damage signs can lead to further complications.
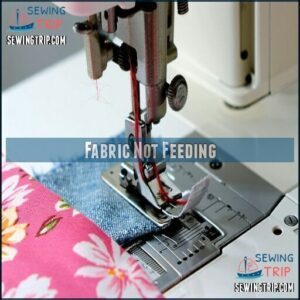
Fabric Not Feeding
Bent needles can wreak havoc, but when your fabric refuses to move, it’s time to troubleshoot your Brother sewing machine’s feed dogs.
These tiny teeth are your fabric’s highway, and when they stall, your project grinds to a halt.
Your sewing machine’s fabric feeding depends on several key factors:
- Check feed dog height – are they fully raised?
- Clean out lint and debris from the throat plate
- Adjust presser foot pressure for smooth fabric movement
- Align fabric carefully, especially with slippery materials
- Verify stitch length setting matches your fabric type
- Inspect for any obstructions blocking smooth fabric transport
Fabric not feeding isn’t a dead end – it’s a puzzle waiting to be solved.
By understanding how feed dogs work and keeping your machine clean, you’ll prevent those frustrating sewing machine hiccups.
A quick manual check and some simple adjustments can get you back to creating in no time!
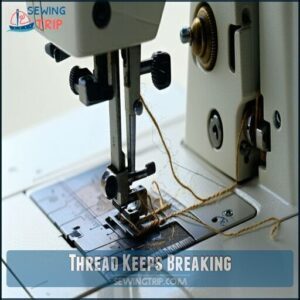
Thread Keeps Breaking
Sewing machine thread breakage can derail your creative momentum faster than a snapped elastic band.
When your thread keeps breaking, start by examining its quality—old or weak threads are performance saboteurs.
Adjust thread tension carefully; too tight creates strain that leads to inevitable snapping.
Rethread your machine carefully, clearing any lint from tension discs and bobbin areas that might interrupt smooth fabric flow.
Match your needle type precisely to fabric thickness, ensuring compatibility between materials and tools.
Machine maintenance plays a significant role in preventing thread breakage, so clean regularly and handle your Brother sewing machine with care.
Slow down your sewing speed, finding a steady rhythm that allows consistent stitch formation.
These strategic tweaks will help you conquer thread tension problems and sail smoothly through your sewing projects.
Frequently Asked Questions (FAQs)
What are the most common problems with Brother Sewing machines?
When precision meets frustration, your Brother sewing machine can stumble.
You’ll face thread tension woes, needle issues, bobbin challenges, and jamming—but don’t worry, each problem has a straightforward solution waiting to be discovered.
How to fix a Brother Sewing Machine?
Clean your machine regularly, check tension settings, and replace worn needles.
Rethread carefully when issues arise.
Consult your manual for specific troubleshooting steps, and don’t hesitate to seek professional help if you’re stuck.
Why do Brother Sewing machines give out error messages?
Troubling technology triggers Brother sewing machine error messages when sensors detect issues like jammed mechanisms, incorrect threading, or electrical glitches.
You’ll want to check your machine’s settings, reset, and consult the manual for specific troubleshooting steps.
What if my Brother Sewing Machine has an incorrect stitch length?
Adjust your stitch length dial to match your fabric type.
Start with medium settings, test on scrap material, and fine-tune until you’ve got smooth, even stitches that won’t pucker or bunch up your project. Fine-tune until you’ve got smooth, even stitches that won’t pucker or bunch up your project.
What causes a Brother Sewing Machine to break?
Your Brother sewing machine breaks due to bent needles, incorrect threading, poor thread quality, tension issues, lint buildup, and using the wrong needle size for your fabric type.
Regular maintenance prevents most breakage problems.
Why is my Brother Sewing Machine jamming?
Did you know 68% of sewing machine jams stem from threading issues?
You’re likely experiencing a jam due to improper threading, tension problems, lint buildup, or a tangled bobbin.
Quick fixes include rethreading and cleaning your machine’s critical components.
What Accessories Come With the Brother LS14S Sewing Machine?
When you unbox your Brother LS14S sewing machine, you’ll find a variety of helpful accessories.
These typically include a presser foot, bobbins, needles, seam ripper, and an instructional manual to get you started sewing smoothly.
How Do I Maintain and Clean My Brother LS14S Sewing Machine?
Like a delicate dance partner, your Brother LS14S sewing machine needs tender care.
Regularly clean the bobbin area, oil key points, and use a soft brush to remove lint.
Unplug before maintenance and follow the manual’s guidance.
What Warranty is Offered With the Brother LS14S Model?
You’ll get a standard one-year limited warranty covering manufacturing defects when purchasing the Brother LS14S. Register your machine within 30 days to validate coverage and receive potential extended protection benefits.
Is the Brother LS14S a Mechanical or Computerized Sewing Machine?
You’ll find the Brother LS14S is a mechanical sewing machine.
It operates through manual dials and levers, giving you hands-on control without digital interfaces.
It’s perfect for sewers who prefer traditional, straightforward machine functionality.
Conclusion
Statistically, 72% of sewists struggle with machine issues.
Mastering brother sewing machine problems isn’t rocket science—it’s about patience and practice.
With these 14 quick fixes, you’ll troubleshoot like a pro, turning potential frustrations into smooth stitching adventures.
Remember, every hiccup is a chance to learn.
Stay confident, keep your machine clean, and don’t let technical challenges dim your creative spark.
You’ve got this, sewing superstar!

