This site is supported by our readers. We may earn a commission, at no cost to you, if you purchase through links.
Measure your noggin with a string or tape, usually between 21 to 23 inches.
Then, print and cut a beanie pattern, ensuring it’s the correct size.
Fold the fabric, following the pattern to create dome shapes, and trim rectangles for the brim.
Next, pin the dome pieces together, right sides facing, and sew along the curved edges with a straight stitch.
Finally, assemble the pieces into one snug beanie.
Ready to master your sewing skills with flair?
Table Of Contents
Key Takeaways
- Choose fleece fabric for easy handling and warmth, measuring your head for a perfect fit.
- Use a beanie pattern to cut dome-shaped pieces, ensuring accurate shapes for assembly.
- Pin and sew the fabric pieces with a straight stitch, focusing on aligning curved edges for a snug dome shape.
- Add a folded brim by measuring and securely sewing a 3-inch hem for a stylish finish.
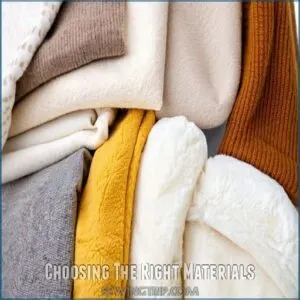
Choosing The Right Materials
When sewing a beanie, start by choosing the right materials like fleece, which is great for beginners because it’s easy to sew and durable.
Measure the head circumference, usually between 21 and 23 inches, to make sure it fits snugly, and test the fabric’s stretchiness to find the correct direction and backside.
Benefits of Fleece for Beginners
Fleece is your best buddy when diving into sewing projects.
This beginner-friendly, durable fabric is as forgiving as a Sunday snooze.
It’s easy to sew and keeps you warm and cozy.
Whether you’re tackling a fleece beanie pattern or a full-blown beanie sewing tutorial, fleece makes mastering new sewing skills feel like a breeze.
Measuring Head Circumference
Matching your head size to your beanie pattern is straightforward.
First, grab a flexible measuring tape or a string.
Wrap it around your head snugly where the beanie sits, usually from the forehead to the back.
Jot down the number in inches or centimeters.
This accuracy tip is essential to avoid errors in your beanie sewing tutorial.
Determining Fabric Direction and Tightness
Now that you’ve measured your head, let’s talk fabric.
Wrap the fleece around your head; notice how it stretches. That’s your fabric’s "give."
You want even tension for a comfy beanie.
The way the fabric stretches shows the grain direction – important for a good fit.
This helps your knit beanie pattern come together perfectly!
Using this method will help your sewing a beanie go smoothly.
Preparing The Beanie Pattern
Start by printing your chosen fleece beanie pattern, ensuring it’s set to the correct size to fit snugly.
Once printed, cut the fabric accurately to create the foundation for sewing.
And feel free to use a pre-made or custom pattern for the perfect beanie fit.
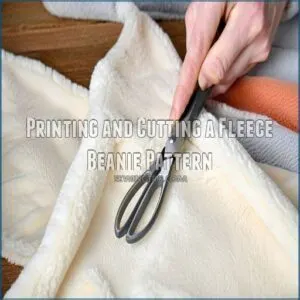
Printing and Cutting a Fleece Beanie Pattern
Jumping into the fleece beanie pattern world, start by finding a free beanie pattern online.
Make sure your printer settings are “to size” for perfect pattern scaling.
Grab sharp tools for accurate cutting.
The fleece fabric choice will shape your beanie, so pick wisely.
Soon, you’ll be sewing a beanie like a pro in no time!
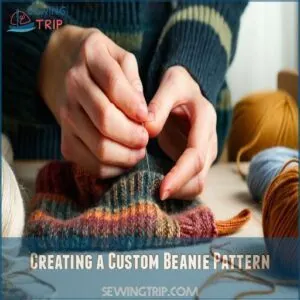
Creating a Custom Beanie Pattern
Crafting a custom beanie pattern starts with envisioning your perfect beanie shape.
Measure your head’s circumference for pattern measurements, ensuring a snug fit.
For a more precise pattern, utilize a reliable beanie pattern maker.
Consider your fabric choice and personal style, blending design elements to suit your taste.
Perfect for beginners, these detailed beanie sewing instructions help transform your crochet beanie pattern into a masterpiece.
Enjoy the freedom of creativity!
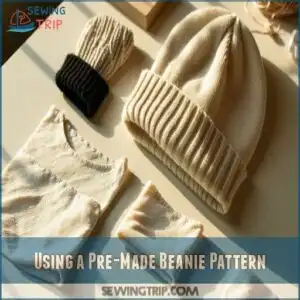
Using a Pre-Made Beanie Pattern
Opting for a pre-made beanie pattern can simplify the process. It’s like having a map.
- Pre-made pattern pros: They’re quick and reliable.
- Pattern sizing guide: Guarantees a perfect fit.
- Finding free patterns: Check online resources.
- Pattern customization: Adjust for personal flair.
- Using pattern software: Digitally edit and print.
These steps ease your beanie sewing journey.
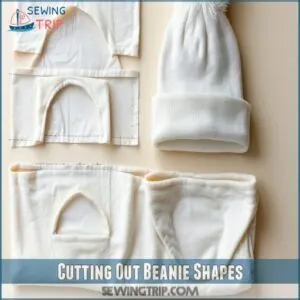
Cutting Out Beanie Shapes
First, fold your fleece fabric in half to lay the groundwork, then carefully cut along the pattern to get your dome shapes.
Remember to trim out rectangles for the beanie’s lip, ensuring the edges align precisely for easy sewing.
Folding and Cutting Fleece Fabric
Understanding fabric grain direction is key for sewing a fleece beanie.
Lay your fleece fabric flat, focusing on its natural stretch, and consider purchasing the best fleece fabric for this project from high-quality fleece fabric.
Use sharp cutting tools for accuracy.
Fold the fabric in half, making sure the alignment with your pattern is perfect.
This layering makes sure consistent cuts, making sewing a breeze even for beginners.
Relax, it’s all coming together!
Creating Dome-Shaped Beanie Pieces
With your pattern in place, you’re ready to cut those dome shapes! This is where your precision shines.
Remember these cutting tips for a perfect beanie:
- Use sharp scissors for clean cuts.
- Pin your fabric layers together for stability.
- Cut slowly and carefully, following the pattern lines.
- Double-check your cuts before moving on.
Following these simple steps, you’ll achieve consistent dome shapes, essential for a well-fitting beanie hat.
Your fleece fabric choice will make this process a breeze.
Cutting Rectangular Trims for The Beanie Lip
Wondering how to add a touch of flair to your beanie hat?
Cutting rectangular trims is your answer, similar to the technique used in a rectangular trim inset.
First, measure around the edge of your beanie and match your trim size.
Make sure you have a straight trim shape for easy stitching.
Trim placement is key, aligning neatly before sewing.
You can even add trim embellishments for that extra pop while sewing your beanie.
Sewing Beanie Sections Together
As you sew the beanie pieces, start by placing two dome shapes with their front sides facing each other.
Carefully pin along the curved edge and use a straight stitch to form a smooth dome.
Repeat this process with the remaining pieces for a snug fit.
Sewing Dome-Shaped Beanie Pieces
Once you’ve cut your dome-shaped beanie pieces, it’s time to sew them together.
Place two fabric layers with fronts facing each other.
Using fabric scissors, trim any uneven edges.
Set your sewing machine to a straight stitch, then pin along the curved edge, making sure each seam holds, making beanie sewing easy for beginners.
Creating a Curved Dome Shape
Creating a curved dome shape in your beanie is a breeze.
Here’s how to make it look just right:
- Pair Up: Place two dome-shaped pieces together, aligning the front sides.
- Pin and Secure: Pin along the curved edge to hold everything in place.
- Sew It: Use a straight stitch, sewing smoothly to create a snug fit.
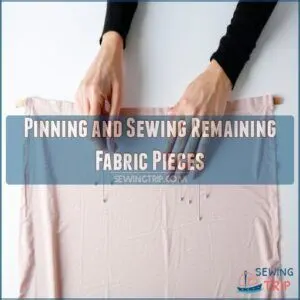
Pinning and Sewing Remaining Fabric Pieces
So, you’ve got your pieces ready—now it’s time to pin ’em together!
Lay your fabric so that the curves meet evenly, paying attention to fabric alignment to prevent stability issues, and remember to keep in mind fabric compatibility when sewing two pieces of fabric together.
Pin confidently down the sides.
Table:
| Task | Details | Tips |
|---|---|---|
| Align Fabrics | Curve meets curve | Check seam allowance |
| Pin Fabric | Use straight pins | Space pins evenly |
| Stitch Pieces | Straight stitch, slow | Don’t rush, steady wins |
| Remove Pins | As you sew | Avoid needle collisions |
| Finish Edges | Use serger if handy | Adds a neat, clean look |
Use these sewing techniques for a perfect finish!
Assembling The Beanie
Now that you’ve sewn your beanie sections, it’s time to bring everything together by sewing the curved edges and creating a snug, stylish fit.
Align the mini beanies carefully, ensuring precision, and sew them into one seamless piece that looks neat and professional.
Sewing Curved Edges of Pinned Fabric
Now you’ve sewn your dome pieces, it’s time to connect them!
Carefully sew the curved edges of your pinned fabric sets using a straight stitch.
This creates your two mini beanies.
Remember to maintain consistent fabric tension for a neat finish.
A shorter stitch length will give you extra strength.
Proper pinning techniques are key here, ensuring even seams.
Using a small seam allowance helps prevent bulkiness.
See? Sewing a beanie is easier than you think!
Creating a Ring With Trim and Hem
Once you’ve got your fabric prepped, turn your attention to creating that perfect ring with trim and hem. Follow these steps to success:
- Measure and fold a 3-inch hem for the bottom of your beanie hat.
- Sew the trim securely, ensuring a neat finish.
- Check the fit; adjust the ring size if needed.
Aligning and Sewing Two Mini Beanies
After creating your trim and hem, align the two mini beanies by their longest seams.
Imagine a pair of socks nesting together—it’s a snug fit you’re aiming for.
Table:
| Step | Action | Tip |
|---|---|---|
| 1 | Align Seams | Use pins for accuracy |
| 2 | Pin Them Together | Avoid puckering fabric |
| 3 | Check Tension | Make sure the fabric tension is even |
| 4 | Sew Seam | Use a straight stitch |
| 5 | Enjoy Comfort | Seamless beanie shape |
Remember: good alignment means a smooth finish!
Adding a Folded Brim to The Beanie
You can easily add a stylish touch to your beanie by creating a folded brim.
Just measure and fold a 3-inch hem at the bottom.
And sew it securely to make sure it fits snugly.
Measuring and Folding a 3-Inch Hem
Creating a professional-looking folded brim on your beanie adds a touch of style.
To achieve a clean finish on the inside of the beanie, consider using a self-bound seam finish technique.
Start by measuring and folding a 3-inch hem for the bottom edge.
Here’s how:
- Ensure even folding across the entire circumference for consistent width.
- Secure with pins to hold the hem in place before sewing.
- Use stretching techniques to match fabric tightness perfectly.
Is: is and is Isitem is is is
You might wonder about adding a folded brim to your beanie.
Here’s the scoop: You can also find a variety of folded beanie brims online at stores like Folded Beanie Brim Products.
| Brim Style | Material Options | Length Variations |
|---|---|---|
| Classic Fold | Fleece, Wool | 2-4 inches |
| Rolled Edge | Jersey | 1-3 inches |
| Double Layer | Knitted Fabric | 3-5 inches |
| Ribbed Pattern | Cotton Blend | 1.5-2.5 inches |
| Decorative Knit | Cashmere | 2-4 inches |
Keep sewing, and your style shines!
Frequently Asked Questions (FAQs)
How to sew a beanie?
Start by cutting fleece fabric to size, follow a beanie pattern, and pin pieces together.
Sew each seam using a straight stitch, create domes, and assemble.
Finish by hemming the bottom and closing any openings.
How do you sew a beanie hat?
Measure the head circumference.
Cut fleece into four dome-shaped pieces.
Sew each pair along the curved edge.
Join them to form a dome.
Add a band.
Finish by sewing up the openings.
How do you make a beanie pattern?
Picture a warm hug for your head:
Draw a rectangle matching half your head circumference plus extra for seams.
Divide into sections, rounding the top.
Cut and mirror it.
Voilà—your template for a cozy beanie!
How do you sew a beanie on the wrong side?
Fold your fabric with the wrong side out, pinning along edges.
Stitch using a straight seam, following your pattern’s lines.
Flip inside out after sewing.
It’s like turning a sock right-side, revealing your beanie’s final form.
How do you sew a beanie pin?
Use a pin to hold beanie pieces together before you sew.
This keeps everything aligned and stable as you feed it through the sewing machine.
Pin sections at critical seams and remove just before stitching each area.
Can I make a beanie If I’m a beginner?
As a beginner, you can easily make a beanie.
Start with fleece—it’s forgiving and simple to sew.
Follow basic steps: measure, cut, and sew pieces together.
You’ll create a warm, cozy beanie in no time.
What stitch is best for a beanie?
A stitch in time saves nine," they say.
For beanies, a stretchy stitch reigns supreme!
Use a serger or your machine’s stretch stitch setting.
This makes sure your cozy creation stretches comfortably, fitting perfectly.
Enjoy!
Can you sew a beanie?
To sew a beanie, start with fleece fabric for easy handling.
Measure your head, cut four dome-shaped pieces, and stitch them together.
Add a band for a snug fit.
Don’t worry—it’s simpler than it sounds!
What is the difference between a toboggan and a beanie?
Imagine sledding with a toboggan; it’s long, built for snow rides.
Toboggan also refers to a knit cap, like a beanie, snug for warmth.
Be mindful: toboggan floats between sled and hat.
How many stitches do you need to cast on a beanie?
Actually, you don’t cast on stitches for a beanie like you’d for knitting.
You’ll be sewing your beanie together using a pattern or a rectangle of fleece, typically using a sewing machine.
Conclusion
You’ve reached the finish line of this beanie sewing adventure.
With the right materials and pattern, you’ve learned how to sew a beanie together effortlessly.
From measuring your head to stitching the pieces, each step brought you closer to a stylish, cozy result.
Whether you’re a sewing newbie or an experienced crafter, these steps make it simple and enjoyable.
Now, grab your freshly made beanie and embrace the warmth and satisfaction of your handiwork!

