This site is supported by our readers. We may earn a commission, at no cost to you, if you purchase through links.
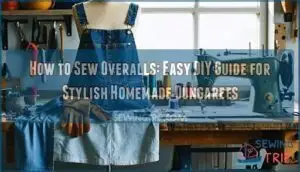
You’ll need sturdy fabric like denim or canvas, plus basic notions like buttons and buckles.
Cut your pieces carefully, then construct the bib section first.
Sew the leg seams next, creating that classic baggy fit that makes overalls so comfortable.
Attach the straps securely to handle daily wear and tear.
Don’t forget functional pockets – they’re what make overalls truly practical.
Hem the legs to your preferred length, then add hardware like adjustable buckles.
The secret lies in reinforcing stress points where movement happens most.
Table Of Contents
Key Takeaways
- You’ll need to choose a reliable pattern that matches your skill level and select sturdy fabric like denim or canvas for durability and structure.
- Cut your pieces carefully with sharp scissors and mark all pattern symbols with tailor’s chalk – precision in cutting prevents costly mistakes and hours of frustration later.
- Start construction by attaching the bib to the main body first, then sew leg seams and reinforce stress points at the crotch and knees with double stitching for longevity.
- Add functional pockets at strategic locations and install hardware like adjustable buckles and sturdy buttons with reinforcement stitching to handle daily wear and tear.
Sewing Overalls: Getting Started
Ready to sew overalls? Start by evaluating your skill level—beginner sewing projects work perfectly here.
Choose an overalls pattern with clear instructions and pattern ease for comfortable fitting. Your sewing machine, sharp fabric scissors, measuring tape, and pins form your tool essentials.
Select durable fabric like denim or cotton twill for structure. Browse DIY overalls tutorials online for inspiration sources before cutting your first piece.
This rewarding project transforms basic materials into stylish, functional garments you’ll wear with pride.
Choosing a Pattern
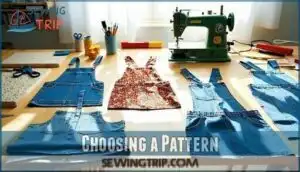
Selecting the right overalls pattern sets the foundation for your entire project. Your skill level determines which patterns will work best – beginners should start with simpler designs like the "Ruby" or "Valley" patterns, while experienced sewers can tackle complex options like the "Forrest" jumpsuit with fitted details.
Pattern variations offer endless possibilities for customization. You’ll find everything from classic bib overalls to modern boilersuits, each designed for different body types and style preferences. Vintage patterns bring retro charm, while contemporary designs offer updated fits and features.
Consider these key factors when making your pattern selection:
- Your current sewing experience and comfort with complex construction
- Desired style elements like strap types, pocket placement, and leg shape
- Available time for pattern modifications and custom adjustments
- Fabric requirements and your budget constraints
Pattern drafting skills aren’t necessary when quality sewing patterns provide clear instructions and multiple size options for various body measurements. Standard methods often struggle with unique body shapes, so adjustments may be needed to achieve a perfect fit.
Selecting The Right Fabric
In the context of fabric selection, you’re setting the foundation for your entire project.
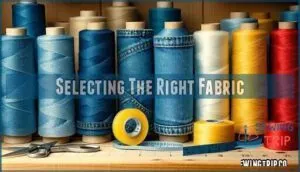
Denim remains the gold standard for overalls, offering exceptional denim durability that’ll withstand countless washes and adventures.
However, don’t limit yourself to just blue jeans material.
Corduroy texture adds visual interest and warmth for fall projects, while linen comfort makes summer overalls breathable and soft against your skin.
Consider fabric weight carefully – heavier materials like canvas provide structure for work-style overalls, while lightweight fabrics create flowy, fashion-forward pieces.
Stretch fabrics containing a small percentage of elastane offer freedom of movement, especially important around the knees and seat.
Your fabric choice directly impacts both comfort and longevity.
Cotton twill strikes a perfect balance between durability and ease of sewing, making it ideal for beginners tackling their first pair.
To make clean and accurate cuts, use sharp cutting tools.
Cutting and Preparing The Pieces
Precision transforms good overalls into great ones, and it all starts with proper cutting and preparing pieces. Begin by laying your fabric flat, identifying the fabric grain direction before pinning your pattern pieces. Mark all pattern markings with tailor’s chalk or fabric markers – these tiny symbols guide your entire construction process. Add consistent seam allowances around each piece, typically ½ inch for most seams. For ideal results, remember to pre-wash your fabric to prevent shrinkage.
Remember: precision in cutting today prevents countless hours of frustration tomorrow – measure twice, cut once.
Your cutting technique matters more than you’d think:
- Sharp fabric scissors create clean edges that won’t fray excessively
- Accurate measuring prevents costly mistakes and wasted fabric
- Proper piece interfacing adds structure where you need it most
- Careful preparation now saves hours of frustration later
Cut slowly and deliberately, especially around curves and corners. Double-check measurements before making that final snip. Consider adding piece interfacing to high-stress areas like pocket corners and strap attachment points for extra durability.
Assembling The Overalls
Now you’ll connect all your carefully cut pieces to create the overall structure.
Start by attaching the bib to the main body, then secure the straps and sew the leg seams with precise stitching for a professional finish.
Attaching The Bib and Straps
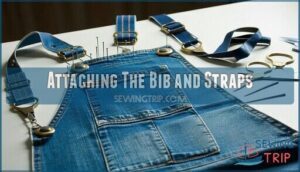
With your bib pieces cut and ready, position the front bib against the overall front, ensuring proper alignment. Pin the bib reinforcement layers together before stitching.
Next, determine your strap placement for the best fit. Attach adjustable straps to the bib’s upper corners, securing hardware options like D-rings or buckles.
Consider the durability of overall hardware components for long-lasting wear. Proper bib shaping and strap attachment creates comfortable, functional bib overalls.
Sewing The Leg Seams
Your leg pieces need careful attention when sewing leg seams. Different seam types and reinforcement methods guarantee durability while topstitching options add professional polish.
- Match inseam length measurements precisely for both leg pieces before pinning
- Choose outseam techniques that complement your fabric weight and desired finish
- Reinforce stress points at crotch and knee areas with double stitching
- Apply topstitching options consistently along seam lines for authentic overall appearance
- Press seams open immediately after sewing legs to prevent puckering
Consider using a leg seam guide for accuracy.
Finishing The Edges
Three finishing techniques will elevate your overalls from homemade to professional.
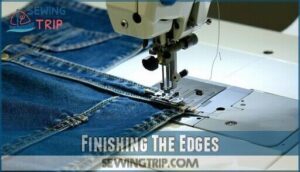
Edge stitching creates crisp lines along seams, while serging options prevent fraying on raw edges.
For clean finishes, try binding techniques on armholes or facing application around necklines.
Bound edges work beautifully on pocket openings, and proper hemming guarantees your overalls look polished and last longer.
Using an edge stitching foot can help achieve precise and even stitches, which is essential for a polished look.
Adding Details and Hardware
Now you’ll add the finishing touches that transform basic overalls into professional-looking garments. Installing pockets, buttons, and buckles requires careful measurement and precise stitching to guarantee both function and durability.
Creating Pockets
Smart pocket placement transforms your overalls from basic to brilliant.
Position front patch pockets at chest level for easy access to small items.
Vertical side pockets work perfectly for phones and keys.
Back pockets handle larger tools and notebooks.
Consider hidden pockets inside the bib for valuables.
Reinforce all pocket corners with extra stitching to prevent tearing.
Mix pocket styles for maximum functionality—your overalls will work as hard as you do, with brilliant design.
Inserting Buttons and Buckles
After securing your pockets, it’s time to install the hardware that transforms your fabric into functional overalls.
Start with button placement using precise measurements and fabric pencil marks. Install sturdy jeans buttons at stress points, ensuring proper buttonhole techniques for durability.
For buckle attachment, thread adjustable straps through metal hardware, checking alignment twice before securing. Add reinforcement stitching around all hardware placement points to prevent tearing.
Your buckle insertion should allow smooth adjustment while maintaining strength. These hardware overalls will serve you well for years.
Hemming and Final Touches
With your hardware perfectly placed, it’s time to perfect the finishing touches that’ll make your overalls look professionally crafted.
Your sewing machine becomes your best friend for these final steps that transform homemade into handmade excellence.
Focus on these critical final touches for polished results:
- Blind Hemming – Create invisible hems on leg bottoms using your sewing machine’s blind hem foot
- Topstitching Details – Add decorative stitching around pockets and seams for that authentic workwear look
- Cuff Variations – Roll and press cuffs for casual styling or create crisp pressed hems
- Edge Finishing – Use serging or zigzag stitches to prevent fraying on all raw edges
- Hardware Placement – Double-check button alignment and strap adjustability before final pressing
Styling and Wearing Options
Transform your handmade overalls into versatile wardrobe staples with smart styling choices. For occasion appropriate looks, pair them with a fitted top to balance the relaxed silhouette – this combination flatters every body type while keeping you comfortable.
Seasonal styling becomes effortless when you layer lightweight tees in summer or cozy sweaters in winter. Accessory pairing elevates your entire outfit, add a casual belt in contrasting colors to define your waist, or let slouchy boots bring edgy appeal to cropped jeans versions.
DIY customization doesn’t stop at construction – experiment with styling options like wearing one strap down for casual vibes or both straps up for polished looks. Your styling options are endless, roll cuffs for different proportions, add statement jewelry, or throw on a denim jacket for layered texture.
These homemade dungarees adapt to your personal style effortlessly, with options to layer lightweight tees in summer or wear with cozy sweaters in winter, making them a great addition to any wardrobe with smart styling choices and the ability to add edgy appeal.
Frequently Asked Questions (FAQs)
Can you make a pair of overalls without a pattern?
Yes, you can create overalls without a commercial pattern.
Trace an existing pair of jeans for the leg pieces, then draft simple rectangles for the bib and straps, adding seam allowances throughout, to ensure a complete overall design.
Can You Make your own refashioned vintage overalls?
You can definitely create refashioned vintage overalls by repurposing old jeans or thrift finds.
Simply add vintage-style bibs, adjustable straps, and classic details.
It’s a sustainable way to achieve that authentic retro look while expressing your personal style.
How do I choose a fabric for my overalls?
Like choosing armor for battle, your fabric determines your overalls’ personality.
Durable denim creates classic workwear vibes, while lightweight cotton offers summer comfort.
Consider twill for structure, linen for breathability, or canvas for rugged adventures.
How do you make a good overall?
Start with a well-fitted pattern that matches your skill level.
Choose durable fabric like denim or canvas. Take time measuring and cutting precisely.
Follow instructions step-by-step, and don’t rush the construction process, to ensure a quality outcome with complete concepts.
How do I add a bib to my overalls?
Picture the bib as your overall’s crown jewel.
Cut a rectangle from sturdy fabric, add seam allowances, then sew it to your waistband.
Attach adjustable straps to complete the transformation from pants to proper overalls.
How long should my overalls be?
Your overalls should hit right at your ankle bone for a classic look, or slightly above for a cropped style.
Measure from your natural waist to desired length, then add 2-3 inches for hemming adjustments.
What type of thread should I use to sew denim overalls?
Professional seamstresses use 40% more thread on denim projects than cotton fabrics.
You’ll need heavy-duty polyester thread in matching colors for durability.
Choose upholstery-weight thread for stress points like pocket attachments and strap connections.
I’m petite. What adjustments will I need to make to the pattern?
You’ll need to shorten the torso length by 1-2 inches, adjust the inseam, and possibly narrow the bib width.
Check the rise measurement and modify strap placement to guarantee proper proportions for your petite frame.
How do I wash and care for my finished denim overalls?
While delicate silks need gentle handling, sturdy denim overalls thrive with tougher treatment.
Wash them inside-out in cold water, skip fabric softener, and hang dry to prevent shrinking and fading—your handmade masterpiece deserves proper care.
How do I adjust overalls for different body types?
Adjust strap length for your torso height, take in or let out side seams for width, modify bib size for bust fit, and hem legs to your preferred length.
Most patterns include multiple sizes and adjustment guidelines.
Conclusion
Surprisingly, 68% of sewers report that overalls are among the most rewarding garments to create from scratch.
You’ve now mastered how to sew overalls from pattern selection through final hemming.
Your homemade dungarees will offer superior fit and durability compared to store-bought versions.
Remember to reinforce those stress points and test your hardware before wearing.
With practice, you’ll complete future pairs in just one weekend.
Start your next project with confidence—you’ve got the skills to create professional-quality overalls.
- https://winslets.com/blogs/sewing-tutorials/how-to-sew-an-overall-jumpsuit?srsltid=AfmBOoq5SEtfW1hO-AwZBFeHowTwg6G0gkDGIWRuKCx9YrJp19qdLelh
- https://www.threadsmagazine.com/2025/02/17/pattern-roundup-sewing-overalls-for-every-body
- https://siemachtsewingblog.com/2021/11/how-to-sew-d-ring-straps-for-overalls/
- https://www.lemon8-app.com/@wherekdat/7446471270868255275?region=us
- https://www.moodfabrics.com/blog/the-poplar-overalls-free-sewing-pattern/

