This site is supported by our readers. We may earn a commission, at no cost to you, if you purchase through links.
 Learning how to thread a bobbin properly sets you up for smooth sewing sessions without frustrating thread tangles or uneven stitches.
You’ll start by winding thread onto your bobbin using your machine’s bobbin winder, then insert the wound bobbin into either a drop-in compartment or removable bobbin case, depending on your machine type.
Next, you’ll pull the bobbin thread up through the needle plate by turning your handwheel, creating the connection between your top and bottom threads that makes every stitch possible.
While the process varies slightly between machine models, the basic steps remain consistent across brands.
Mastering this fundamental skill and you’ll gain access to techniques that transform ordinary fabric into professional-looking projects.
Table Of Contents
Key Takeaways
- **You’ll need to wind thread onto your bobbin using your machine’s bobbin winder, then insert it into either a drop-in compartment or a removable bobbin case, depending on your specific machine type.
- **Proper bobbin threading prevents thread tangles and uneven stitches – orient your bobbin so that the thread unwinds counterclockwise and ensure it sits flush without forcing or jamming.
- **You’ll complete the process by pulling up the bobbin thread through turning your handwheel one full rotation, which allows the needle to catch and lift the bobbin thread to the surface.
- **Check your manual for the correct bobbin size, since most home machines use Class 15 bobbins, while industrial models need different specifications – using the wrong size causes jams and threading problems.
What is a Bobbin?
A bobbin’s purpose is simple yet essential – it holds the bottom thread that creates every stitch. Think of your sewing machine’s bobbin as the unsung hero working beneath the surface. While your needle thread gets all the attention, the thread bobbin quietly does its job below.
Every perfect stitch starts with a properly wound bobbin – your sewing machine’s quiet foundation.
Understanding bobbin types matters for your projects. Drop-in bobbins slide directly into your machine, while front-loading ones require a separate bobbin case. Bobbin materials vary too – plastic versions work well for everyday sewing, but metal ones last longer with heavy use.
Bobbin sizes aren’t one-size-fits-all either. Class 15 bobbins fit most home machines, while industrial models need different specifications. Using wrong bobbin sizes creates tension problems and poor stitches.
The bobbin function depends on proper threading and tension. When your bobbin thread tangles or breaks, it’s usually because something’s off with the setup. Keep your bobbin case clean, choose the right bobbin alternatives for your machine, and you’ll avoid most threading headaches.
Why Learn to Thread a Bobbin?
Since mastering bobbin threading directly impacts your project success, you’ll save countless hours and avoid major headaches.
Proper bobbin winding prevents tangled thread underneath your fabric, ensuring consistent stitch quality on both sides.
When you understand your sewing machine’s bobbin system, you’ll spend less time troubleshooting and more time creating.
Threading a bobbin correctly also extends machine longevity by reducing strain on internal mechanisms.
Whether you’re winding a bobbin for the first time or switching thread colors mid-project, this skill eliminates frustration and keeps your workflow smooth.
Think of it as your sewing foundation—get it right, and everything else follows naturally.
Some machines use front-loading bobbin systems, requiring specific insertion techniques.
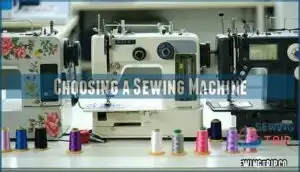
Choosing a Sewing Machine
Before choosing a sewing machine, you’ll want to take into account three key factors that directly impact how easy it’ll be to thread and wind your bobbin.
The right machine type, stitch variety, and budget will determine whether you’re wrestling with complicated threading paths or enjoying smooth, hassle-free bobbin changes every time you sew.
Select Machine Type
When choosing your sewing machine, understanding different machine types helps you master bobbin threading techniques. Mechanical vs. Electronic machines handle bobbins differently—mechanical models need manual tension adjustments, while electronic versions offer automated controls that simplify winding a bobbin.
For those preferring simplicity, consider classic sewing solutions. Consider your Intended Use and Portability Needs. If you’ll move your machine frequently, lighter models with simpler bobbin systems work better.
Brand Reputation matters too—established manufacturers provide clearer manuals for sewing machine bobbin procedures. Feature Prioritization affects bobbin threading ease. Drop-in bobbin systems offer better visibility during loading, while front-loading designs require removing compartments.
Match your skill level with machine complexity. Beginners benefit from straightforward bobbin winding mechanisms, while experienced sewists can handle advanced features. Your sewing machine bobbin compatibility determines which replacement bobbins you’ll need, affecting long-term costs and convenience.
– Consider Stitch Options
Modern sewing machines pack impressive stitch variety that can transform your projects from basic to brilliant.
Start with essential straight stitches and zigzag stitches – these handle 80% of everyday sewing tasks.
Then explore stretch stitches for knits and athletic wear, plus buttonholes for professional finishing touches.
Most machines offer 20+ built-in patterns, including decorative stitches that add personality to hems and seams.
Check the stitch length range (typically 0-5mm) for fabric versatility.
Width adjustments up to 7mm let you customize zigzag and specialty stitches perfectly.
Consider your thread types and tension needs when evaluating options.
Quality bobbin winding tips include matching upper thread weight to avoid bobbin problems.
Test different settings on scrap fabric first – this prevents frustrating bobbin winder issues and guarantees smooth stitching across various materials.
– Set Realistic Budget
Your wallet doesn’t need to break for quality stitching. Smart shoppers can find excellent budget sewing machines that handle bobbins, thread spools, and basic bobbin winding without compromise.
Setting realistic expectations helps you invest wisely:
- Entry-level machines ($100-$300) offer reliable bobbin winder systems and proper thread tension for beginners
- Total ownership costs include maintenance fund allocation of $50-$120 annually for peak performance
- Project cost tracking should account for thread budgeting and fabric cost savings over time
- Used machines often provide better value with proven bobbin winding tips from previous owners
Focus on mechanical reliability over fancy features. A dependable machine that winds bobbins smoothly beats computerized models with temperamental systems.
How to Wind The Bobbin
The bobbin-winding process transforms loose thread into perfectly wound spools ready for smooth stitching.
You’ll start by placing your thread spool on the machine and guiding it through the thread guides before securing the thread end through the bobbin’s small hole.
Push the bobbin winder spindle to the right until it clicks, then disengage your needle mechanism to focus solely on the winding process.
Here’s what you’ll need to monitor during thread winding:
- Winding speed – Start slowly, then increase gradually for even distribution
- Thread tension – Make certain of consistent pull without being too tight or loose
- Bobbin type compatibility – Use only machine-recommended bobbins
- Winder stopper position – It’ll automatically halt when your bobbin’s full
The bobbin winding mechanism works like a miniature thread factory.
Many sewers use a separate winding machine to increase efficiency.
As you press the foot pedal, watch the bobbin thread build up in neat layers.
The winding process continues until the winder stopper touches the wound thread, signaling completion.
Remove your finished bobbin and trim excess thread before moving forward.
Removing The Bobbin Case
Two simple steps can save you from bobbin case removal headaches down the road. First, locate your bobbin case – it’s either a front-loading compartment you’ll need to lift out or a top-loading area with direct bobbin access.
Before touching anything, make certain your machine is completely off and unplugged for damage prevention. For front-loading machines, gently lift the bobbin case straight up using the small metal tab or finger grip. Don’t yank or twist – these cases are delicate.
If it feels stuck, check for tangled bobbin thread that might be causing resistance. For top-loading machines, simply lift the bobbin straight out.
Case cleaning is vital during this step. Using a bobbin case cleaner can help remove stubborn debris. Remove any lint or thread scraps from the bobbin case and surrounding area using a small brush or compressed air.
This prevents tension release problems and makes certain smooth reinsertion later. Always handle the case gently – bent metal can cause permanent bobbin troubleshooting issues.
Inserting The Wound Bobbin
Perfect placement makes all the difference when securing your wound bobbin. Orient your bobbin so the thread unwinds counterclockwise—this matches most machine requirements for proper tension. Check your manual since some machines prefer clockwise rotation.
Take your time here – rushing bobbin insertion leads to threading headaches that’ll have you pulling your hair out.
Align the bobbin case carefully, ensuring it sits flush without forcing or jamming. Thread through the bobbin thread slot following your machine’s designated path. Secure the bobbin by pressing it gently into place until you hear or feel it click.
Run a quick tension check by pulling the thread—it should draw smoothly with slight resistance. The bobbins thread guide keeps everything aligned during insertion. Remember, a properly seated bobbin prevents frustrating tangles later.
Take your time here; rushing bobbin insertion leads to threading headaches and uneven stitches that’ll have you pulling your hair out. A properly secured bobbin is crucial for a smooth sewing experience, making it essential to follow these steps carefully to achieve the best results with your machine requirements.
Pulling Up The Bobbin Thread
Now you’re ready for the final step – pulling up the bobbins thread to complete your sewing machine threading.
This vital process guarantees proper thread tension and creates the foundation for perfect stitches.
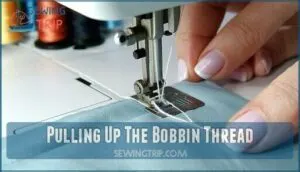
Start by holding your upper thread while gently turning the hand wheel toward you one full rotation.
You’ll feel the needle go down and catch the bobbins thread below.
The needle position determines hook timing, allowing the upper thread to grab and lift the bobbin thread.
Pull the upper thread gently, and you’ll see the bobbin thread loop appear on the fabric surface.
Use tweezers or your fingers to grasp this loop and pull about six inches of bobbin thread up.
Both threads should now extend under your presser foot with proper fabric grip.
Check thread visibility – you should see both threads clearly.
If tension feels off during this process, minor tension adjustment may be needed before sewing begins.
Frequently Asked Questions (FAQs)
What bobbin size fits my sewing machine?
Wondering which bobbin will work with your machine? Check your manual first—most home machines use Class 15 bobbins, while industrial models need L or M styles. Wrong size causes jams.
Can I mix different thread types together?
You shouldn’t mix different thread types on the same bobbin since they’ve varying weights and tensions. This creates uneven stitches and potential machine problems during sewing projects.
How do I fix uneven bobbin tension?
Sarah’s vintage Singer kept creating loose, loopy stitches until she discovered her bobbin tension was too loose.
Adjust the small screw on your bobbin case clockwise to tighten tension, or counterclockwise to loosen it—quarter turns work best.
Why does my bobbin thread keep breaking?
Your bobbin thread breaks when tension’s too tight, you’re using wrong thread type, the bobbin’s wound unevenly, or there’s lint buildup in the bobbin case.
Should I remove bobbins when storing machine?
You don’t need to remove bobbins when storing your machine, but it’s smart to do so. Leaving thread under tension for months can weaken it and stress your machine’s mechanisms.
Conclusion
Threading your bobbin is like building the foundation of a house – without it, everything above falls apart.
Now that you’ve learned how to thread a bobbin through each step, you’ll avoid those frustrating moments when your machine jams mid-project.
Remember to check your thread tension and verify the bobbin thread direction matches your machine’s requirements.
With practice, this process becomes second nature, and you’ll spend less time troubleshooting and more time creating beautiful projects that showcase your growing sewing skills.

