This site is supported by our readers. We may earn a commission, at no cost to you, if you purchase through links.
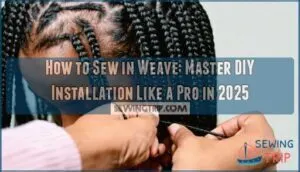
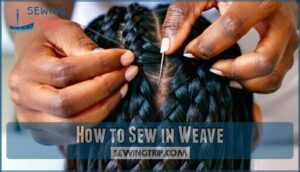
You’ll thread wefts onto a curved needle and stitch them directly to each braid row by row. Start from the nape and work upward, keeping stitches small and secure.
The key is consistent tension – too loose and your weave shifts, too tight and you’ll damage your scalp.
Clean, conditioned hair makes all the difference in how smooth your installation goes. Master stylists have specific techniques for blending edges and creating that seamless finish that makes your weave look completely natural.
Table Of Contents
Key Takeaways
- Start with proper prep – You’ll need clean, conditioned hair and tight cornrows as your foundation, since this determines how natural and secure your weave looks.
- Master your stitching technique – You’ll use a curved needle to sew wefts directly onto braids with consistent tension that’s firm but not scalp-damaging.
- Choose quality hair that matches – You’ll get better results with human hair extensions that match your natural texture for seamless blending and longer wear.
- Maintain it properly – You’ll extend your weave’s 8-week lifespan by washing every 1-2 weeks with sulfate-free products and sleeping with silk scarves to prevent tangling.
Sew in Weave Basics
You’ll transform your hair game with sew-in weaves, a protective styling method that adds length and volume without damaging your natural hair.
This technique involves sewing hair extensions onto braided cornrows, creating stunning looks that last up to eight weeks with proper care.
Sew-in weaves create flawless, natural-looking transformations that protect your hair while delivering stunning versatility.
Benefits of Sew in Weave
Beyond just adding length and volume, sew in weave offers game-changing benefits that transform your hair routine.
This protective styling method shields your natural strands from daily manipulation, promoting healthy hair growth while you experiment with versatile styles.
You’ll achieve a seamless blend that looks completely natural, plus enjoy significant cost savings compared to salon visits, which is essentially hair freedom at its finest.
Types of Hair for Sew in Weave
Choosing the right hair extensions transforms your sew-in weave from amateur to professional. Human vs Synthetic hair creates the biggest impact on your final look. Virgin Hair Quality offers unmatched durability and styling freedom.
Understanding Hair Origin Matters helps you select premium bundles that last longer and blend seamlessly. If you’re looking for options, consider exploring a wide variety online.
- Human hair weave costs $80-$300 per bundle but allows heat styling and lasts up to 12 months
- Synthetic weave starts under $25 but tangles easily and limits styling to 350°F maximum
- Hair blends combine both types, offering mid-range pricing ($30-$100) with moderate heat tolerance
- Texture Matching Guide: Match your natural pattern for seamless results using straight, body wave, or kinky options
- Hair quality grades 10A and above guarantee cuticles stay intact with minimal shedding throughout wear
Essential Tools for Sew in Weave
Having the right tools makes your weave installation smooth and professional.
You’ll need weaving needles for precise stitching, strong sewing thread that matches your hair wefts, and hair clips to section your hair.
A rat-tail comb creates clean parts for braiding, and High-quality thread options guarantee durability and ease of use.
Optional wig caps protect your natural hair during the process, facilitating your sew in techniques to deliver salon-quality results.
How to Sew in Weave
Three fundamental techniques will transform your DIY sew-in installation from amateur to professional quality.
Understanding proper weave installation starts with mastering these core skills that separate successful DIY sew-ins from disasters waiting to happen.
Your journey to flawless weave styles depends on these essential elements:
- Thread tension – Too tight causes breakage, too loose creates gaps
- Needle types – Curved needles navigate braids easier than straight ones
- Stitch security – Double-back stitching prevents weft slippage
- Weave patterns – Horizontal rows create the most stable foundation
The secret lies in consistent sew in techniques that professional stylists use daily.
Start with quality tools and take your time.
Rushing leads to uneven attachment points and poor blending.
Each stitch should feel secure but not overly tight against your scalp.
Remember to pre-wash fabric, as sewing basics are foundational for any project.
Mastering DIY installations means understanding that weave maintenance begins during installation.
Proper technique now saves hours of frustration later.
Your patience during this process determines whether you’ll love or regret your new look.
Focus on precision over speed for professional results.
Preparing Natural Hair
Properly preparing your natural hair is the foundation for a professional-looking sew-in weave that lasts. You’ll need to wash, condition, and create the right braid pattern before installing any extensions.
The perfect foundation sets the stage for a weave that turns heads and lasts weeks.
Washing and Conditioning
Always prep your hair properly before installing that sewin weave. Start by washing with sulfate-free shampoos to remove product buildup without stripping natural oils.
Follow with deep conditioning treatments to strengthen strands. Clean scalp thoroughly using gentle circular motions.
Proper drying techniques prevent mold and create the perfect foundation for weave maintenance and long-lasting results.
| Hair Care Step | Products to Use | Why It Matters |
|---|---|---|
| Scalp Cleansing | Sulfate-free shampoos | Removes buildup without damage |
| Deep Conditioning | Protein-free conditioners | Adds moisture and flexibility |
| Product Buildup Removal | Clarifying treatments | Creates clean installation base |
| Drying Techniques | Air dry or low heat | Prevents mold under weave |
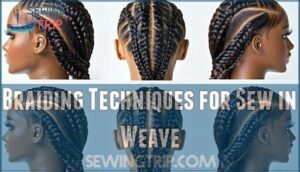
Braiding Techniques for Sew in Weave
After preparing your hair, create your braid foundation with purpose.
Use straight-back cornrows or circular patterns to match your styling goals. Space braids ¼ inch apart for ideal hair distribution and foundation stability.
Keep scalp tension firm but comfortable – tight enough to secure wefts without causing breakage. Your braid pattern determines styling versatility later.
A key consideration is choosing braid patterns that align with your desired look.
Measuring and Cutting Wefts
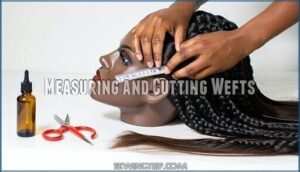
Before measuring, lay each weft against your braided sections to determine the perfect fit. Proper weft preparation sets the foundation for a flawless weave installation that won’t budge or shed.
You can find specialized products like fabric glue wefts to aid in this process.
- Measure twice, cut once: Hold wefts against each braid row to determine exact length needed
- Seal immediately: Apply fabric glue or clear nail polish to cut edges to prevent fraying
- Double-check thickness: Stack wefts to confirm even track thickness throughout your weaving process
Installing Sew in Weave
Now that your hair is properly prepared with clean, braided cornrows, you’re ready to transform your look with the actual weave installation.
This step requires patience and precision, but following the right techniques will give you salon-quality results at home.
Securing Wefts to Braids
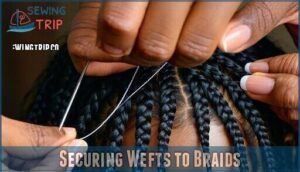
Securing each weft properly transforms your braided foundation into professional-looking weave installation.
You’ll thread your curved needle with strong weaving thread, then stitch wefts horizontally across cornrows using consistent track spacing for even coverage.
You may want to acquire a specialized weaving tool for this process.
| Technique | Best Practice |
|---|---|
| Weft Stitching | Loop under braid every half-inch |
| Thread Strength | Use 18-24 inches matching thread |
| Knot Security | Double-knot at track ends |
Choose curved needle types for easier maneuvering around your head’s contours during hair weaving steps.
Blending Weave With Natural Hair
Perfect weave blending starts with matching texture to your natural hair pattern.
Choose a partial sew in for seamless color blending, leaving strategic sections out near your parting.
Layer the weave with your natural hair using blending techniques that create smooth shifts.
Focus on weave patterns that complement your hair’s natural flow and density, ensuring a seamless integration of the weave with your natural hair.
Styling and Finishing Touches
With your weave seamlessly blended, you’re ready to create your signature look.
Start with heat styling using your favorite hair styling tools. Cut layers or trim length with sharp shears for shape. Match your natural hair color if needed. Apply lightweight hair styling products for hold and shine.
A great way to maintain your style is to use deep conditioning treatments.
- Heat Styling: Use curling irons or flat irons on medium heat to create weave hairstyles that complement your face shape
- Cutting Techniques: Trim wefts and blend layers using point-cutting methods for natural movement
- Color Matching: Apply semi-permanent color or highlights to match your leave-out hair perfectly
- Edge Control: Use hair styling products and small brushes to smooth edges and flyaways around your hairline
Maintaining Sew in Weave
Your sew-in weave installation is complete, but the real work begins now with proper maintenance.
Following the right care routine will keep your weave looking fresh and extend its lifespan up to 8 weeks.
Washing and Conditioning Weave
Cleanliness keeps your weave fresh and prevents scalp irritation.
Wash every 1-2 weeks using sulfate-free shampoos diluted with water in an applicator bottle. Focus on your scalp and braids, not just the weave surface.
Apply deep conditioning treatments to the hair extensions only, avoiding your natural roots.
Proper drying techniques prevent mildew—use a hooded dryer for complete moisture removal.
Preventing Tangling and Matting
Gentle brushing prevents your weave from turning into a bird’s nest.
Use wide-tooth combs for detangling methods, starting from ends and working upward. Quality hair products help avoid product buildup that causes knots.
Regular hair maintenance tips include using silk scarves while sleeping to reduce friction.
Remember, weave quality matters – cheaper extensions tangle more easily than premium hair.
Nighttime Care for Sew in Weave
Your sew-in weave needs proper nighttime protection to maintain its fresh appearance.
Smart bedtime habits keep your investment looking salon-worthy longer.
- Silk scarves or satin bonnets protect against friction and frizz while you sleep
- Loose braids or ponytails prevent tangling without creating tension on your scalp
- Moisture retention sprays applied before bed keep hair hydrated overnight
- Silk pillowcases reduce friction if you forget your bonnet
- Product application timing works best 30 minutes before sleep for absorption
These simple hair care routine steps extend weave longevity substantially.
Frequently Asked Questions (FAQs)
How do I get a natural look with a sew-in weave?
Choose hair that matches your natural texture perfectly. Leave out sections of your own hair to blend with extensions. Guarantee proper braiding foundation and professional installation for seamless results.
How to care for a sewn-in hair weave?
Want to keep your weave looking fresh? Wash with sulfate-free shampoo, brush gently to avoid shedding, and always sleep with hair completely dry to prevent mold and mildew buildup.
How do you curl a sew-in weave?
Use heat tools like curling irons or hot rollers on low-to-medium heat.
Apply heat protectant first.
Section hair and curl away from your face.
Let curls cool completely before gently finger-combing for natural-looking waves.
What do I need to do a sew-in weave?
Picture yourself creating hair magic in your bedroom mirror.
You’ll need weaving needle, strong thread, hair wefts, rat-tail comb, scissors, and hair clips.
Clean and braid your natural hair first for foundation.
How long does sew-in installation typically take?
Sew-in installation typically takes 2-4 hours depending on your desired fullness and length. The braiding foundation requires about an hour, while sewing wefts takes additional time for each track layer.
Can you swim with a sew-in weave?
Yes, you can swim with a sew-in weave, but chlorine and salt water will damage it.
Rinse immediately after swimming, use leave-in conditioner, and dry thoroughly to prevent mold and extend your weave’s lifespan.
Whats the cost range for professional installation?
Professional sew-in weave installation typically costs $150-$400, depending on your location, stylist’s experience, and hair quality. Expect higher prices in major cities and premium salons specializing in protective styles.
How do you remove a sew-in weave?
Time to break free from your protective style.
You’ll carefully cut the threads holding each weft using small scissors.
Start from the bottom, snip threads close to braids, then gently pull wefts away, this is the time to be careful.
Can sew-ins cause hair loss or damage?
Improperly installed sew-ins can cause damage through excessive tension, tight braids, or heavy extensions pulling on your roots.
However, when professionally installed with proper technique and removed correctly, they’re generally safe and protective.
Conclusion
Like mastering a precise dance, learning how to sew in weave requires practice and patience.
Your foundation cornrows set the stage for everything that follows. Remember to maintain consistent tension throughout the process.
Take your time with each step, from preparing your natural hair to securing the final weft. With proper care and maintenance, your sew in weave will look natural and last for weeks.
Practice makes perfect when mastering this DIY installation technique, which requires patience.

