This site is supported by our readers. We may earn a commission, at no cost to you, if you purchase through links.

As an experienced seamstress, I recommend:
- Tracing pattern pieces twice to cut double-layer
- Using a non-slip surface
- Cutting velvet right side down with sharp scissors
- Leaving ample seam allowances
Follow these velvet-cutting tips, and you’ll achieve beautiful results that satisfy your creative spirit.
Table Of Contents
Key Takeaways
- Determine velvet nap direction before cutting and use sharp scissors on a non-slip surface.
- Prevent fraying by using velvet with grid backing, sealing edges, and finishing seams.
- Use small seam allowances, sew close to the edge, or finish seams with zigzag stitches when sewing.
- Test alternatives like glue or sealants to check for fraying instead of using pins.
Assess Velvet Nap Direction
When working with velvet, you must first determine the direction of the nap by running your hand along the fabric’s edge.
Duplicate any cut-on-fold pattern pieces and tape them together to avoid cutting layers; use pattern weights instead of pins that leave holes.
For the cleanest cuts, place the velvet pile-side down on a covered, non-slip surface and use sharp sewing scissors.
Duplicate Cut-on-Fold Pattern Pieces
By duplicating cut-on-fold pattern pieces and taping them together, you avoid cutting velvet fabric on the fold.
Cut each pattern piece individually.
Tape pieces at the fold line.
This allows you to cut velvet in a single layer.
Don’t Use Pins
When pinning velvet, you’ll poke permanent holes that damage the fabric’s appearance. Instead, use pattern weights or fabric tape to secure the pattern pieces during cutting.
| Method | Pros | Cons |
|---|---|---|
| Pins | Secure hold | Damages fabric |
| Weights | No damage | Can shift |
| Tape | Holds well | Residue |
Use Non-Slip Surface
You should choose a non-slip surface like a cutting mat and protect it with tissue paper to collect fluff when cutting velvet’s delicate nap.
Velvet Innovations in Surface Protection and Cutting Techniques prevent fraying without pins through Sewing Mastery of nap direction.
Cut Right Side Down With Sharp Scissors
How should you cut the velvet to follow the nap direction?
Cut the velvet right side down using sharp sewing scissors or micro-serrated cutting shears.
Cut in the direction of the pile, making deep cuts with the interior portion of the scissors to prevent fraying.
Does Velvet Fray When Cut?
Since velvet fabric generally frays due to its delicate nature, you’ll need to take precautions when cutting it.
Opt for fabrics with grid-like backing or seal the edges with fray check or a PVA glue mixture.
When cutting, use small seam allowances, sew close to the edge, or finish seams with a zigzag stitch or pinking shears.
Test fray check alternatives like white glue mixtures, fabric sealants, or clear nail polish.
Understanding the origins and types of velvet helps select the best variety for your project.
Whether it’s traditional velvet, stretch velour, crushed, devore, or luxurious silk velvet, assess the nap direction first when cutting to avoid fraying issues down the line.
How to Prevent Velvet From Fraying
Employing techniques like sealing the edges or stabilizing the fabric will prevent your velvet from fraying.
Use fabrics with grid-like backing to minimize fraying.
Seal the cut edges with fray check, a 50/50 mixture of white glue and water, or clear nail polish before cutting out the pattern pieces.
Interface or underline velvet with iron-on interfacing or silk organza to reinforce the fabric and prevent fraying along cut edges or seams.
Strategically selecting stable velvet fabrics, sealing the edges, and stabilizing the base structure are proactive steps to combat the delicate nature of velvet during cutting and construction.
Understanding the innate characteristics of this luxurious piled fabric helps employ preventative measures for successful garment creation.
With some forethought and targeted preparation, velvet’s potential to fray can be contained.
History of Velvet Fabric
Coming off preventing fraying, velvet’s origins lie in Eastern cultures like ancient China and Egypt, where the luxurious silk fabric was initially reserved for royalty due to the time-intensive production process.
Introduced to Europe in the 12th-18th Century, velvet gained popularity for use in furniture, clothing, and upholstery.
The industrial revolution enabled mass production, making velvet more accessible to the public.
Understanding the fabric’s ancient origins and evolution in royalty helps inform proper technique today – like assessing nap direction when cutting to avoid fraying and pins.
Retaining some air of exclusivity, velvet still conveys luxury.
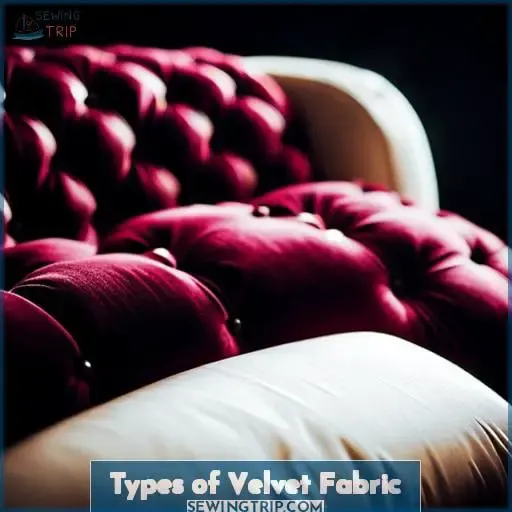
Types of Velvet Fabric
You’ll encounter various velvet types: traditional, crushed, devore, and silk velvet.
Traditional velvet features a uniform, luxurious pile and thicker weave. Often expensive yet durable, traditional velvet maintains pile height well after wear.
Crushed velvet undergoes mechanical treatments, giving the pile a disturbed, mottled look.
Devore velvet features a gorgeous burnout technique, removing fibers to leave behind an intricate design.
Silk velvet provides unparalleled softness with excellent drape. However, it requires gentle handling during cutting and sewing to prevent permanent markings.
When working with any velvet type, consistent nap direction remains key for optimal final appearance. Fray prevention methods and specialized sewing techniques allow the true beauty of velvet’s pile and colors to shine.
Sewing Tips for Velvet
When working with the luxurious velvet fabric, you must take care to properly finish your seams and handle the fabric delicately.
To prevent fraying, utilize techniques like overlocking or zigzag stitches.
Finger pressing instead of ironing will maintain the pile’s loft and luster.
With some extra diligence throughout the construction process, your velvet garment will impress with its beauty and elegance.
Finishing Velvet
When finishing velvet, overlock or zig-zag stitch seams to prevent fraying.
Use a single fold, blind hem for a cleaner finish without bulk.
Loosen machine tension and lower presser foot pressure to accommodate the plush pile.
Avoid ironing; finger press with steam using a pressing board or towel to maintain the lush texture.
Extra Tips
Remember to baste seams, avoid pressing, use steam and finger pressing instead.
Apply a pressing board or towel when needed to protect the velvet pile.
Tag and share your velvet creations on social media.
Using the right cutting tools and fabric finishing techniques like basting and steam pressing will help you achieve success sewing with velvet and showcase your projects.
When cutting, always check nap direction first.
Social media provides a platform to inspire others with your velvet creations.
Frequently Asked Questions (FAQs)
What is the best rotary cutter blade for cutting velvet?
Use a double-edged micro-serrated rotary cutter with a sharp new blade for optimal velvet cutting.
The micro-serrations grip the pile properly while the sharpness provides clean slicing action without crushing or tearing.
Always cut in the direction of the pile for best results.
Should I wash velvet fabric before sewing it?
Generally, prewashing velvet is unnecessary.
Instead, use a dry iron or steaming to relax the fibers before cutting.
Then, handle gently during construction.
How do I clean velvet clothing or upholstery?
A spritz of steam refreshes velvet’s nap.
Vacuuming lifts stains and restores luster.
For deeper cleaning, use specialty velvet cleaners and brushes made for pile.
Take care around edges to avoid fray.
Is it possible to dye velvet fabric at home?
Yes, dyeing velvet at home is possible, but it is challenging.
Use fiber-reactive dyes and carefully follow the instructions.
Test the dye on swatches first.
Steam-set the dye.
Expect less vibrancy on the pile side.
Handle the velvet gently to avoid crushing the nap.
What is the best sewing machine foot to use when sewing velvet?
For velvet, use a walking or roller foot.
This lifts and rolls the fabric over the feed dogs, preventing shifting and slipping.
Be sure the foot can fully lift above the pile height.
Adjust presser foot pressure lower and loosen upper thread tension too.
Conclusion
So, you see, my velvet-loving friend, while this luxe fabric may look dainty, following proper cutting techniques allows you to wield those fabric shears with confidence.
Respect the nap, trace precise pattern pieces, and leave ample seam allowance.
Then, watch your creative vision emerge, unfrayed and flawless. With skill and care, velvet’s beauty comes alive in your talented hands.


