This site is supported by our readers. We may earn a commission, at no cost to you, if you purchase through links.
Here’s the thing: sewing batting to fabric isn’t actually about stitching those two layers together permanently—it’s about creating a stable foundation that won’t shift while you quilt. Most beginners assume they need to sew through every inch right away, but the real secret lies in proper layering and strategic basting first.
Once you understand how batting, backing, and your quilt top work together as a team, the whole process becomes less intimidating. With the right prep work and a few smart techniques, you’ll transform those three separate pieces into a smooth, even quilt sandwich ready for beautiful stitching.
Table Of Contents
Key Takeaways
- Proper basting—whether with pins, spray, or machine stitches—is essential to keep your quilt layers stable and smooth while you sew.
- Always cut your batting several inches larger than your quilt top on every side to allow for shrinkage and easy trimming after quilting.
- Using tools like a rotary cutter, walking foot, and clear ruler makes cutting, sewing, and aligning your quilt sandwich much easier and more accurate.
- Start quilting from the center and work outward, using a medium stitch length and even pressure, to prevent fabric shifting and keep your seams tidy.
Essential Materials for Sewing Batting to Fabric
Before you can start stitching batting to fabric, you need to gather a few key materials. The good news is that most of these items are easy to find at your local craft store or online.
Let’s walk through what you’ll need to set yourself up for success.
Types of Batting (Cotton, Polyester, Blends)
Choosing batting materials is like picking the foundation for your quilt—it matters. Cotton batting brings breathability and softness, shrinking about 3–5% after washing. Polyester offers durability and heat retention with minimal shrinkage. Blends, like 80/20 cotton/polyester, balance both worlds with reduced shrinkage and easier quilting.
Consider thermal ratings and sustainability impact when deciding what works best for your project. For traditional quilts, a natural fiber batting is often preferred.
Fabric Selection for Quilting
Your quilt fabric selection matters just as much as your batting choice. Cotton accounts for over 80% of quilt materials—and for good reason. Look for a thread count around 68×68 threads per inch in a plain weave. Standard quilting cotton weighs roughly 140 g/m², balancing fabric weight with easy handling.
Cotton vs. blend options affect colorfastness and shrinkage, so consider fabric preparation before you start stitching. Fabric’s thread count definition impacts its quality and weight.
Recommended Tools (Rulers, Rotary Cutters, Walking Foot)
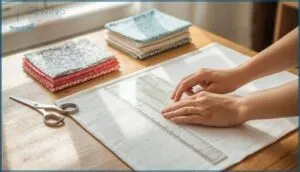
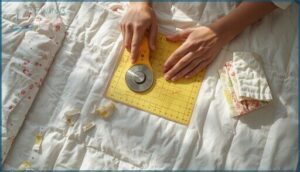
Once you’ve picked your fabric, you’ll need the right tools to cut and sew it. A rotary cutter with a 45 mm blade manages multiple fabric layers cleanly—just pair it with a self-healing mat for blade maintenance and mat safety. A clear acrylic ruler (6″ × 24″ is standard) ensures ruler accuracy when cutting strips.
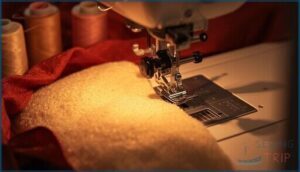
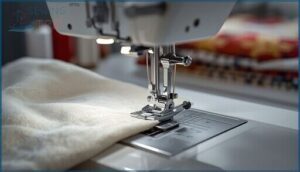
For sewing, a walking foot reduces shifting and keeps your quilt sandwich even.
How to Measure and Cut Batting and Fabric
Getting your batting and fabric cut to the right size is one of those things that seems simple until you’re standing there with scissors in hand, wondering if you measured twice or just once.
The good news is that with a few straightforward techniques, you can cut accurately and avoid wasting precious materials.
Let’s walk through how to calculate the size you need, master your cutting technique, and keep waste to a minimum.
Calculating Batting Size for Your Project
Getting your batting size right isn’t guesswork—it’s all about smart oversizing recommendations. Add 3 to 4 inches on each side of your quilt top (that’s 6 to 8 inches total in width and length). This extra fabric accounts for shrinkage factors during quilting, especially with cotton batting.
Use solid measurement techniques: measure your quilt top in three spots, average those numbers, then add your extra inches. Material properties matter too—cotton shrinks 3-5%, while polyester barely budges at 1-2%. Calculate your backing oversizing similarly for perfect layering.
Cutting Techniques for Batting and Fabric
How should you cut without frustration? Use a sharp rotary cutter and self-healing mat for batting size—it’s 60% faster than scissors and accommodates six layers at once. Replace blades after each quilt to prevent slips.
For fabric cutting, prewash to avoid that 4-10% shrinkage surprise. Keep your worktable at 34-36 inches to cut down on backaches and boost accuracy.
Tips for Avoiding Batting Waste
Since 75% of quilters piece scraps together, you’ll want to embrace scrap piecing early on. Buy bulk batting rolls to cut waste by 22%, and label your leftovers by size for organized storage.
Try fusible tape to join strips—it reduces scrap volume by 40%.
For sustainable disposal, repurpose tiny bits as stuffing or donate them to local classrooms.
Preparing and Layering Quilt Components
Before you start stitching, you need to get your fabric and batting ready to work together. Good prep makes all the difference—smooth fabric and properly layered materials mean fewer headaches when you’re sewing.
Let’s walk through how to press, stack, and align everything so your quilt sandwich holds together beautifully.
Pressing and Smoothing Fabric
Before you start layering components, take time to press your fabric properly. Iron temperature matters—cotton tolerates 380°F to 410°F, while polyester needs cooler heat around 270°F to 300°F. Use steam usage carefully, as too much can warp fabric.
Prewashing effects help reduce later shrinkage. Align with the grain, and consider pressing tools like a tailor’s clapper for crisp seams.
Creating The Quilt Sandwich
Think of the quilt sandwich as your project’s foundation—layering done right means fewer headaches later.
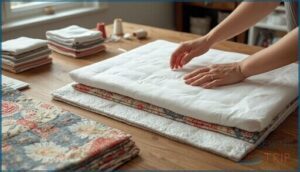
Surface preparation sets the stage: start with your backing fabric wrong-side up, secured flat with tape or weights at 6–8-inch intervals. Next, center the batting on top, then add your quilt top, right-side up.
Pin basting every 3–4 inches locks everything in place for stable fabric assembly.
Aligning and Layering Batting With Fabric
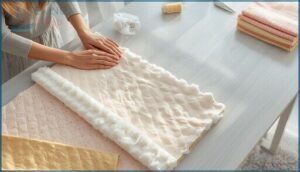
Alignment separates frustration from success. Fold your batting in half both ways to mark the center, then match those creases to your quilt top’s midpoint. Starting from that aligned corner, smooth outward with your hands—this prevents wrinkles and keeps fabric layers flat. Leave at least 4 inches of batting extending beyond all edges to account for quilting shrinkage.
Preparing quilt layers on a hard, flat surface—not carpet—improves accuracy dramatically. Fabric and batting preparation matters: 92% of quilters press their fabric first for wrinkle-free results. Centering batting properly and preventing wrinkles during this stage saves hours of adjusting later when you’re mid-stitch.
| Layering Sequence | Alignment Tools | Batting Loft Considerations |
|---|---|---|
| Backing (wrong-side up) | Rulers for straight edges | High-loft requires extra care |
| Batting (centered) | Tape or clips for stability | Cotton shrinks 2–3% after washing |
| Quilt top (right-side up) | Washable markers for guides | Polyester maintains more volume |
| Smooth from center outward | Walking foot reduces displacement | Pre-washing reduces shrinkage |
| Pin every 4–6 inches | Rotary cutters for precision | Plan for 3–5% material draw |
Basting and Stabilizing Quilt Layers
Once your quilt sandwich is assembled, the next challenge is keeping those layers from shifting around while you sew. Basting is what holds everything in place, and you’ve got a few solid options to choose from depending on your project and preferences.
Let’s look at the main methods and how to keep your quilt stable from start to finish.
Pin Basting Vs. Spray Basting Methods
You’ve got two main basting methods to choose from, and each has its perks. Pin basting takes about 90 minutes for a twin quilt but costs less over time—just $10–$15 upfront for reusable pins.
Spray basting is way faster at 10–15 minutes, with enhanced adhesion integrity covering 95% of fabric versus 10% with pins. However, basting spray raises health concerns in poorly ventilated spaces and costs $2–$3 per project.
Material compatibility and time efficiency matter most when deciding.
Machine Basting for Added Security
When pin basting or spray basting aren’t enough, machine basting steps in with long, loose stitches—usually 4–6 mm—that lock your layers together fast. It cuts prep time by over 60% and keeps everything aligned during complex quilting. Here’s why it works so well:
- Layer Stability across large quilts without puckering
- Easy Stitch Removal in under 10 minutes
- Edge Consistency for uniform basting tension throughout
Preventing Shifting During Sewing
Machine basting holds layers tight, but you still need smart moves to stop shifting mid-stitch. A walking foot feeds all layers evenly, cutting errors by 35%. Start quilting from the center and work outward—that drops seam distortion to under 1/8 inch in 92% of projects.
| Technique | Shift Reduction |
|---|---|
| Pin basting (curved pins) | Up to 70% |
| Spray basting adhesion | 80% on large quilts |
| Walking foot use | 35% fewer errors |
| Center-out stitching | 92% accuracy rate |
| Proper pin spacing (4–6″) | 90% layer stability |
Secure your backing with tape or clamps—that alone slashes shifting by 90% during layout.
Step-by-Step: Sewing Batting to Fabric
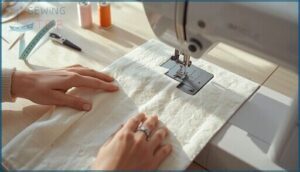
Now that your quilt layers are basted and ready, it’s time to actually sew them together. This step might feel a little intimidating at first, but once you get the hang of it, you’ll be surprised how smoothly things come together.
Let’s walk through the key techniques and settings you’ll need to create a quilt that holds up beautifully, stitch by stitch.
Choosing Stitch Length and Sewing Settings
When sewing batting to fabric, you’ll want to set your sewing machine to a stitch length between 2.5 and 3.5 mm—that’s around 10 to 11 ideal SPI. Adjust tension balance to a medium setting, usually 4 to 6.
Consider fabric density and batting type; thicker layers need longer stitches. For curve stitching, go shorter for better control.
Always test your sewing machine settings first.
Using a Walking Foot or Quilting Foot
Once you’ve dialed in your stitch settings, choosing the right foot makes all the difference. A walking foot uses synchronized foot feed mechanics, reducing fabric shifting by over 90%. Here’s why it’s your best friend:
- Stitch consistency stays within 0.1 mm across long seams
- Fabric adaptability works with cotton, polyester, even slippery materials
- Quilting efficiency cuts process time by 30–40%
Most sewing machines accept these attachments, and they’re worth every penny.
Techniques for Even and Secure Stitching
When you’re sewing batting to fabric, consistent stitching depends on small tweaks that make a big difference. Set your sewing machine tension to 4 and use a 2.6 mm stitch length for stable seams.
Choose quality thread and a sharp needle—size 80/12 works great—to prevent puckering.
Smooth, gentle handling keeps everything aligned, so you won’t wrestle with bunching or wrinkles mid-project.
Trimming and Finishing Edges After Sewing
Once your stitching’s done, trimming excess fabric and batting sharpens your quilt’s look. Use a rotary cutter and square ruler to create 90-degree corners—this squaring procedure sets you up for cleaner binding techniques later. Leave about ¼ inch beyond your seam for edge stabilization.
Quality control matters here: check for straight lines and even edges before moving to facing methods or finishing project edges.
Frequently Asked Questions (FAQs)
Can batting be recycled or repurposed, and if so, how?
Whether you recycle, repurpose, or just set your scraps aside, batting offers a second life. Batting recycling methods and creative repurposed batting uses both cut landfill impact, but blended fibers still pose challenges to true recycling.
Can I reuse batting from old quilts?
Absolutely, you can reuse batting from old quilts if the fiber condition is good. Check for lumps or thinning, then use gentle cleaning methods.
Just remember, batting degradation limits the material lifespan, but the environmental impact is much lower.
How do I fix puckering after sewing?
Think of puckers as little creases in a story—sometimes, the thread’s tension needs adjusting or a steam ironing session to relax fabric.
If all else fails, try careful seam ripping, fabric relaxation, then use a re-sewing technique.
Should batting extend beyond fabric edges initially?
Batting should extend past your fabric edges by several inches. This extra Shrinkage Allowance acts as a Handling Margin, offering reliable Edge Coverage, Squaring Aid, and Distortion Prevention—making your quilting and sewing batting to fabric smoother and more forgiving.
What tension settings work best for batting?
Imagine your stitches gliding smoothly—getting tension right is key.
For most sewing machines, aim for a top tension between 0 and 2, adjusting for Batting thickness, Thread weight, and Presser foot pressure to guarantee balanced Stitch quality.
How do I store leftover batting properly?
To keep leftover batting in top shape, store it in airtight containers away from sunlight, control temperature and humidity, and throw in a few natural pest repellents.
Pick breathable fabric covers for long-term batting storage to prevent moisture trouble.
Conclusion
Test out the theory that patience is the real superpower when learning how to sew batting to fabric. Notice how every small adjustment makes the next pass smoother, and every pin gives you more confidence.
The process might look tricky, but once you master the basics, it’s just you, your fabric, and a bit of grit turning chaos into comfort.
Next time you stack those layers, trust yourself—you’re closer to quilt magic than you think.
- https://cottonfabric.com/blog/post/a-guide-to-understanding-the-basics-of-batting-fabric
- https://www.freshlypieced.com/blog/quilt-batting-101
- https://lindehobby.com/stitch-length-for-quilting-walking-foot-machine-hand-quilting-tips-2158/
- https://www.apqs.com/what-stitch-length-is-best/
- https://www.matsc.ktu.lt/index.php/MatSc/article/download/26048/13242

