This site is supported by our readers. We may earn a commission, at no cost to you, if you purchase through links.
 Did you know that over 60% of professional tailors and seamstresses recommend using a serger for finishing edges and creating durable seams?
If you’re looking to elevate your sewing projects with a Singer sewing machine, mastering the art of serging is a game-changer.
This essential guide will walk you through everything from understanding what a serger does to troubleshooting common issues.
Whether you’re working with delicate knits or sturdy woven fabrics, you’ll discover how to achieve professional, clean finishes every time.
Let’s dive into the world of serging with your Singer sewing machine and unlock the full potential of your creative projects.
Yes, you can serge with a Singer sewing machine by changing the presser foot to an overcast foot and using the overcast stitch suitable for serging. This technique trims the seam and makes it neat, but ensure your machine has serging capabilities.
Table Of Contents
Key Takeaways
- Sergers, also known as overlock machines, are versatile tools that can trim excess fabric, sew seams, and finish edges in one step, enhancing sewing efficiency and project appearance.
- Proper preparation of the Singer sewing machine for serging involves selecting the appropriate serger feet, adjusting thread tension for balanced stitches, and practicing on scrap fabric to familiarize with the machine’s speed and handling.
- Different stitch types on sergers, such as 2-thread, 3-thread, and 4-thread overlock, offer various levels of strength, versatility, and decorative options, suitable for different fabric types and applications.
- Handling different fabric types requires specific adjustments; for woven fabrics, consider seam allowance and thread tension, while knit and stretch fabrics may need machine settings adjustments and the use of fabric stabilizer to maintain fabric integrity and achieve optimal results.
Serger Overview
Understanding the benefits and functionalities of a serger can significantly enhance your sewing projects.
Sergers, also known as overlock machines, are designed to sew seams, trim excess fabric, and finish edges all in one step, offering a professional look to your creations.
They’re particularly advantageous for working with stretch fabrics, ensuring durable seams that move with the material.
By incorporating a serger into your sewing toolkit, you’ll not only save time but also expand your capabilities, allowing for more adventurous and confident sewing endeavors.
Understanding a Serger
Understanding a serger is key to unlocking the potential of your sewing projects.
- Sergers, also known as overlock machines, are champions of efficiency, sewing seams, trimming excess fabric, and finishing edges all in one swift motion.
- They come in various serger types, each offering different stitch quality and fabric compatibility, ensuring you have the right tool for any material.
- With a serger, you can explore a multitude of stitch applications, from constructing durable seams to creating decorative edges that enhance your creations.
- Regular serger maintenance, paired with the right overlock foot, ensures your machine runs smoothly, providing that professional touch to fabric edges every time.
Benefits of Using a Serger
Embrace the serger’s versatility for handling various fabric types, from delicate knits to sturdy upholstery.
With a serger, you can confidently tackle projects, knowing your seams will be strong and your finishes professional.
Dive into serger decorative stitches to add flair to your creations, and don’t let troubleshooting slow you down—mastering serger troubleshooting tips ensures smooth sailing.
Regular serger maintenance keeps your machine in top shape, saving you time and preserving the quality of your work.
Adjust stitch length and thread tension to perfect those overedge stitches, and watch as your serger transforms knit fabrics into durable, beautifully finished pieces.
Preparing Your Singer Sewing Machine
To prepare your Singer sewing machine for serging, you’ll want to ensure you have the right setup for a smooth sewing experience. Begin by selecting the appropriate serger feet for your project, as they can significantly impact your fabric handling and the quality of your seams.
Check your thread tension, as it’s crucial for preventing fabric distortion and troubleshooting issues that may arise during serging.
Next, familiarize yourself with the different stitch types your machine offers, such as the 2-thread, 3-thread, or 4-thread overlock, and choose the one that best suits your fabric type and the decorative applications you’re aiming for.
Remember, the right stitch type can enhance the durability and appearance of your seams.
Before you start, take a moment to practice on scrap fabric to adjust to the serger’s speed and handling. This will help you gain confidence and ensure you’re ready to tackle your project with precision.
With these steps, you’ll be well on your way to mastering how to serge with a Singer sewing machine, creating professional-looking garments and projects.
Stitch Types
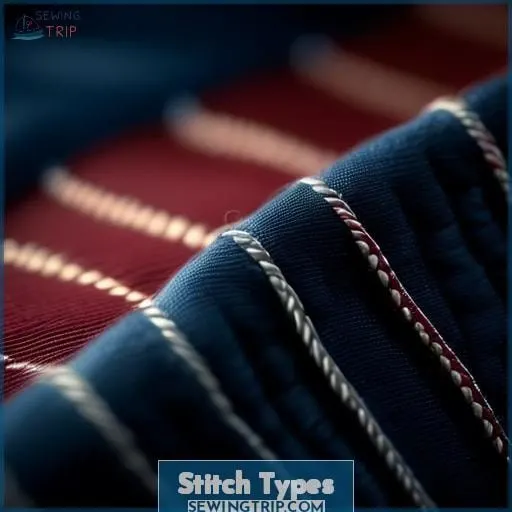
When exploring the capabilities of your Singer sewing machine for serging, you’ll find a variety of stitch types at your disposal. These include the 4 Thread Overlock, 3 Thread Overlock (both Wide and Narrow), and the 2 Thread Overlock.
Each of these stitch types offers unique benefits, making them suitable for different fabric types and sewing needs.
Whether you’re working on heavy fabrics requiring durable seams or delicate projects that call for a lighter touch, understanding these options will empower you to achieve professional-quality results and expand your sewing repertoire.
4 Thread Overlock
Moving from the basics of setting up your Singer sewing machine, let’s delve into the 4 Thread Overlock stitch. This stitch is a powerhouse, offering both strength and versatility for your projects.
- Thread Tension Mastery: Adjusting the thread tension is key to preventing fabric stretch and ensuring your seams lie flat and look professional.
- Decorative Seams Galore: With four threads, your decorative seams won’t only be strong but also aesthetically pleasing, adding a touch of sophistication to your creations.
- Serger Feet Adventures: Embrace the serger feet for creative applications that will elevate your sewing game, making you more confident and adventurous in your craft.
3 Thread Overlock (Wide and Narrow)
Moving from the robust 4-thread overlock, let’s delve into the 3-thread overlock stitch, which offers versatility for your projects.
With either a wide or narrow option, this stitch is perfect for medium to lightweight fabrics, giving you a strong yet stretchy seam. Adjusting the thread tension and differential feed allows you to tailor the stitch to your fabric selection, ensuring a smooth finish without puckering.
Experiment with stitch length and decorative finishes to elevate your sewing to a professional level. Whether you’re crafting delicate lingerie or cozy sweatshirts, the 3-thread overlock is a valuable tool in your sewing arsenal.
2 Thread Overlock
The 2-thread overlock stitch is a versatile option for your serging needs, especially when working with lightweight and delicate fabrics. This stitch type isn’t only quick to execute but also provides a basic overlock finish that’s ideal for simple seam requirements.
While it may not be as strong as its 3 or 4-thread counterparts, it excels in delivering a neat edge finish that prevents fraying. When using the 2-thread overlock, consider the fabric weight to ensure the stitch complements the material.
Additionally, making tension adjustments can be crucial for achieving the perfect hem finishes and decorative stitches. Remember, the right balance of thread types and tension will result in a seam that’s both functional and aesthetically pleasing.
Fabric Types and Handling
When it comes to serging with a Singer sewing machine, understanding the types of fabrics you’re working with is crucial.
Woven fabrics, knit fabrics, and stretch fabrics each have their unique characteristics that can affect the outcome of your serging project.
It’s important to approach each fabric type with the right mindset and techniques to ensure a successful and professional finish.
Whether you’re working on a delicate knit or a sturdy woven material, being informed and prepared will make your serging experience more enjoyable and rewarding.
Woven Fabrics
After mastering the various stitch types on your Singer sewing machine, it’s time to turn your attention to woven fabrics.
When working with these materials, it’s crucial to consider the seam allowance and ensure that your thread tension is set correctly to avoid fabric stretch.
Overcast edges can be transformed with decorative stitches, adding a touch of elegance to your projects.
Knit and Stretch Fabrics
When serging knit and stretch fabrics, it’s crucial to handle them with care to maintain their integrity. You’ll want to adjust your machine settings to accommodate the stretch, ensuring seams that move with the fabric without distortion.
For beginners, serging can seem daunting, but with the right fabric care and maintenance tips, you’ll gain confidence. Remember, a serger trims and finishes edges in one step, saving time on your DIY projects.
Practice makes perfect, so start with simple projects and gradually work your way up to more complex ones as you become more familiar with your serger’s capabilities.
Sewing Techniques
When you’re ready to serge with your Singer sewing machine, you’ll find it’s a game-changer for creating professional-looking seams and finishes.
With the ability to sew a seam and finish the edge in one step, you’ll save time and elevate the quality of your projects.
Whether you’re working with stretchy fabrics or just looking to add a polished touch, mastering the serger function on your machine will boost your confidence and expand your sewing capabilities.
Seam With Seam Finish
When using a Singer sewing machine to create a seam with a seam finish, you’re combining efficiency with a professional touch.
The serger function allows you to sew the seam and finish the edges simultaneously, trimming away any excess fabric. This not only saves time but also gives your projects a clean, store-bought look.
Whether you’re working with 2, 3, or 4 threads, the Singer serger can handle a variety of stitch combinations, making it ideal for a wide range of fabrics and sewing techniques.
With the ability to sew stretchy seams without distortion and achieve delicate finishes on lightweight fabrics, the serger enhances your sewing experience and boosts your confidence to tackle more adventurous projects.
Stretch Stitch Applications
When working with stretch fabrics on your Singer sewing machine, it’s essential to choose the right tools and settings to ensure a professional finish.
- Select the appropriate needle types for your fabric, such as ballpoint needles for knits to prevent snags.
- Use a fabric stabilizer to support delicate stretch materials and maintain the fabric’s shape.
- Pick the right thread selection for stretch, like polyester or nylon, which have more give.
- Adjust the stitch length and differential feed to handle the fabric’s elasticity without puckering or stretching.
Notions and Accessories
When you’re ready to take your sewing to the next level, serging with a Singer sewing machine can be a game-changer.
You’ll find that the right accessories, like serger feet, can expand your machine’s capabilities, allowing you to achieve professional-looking seams and finishes with ease.
Keep your projects looking sharp and your sewing experience enjoyable by exploring the essential tools and notions designed for your Singer machine.
Essential Tools for Serging
To ensure your serging is top-notch, you’ll need to pay close attention to several key factors:
Thread tension: Proper tension ensures balanced stitches, which are essential for a professional finish.
Fabric selection: The right fabric choice can greatly impact the outcome of your project.
Seam allowance: Maintaining the correct seam allowance is key for achieving a clean and polished finish, especially when using a serger that trims excess fabric.
Decorative stitching: Adding decorative stitching can enhance your work, but it requires a well-maintained machine to achieve the desired results.
Regular serger maintenance is also crucial for smooth operation. Keeping your machine in good condition will help you achieve consistent and high-quality results.
Exploring Serger Feet
As you continue to explore the capabilities of your Singer sewing machine, it’s time to delve into the world of serger feet attachments. These specialized feet enhance your machine’s functionality, allowing you to achieve professional results with ease.
Whether you’re working with tricky fabrics or aiming for precision, the right foot attachment makes all the difference.
Regular maintenance and proper tension adjustments are key to keeping your feet attachments in top condition, so you can continue to push the boundaries of your sewing projects with confidence.
Troubleshooting Common Issues
When serging with a Singer sewing machine, encountering issues like tension problems or fabric distortion can be frustrating.
It’s important to start by checking your tension settings and ensuring they’re appropriate for the fabric you’re using. If your fabric is stretching or the stitches aren’t forming correctly, adjusting the tension can help.
Tension Adjustments
When it comes to mastering your Singer sewing machine, understanding how to adjust tension is crucial.
-
Check Threading: Incorrect threading is a common culprit for tension issues. Ensure both your upper and bobbin threads are properly threaded. Missteps here can lead to loose stitches or unwanted puckering.
-
Adjust the Tension Dial: If your stitches are too loose or too tight, tweaking the tension dial can help. A higher number tightens the tension, while a lower number loosens it. Finding the sweet spot requires a bit of experimentation.
-
Consider Fabric and Thread Type: Different fabrics and threads can affect tension. For instance, heavier fabrics or decorative cording might need adjustments to the tension or even the differential feed to prevent stretching or puckering.
Avoiding Fabric Distortion
To avoid fabric distortion when using your serger, it’s crucial to manage thread tension, needle selection, fabric stabilization, and stitch length.
| Factor | Adjustment | Result |
|---|---|---|
| Thread Tension | Balanced | Even stitches, no puckering |
| Needle Selection | Correct size/type | Smooth stitching, no skipping |
| Fabric Stabilization | Appropriate method | Prevents stretching/warping |
| Seam Length | Adjust as needed | Proper seam security |
| Stitch Length | Set for fabric type | Affects seam strength |
Creative Applications
When it comes to enhancing your sewing projects, a Singer sewing machine equipped with a serger function can be a game-changer.
You’re not just limited to basic seams; you can create decorative edges and embellish your projects in ways that elevate them from homemade to professionally crafted.
It’s a fantastic tool that encourages you to explore your creativity and experiment with different fabrics and designs, making your sewing experience more enjoyable and fulfilling.
Decorative Edges
To serge with a Singer sewing machine and create decorative edges, you’ll want to explore the creative potential of your serger.
With the ability to use decorative threads, you can add sparkling edges to your projects, as seen with Halo polyester/metallic thread.
Experiment with stitch variations to produce unique edge finishes and creative embellishments that elevate your sewing projects.
Combining different fabric types can result in stunning contrasts and textures, showcasing your serger’s versatility.
Whether you’re working with a 4-thread overlock for heavy fabrics or a 2-thread overlock for delicate materials, the right combination of threads and settings can transform a simple seam into a work of art.
Embellishing Projects
Enhance your projects with a serger by exploring decorative threads, specialty stitches, ribbon embellishments, fabric manipulation, and fringe effects.
Unleash your creativity with the versatility of a serger, adding unique and professional touches to your creations.
Experiment with different techniques to elevate your sewing projects and achieve stunning results that showcase your skills and innovation.
Frequently Asked Questions (FAQs)
How can I prevent my lightweight fabrics from getting chewed up by the feed dogs when serging with a Singer sewing machine?
To prevent lightweight fabrics from getting chewed up by the feed dogs when serging with a Singer sewing machine, consider using a stabilizer or tissue paper beneath the fabric. This provides extra support, making it harder for the machine to pull the fabric into the feed dogs.
Additionally, ensure you’re using the correct needle for your fabric type, as this can significantly impact how the fabric feeds through the machine.
What should I do if my Singer sewing machine’s overlock stitch is not enclosing the edge of the seam allowance as expected?
Check your Singer sewing machine’s tension settings and adjust if necessary; incorrect tension can cause the overlock stitch to not enclose the edge properly.
Ensure you’re using the correct overlock foot for your machine, as it guides the fabric and helps create a professional finish.
If the issue persists, consult the machine’s manual for troubleshooting tips or consider seeking advice from a sewing community or professional.
Can I use a Singer sewing machine to create a professional-looking overlock stitch on heavy fabrics like denim or upholstery?
Yes, you can use a Singer sewing machine to create a professional-looking overlock stitch on heavy fabrics like denim or upholstery, especially with models like the Singer Heavy Duty
How do I adjust the differential feed on my Singer sewing machine to prevent puckering or stretching when serging stretchy fabrics?
To adjust the differential feed on your Singer sewing machine and prevent puckering or stretching when serging stretchy fabrics, locate the differential feed control, often near the handwheel.
If your seams are wavy, decrease the differential feed by turning it down a notch or two.
Always test on a fabric scrap to find the perfect setting for smooth, flat seams.
What are some tips for choosing the right thread color for overlocking stitches to ensure they blend well with my fabric?
Choosing the right thread color for overlocking stitches is simpler than you might think. Opt for neutral tones like gray, beige, or white for most projects, as they blend well with a wide range of fabric colors.
For darker fabrics, consider black, brown, or navy, and for pastels, white or off-white works best.
This approach saves you time and money, ensuring your seams look professional without the need to match every fabric color perfectly.
Conclusion
Embarking on the journey of serging with a Singer sewing machine is akin to unlocking a treasure chest of creative possibilities. You’ve now armed yourself with the knowledge to navigate through the intricacies of sergers, from understanding their benefits to mastering various stitch types and handling different fabrics with ease.
Your Singer sewing machine is a gateway to enhancing your projects with professional, durable seams and decorative edges. Keep pushing the boundaries of your creativity, and soon, serging will become second nature to you.

