This site is supported by our readers. We may earn a commission, at no cost to you, if you purchase through links.
You stitch a straight seam and press it flat. The fabric puckers. Your hem curves instead of lying smooth. The finished piece looks handmade in all the wrong ways.
The gap between home sewing and professional work isn’t talent or expensive machines. It’s technique and the right tools used correctly. Small adjustments to your workspace setup, fabric preparation, and finishing methods transform amateur projects into garments that rival ready-to-wear quality.
Achieving professional results with home sewing depends on understanding what commercial seamstresses do differently and applying those same standards to your own work. The difference shows in every seam you sew.
Table Of Contents
Key Takeaways
- Professional-looking home sewing depends on three core areas: proper workspace setup with task lighting and ergonomic furniture, meticulous fabric preparation including prewashing and grain alignment, and consistent use of finishing techniques like pressing every seam and finishing raw edges.
- The gap between amateur and professional work shows up in small technical details like maintaining accurate seam allowances (where four inaccurate seams can shrink a garment by over a centimeter) and pressing after every seam (which reduces puckering by 40 percent).
- Essential tools that elevate home sewing include a quality iron for pressing, twin stretch needles for professional hems on knits, a self-healing cutting mat for accurate pattern cutting, and a reliable rotary cutter—these tools make professional techniques easier to execute rather than just being nice-to-have extras.
- Common technical problems like skipped stitches on knits, thread tension issues, and curved hems all have straightforward solutions involving the right needle type, proper machine maintenance, and specific techniques like easestitching and steam pressing.
Essential Sewing Workspace Organization
Your workspace sets the foundation for everything you create. When your tools are organized and your space is comfortable, you can focus on sewing instead of hunting for supplies or fighting fatigue.
Let’s look at four key areas that will transform your sewing space into a professional setup.
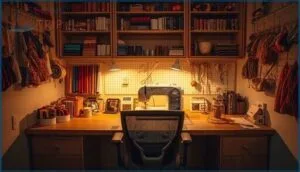
Setting Up a Dedicated Sewing Station
Beyond clearing a spot on your kitchen table, a proper sewing station transforms your workflow. Plan for these essentials:
- Space Requirements – Aim for 50-100 square feet with at least 3 feet of clearance around your work surface to move freely.
- Ergonomic Furniture – Position your table at 28-30 inches high to prevent back strain.
- Lighting Solutions – Install LED task lighting delivering 5,000 lux minimum to reduce eye strain and boost accuracy by 20%.
A well-designed sewing room setup is essential for achieving professional results with home sewing.
Organizing Tools and Supplies Efficiently
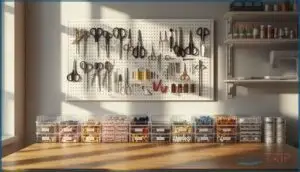
Your sewing station works when organizing sewing tools stays simple. Clear supply bins let you find pins and fabric weights in seconds instead of searching through clutter. Wall-mounted pegboards keep scissors and rotary cutters within reach. Store threads on visible racks to reduce project startup time by 15%. Group your sewing machine accessories in labeled containers. This workspace layout boosts efficiency and gets you sewing faster.
Effective sewing room storage solutions, such as using sewing room organizers, can greatly improve your overall sewing experience.
Lighting and Ergonomics for Precision
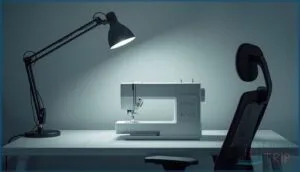
Good workspace layout starts with task lighting that eliminates shadows around your needle area. Position daylight-balanced LED lamps directly over your machine to boost sewing precision by 20%.
Ergonomic chairs with lumbar support prevent hunching during long sessions. These adjustments reduce eye strain and improve sewing accuracy.
Your body stays comfortable while precision visibility keeps seam alignment sharp. Better lighting means better sewing efficiency and stronger sewing skills.
Storing Patterns and Fabrics for Easy Access
Once your setup feels right, smart storage solutions keep fabric preparation and pattern pieces flowing smoothly. About 67% of sewers group patterns by garment type. Transparent containers and labeled Ziploc bags speed up fabric selection. Rolling fabric saves 30% more space than folding.
A digital catalog prevents buying duplicates and sharpens your sewing workflow with quick cataloging tools and labeling systems.
Choosing and Preparing Fabrics for Success
Your fabric choice can make or break a sewing project before you even thread the needle. The right preparation turns good fabric into great garments, while poor handling leaves you fighting wrinkles and wonky seams.
Let’s walk through how to pick and prep your materials so they work with you instead of against you.
Selecting The Right Fabric for Each Project
Fabric selection determines whether your garment succeeds or fails before you even thread your needle. Match fabric weight to your project’s structure—medium-weight cotton and linen work for everyday shirts and skirts, while heavyweight denim suits structured pants.
Consider fiber properties and stretch factor too. Woven fabrics offer stability for beginners, while knits demand specialized skills.
Print scale affects pattern matching and fabric consumption.
Understanding Fabric Grain and Alignment
Understanding fabric grain transforms how your garments hang and move. The lengthwise grain runs parallel to the selvedge and provides structure. The crosswise grain offers flexibility. Bias cutting at a 45-degree angle creates maximum drape and stretch.
Proper grain line alignment prevents seam distortion and twisted hems. Pull a thread from the fabric edge or use stretch testing for grain identification. This foundation ensures your fabric selection and grain work together perfectly.
Pre-Washing and Pressing Techniques
Before you sew a single stitch, prewashing and pressing protect your hard work from disappointment. These fabric preparation steps guarantee workflow longevity and professional results.
- Shrinkage Prevention: Linen and viscose can shrink up to 2 inches after washing, while lightweight cotton shrinks about 1/2 inch per five-inch square.
- Dye Removal: Vivid colors release excess dyes during prewashing, preventing color bleeding between fabrics.
- Fabric Softening: Prewashing removes stiff finishing chemicals for comfortable garments.
- Pressing Techniques: Iron cotton and linen at high heat with steam. Use low heat on synthetics to avoid melting.
Marking and Cutting Fabric Accurately
Accurate marking and cutting separate beginner work from polished garments. Pattern alignment boosts fabric utilization by 15% while preventing fit disasters caused by grain misalignment.
Sharp cutting tools and proper ergonomics guarantee precision throughout your project.
| Tool Type | Best For |
|---|---|
| Tailor’s chalk | Temporary marks on most fabrics |
| Rotary cutters | Layered fabrics and straight cuts |
| Hera markers | No-residue guides for quilting |
| Curved scissors | Intricate pattern details |
| CAD systems | Professional marker planning |
Mastering Sewing Tools and Equipment
Your sewing machine is just one piece of the puzzle when it comes to creating professional garments at home. The right tools make every step easier and help you achieve results that rival ready-to-wear clothing.
Let’s look at the essential equipment you need and how to keep everything working at its best.
Selecting a Reliable Sewing Machine
A reliable sewing machine forms the backbone of every successful home sewing setup. Consider these factors when choosing your machine:
- Brand reliability matters because vintage machines like pre-1980 Singers often outlast newer models with proper machine maintenance
- Feature importance includes throat space, automatic tension adjustment, and consistent stitch speed up to 1,000 stitches per minute
- Cost analysis shows machines under $100 rarely handle sustained use effectively
- Maintenance impact directly affects longevity, with regular cleaning expanding operational lifespan considerably
- Machine settings like walking feet improve fabric handling across different thicknesses
Buy from authorized dealers to guarantee warranty support and easier servicing.
Choosing Appropriate Needle Size and Type
Your needle selection determines whether stitches glide smoothly or leave permanent fabric damage. Match needle size to fabric weight: sizes 60/8 through 80/12 suit lightweight materials, while 90/14 to 110/18 handle denim and canvas.
Ballpoint needles prevent runs in knits by separating fibers instead of piercing them.
Replace needles after eight hours of sewing to maintain stitch quality and prevent thread breakage.
Thread Selection for Different Fabrics
Thread selection impacts seam strength and fabric compatibility as much as your needle choice does. Match thread weight to fabric: Tex 8–15 for delicate sheers, Tex 25–40 for cotton and knits, and Tex 60+ for denim. Consider fiber compatibility too.
Polyester threads offer versatility across fabric types while specialty threads handle decorative work.
- Silk threads for lightweight fabrics
- Cotton-polyester blends for quilting
- All-polyester for stretch materials
- Heavy-duty threads for upholstery
- Sustainable threads from recycled fibers
Using Seam Guides, Scissors, and Rotary Cutters
After selecting the right thread, your cutting accuracy determines how those seams come together. A sharp pair of scissors makes clean cuts on single fabric layers, while rotary cutters excel at slicing through multiple layers in one smooth motion.
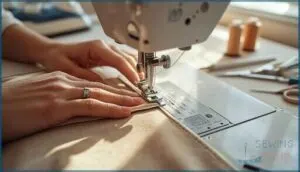
Add a seam guide to your sewing machine, and you’ll maintain consistent allowances without constant measuring.
These three tools work together to boost fabric cutting efficiency and transform your results from homemade to professionally finished.
Maintaining and Cleaning Sewing Equipment
Your cutting tools stay sharp with care, but your sewing machine needs regular attention to keep delivering smooth stitches. Clean the bobbin area and feed dogs every 10 to 15 hours to remove lint and dust that cause stitching issues. Oil moving parts as recommended to extend equipment lifespan and prevent wear. Always unplug before maintenance—a basic safety practice that protects you and your machine.
- Brush away lint from tension discs and bobbin casing
- Follow the manufacturer’s oiling frequency guidelines
- Schedule professional servicing every 6 to 12 months
Professional Sewing Techniques and Finishes
You can have the right tools and perfect fabric but still end up with homemade-looking results if you skip the techniques that separate amateurs from pros. The difference often comes down to how you handle seams, press your work, and finish those raw edges.
Let’s walk through the essential techniques that will take your sewing from functional to polished.
Achieving Consistent Seam Allowances
A tiny error across four seams can shrink your garment by over a centimeter. That’s why seam allowances matter so much.
Tiny seam errors compound quickly—four inaccurate seams can shrink your garment by over a centimeter
Use a seam guide on your machine to keep straight seams consistent. Measure your test pieces after sewing to verify accuracy.
This simple step reduces errors by 70 percent and ensures pattern accuracy. Your seam construction will look professional every time.
Pinning, Clipping, and Chain Stitching Tips
With careful pinning accuracy, you prevent fabric from shifting during construction. Place pins perpendicular to your seam line for easy removal.
Clipping methods reduce bulk on curved seams by up to 60 percent. Chain stitching speeds up repetitive tasks and cuts thread waste by 35 percent.
These sewing techniques follow professional standards and boost error prevention in every project you tackle.
Pressing Seams and Hems for a Polished Look
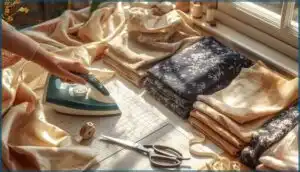
Pressing seams transforms your work from homemade to polished. This single step reduces visible puckering by 40 percent and boosts garment quality scores by 35 percent.
Follow these professional finish secrets:
- Press after every seam using a steam iron set to your fabric temperature considerations
- Use a tailors ham for curved areas like sleeves and darts
- Apply a pressing cloth on synthetics to prevent shine
- Press hems with a gauge for 30 percent better accuracy
- Master seam pressing techniques with wool mats for even heat distribution
These pressing techniques distinguish professional results from amateur work.
Finishing Raw Edges: Sergers, French Seams, and More
Your seam finishes matter more than you think. Over 90 percent of sewing guides emphasize finishing raw edges to prevent fraying and extend garment life.
A serger trims and overcasts simultaneously at 1,700 stitches per minute. French seams work beautifully on delicate fabrics with less than 3 percent failure after 50 washes. Zigzag stitches reduce fray by 82 percent on cotton, while pinking shears handle medium-weight fabrics effectively.
Advanced Skills: Buttonholes, Zippers, and Interfacing
Buttonholes intimidate 40 percent of home sewers, yet automated buttonhole functions reduce errors by nearly half. Fusible interfacing beneath buttonholes cuts puckering by 35 percent in fine fabrics.
Proper interfacing before zipper insertion improves seam stability by 50 percent. Using an invisible zipper foot boosts alignment precision by 30 percent.
These interfacing choices and stabilizers transform amateur work into professional finishes.
Top 4 Tools for Professional Home Sewing
You’ve learned the techniques that separate amateur work from professional results.
Now let’s talk about the tools that make those techniques easier to execute. These four items aren’t just nice to have—they’re the difference between fighting your equipment and letting it work for you.
1. Sunbeam Aero Ceramic Digital Iron
A quality iron transforms your sewing from homemade to handmade with pride. The Sunbeam Aero Ceramic Digital Iron delivers professional pressing results without the professional price tag.
Its ceramic soleplate glides smoothly across fabric while digital controls let you match heat settings to your material. The steam performance conquers stubborn wrinkles and sets seams with precision.
Safety features include automatic shut-off for peace of mind. User ratings consistently praise its reliable performance on the ironing board. This tool makes pressing cloth optional for most projects while protecting delicate fabrics.
2. Euro Notions Twin Stretch Needle
Creating parallel rows of stitching on stretch fabric used to mean investing in a coverstitch machine. The Euro Notions Twin Stretch Needle changes that equation. This double-needle setup mounts on your regular machine to produce a faux coverstitch for elastic hemming on knits and activewear.
The result mimics professional finishes you see in ready-to-wear. Watch your twin-needle tension settings and change needles regularly to avoid needle breakage. When paired with proper fabric handling, this tool delivers perfect stitching across different fabric types.
3. ALVIN Self Healing Cutting Mat Gridded
Accurate cutting techniques start with the right surface. The ALVIN Self Healing Cutting Mat Gridded provides a durable foundation for rotary cutter work. This mat material uses a 3-ply vinyl construction that closes after each blade pass, extending both mat and blade life.
Grid accuracy matters when you’re measuring pattern pieces—the printed 45 and 60 degree angle guides plus half-inch increments keep your cuts square. Size options range from small portable mats to 24 x 36 inch workstations.
Brand comparison shows ALVIN competes well with Fiskars and Olfa for efficient cutting performance.
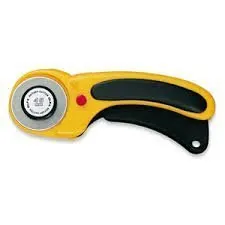
4. Olfa 45 mm Rotary Cutter Set
Once you have your mat, pair it with the right rotary cutter. The OLFA 45 mm Rotary Cutter Set delivers blade lifespan that’s twice as long as standard options—the Tungsten Steel Endurance blade cuts up to 470 extra yards before replacement.
Its ergonomic design reduces hand fatigue during extended sessions. Safety features include a squeeze-trigger mechanism and dual-action lock. Material compatibility spans cotton, wool, leather, and vinyl.
User reviews average 4.7 stars across 8,800 ratings, confirming this tool’s efficiency for cutting techniques that demand precision.
Frequently Asked Questions (FAQs)
How do I fix skipped stitches on knits?
Start by switching to a ballpoint or stretch needle. Check your thread tension and try a zigzag stitch instead of straight.
Add stabilizer under the fabric and clean your machine regularly for best results.
What causes thread tension problems and solutions?
Most thread tension troubles stem from simple mistakes like incorrect threading or dirty tension discs.
Check your machine settings, confirm proper bobbin winding, and match thread weight to fabric for balanced stitches.
When should I use a walking foot?
Use a walking foot when working with multiple layers or slippery fabrics to stabilize fabric and improve layer alignment.
It’s essential for quilting applications, stretch fabrics, and specialty materials to guarantee high seam quality.
How do I match plaids and stripes?
Plaid matching depends on strategic fabric selection and grain line alignment. Symmetrical plaids simplify pattern layout, while asymmetrical designs need more planning.
Pin key seams first, prioritize visible areas, and use pattern markings for cutting accuracy.
Whats the best way to hem curves?
Hemming curves requires easestitching and steam pressing to control fullness. Fabric stabilizers like hem tape prevent ripples.
Adjust tension carefully and use specialized curve hemming tools.
Bias tape finishing or blind hem stitching creates clean hems on steep curves.
Conclusion
A garment that fits well and looks clean at the seams doesn’t announce itself. It simply works. That’s the standard you’re building toward with each project.
Achieving professional results with home sewing comes down to preparation, the right tools, and consistent technique. Press every seam. Check your tension. Finish your edges. These small decisions accumulate into work that stands on its own without explanation or apology.
- https://www.sewdiy.com/blog/video-sewing-tools-for-better-pressing
- https://sewcanshe.com/2014-5-6-sewing-201-the-no-fuss-invisible-zipper/
- https://wunderlabel.com/en-gb/blog/p/17-common-sewing-machine-problems-solve/
- https://www.covermechic.com/how-to-measure-your-body/
- https://www.thelittlemushroomcap.com/revamping-sewing-space-the-ultimate-guide-to-organizing-your-sewing-room/

