This site is supported by our readers. We may earn a commission, at no cost to you, if you purchase through links.

Start by checking for uneven stitches, puckering, or thread loops—they’re telltale signs of tension trouble. Make sure the thread is properly seated between the tension discs and that the bobbin is inserted with the thread unwinding in the right direction.
For balanced stitches, aim for the threads to lock neatly in the fabric’s middle. If the control dial feels stiff or tension springs seem loose, clean or adjust them.
Remember, perfect tension transforms your sewing from frustrating to flawless—like magic in every stitch!
Table Of Contents
- Key Takeaways
- Identifying Sewing Machine Tension Issues
- Mastering Basic Tension Adjustments
- Troubleshooting Common Tension Problems
- Advanced Tension Adjustments and Fine-Tuning
- Balancing Top and Bottom Thread Tensions
- Tips and Tricks for Optimizing Tension Performance
- Frequently Asked Questions (FAQs)
- Conclusion
Key Takeaways
- You’ll know your sewing machine’s tension needs adjustment when you spot uneven stitches, puckering, or thread loops on either side of your fabric, so check for these signs regularly.
- To achieve balanced stitches, you’ll need to adjust your machine’s thread tension, which involves tweaking the tension dial, checking thread guides, and ensuring proper bobbin placement, so don’t be afraid to experiment.
- You should keep a tension log to track your thread types, fabric compatibility, and tension adjustment settings, as this will help you streamline your thread management and save time during machine calibration.
- By mastering the art of adjusting your sewing machine’s thread tension, you’ll be able to navigate the tightrope of thread tension with ease, ensuring balanced stitches and making every project a masterpiece, so it’s worth taking the time to practice and fine-tune your skills.
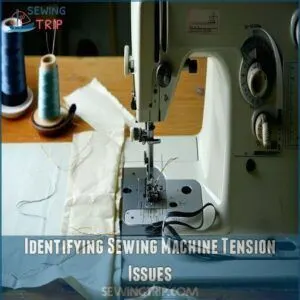
Identifying Sewing Machine Tension Issues
You’ll know your sewing machine’s tension needs attention when you spot uneven stitches or looping threads on either side of your fabric.
If your stitches look perfect on top but messy underneath (or vice versa), you’ve got a tension issue that’s throwing off your project’s professional finish.
Recognizing Imbalanced Tension Symptoms
Three telltale signs reveal tension issues in your sewing machine. Your fabric’s appearance instantly signals when thread tension needs adjustment.
- Watch for puckered seams that ripple like waves across your fabric
- Notice thread loops appearing on either the top or bottom surface
- Listen for sudden thread breakage interrupting your smooth sewing flow
- Spot uneven stitches where tension isn’t balanced between layers
When perfect tension exists, your stitches lock neatly in the fabric’s middle. If you’re seeing loops or knots, it’s time to address those tension problems.
Understanding Tension Device Malfunctions
Now that you’ve mastered spotting tension issues, let’s tackle those pesky tension device malfunctions.
You’ll want to keep an eye on these common trouble spots:
| Component | Warning Signs | Quick Fix |
|---|---|---|
| Tension Discs | Wear marks, rust | Clean, lubricate |
| Thread Guides | Bent, scratched | Replace if damaged |
| Tension Springs | Weak resistance | Adjust or replace |
| Control Dials | Stiff movement | Clean mechanism |
| Tension Gauges | Inconsistent readings | Recalibrate |
Check these parts monthly to catch problems before they affect your stitching. A well-maintained tension system is your ticket to perfect seams.
Thread Breakage and Tangling
While tension devices affect stitch quality, thread breakage often reveals deeper issues.
When threads snap or tangle mid-project, inspect these common culprits:
- Incorrect tension settings causing excessive thread strain
- Fiber friction from poor-quality thread with inconsistent thickness
- Thread path obstructions collecting lint or debris
- Yarn snags from damaged needle eyes
- Incompatible thread weight for your machine’s capabilities
Check these points before adjusting your sewing machine thread tension to prevent frustrating breaks and ensure a smooth sewing experience with the right thread weight and proper tension settings.
Visible Loops or Knots on Fabric
Spotting thread loops on your fabric? While thread breaks create tangles, visible loops signal sewing machine tension adjustment needs.
You’ll notice:
- Loose loops on top mean your top thread tension is too tight
- Bird nesting underneath occurs when tension discs aren’t engaged properly
- Knots at stitch ends reveal unbalanced thread flow
- Puckered fabric appears when tension settings fight each other
Proper thread tension settings are essential to avoid these issues, as they directly impact the quality of your sewing, including the presence of loose loops, bird nesting, and puckered fabric, which can be prevented with the right tension settings.
Mastering Basic Tension Adjustments
You’ll find that adjusting your machine’s thread tension isn’t rocket science once you understand the basics.
With the right thread selection and consistent record-keeping, you’ll transform those frustrating tension headaches into perfect stitches every time, which will make the process much easier and result in perfect stitches.
Choosing The Right Thread for Your Machine
Like a skilled chef choosing the perfect ingredients, selecting the right thread type can make or break your sewing project.
Your machine’s preset tension works best with specific thread weights, so you’ll need to adjust settings when switching between different thread materials. Consider matching thread quality to your fabric – cotton threads for natural materials, and synthetic options for modern textiles.
High-quality threads prevent frustrating breakages and guarantee smooth stitching. When experimenting with thread selection, remember that fiber content matters – the right combination of thread weight and material creates professional, polished results.
To achieve ideal stitching, understanding thread tension devices is essential for balanced and strong seams.
Selecting The Correct Bobbin Thread
Now that you’ve found the right top thread, your bobbin thread deserves equal attention.
For balanced tension, always match your bobbin thread weight and fiber to your top thread. Cotton, polyester, or specialty threads should coordinate with your project needs.
Clean your bobbin case regularly and adjust tension screws with quarter turns only. This compatibility ensures smooth, balanced stitches without puckering or loops.
Using the right bobbin thread types is essential for achieving professional results.
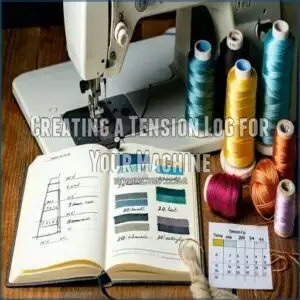
Creating a Tension Log for Your Machine
Moving from bobbin selection to mastery, a tension log becomes your sewing compass.
Create your personalized thread tension guide by recording each project’s details:
- Record the thread brand/weight and corresponding tension dial number
- Note fabric types tested with successful tension settings
- Track seasonal adjustments as humidity affects thread tension
Keep this log beside your machine for quick reference.
When you encounter that perfect stitch balance during machine calibration, you’ll thank yourself for this bit of thread monitoring wisdom.
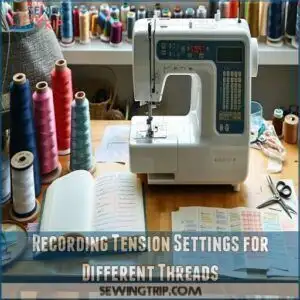
Recording Tension Settings for Different Threads
Your tension journal becomes invaluable when you record specific settings for each thread type.
Start documenting your perfect stitch combinations today.
| Thread Type | Fabric Type | Tension Setting | Notes |
|---|---|---|---|
| Cotton 40wt | Quilting | 4-5 | Perfect for piecing |
| Polyester | Knits | 3-4 | Prevents rippling |
| Metallic | Canvas | 2-3 | Loosened to prevent breaks |
| Silk | Delicates | 4 | Balanced for sheen |
These thread tension records eliminate guesswork and save time on future projects, making your tension journal a valuable tool for achieving perfect stitch combinations and ensuring balanced results.
Troubleshooting Common Tension Problems
You’ll spot tension problems quickly when your stitches look like a roller coaster ride on either side of your fabric.
With a few simple adjustments to both your top thread path and bobbin case, you’ll transform those problematic loops and puckers into perfectly balanced stitches.
Correcting Incorrect Thread Placement
Now that you’ve mastered basic tension settings, proper thread placement becomes your next challenge. Incorrect threading causes 80% of tension problems!
Your thread’s journey through the machine must be flawless for perfect stitch quality. Check these critical points:
- Thread properly seated between tension discs
- All thread guides engaged in correct sequence
- Bobbin inserted with thread unwinding in right direction
- Needle threaded from front to back
When fabric tension seems off, verify your thread routing first. You’d be surprised how often simply re-threading your machine fixes those frustrating tension issues without touching the thread tensioner dial. Understanding proper thread tension is key to resolving common sewing machine problems, and it’s crucial to have perfect stitch quality with proper thread placement to avoid tension problems.
Resolving Top Thread Tension Issues
Now that you’ve got your thread placement sorted, let’s tackle those pesky top thread issues.
If you’re seeing broken threads or inconsistent stitches, your thread tension needs attention.
Start by checking your thread tensioners and tension gauges along the thread path.
Adjust your machine’s tension dial in small increments, testing stitch quality on scrap fabric.
A balanced thread tension creates perfect stitches that don’t pucker or loop, resulting in a perfect stitches outcome.
Fixing Bobbin Thread Tension Imbalances
Now that you’ve mastered adjusting the top thread, let’s fix those pesky bobbin thread tension imbalances.
Start by checking your bobbin case – a quick inspection can reveal thread flow issues.
For perfect sewing calibration, verify thread compatibility and examine the tension spring.
You’ll want 23 grams of tension using a bobbins gauge for ideal fabric tension.
Clean your bobbins area regularly and keep your machine’s manual handy for quick reference when adjusting sewing machine thread tension.
Eliminating Gathering Underneath Fabric
Those pesky fabric gathers under your stitches can drive any sewist crazy.
Here’s your foolproof guide to thread tension balancing that’ll keep your fabric smooth as silk.
- Lower your presser foot pressure for better fabric control
- Adjust your stitch length shorter to prevent bunching
- Switch to a heavier-weight thread that’ll maintain tension
- Use a larger needle size to reduce fabric stress
With these sewing machine tension adjustments, you’ll say goodbye to those annoying gathers and hello to perfectly flat seams and a more enjoyable sewing experience with better fabric control.
Advanced Tension Adjustments and Fine-Tuning
When basic adjustments aren’t enough, it’s time to fine-tune your machine for trickier fabrics and threads. Don’t worry—it’s easier than it sounds!
Temporary Tension Adjustments for Specific Threads
Every thread has its quirks, and sewing machine thread tension adjustment is all about adapting.
Keep a tension log to track thread weights, fabric types, stitch lengths, and thread materials. This cheat sheet saves time and frustration.
Pro tip: Test tension on scrap fabric before diving into your project.
| Thread Weight | Fabric Type | Stitch Length | Needle Size | Tension Setting |
|---|---|---|---|---|
| Light | Silk | Short | 70/10 | 2 |
| Medium | Cotton | Medium | 80/12 | 4 |
| Heavy | Denim | Long | 90/14 | 6 |
| Stretch | Knit | Medium | Ballpoint | 3 |
| Metallic | Satin | Short | Topstitch | 5 |
Experiment, record, and adjust—perfect stitches await!
Making Fine-Tune Adjustments for Sensitive Fabrics
Silk and chiffon can test your patience, but mastering their delicate balance is worth it.
Nail your thread tension adjustment with these steps:
- Use ultra-fine needles designed for lightweight fabrics.
- Match thread weight to the fabric—no shortcuts here!
- Test with contrasting thread colors for clear tension control.
- Clean your machine to avoid snags ruining your flow.
- Adjust the tension dial in tiny increments—think “whisper-light” changes.
Sensitive fabrics demand fine tuning, but the results? Flawless stitches.
Customizing Tension Settings for Heavy-Duty Sewing
Sewing heavy fabric like denim or leather requires fine-tuning your sewing machine tension settings for smooth, professional results. Think of tension control as your secret weapon against uneven stitches and thread breakage.
Start by selecting a heavy-duty needle and matching thick thread weights to handle material thickness. Adjust the upper tension using tension gauges, ensuring the thread flows evenly. Opt for a longer stitch length to reduce strain on the thread.
Always test on scrap fabric first to perfect your thread adjustment. Understanding proper tension settings is essential for achieving perfect stitches on heavy fabrics.
- Use a Teflon-coated foot for sticky materials like vinyl
- Increase sewing speed gradually for better control
- Check bobbin tension periodically
- Clean tension discs for smooth operation to ensure your machine runs efficiently and effectively.
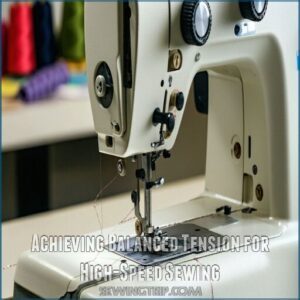
Achieving Balanced Tension for High-Speed Sewing
High-speed stitching demands precision, and balanced stitches start with proper thread tension.
Think of your sewing machine as a racecar—it performs best when tuned perfectly.
Nail your tension control with these speed settings:
| Thread Type | Needle Pressure | Stitch Length |
|---|---|---|
| Cotton | Medium | 2.5–3.0 mm |
| Polyester | High | 3.0–3.5 mm |
| Nylon | Low | 2.0–2.5 mm |
Always test fabric tension first!
Balancing Top and Bottom Thread Tensions
Getting the top and bottom thread tensions to work together can feel like balancing a seesaw. With a few adjustments, you’ll have stitches that look flawless on both sides.
Achieving Symmetrical Stitches on Different Fabrics
Balanced stitches depend on precise tension adjustment and understanding fabric behavior.
To achieve stitch balance, test scrap fabric before starting your project.
Here’s how:
- Adjust for Fabric Selection: Lower sewing machine tension for lightweight fabrics; increase it for heavier materials.
- Match Thread Weights: Pair thread weight to fabric stretch and thickness for smooth stitching.
- Use Tension Gauges: Monitor stitch length and thread tension to prevent puckering or loose threads.
Perfect balanced stitches start with careful preparation!
Preventing Tension Imbalance in Multiple Thread Sewing
Managing multiple threads requires precision to avoid sewing machine tension problems.
Thread balance starts with guiding each thread smoothly through its path—no shortcuts! Regular cleaning prevents fabric stretch and thread breakage.
Adjust tension for thread thickness and material compatibility. A well-maintained machine maintains harmony, even at high sewing speeds.
Think of tension adjustment as fine-tuning an orchestra—every thread plays its part, requiring precision and regular cleaning to ensure smooth operation.
Solving Uneven Thread Flow Problems
Uneven thread flow can feel like herding cats, but a few tweaks will restore harmony.
Here’s how to master tension control:
- Check thread guides to achieve smooth threading—misalignment causes uneven stitching while sewing.
- Adjust bobbin tension to match fabric stretch and thread quality for balanced sewing machine tension.
- Switch needles to suit thread thickness and prevent thread breakage.
- Fine-tune the tension dial gradually—small changes make a big difference.
Understanding thread tension issues is essential for achieving perfect stitches.
With patience, your sewing machine tension will hum perfectly!
Monitoring Tension While Sewing in Real-Time
Think of real-time monitoring as your sewing machine’s pulse check.
Watch for tension alerts like skipped stitches or uneven thread flow.
Feel the fabric feedback under your fingers—it’s a subtle guide.
Adjust sewing machine tension on the fly, tweaking tension settings as needed.
Keep sewing speed steady, and listen closely; your machine’s rhythm reveals when a tension adjustment is due.
This approach allows for real-time monitoring to ensure optimal performance.
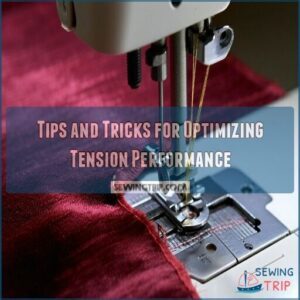
Tips and Tricks for Optimizing Tension Performance
You can fine-tune your sewing machine’s tension with a few simple tricks and regular upkeep. A little care goes a long way toward perfect stitches.
Understanding Tension Settings for Various Stitches
Perfect stitches start with understanding how tension settings adapt to stitch types.
Tension gauges are your best friend here.
- Embroidery: Loosen thread tension (around 3-4) for smooth designs.
- Quilting: Balance thread tension for even, sturdy stitches.
- Blind hems: Tighten bobbin thread for hidden results.
Mastering thread control means adjusting sewing machine tension to match fabric stretch and sewing speed.
Tips for Regularly Cleaning and Maintaining Tension Devices
Your sewing machine tension deserves regular TLC to stay flawless.
Use a soft brush or cotton swab for Tension Device Cleaning and Thread Guide Maintenance. Clear lint from tension disks and inspect guides for smooth operation.
Regular Lubrication prevents snags, while Device Inspection guarantees precision. Proper sewing machine oil maintenance is essential for ideal performance.
Here’s a quick reference:
| Task | Frequency | Tools Needed |
|---|---|---|
| Tension Disk Care | Weekly | Soft brush |
| Thread Guide Check | Every project | Cotton swab |
| Regular Lubrication | Monthly | Sewing oil |
| Device Inspection | Quarterly | Magnifying glass |
| Cleaning Debris | After sewing | Lint brush |
Upgrading Tension Devices for Better Performance
Ready to boost your sewing efficiency? Tension upgrades can work wonders!
Modernize your machine with these performance enhancements:
- Automatic tension systems: Forget constant tension adjustment—these smart tools handle thread tension for you.
- DIY tension kits: Affordable and easy-to-install, they’re perfect for better thread optimization.
- Premium tension discs: Replace worn-out parts for smoother stitching and fewer tangles.
With these device replacements, your sewing machine tension settings will deliver precision and reliability like never before.
Proper tension adjustment techniques are essential for achieving superior stitch quality and minimizing thread breakage.
Keeping a Tension Guide for Your Machine
A sewing machine tension guide is your ultimate ally for mastering thread tension.
Create a log that tracks thread types, fabric compatibility, and tension adjustment settings.
This personalized tool streamlines thread management and tension tracking, saving time during machine calibration.
Pair it with maintenance schedules to guarantee consistent performance.
Your future projects will thank you for this simple, stress-saving habit, and it will be a valuable asset for mastering thread tension.
Frequently Asked Questions (FAQs)
How do you adjust tension on a sewing machine?
Don’t worry if adjusting tension feels tricky—it’s just fine-tuning.
Turn the tension dial slowly, testing stitches on scrap fabric.
Balance top and bobbin threads until stitches lock evenly between fabric layers.
Patience pays off, as it is crucial for achieving the desired outcome with evenly locked stitches.
What is a sewing machine tension?
Tension on a sewing machine balances the top and bobbin threads, ensuring smooth, even stitches.
Think of it as a tug-of-war—too tight or loose, and your fabric puckers or stitches unravel.
Balance is key!
Should you adjust your sewing machine thread tension?
Imagine a tug-of-war where one side pulls too hard—it’s chaos.
Adjusting thread tension is like balancing that game, ensuring smooth stitches.
Yes, tweak it to match your fabric and thread for perfect results.
How to adjust bobbin thread tension on a sewing machine?
To adjust bobbin thread tension, locate the small screw on the bobbin case.
Turn it right to tighten or left to loosen.
Make small adjustments, test stitches, and repeat until the tension balances perfectly.
How do you adjust thread tension?
Picture your stitches gliding perfectly.
Turn the tension dial slightly, testing on scrap fabric. If loops form, tweak gently—clockwise tightens, counterclockwise loosens.
Balance top and bobbin threads until stitches lock beautifully between fabric layers, ensuring a perfect finish.
Can a sewing machine tension be tightened or loosened?
Yes, you can tighten or loosen sewing machine tension.
Turn the tension dial clockwise to tighten and counterclockwise to loosen.
Test on scrap fabric first—it’s like tuning a guitar for perfect harmony!
Are Your Machine Stitches Balanced?
Balanced stitches lock threads neatly between fabric layers.
If loops, puckers, or uneven stitches appear, your tension’s off.
Tweak it until both threads sit snugly, ensuring smooth, professional-looking seams every time.
Are You Using The Same Thread in The Bobbin and Through The Needle?
Using the same thread in the bobbin and needle creates harmony in your stitches.
Mismatched threads can cause tension headaches—literally!
Keep it consistent for smoother sewing and fewer adjustments.
Your machine will thank you, and this will lead to fewer adjustments.
How to tell if sewing machine tension is right?
You’ll know tension is right when stitches are even on both sides, threads lock in the fabric’s center, and there’s no puckering or looping.
Think of it as your machine’s “sweet spot” harmony.
Why does my sewing machine keep jamming underneath?
A sewing machine jamming underneath is like a traffic jam—caused by tangled threads, incorrect bobbin placement, or improper threading.
Check the bobbins, rethread carefully, and clean lint buildup to restore smooth stitching, addressing issues such as improper threading.
Conclusion
Mastering the art of adjusting sewing machine thread tension, you’ll weave a tapestry of perfect stitches.
With practice, you’ll navigate the tightrope of thread tension with ease, ensuring balanced stitches.
By fine-tuning your skills in adjusting sewing machine thread tension, you’ll attain flawless sewing, making every project a masterpiece.
- https://www.thesprucecrafts.com/easily-adjust-sewing-machine-tension-2821432
- https://www.thesewingdirectory.co.uk/thread-tension/
- https://www.threadsmagazine.com/2008/11/02/understanding-thread-tension
- https://ohyoucraftygal.blogspot.com/2013/10/sewing-lesson-10-how-to-fix-tension-on.html
- https://www.tillyandthebuttons.com/2020/03/thread-tension-troubleshooting.html

