This site is supported by our readers. We may earn a commission, at no cost to you, if you purchase through links.
You’re probably familiar with the lever or dial on your machine that controls stitch length – it’s usually marked with dashes or lines that go from short to long.
To adjust the stitch length, simply move the lever or turn the dial.
But here’s the thing: getting the perfect stitch length is an art that requires some know-how.
By mastering the stitch length mechanism, you’ll be able to tackle a wide range of fabrics and projects with confidence.
And that’s just the beginning – you’re about to open up a whole new world of sewing possibilities!
Table Of Contents
- Key Takeaways
- Stitch Length Mechanism Components
- Locating the Stitch Length Adjustment Dial
- Types of Stitch Length Controls
- Setting the Correct Stitch Length
- Troubleshooting Common Stitch Length Issues
- Maintaining the Stitch Length Mechanism
- Advanced Stitch Length Adjustment Techniques
- Impact of Stitch Length on Sewing Projects
- Stitch Length Variations Across Machine Models
- Professional Tips for Optimal Stitch Length Control
- Frequently Asked Questions (FAQs)
- Conclusion
Key Takeaways
- You’re the boss of your stitch length mechanism – master it, and you’ll be sewing like a pro in no time! By adjusting the control shaft, levers, feed dogs, cam profiles, tension spring, and needle bar, you can achieve perfect stitches that’ll make your sewing buddies green with envy.
- Finding the perfect stitch length is like cracking a code – it depends on your fabric type, thread weight, and needle size. For most projects, 2.5 mm is your sweet spot, but feel free to experiment and find what works best for you. Just remember, shorter stitches are stronger, but might not be the best choice for thicker fabrics.
- Don’t be afraid to get a little creative with your stitch length – it’s not just about functionality, but also aesthetics! By adjusting your stitch length, you can create beautiful, even stitches that’ll make your projects stand out. Whether you’re working with delicate silks or sturdy denim, you’ve got the power to create something truly special.
- To keep your stitch length mechanism in top shape, make sure to regularly clean, lubricate, and inspect it. It’s like keeping your car in good condition – a little TLC goes a long way! By taking care of your machine, you’ll be able to achieve perfect stitches every time and make your sewing experience a whole lot smoother.
Stitch Length Mechanism Components
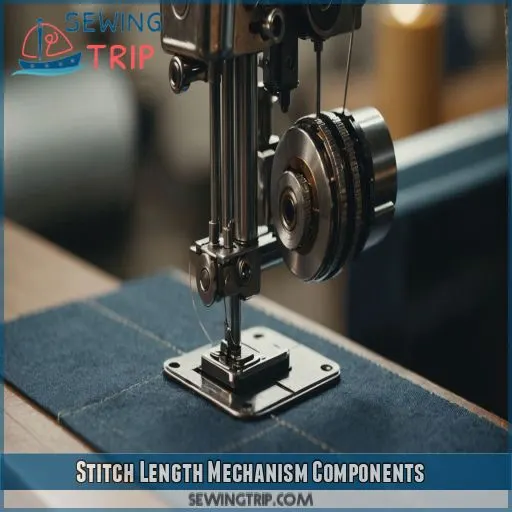
You’re about to uncover the inner workings of your sewing machine’s stitch length mechanism. We’ll break down the key components that make those perfect stitches possible, from the control shaft to the feed dogs, so you can troubleshoot like a pro and sew with confidence.
Control Shaft and Lever System
Your sewing machine’s control shaft and lever system are the unsung heroes of stitch length adjustment. They’re like the conductor of an orchestra, directing the movement of other components. Here’s what you need to know:
- The control shaft’s smooth rotation is key to perfect stitches
- Levers act as your machine’s ‘muscles’, translating your adjustments
- A well-oiled system feels like butter under your fingertips
- Understanding this mechanism is your ticket to sewing mastery
Feed Dogs and Their Function
Moving on from the control shaft, let’s talk about those little metal teeth that grip your fabric: the feed dogs.
These unsung heroes are the workhorses of your stitch length mechanism.
They move in a four-motion elliptical pattern, pushing the fabric along as you sew.
Think of them as tiny conveyor belts, working in sync with your needle to create perfectly spaced stitches.
Their height and movement are key for achieving that just-right stitch length.
Cam Profiles for Forward and Reverse Movement
Ever wondered how your Sewing Machine knows when to go forward or backward?
It’s all thanks to the cam profiles – the unsung heroes of your stitching adventures.
These nifty little cams are like the brain of your stitch length mechanism, dictating whether you’re moving full steam ahead or backing up like a pro.
Understanding these profiles can help you master your machine’s moves and achieve stitch length consistency that’ll make your sewing buddies green with envy.
Tension Spring and Its Role
You’ve got a secret weapon in your sewing machine: the tension spring! This tiny powerhouse plays a key role in your stitch length mechanism. Here’s what you need to know:
- It regulates thread tension
- It affects stitch formation
- It influences overall stitch quality
Think of it as the unsung hero of your stitches. By mastering tension spring adjustment, you’ll be well on your way to achieving those perfect, pro-level seams you’ve always dreamed of!
Needle Bar and Presser Foot Interaction
Ever wonder how your needle and presser foot work together like a well-oiled machine?
It’s all about the dance between the needle bar and presser foot.
As the needle bar moves up and down, the presser foot keeps your fabric in check.
This dynamic duo controls your stitch length and width, ensuring each seam is picture-perfect.
Get these two in sync, and you’ll be stitching like a pro in no time!
Locating the Stitch Length Adjustment Dial
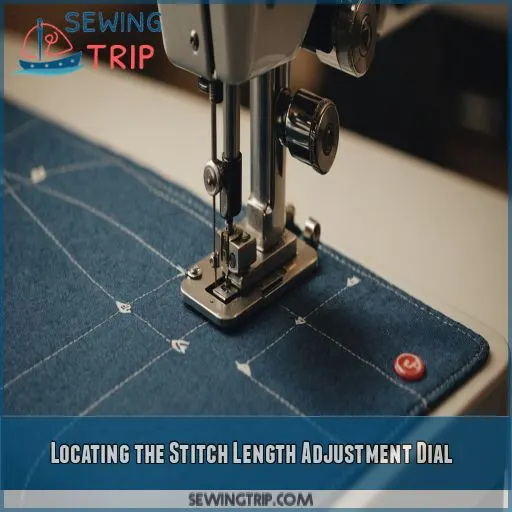
Finding your sewing machine’s stitch length dial can be like a treasure hunt, but fear not! It’s usually front and center, waiting for you to get the most out of it. Think of it as your machine’s secret weapon for perfect stitches. Here’s where you might spot this elusive dial:
- Front panel: Often nestled among other adjustment knobs
- Side of the machine: Sometimes hiding in plain sight
- Top of the machine: Peeking out near the thread guide
- Inside a flip-up compartment: For those who love a good surprise
Types of Stitch Length Controls
You’ll find a variety of stitch length controls on modern sewing machines, each offering unique advantages for precise adjustments. Whether you prefer the tactile feel of manual dials or the convenience of digital displays, understanding these control types will help you master your machine’s stitch length capabilities.
Manual Dial Adjustments
Now that you’ve found the stitch length dial, let’s talk about manual adjustments.
It’s like fine-tuning a radio – you’ll need a gentle touch.
Turn the dial clockwise for shorter stitches, counterclockwise for longer ones.
Keep an eye on the needle plate markings; they’re your roadmap to perfect stitches.
Digital Display Controls
You’ll love digital display controls for stitch length – they’re like having a high-tech tailor at your fingertips! These user-friendly interfaces offer:
- Crystal-clear readouts
- Precise adjustments down to fractions of a millimeter
- Customizable settings for your favorite projects
No more squinting at tiny dials or guessing if you’ve got it just right. With digital accuracy, you’ll be stitching like a pro in no time. It’s so easy, even your cat could do it (if they’d opposable thumbs)!
Automatic Stitch Length Systems
Building on digital displays, automatic stitch length systems take precision to the next level. These smart systems adjust stitch length on the fly, ensuring consistent results across various fabrics. You’ll love how they simplify your sewing experience:
| Feature | Benefit | Example |
|---|---|---|
| Auto-calibration | Perfect accuracy | Adjusts for thick denim |
| Programmable presets | Time-saving | Store settings for quilts |
| Adaptive feed | Smooth sewing | Tackles stretchy knits easily |
With these systems, you’re the boss, but your machine’s got your back. It’s like having a tiny sewing expert right at your fingertips!
Integrated Touchscreen Interfaces
Sewing is going digital with touchscreen interfaces.
These high-tech helpers are found on modern sewing machines.
They offer a smooth user experience.
With a tap, you can adjust stitch length and save settings quickly.
Touchscreen interfaces often come with customization options.
Setting the Correct Stitch Length
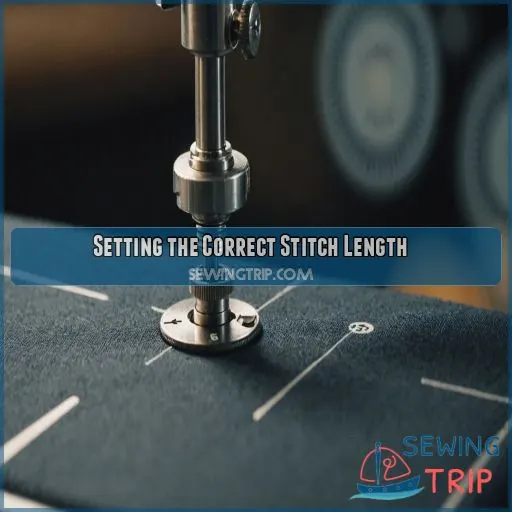
You’re about to become a stitch length pro, mastering the art of perfect seams and flawless finishes. Whether you’re sewing delicate silk or sturdy denim, we’ll show you how to dial in the ideal stitch length for any project, considering fabric type, thread weight, and needle size.
Standard Stitch Length Measurements
Ever feel like you’re playing a guessing game with stitch lengths?
Let’s crack that code!
Standard stitch lengths typically range from 2 to 5 mm.
Think of it like Goldilocks – not too long, not too short, but just right.
For most projects, 2.5 mm is your sweet spot.
It’s like the trusty Swiss Army knife of stitch lengths, versatile enough for various tasks.
Fabric Type Considerations
When adjusting stitch length, your fabric’s the star of the show.
Think of it as giving your material its own tailor-made fit!
Heavier fabrics like denim crave longer stitches, while delicate silks prefer a shorter, tighter embrace.
Got a stretchy knit? Go for a longer stitch to maintain flexibility.
It’s all about finding that sweet spot for your fabric’s personality!
Thread Weight and Needle Size Factors
You’ve nailed fabric choice, but don’t forget about thread and needles! They’re the dynamic duo of stitch perfection. Thicker threads need longer stitches to prevent bunching, while finer threads can handle shorter ones. As
Project-Specific Length Requirements
Beyond thread and needle, your project’s needs dictate the perfect stitch length.
Quilting? Go shorter for strength.
Knits? Longer stitches prevent puckering.
Seam allowances and fabric weight play their part too.
Don’t forget your machine’s personality – a walking foot might be your best friend for 3D projects.
Troubleshooting Common Stitch Length Issues
You’ve set your stitch length, but something’s not quite right? Don’t worry, we can help you troubleshoot common stitch length problems. From stubborn dials to reverse stitching woes, we’ll help you diagnose and fix these pesky problems faster than you can say "bobbin thread.
Inconsistent Stitch Lengths
Ever feel like your stitches are playing hopscotch?
Inconsistent stitch lengths can turn your project into a hot mess.
Check your fabric’s grip on those feed dogs – they’re the unsung heroes of smooth stitching.
Next, give your thread tension a once-over.
It might be tighter than your great-aunt’s corset!
Don’t forget to match your needle size to your thread weight for a perfect pairing.
Stitch Length Not Changing Despite Adjustments
Is your stitch length dial stuck in a rut? Don’t throw in the towel just yet! When your trusty machine isn’t responding to adjustments, it’s time to play detective. Here are some common culprits:
- Dust buildup gumming up the works
- Broken linkage in the adjustment mechanism
- Incorrect tension throwing off the whole system
Try giving your machine a good clean, check for any visible damage, and double-check those tension settings. You might just crack the case!
Reverse Stitch Malfunctions
Is your reverse stitch giving you grief? Don’t throw in the towel just yet! Reverse stitch malfunctions can turn your sewing project into a comedy of errors.
Check if the reverse button’s stuck or the mechanism’s clogged with lint. A stubborn pre-tension spring might be the culprit too.
If all else fails, it’s time to call in the pros.
Feed Dog Problems Affecting Stitch Length
Ever feel like your sewing machine’s gone rogue?
Feed dog troubles might be the culprit!
These little teeth can make or break your stitch game.
If they’re too low, your fabric might slip around like a kid on a Slip ‘N Slide.
Too high? You’ll end up with skipped stitches faster than you can say "bobbin."
Don’t fret!
Adjusting feed dog height is easier than you think.
Maintaining the Stitch Length Mechanism
You’re just a few tweaks away from achieving perfect stitches – and it all starts with maintaining your trusty stitch length mechanism. By regularly cleaning, lubricating, and inspecting this important component, you’ll be able to make precise adjustments and troubleshoot common issues with ease.
Regular Cleaning and Lubrication
To keep your stitch length mechanism humming, regular cleaning and lubrication are key. Use a soft brush and cotton swabs to gently remove dust and debris. Apply a few drops of sewing machine oil to the designated points, like the handwheel and centralized oil wick. Check your manual for the recommended frequency and lubricant type.
Inspecting for Wear and Damage
Now it’s time to play detective! Inspect your stitch length mechanism for wear and damage.
Check the feed dog condition, needle wear, and cam for any signs of trouble.
Don’t forget the tension spring, stitch plate, and feeler finger.
A damaged thread guide or handwheel can also throw off your stitch length.
Keep your machine in top shape for perfect stitches every time!
Adjusting Tension Settings
To adjust tension settings, start by checking your top thread tension and bobbin tension. Make sure they’re balanced for your fabric type, needle size, and thread weight. Here are some tips to get you started:
- Use a heavier thread weight for thicker fabrics
- Adjust bobbin tension for smooth, even stitches
- Don’t overtighten top Thread Tension – it can cause puckering
- Use a thread cutter or trimmer to keep threads tidy
- Wind your bobbin thread carefully to avoid tangles
Calibrating the Stitch Length System
Now that you’ve adjusted the tension settings, it’s time to calibrate the stitch length system.
Think of it like fine-tuning your favorite recipe – a little tweak here, a pinch there.
Refer to your machine’s manual or online troubleshooting guides for specific calibration steps.
Proper calibration helps you stitch smoothly and consistently, especially when working with high-speed performance or 3-dimensional sewing projects.
Advanced Stitch Length Adjustment Techniques
As you master the basics of stitch length adjustment, it’s time to take your skills to the next level with advanced techniques that will help you tackle even the most challenging projects.
You’ll learn how to fine-tune your stitch length for decorative stitches.
You’ll also learn how to adjust for thick or layered fabrics.
You’ll learn how to compensate for stretch materials.
You’ll even learn how to create custom stitch patterns that will make your sewing projects truly stand out.
Fine-Tuning for Decorative Stitches
Now that you’ve mastered maintaining your stitch length mechanism, it’s time to get creative! Fine-tuning for decorative stitches is all about experimentation. Play with stitch density, zigzag width, and thread choice to achieve unique effects. Adjust your stitch spacing to create intricate designs. With a little practice, you’ll be whipping up stunning decorative stitches like a pro.
Adjusting for Thick or Layered Fabrics
Adjusting for thick or layered fabrics requires finesse.
You’ll want to increase feed dog pressure and use a longer stitch length for smooth sailing.
Compare stitch lengths on scrap fabric to find the sweet spot.
For layered fabrics like denim or canvas, switch to a heavier-duty needle and tweak tension settings.
Don’t forget to adjust your foot holder for good fabric control.
Compensating for Stretch Materials
Compensating for stretch materials requires finesse! To tame the stretchy beast, consider these tips:
- Adjust tension settings to prevent puckering
- Test stitch length on a scrap piece of fabric
- Use a walking foot or Teflon foot for smooth feeding
- Align fabric grain carefully to prevent distortion
Creating Custom Stitch Patterns
Time to get creative! With advanced stitch length control, you can create custom patterns that elevate your sewing projects. Experiment with software tools, embroidery techniques, and fabric choices to design unique stitch patterns. Don’t be afraid to push boundaries – and remember, an extension table and double-capacity hook can be your best friends in this creative journey!
Impact of Stitch Length on Sewing Projects
You’re probably wondering how stitch length affects your sewing projects – well, it’s more than just a matter of aesthetics. The right stitch length can make or break the durability and functionality of your seams, so let’s explore how to get it just right.
Seam Strength and Durability
Seam strength and durability depend a lot on stitch length.
A shorter stitch can make a stronger seam, but it might not be the best choice for thicker fabrics.
Think about how heavy your fabric is, how tight your thread is, and how fast you’re sewing when you adjust your stitch length.
And don’t forget to pick the right needle for the job!
Aesthetic Considerations in Visible Stitching
Now that you’ve mastered seam strength and durability, let’s talk aesthetics! When it comes to visible stitching, stitch length can make or break the look. Here are three things to keep in mind:
- Stitch type: Match your stitch type to your fabric texture for a cohesive look.
- Thread color: Choose a thread color that blends with your fabric for a seamless finish.
- Stitch spacing: Adjust your stitch length to achieve a beautiful, even hand-stitched look.
Functional Applications of Various Lengths
Now that you’ve mastered the art of visible stitching, it’s time to explore the functional side of stitch length. Different lengths serve various purposes, like reinforcing seams for heavy-duty projects or creating a loose, airy texture for delicate fabrics. Consider your project’s needs and adjust your stitch length accordingly to achieve the perfect balance of seam strength and fabric gathering.
Fabric Puckering and Gathering Effects
As you tweak your stitch length, remember that fabric puckering and gathering can be friends or foes. To avoid unwanted gathering, adjust your tension settings and needle size according to your fabric type. For a smooth finish, balance stitch density and seam allowance. Don’t be afraid to experiment – it’s all about finding that sweet spot for your project!
Stitch Length Variations Across Machine Models
As you learn about sewing machines, you’ll notice that stitch length variations can be a game-changer, depending on the type of machine you’re using. From domestic to industrial, vintage to modern, and computerized to mechanical, understanding the differences in stitch length capabilities will help you get the most out of your machine.
Domestic Vs. Industrial Machine Differences
When it comes to stitch length, domestic and industrial machines have distinct differences. Domestic machines offer a moderate stitch length range, suitable for casual sewing projects. Industrial machines, on the other hand, provide an extensive range, higher speed capabilities, and more motor power, making them perfect for heavy-duty sewing, large-scale production, and handling thicker threads and fabrics.
Brand-Specific Stitch Length Features
Now that we’ve explored domestic vs. industrial machine differences, let’s talk about brand-specific stitch length features. Your machine’s brand can greatly impact your stitching experience. Here are some exciting features to look out for:
- A wide stitch length range for ultimate flexibility
- Top-stitch options for added texture and style
- Built-in patterns to take your sewing to the next level
- Needle position control for precision and accuracy
Vintage Vs. Modern Machine Capabilities
If you’re thinking about stitch length, vintage and modern machines have some differences. Vintage machines often require more manual adjustments, while modern machines offer advanced stitch control and higher speeds. However, modern machines can be more prone to errors and require more maintenance. Here’s a comparison of vintage and modern machine capabilities:
| Feature | Vintage Machines | Modern Machines |
|---|---|---|
| Stitch Control | Manual adjustments | Automated stitch control |
| Speed | Up to 500 stitches/min | Up to 3,000 stitches/min |
| Durability | Robust and long-lasting | More prone to errors and wear |
| Maintenance | Simple and infrequent | Regular software updates and cleaning |
| Customization | Limited options | Extensive stitch options and customization |
Computerized Vs. Mechanical Control Systems
Now that we’ve explored vintage and modern machine capabilities, let’s talk about computerized versus mechanical control systems.
Computerized systems offer accuracy and reliability.
However, they also come with a higher cost and maintenance requirements.
Mechanical systems, on the other hand, provide a more tactile experience and lower cost.
However, they may require more adjustments for the best stitch length.
Ultimately, the choice comes down to your user experience preferences.
Professional Tips for Optimal Stitch Length Control
As you master the art of adjusting your stitch length mechanism, you’ll want to take your skills to the next level with expert tips that’ll make your stitches truly shine. From pre-testing on scrap fabric to documenting your go-to settings, these insider secrets will help you achieve perfect stitches every time, no matter the project or fabric.
Pre-Testing on Scrap Fabric
Before starting your actual project, test your stitch length on scrap fabric. It’s like baking a test cake – you want to make sure the ingredients (thread tension, needle size, and fabric type) are just right. This step saves you from potential disasters and guarantees a professional finish. It’s your chance to fine-tune and get that perfect stitch quality.
Adjusting on the Fly During Sewing
Adjusting on the fly during sewing? You’re a daredevil! Seriously, it’s a skill that requires finesse. To master it:
- Keep an eye on your fabric: Different types react differently to stitch length changes.
- Choose the right needle: A sharp one will make adjustments smoother.
- Control your speed: Slow down when adjusting to avoid messy stitches.
Combining Different Lengths in One Project
When combining different stitch lengths in one project, think of it like cooking a recipe – you need the right ingredients in the right proportions. Consider your project goals, fabric types, and seam strength requirements. Mix and match stitch lengths to achieve the perfect blend of decorative stitches and functional seams, making smooth stitch changes a breeze.
Documenting Successful Settings for Future Use
Now that you’ve mastered combining different stitch lengths, it’s time to document your successes for future reference. Keep a sewing journal or project notes to track your stitch logs, fabric chart, and settings database. This habit will save you time and frustration in the long run. Think of it as your own secret recipe book for perfect stitches!
Frequently Asked Questions (FAQs)
How do you adjust the stitch length of a sewing machine?
To adjust your sewing machine’s stitch length, locate the stitch length dial or control, turn it to the desired setting, and check your manual for specific instructions, as the process may vary between machines (Source).
Which part of the sewing machine adjusts the length of the stitch?
Get a grip on your stitch length! You adjust it using the stitch length dial, which controls the feeder movement. This dial is usually located on the top of your sewing machine, so it’s easy to find and use.
What is the stitch length control?
You’re in control! The stitch length control is typically a dial or button on your sewing machine that allows you to adjust the length of your stitches, giving you mastery over your sewing projects.
How do you control the length of the stitches?
You control the length of stitches by adjusting the stitch length dial, which engages the feeder movement. Make sure to check your machine’s manual for specific instructions and troubleshooting tips to master this important sewing skill!
What causes uneven stitch lengths despite proper adjustment?
Uneven stitch lengths got you stumped? Check if the stitch length mechanism is clogged or if the feed dogs are moving at the right pace, and make sure tension settings are spot on for your thread and fabric combo.
Can stitch length be adjusted during continuous sewing?
You’re in control! With the right machine, like the DNU-1541 Series, you can adjust stitch length during continuous sewing. Simply use the stitch dial to select your desired length, and the machine will take care of the rest.
How does stitch length impact fabric type and weight?
When talking about fabric, you’re all in the same boat – each type has its own unique needs. Thicker fabrics require longer stitches, while delicate ones need shorter ones to prevent damage and create a smooth finish.
What is the ideal stitch length for quilting projects?
For quilting projects, you’ll want a stitch length that’s just right – not too tight, not too loose. Aim for 5-5 mm, depending on the fabric and batting thickness, to get a smooth, even finish.
Can stitch length mechanisms be replaced or upgraded?
Your trusty sewing machine’s stitch length mechanism is on the fritz! Can you replace or upgrade it? Absolutely! With a few tweaks and some expert know-how, you’ll be sewing like a pro in no time – upgrade away!
Conclusion
You’ve figured out the secret to perfect stitches by adjusting the stitch length mechanism.
You’re now the master weaver!
With these 10 pro secrets, you can confidently tackle a wide range of fabrics and projects.
Remember to fine-tune your stitch length for each new project, and don’t be afraid to experiment.
Happy sewing! Your perfectly stitched creations will thank you for mastering the art of adjusting stitch length.

