This site is supported by our readers. We may earn a commission, at no cost to you, if you purchase through links.
Start with hand stitches like running stitch for quick fixes and backstitch for strong seams.
Machine sewing isn’t rocket science – just thread your needle, adjust tension, and use the right presser foot.
French seams and overlock edges prevent fraying like magic.
Working with fabric grain matters more than you’d think – it’s the difference between a wonky sleeve and professional results.
Don’t worry if your first attempts look like a toddler’s art project.
Even seasoned sewers still battle tangled thread sometimes.
The real game-changers come with understanding tension settings and specialty techniques.
Table Of Contents
Key Takeaways
- You’ll master essential hand stitches like running stitch and backstitch first, then progress to machine sewing by learning proper threading, tension adjustment, and presser foot usage for professional results.
- You’ll achieve better garment construction by understanding fabric grain direction, choosing appropriate seam finishes, and practicing on scraps before working on actual projects to avoid costly mistakes.
- You’ll transform basic projects into professional-looking pieces by mastering specialty techniques like installing zippers, creating darts and pleats, and adding interfacing and lining for structure and finish.
- You’ll build confidence through consistent practice with simple projects like drawstring bags using cotton fabric, gradually advancing to more complex techniques like working with knits and creating mitered corners.
Basic Sewing Techniques
You’ll master sewing faster than your favorite shirt falls apart when you learn these basic techniques that every sewist needs to know.
These fundamental skills will transform you from someone who panics at loose buttons into a confident crafter who can tackle any fabric challenge with the right stitch for every situation.
Master these basics and watch panic transform into pure sewing confidence—one perfect stitch at a time.
Hand Sewing Fundamentals
Before diving into hand sewing fundamentals, master needle threading and knot tying—your gateway to confident stitching!
Start with basic hand stitches like the running stitch, which forms the backbone of all sewing techniques.
Focus on fabric control as you practice consistent stitch lengths.
These sewing basics build muscle memory for creating invisible seams.
Remember, every expert started with wobbly first stitches—embrace the learning curve and enjoy each small victory!
Machine Sewing Basics
Your sewing machine becomes your best friend once you master the fundamentals.
Start with machine threading—it’s essential for perfect stitches every time. Practice straight stitch on scrap fabric to develop speed control and understand fabric feeding. Focus on maintaining consistent seam allowance for professional results.
A good resource is a machine threading guide for assistance. Stitch selection opens up creative possibilities, but don’t rush into fancy options yet.
Master the basics first! Regular maintenance keeps your machine humming smoothly. With patience and practice, machine sewing basics become second nature, transforming your sewing stitches from wobbly to wonderful.
Essential Stitches
You’ll master these fundamental stitches that form your sewing foundation.
Each offers unique stitch strength and fabric compatibility for different projects:
- Running Stitch: Quick basting and gathering with adjustable tension control
- Backstitch: Unbreakable seams with superior stitch strength for durability
- Slip Stitch: Invisible hems that disappear into your fabric
- Overcast Stitch: Raw edge protection preventing fraying
These essential stitches open up countless sewing techniques and decorative stitches ahead!
Seam Finishes
Now that you’ve got your stitches down pat, let’s talk about keeping those seams looking sharp and lasting longer.
Seam finishes prevent fraying and give your projects that polished look.
French seams wrap raw edges for delicate fabrics, while Flat Felled Seams create sturdy joints perfect for jeans.
Overlock stitches quickly seal edges, and Bound Seams with bias tape add professional flair.
The Hong Kong Finish works wonders on unlined jackets.
Choose your finish based on fabric weight and project needs.
Sewing Machine Operations
Your sewing machine can feel like a stubborn friend at first, but once you learn its basics, it’ll become your most reliable crafting companion.
We’ll walk you through threading, tension adjustments, presser feet, and fixing those pesky problems that make you want to throw fabric across the room.
Threading The Machine
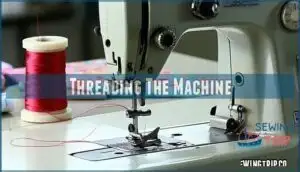
Properly threading your sewing machine usually makes the difference between perfect stitches and tangled frustration. Start by following your machine’s specific thread path—it’s like following breadcrumbs through a forest. Each machine has its own route, so don’t wing it.
Here’s your threading roadmap:
- Check Thread Types for weight and quality before starting
- Follow the Thread Path exactly as your manual shows
- Guide thread gently through Tension Discs without forcing
- Use a Needle Threader when your eyes get tired
Bobbin Winding comes next—wind it evenly and snugly. Make certain you properly place spool on pin before winding. Keep your manual nearby for quick reference checks.
Adjusting Tension
Once you’ve got your sewing machine threaded properly, it’s time to tackle tension adjustment—the make-or-break skill that separates amateur work from professional results.
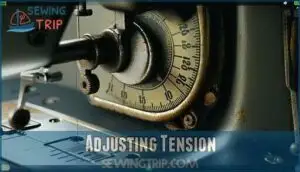
Perfect machine tension creates balanced stitches where upper and bobbin threads lock together beautifully in the fabric’s center. Start with your sewing machine’s default setting of 4.5, then test on scrap fabric using your project’s exact thread type and fabric compatibility.
| Tension Issue | What You’ll See | Quick Fix |
|---|---|---|
| Too Tight | Fabric puckering, thread breaks | Lower tension dial number |
| Too Loose | Loops on fabric surface | Raise tension dial number |
| Bobbin Problems | Uneven stitch quality | Check bobbin tension screw |
| Thread Jamming | Bunched fabric underneath | Re-thread and adjust gradually |
| Perfect Balance | Smooth, even stitches | No adjustment needed! |
Tension troubleshooting requires patience and practice. Make small adjustments—one number at a time on your tension dial. Test each change on fabric scraps before touching your actual project. Remember, different thread types and fabrics need different settings, so don’t expect one setting to work for everything you sew. It’s about finding the perfect balance for your specific project, which leads to professional results and smooth, even stitches. With practice, you’ll master the art of tension adjustment and achieve beautifully balanced stitches every time.
Using Presser Feet
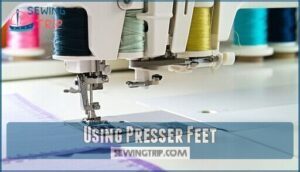
When you’re ready to level up your sewing game, presser feet become your best friends.
These sewing machine accessories transform ordinary stitching into professional-quality work by controlling fabric flow and stitch precision.
Think of using presser feet like switching golf clubs—each one tackles specific jobs:
- Zipper Foot: Hugs close to zipper teeth for clean installations
- Button Attachment foot: Secures buttons with consistent spacing
- Blind Hemming foot: Creates invisible hems that look store-bought
- Adjustable Presser feet: Handle varying fabric thicknesses effortlessly
- Specialty Feet: Include walking feet for quilting and darning feet for embroidery
Your sewing machine feet collection grows as your skills develop.
A good starting point is to find a specialized zipper foot for your sewing machine.
Start with basic sewing machine presser feet, then expand based on your favorite projects.
Troubleshooting Common Issues
Why does your sewing machine act up when you need it most? Don’t panic—troubleshooting’s easier than threading a needle in the dark!
| Problem | Quick Solution |
|---|---|
| Tension Problems | Balance upper and bobbin settings |
| Needle Issues | Replace with correct size for fabric |
| Fabric Puckering | Check presser foot pressure |
| Skipped Stitches | Insert fresh needle, rethread machine |
When Bobbin Snags happen, clean the bobbin case thoroughly. Regular sewing machine maintenance prevents most headaches. Remember: proper threading and adjusting tension solve ninety percent of issues. Keep your machine happy, and it’ll keep you stitching smoothly!
Essential Sewing Skills
You’ll build confidence fast when you master these core sewing skills that separate beginners from pros.
Learning to work with fabric grain, identify different materials, use specialty tools, and sew smooth curves will make every project look polished and professional.
Working With Fabric Grain
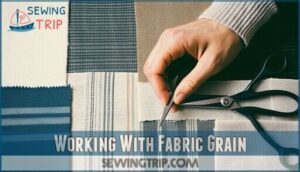
Understanding fabric grainline transforms your sewing from amateur to professional. The fabric grainline runs parallel to the selvage and acts as your project’s roadmap. When you match grain direction properly, your garments hang beautifully and maintain their shape.
Bias cutting creates flowing movement, while straight grain provides stability. Pattern layout follows these invisible guidelines to prevent twisted seams and wonky hems. Knowing how to check selvage edges is essential for identifying the lengthwise grain.
- Grain direction determines how your finished garment drapes and moves
- Woven fabrics have stronger stability along the straight grain
- Bias cutting allows fabric to stretch and flow naturally
- Grain matching prevents puckering and distortion in seams
- Fabric stability depends on respecting the grainline during cutting
Identifying Fabric Types
Smart fabric selection starts with detective work—you’re solving the mystery of what’s in your hands! Understanding fabric types transforms your sewing from guesswork into confident choices.
Your fabric holds secrets—become the detective who unlocks perfect project choices through smart selection!
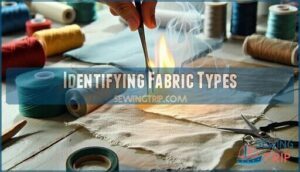
The burn test reveals fiber content secrets. Snip a small sample, light it carefully in a controlled space, and watch the magic happen.
| Fiber Type | Burn Behavior | Key Clue |
|---|---|---|
| Cotton | Burns quickly with yellow flame | Smells like burning paper |
| Polyester | Melts into hard black beads | Sweet chemical odor |
| Wool | Self-extinguishes immediately | Burnt hair smell |
| Silk | Curls away from flame | Hair-like burning scent |
Fabric properties like weight and drape characteristics complete your identification. Feel the texture, check weave structures, and consider fabric weights—these clues guide perfect fabric selection for every project’s needs.
Using Specialty Tools
Beyond basic scissors and pins, specialty sewing tools transform your projects from amateur to amazing.
Rotary cutters slice through multiple fabric layers like butter, while seam rippers fix mistakes without tears.
Point turners create crisp corners on collars and cuffs.
A tailor’s ham helps press curved seams perfectly.
Awls and pouncers mark fabric precisely.
These tools aren’t just fancy gadgets—they’re your secret weapons for professional-looking results every time.
Many sewers find specialized cutting tools invaluable.
Mastering Curves and Corners
Curves and corners can feel tricky, but they’re totally manageable! Clipping curves prevents puckering—snip little notches without cutting your seam.
For pivoting corners, stop with your needle down, lift the presser foot, and rotate your fabric smoothly.
Mitering techniques create crisp angles, while facing application and understitching edges give professional results. Practice makes perfect!
Garment Construction Basics
You’ve mastered the basic stitches, and now it’s time to put those skills to work building actual garments that people will want to wear.
Think of garment construction as the exciting moment when your fabric pieces transform from flat patterns into three-dimensional clothing, complete with zippers that actually zip, darts that create shape, and linings that make everything feel professionally finished.
Attaching Closures
Attaching closures transforms your sewing from amateur to professional.
You’ll master button placement, snap fasteners, and hook-eye closures with practice.
Here’s your game plan:
- Match closures to fabric weight – heavy snaps need sturdy material, delicate buttons suit lightweight fabrics
- Mark placement precisely – measure twice, attach once saves headaches later
- Use proper presser feet – zipper feet aren’t just for zippers, they’re perfect for close-edge work
Sewing Zippers
Zippers transform ordinary projects into professional-looking garments when you know the right techniques.
Choose your zipper types carefully—invisible zippers create seamless finishes while regular zippers add functional style. Match zipper length to your project’s needs, then grab the proper zipper feet for your machine.
Invisible zipper installation becomes easier with an invisible zipper foot that guides fabric perfectly. Practice sewing zipper installation on scraps first.
Addressing wavy fabric issues during installation can greatly improve the final look. Soon, zipper replacement and zipper repair won’t intimidate you—they’ll feel like second nature!
Creating Darts and Pleats
Perfect zippers deserve perfect shaping! Creating darts and pleats transforms flat fabric into three-dimensional fashion.
Dart manipulation sculpts curves while pleat variations add structure or volume. Your fabric choice affects these shaping techniques—lightweight cottons fold beautifully, while heavy wools need wider seam allowances.
Master these garment construction basics with pattern adjustments:
- Mark dart legs precisely for professional results
- Press pleats before stitching to prevent shifting
- Test on scraps first to avoid costly mistakes
- Use sharp scissors for clean fold lines
- Pin generously to secure fabric layers
These basic sewing techniques create custom-fitted garments that flatter your figure perfectly.
Adding Lining and Interfacing
Now that you’ve mastered darts and pleats, let’s explore adding lining and interfacing – the secret ingredients that transform homemade into handmade masterpieces.
These garment construction basics aren’t just fancy extras; they’re your fabric’s best friends.
Interfacing types range from fusible vs sew-in options, each offering shape retention for collars and cuffs.
Lining fabrics create smooth interiors while adding fullness where needed.
- Fusible interfacing bonds with heat for quick application
- Sew-in interfacing offers flexibility for delicate fabric types
- Lining protects your skin from scratchy seams
- Interlining adds warmth between outer fabric and lining
- Underlining gives structure to flimsy materials
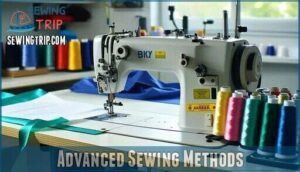
Advanced Sewing Methods
You’ve mastered the basics, and now it’s time to tackle the tricky stuff that’ll make your projects look store-bought.
These advanced methods will turn your wobbly knit fabric wrestling matches and gathering disasters into smooth victories that’ll have you wondering why you waited so long to learn them.
Working With Knit Fabrics
Knit fabrics stretch like rubber bands, making them trickier than woven materials.
You’ll need ballpoint or stretch needles to slip between fibers without snagging.
Test your sewing machine tension on scraps first—too tight creates puckered seams.
Always identify stretch direction before cutting.
To maintain even fabric feed, consider using a walking foot attachment.
Use stretch stitches or narrow zigzag for seams that won’t pop when stretched.
Sewing Elastic and Gathering
Before tackling elastic types and gathering methods, check your fabric weight and adjust stitch settings accordingly.
Lightweight fabrics need gentle tension control, while heavier materials require stronger settings.
These sewing techniques for beginners transform ordinary seams into professional finishes.
Master basic sewing techniques by practicing sewing elastic and gathering on scraps first—your future projects will thank you!
Creating Mitered Corners
Mitered corners transform ordinary projects into professional masterpieces.
Angle accuracy matters—fold your fabric choice at exactly 45 degrees to eliminate bulk.
Measure your seam allowance carefully, then use proper pressing techniques to create crisp edges.
Reinforcement stitching prevents corners from pulling apart over time.
These basic sewing techniques work perfectly on quilts, napkins, and tablecloths.
Master these sewing basics and your seams will look store-bought every single time!
Altering and Fitting Garments
Four simple steps transform ill-fitting clothes into perfect garments.
Start by taking accurate Body Measurements, then create Muslin Mockups to test fit before cutting expensive fabric.
Pattern Adjustments help you customize sizing, while proper Alteration Tools make precise changes possible.
- Tackle common Fitting Issues like gaping necklines with confidence
- Master sewing garment construction through hands-on practice
- Use sewing body measurement techniques for custom fits
- Achieve sewing perfect measurement with careful planning
- Turn garment repair into satisfying creative projects
Smart altering and fitting garments saves money while building essential skills.
Frequently Asked Questions (FAQs)
What is the basic sewing technique?
Imagine this scenario: you’re mending your favorite shirt’s torn seam.
You’ll start with the running stitch – simply weave your needle and thread over and under the fabric in even intervals.
It’s sewing’s foundation technique, which is a complete concept that you will use as the basis for more complex stitches.
What are the four basic sewing processes?
You’ll master sewing by learning these essential processes: cutting fabric accurately, pinning pieces together securely, stitching seams with consistent tension, and pressing finished work properly.
These steps form your foundation for every project.
What are the 10 basic stitches?
You’ll master these essential stitches: running, backstitch, slip, overcast, blanket, chain, catch, hem, basting, and cross stitch.
Each serves specific purposes from securing seams to decorative finishing touches in your projects, utilizing techniques like the backstitch.
What is the first thing a beginner should sew?
Ready to begin your first sewing adventure?
Start with a simple drawstring bag using cotton fabric.
You’ll practice straight stitches, seams, and hemming without complex curves or fitting issues.
It’s practical and builds confidence quickly.
What are the 5 basic stitches?
You’ll need these five essential stitches: running stitch for quick basting, backstitch for strong seams, slip stitch for invisible hems, overcast stitch to prevent fraying, and blanket stitch for decorative edges.
What is the easiest sewing technique?
Just like riding a bike, you’ll find the running stitch comes naturally.
Simply weave your needle up and down through fabric in even spaces.
It’s perfect for basting, gathering, and basic seams.
How do I fix a broken sewing machine needle?
Turn off your machine and unplug it first.
Remove the needle plate carefully, then pull out any broken needle pieces with tweezers.
Insert a new needle, making sure it’s pushed all the way up and tightened securely.
What fabric works best for beginners?
Cotton fabrics make perfect practice partners for new sewers.
They’re forgiving, affordable, and won’t slip around like silk.
Start with quilting cotton or lightweight canvas—they’ll behave beautifully while you master your stitches.
How much should I invest in equipment?
Your first machine doesn’t need bells and whistles—you’ll outgrow it anyway.
Start with a basic model around $150-300, decent scissors for $25, and essential notions.
Quality matters more than quantity when building your sewing toolkit.
Can I learn sewing without taking classes?
You can master sewing through online tutorials, YouTube videos, and practice. Start with basic stitches, use beginner-friendly patterns, and don’t be afraid to make mistakes—they’re your best teachers.
Conclusion
You’ve just navigated the wonderful world of needle and thread without losing your sanity.
These basic sewing techniques explained here will transform you from someone who’s afraid of sharp objects into a confident creator.
Remember, every expert seamstress once struggled with tangled thread and wonky seams.
Practice makes progress, not perfection.
Start with simple projects, embrace your mistakes as learning opportunities, and soon you’ll be stitching like you’ve been doing it for years, which will lead to happy sewing.
Happy sewing!

