This site is supported by our readers. We may earn a commission, at no cost to you, if you purchase through links.
Most pedal problems stem from frayed wires near the plug or inside the housing.
Unplug your machine and inspect the entire cord length for cracks or exposed wires.
Open the pedal casing to examine internal connections – they often work loose from vibration.
Clean out lint buildup around contacts and moving parts with compressed air.
Test continuity with a multimeter if you have one.
Simple wire splicing or reconnecting loose terminals fixes most issues.
Some pedals need new carbon discs or resistors, but wire problems cause ninety percent of failures.
Table Of Contents
- Key Takeaways
- Foot Pedal Basics
- Common Foot Pedal Issues
- Troubleshooting Foot Pedals
- Repairing Foot Pedals
- Top 9 Foot Pedal Repairs
- 1. Brother Sewing Machine Foot Pedal Controller
- 2. HONEYSEW Sewing Machine Foot Control Pedal
- 3. Janome Kenmore Sewing Machine Pedal Cord
- 4. Brother Sewing Machine Foot Control Pedal
- 5. HONEYSEW Singer Sewing Machine Air Pedal
- 6. Janome Sewing Machine Foot Control
- 7. Fiskars Rotary Cutter Sewing Set
- 8. Fiskars Sewing Quilting Ruler 3×18 Inch
- 9. Upholstery Repair Kit Heavy Duty
- Preventing Foot Pedal Damage
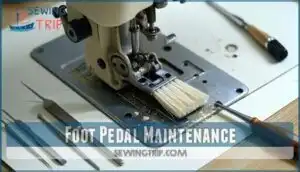
- Foot Pedal Maintenance
- Fixing Electrical Problems
- Advanced Foot Pedal Repair
- Frequently Asked Questions (FAQs)
- Conclusion
Key Takeaways
- Check your cord first – 90% of foot pedal problems stem from frayed wires or loose connections near the plug, so you will want to inspect the entire cord length for damage before attempting other repairs.
- Clean out debris regularly – Lint buildup around contacts and moving parts causes friction and slower response, but you can restore smooth operation by using compressed air to remove accumulated dust and grime.
- Test electrical continuity – You will need a multimeter to identify broken wires and faulty connections inside the pedal housing, which helps you pinpoint exactly what needs repair rather than guessing.
- Master basic wire repairs – Simple wire splicing and reconnecting loose terminals fix most pedal failures, so you will save money and time by learning these fundamental electrical repair techniques.
Foot Pedal Basics
Your sewing machine’s foot pedal controls power and speed through two main types.
Mechanical pedals use a physical lever to switch power on and off, while electronic pedals stay powered and control speed through foot pressure, utilizing mechanical components is not their primary function.
Mechanical Foot Pedals
Mechanical foot pedals use lever mechanics to control your sewing machine’s power.
Simple lever pressure turns your machine on and off instantly.
These simple devices rely on physical components like springs and switches to operate your machine effectively.
- Lever Mechanics: Physical lever activates when you press down
- Spring Tension: Controls pedal return and resistance feel
- Switch Replacement: Simple on/off mechanism underneath pedal
- Wiring Diagrams: Basic electrical connections power the machine
- Pedal Calibration: Adjusts sensitivity and response timing
The mechanical foot pedal inspection reveals straightforward construction.
During foot pedal disassembly, you’ll find minimal internal parts.
The repair process focuses on the pedal mechanism’s moving components.
Electronic Foot Pedals
Electronic foot pedals work differently than mechanical ones. You’ll find constant power flowing through these models.
Electronic Sensors detect your foot pressure and send signals to Circuit Boards for Speed Regulation.
Port Compatibility matters when connecting your electronic foot pedal to different machines. Pedal Calibration guarantees accurate response.
These systems use electrical wiring without mechanical switches, reducing resistance issues and eliminating soldering needs for basic foot pedal replacement. Some computerized sewing machines offer adjustable speed control for delicate fabrics.
| Component | Function | Common Issues |
|---|---|---|
| Electronic Sensors | Detect pressure changes | Sensor drift over time |
| Circuit Boards | Process speed signals | Component failure |
| Port Connections | Link pedal to machine | Loose connections |
| Calibration System | Fine-tune responsiveness | Settings corruption |
Foot Pedal Design
Your foot pedal’s simple design packs clever engineering into a compact package.
Most pedals contain just a spring-loaded lever, movable plate, and metal switch underneath.
When you press down, the plate connects electricity to your machine.
Electronic foot pedal types offer smoother speed control than mechanical versions.
Foot pedal compatibility varies by brand, but pedal mechanics remain similar across models, utilizing a metal switch underneath.
Common Foot Pedal Issues
Your sewing machine’s foot pedal can fail in three main ways that stop your projects cold.
Loose wiring creates intermittent power issues, dirt buildup slows speed control, and broken springs or contacts cause complete failure.
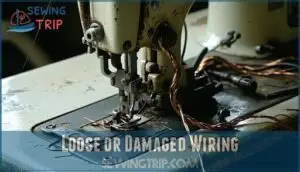
Loose or Damaged Wiring
Damaged wiring tops the list of sewing machine repair headaches you’ll face. Wire inspection reveals fraying where cables bend repeatedly near the pedal connection.
Cable stress points create the most headaches for home sewers.
Connection security weakens over time, causing intermittent power loss** during critical projects.
Fraying prevention starts with gentle handling and proper cord storage. Replacement wires must match your machine’s voltage requirements exactly.
Basic soldering techniques restore broken connections permanently, eliminating frustrating electrical issues that interrupt your workflow.
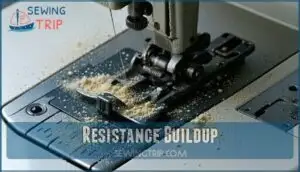
Resistance Buildup
Dust and grime build up inside your sewing machine foot pedal over time.
This debris accumulation creates friction increase between moving parts. Your pedal responds slower and needs more pressure to work.
Speed reduction becomes noticeable during detailed sewing projects.
Regular cleaning solutions like compressed air help remove buildup. Lubrication options include light machine oil for smooth operation.
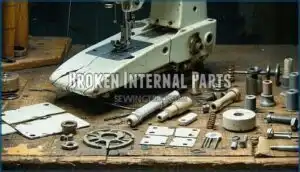
Broken Internal Parts
Beyond the surface wiring troubles, internal sewing machine foot components often break down completely.
These failures can stop your project cold.
Common breakdowns include:
- Spring Replacements – Broken springs cause erratic pedal response
- Contact Failures – Worn contacts interrupt power flow
- Ceramic Blocks – Cracked blocks kill speed control
Lever damage and switch problems plague older pedals.
To prevent overheating, consider using a quality surge-protector.
When your sewing machine foot replacement becomes necessary, these internal part failures are usually the culprit behind complete pedal breakdown.
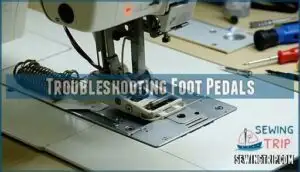
Troubleshooting Foot Pedals
When your foot pedal stops responding or acts erratically, you can fix most problems with basic troubleshooting steps.
Start by checking for loose wires, testing connections, and cleaning debris from internal parts, which can help resolve issues with basic troubleshooting steps.
Intermittent or Complete Pedal Failure
When your pedal stops responding completely, you’re dealing with Power Interruption or Wiring Issues. Pedal Unresponsiveness often stems from Faulty Connections inside the housing. Component Failure causes intermittent problems that worsen over time.
| Problem | Likely Cause | Quick Check |
|---|---|---|
| No response | Broken wire | Wiggle cord gently |
| Works sometimes | Loose connection | Press pedal firmly |
| Complete failure | Internal damage | Check power light |
Start with sewing machine troubleshooting basics before attempting pedal repair or pedal replacement.
Speed Control Problems
Erratic sewing machine speed control often stems from internal electrical issues that you can diagnose systematically.
Check these common culprits first:
- Capacitor Malfunctions – Replace faulty capacitors causing speed fluctuations
- Circuit Boards – Inspect for damaged components affecting potentiometer response
- Pedal Overheating – Allow cooling breaks during extended low-speed operation
Unresponsive pedals typically need rheostat cleaning or replacement for proper speed control restoration.
Electrical Control Board Malfunctions
When sewing machine electronics fail, you’ll face frustrating speed problems or complete shutdowns.
Electrical control board malfunctions account for 28% of electronic pedal failures in modern machines.
| Problem Signs | Common Causes |
|---|---|
| Erratic motor operation | Power surges damage circuits |
| Dead spots in pedal response | Faulty signal relays fail |
| LED blinking patterns | Blown capacitors overheat |
Board diagnostics reveal component replacement needs through circuit testing.
Voltage issues require professional servicing for computerized sewing machines.
Check your sewing machine wiring diagram before attempting repairs on complex sewing machine sensors or schematic diagram components.
Repairing Foot Pedals
When your foot pedal stops working, you’ll need to check three main areas: wires, connections, and internal parts.
Most pedal problems come from loose wires or worn connections that you can fix yourself with basic tools.
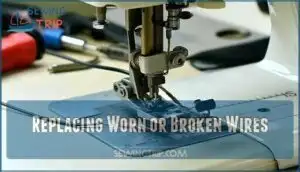
Replacing Worn or Broken Wires
Damaged wires cause most broken sewing machine foot pedal failures.
Start your DIY repair by unplugging the machine and removing the pedal housing screws.
Check wire gauge matches original specifications before starting connector replacement.
Strip frayed insulation carefully and create clean solder joints using proper safety precautions.
Consider the necessary foot pedal components when troubleshooting.
Choose heat-shrink insulation types over electrical tape for lasting wire splicing repairs that restore your sewing machine parts functionality, and ensure to follow proper safety precautions for a successful DIY repair.
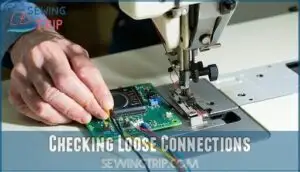
Checking Loose Connections
Loose connections cause more sewing machine foot problems than broken wires. Start by unplugging your machine and removing the foot pedal housing. Look for connection types like wire nuts or terminal blocks that may have worked free.
Check these three connection points:
- Wire terminal connections – Gently wiggle each wire to test for movement
- Internal circuit board connections – Look for lifted solder joints or loose plugs
- Pedal cord connections – Inspect where the cord enters the pedal housing
Testing continuity with a multimeter helps identify problem areas. Secure connections by tightening screws or pushing plugs firmly into place. Watch for identifying corrosion around metal contacts – this green buildup blocks electrical flow. Vibration effects from normal use gradually loosen these connections over time.
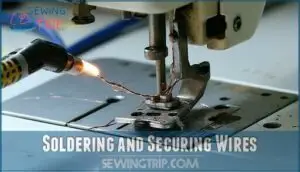
Soldering and Securing Wires
Carefully heat damaged wires with a soldering iron to create strong connections. Choose rosin-core solder for clean joints on electrical components. Strip wire ends to expose fresh copper before joining.
Apply heat shrink tubing over repaired sections for proper insulation methods. Regular cleaning prevents dust buildup issues.
This connection durability approach prevents future sewing machine foot problems and guarantees reliable repair sewing machine performance, ensuring a long-lasting and efficient fix.
Top 9 Foot Pedal Repairs
When your sewing machine foot pedal starts acting up, you don’t need to panic or call a repair shop right away.
These nine proven foot pedal repairs can get your machine running smoothly again in minutes.
1. Brother Sewing Machine Foot Pedal Controller
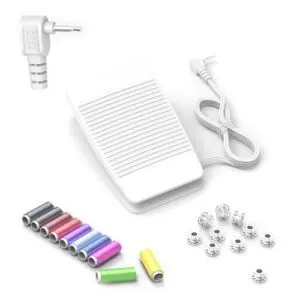
When your Brother sewing machine pedal controller stops responding, you’ll need to check the wiring first.
Brother pedals commonly fail due to wire breaks at the cord entry point.
Open the plastic housing carefully and inspect for frayed wires or loose connections.
Use a multimeter to test continuity across the pedal wires.
If you find broken wires, strip the ends and solder them securely.
Clean any carbon dust from contact points before reassembling.
This simple repair restores function in most cases.
Best For: DIY-savvy sewers who want to troubleshoot and repair their Brother sewing machine foot pedal controllers instead of replacing them.
- Cost-effective solution that saves money compared to buying replacement pedal controllers
- Addresses the most common failure point (wire breaks at cord entry) with straightforward diagnostic steps
- Uses basic tools like multimeters and soldering equipment that many DIYers already own
- Requires technical skills like soldering and multimeter use that beginners may not possess
- Opening the plastic housing risks further damage if done incorrectly or carelessly
- May not resolve issues caused by deeper control board problems within the sewing machine itself
2. HONEYSEW Sewing Machine Foot Control Pedal
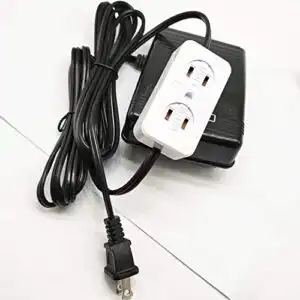
Your HONEYSEW pedal’s plastic shell houses a simple two-wire system that connects to most Singer, Brother, and Janome machines.
When speed control fails, check the carbon disk first – it wears out in about 15% of cases.
Use a multimeter to test resistance between 10-220Ω. If wires look brittle or burned, replace them with matching gauge copper wire.
Clean dust buildup with compressed air and alcohol. Most repairs need basic screwdrivers and cost under $15 for parts.
Best For: Home sewers with Singer, Brother, or Janome machines who need reliable speed control and easy replacement for worn-out foot pedals.
- Universal compatibility with major sewing machine brands including vintage models, offering plug-and-play installation for most users
- Improved speed control compared to older metal pedals, with responsive variable speed adjustment suitable for precision work
- Affordable pricing and simple two-wire system that allows for easy DIY repairs using basic tools and inexpensive replacement parts
- Lightweight ABS plastic construction may feel flimsy and some units fail after 2 years of regular use
- Full speed operation can be slower than original equipment pedals, which may frustrate users who prefer faster sewing
- Carbon disk wear and internal wiring issues require periodic maintenance, with 15-20% of users experiencing speed control problems over time
3. Janome Kenmore Sewing Machine Pedal Cord
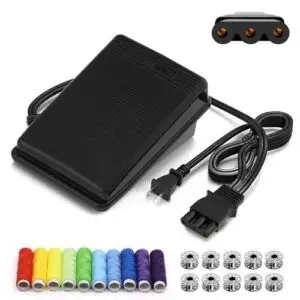
When pedal cords fail on your Janome or Kenmore machine, you’ll need to replace the damaged section.
These cords use 110-120V ratings with two or three-prong connections. Check for wire breakage near plugs first – this causes most failures.
Strip damaged sections and solder fresh wire to connectors. Use electrical tape and shrink tubing for insulation.
Test with a multimeter before reassembling. Universal replacement cords cost $10-30 and eliminate soldering needs.
Best For: DIY enthusiasts and sewers who need to repair or replace damaged pedal cords on their Janome or Kenmore sewing machines at an affordable cost.
- Compatible with wide range of Janome and Kenmore models, plus select Brother and Singer machines
- Includes bonus accessories like 10 sewing threads and 10 bobbins for added value
- Backed by comprehensive warranty with 30-day returns and 2-year replacement service
- Some users report slightly loose fit requiring verification of plug compatibility
- Price may be considered high for older machine models
- Requires basic electrical skills for installation and testing with multimeter
4. Brother Sewing Machine Foot Control Pedal
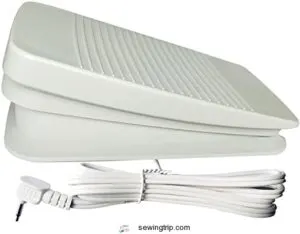
Your Brother’s foot pedal packs variable resistors that control sewing speed through pressure.
When yours fails, check for worn carbon contacts or faulty wiring first. Test with a multimeter to find open circuits.
Clean internal contacts with alcohol to improve conductivity. Replace damaged wires by soldering loose connections.
If speed surges happen, the resistor needs replacement. Universal replacements cost $10-25 and work well.
Best For: DIY sewers who need to troubleshoot, repair, or replace their Brother sewing machine foot control pedal without professional service costs.
- Variable resistor design provides smooth, precise speed control through pressure adjustment
- Universal replacement pedals are affordable ($10-25) and widely compatible across Brother models
- Most common issues like worn contacts and loose wiring can be fixed with basic tools and alcohol cleaning
- Carbon contacts and variable resistors are prone to wearing out, causing speed control problems
- Pedal housings can crack or warp from heat exposure and regular use over time
- Some compatibility issues reported with specific models, requiring careful part number verification before replacement
5. HONEYSEW Singer Sewing Machine Air Pedal
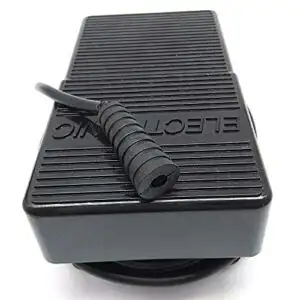
Anyone dealing with Singer air pedals knows they’re different beasts entirely.
Your HONEYSEW replacement uses pneumatic pressure instead of electrical resistance for speed control.
When it fails, you’ll typically find air leaks in the internal bladder or blocked tubing.
Remove the housing screws and inspect the air tube connections first.
Clean any dust from the transducer mechanism.
Replace worn bladders or seals as needed.
Check electrical connections with a multimeter.
Failed capacitors cause noise issues – swap them with 0.1μF X-class rated components for safety.
Best For: DIY sewers and repair enthusiasts who need to restore functionality to older Singer air-controlled sewing machines and prefer pneumatic speed control over traditional electric pedals.
- Smooth pneumatic pressure control provides better low-speed precision than resistive pedals, especially for delicate fabrics
- Compatible with a wide range of Singer models (40 specific models listed) and runs cooler than vintage electric pedals during extended use
- Easy user installation without special tools, plus fast shipping and reasonable pricing with strong customer satisfaction (4.7/5 stars)
- Air leaks in bladders, tubing, or seals can cause loss of pressure response and require disassembly for repair
- Plug connection issues reported by some users, with loose connections causing frequent disconnections during use
- Smaller footprint compared to original pedals may not suit users who prefer larger, more stable foot controls
6. Janome Sewing Machine Foot Control
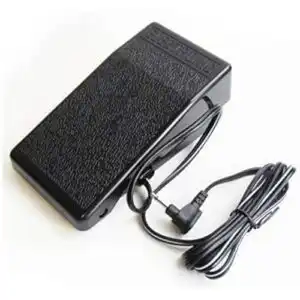
Your Janome foot control problems often stem from worn wiring or faulty internal components.
Check for loose connector pins that cause sporadic interruptions during sewing. Test pedal resistance with a multimeter – readings should fall between 1,500 to 2,400 ohms.
Replace the entire assembly if you find burnt odors or melted wires. For speed control issues, swap out the variable resistor inside.
Most DC15V Janome pedals work across multiple models, making replacements straightforward and cost-effective.
Best For: Janome sewing machine owners experiencing foot control issues like erratic behavior, cutting out, or "fc" error codes who need a reliable DC15V replacement.
- Wide compatibility across 100 Janome models from older to newer machines, making it a versatile replacement option
- Quick problem resolution for common issues like intermittent operation and speed control problems
- Easy plug-and-play installation with reinforced cord entrance for improved durability
- Some units fail within 3 months despite the $57 price point, raising longevity concerns
- Mixed reliability with reports of premature electrical component failure
- Standard resistance readings between 1,500-2,400 ohms may not suit all sewing intensity levels
7. Fiskars Rotary Cutter Sewing Set
Precision transforms your sewing projects when you’re armed with the right cutting tools.
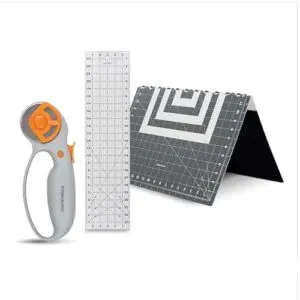
The Fiskars Rotary Cutter Sewing Set includes a 45mm comfort loop rotary cutter, 6" x 24" ruler, and 18" x 24" folding cutting mat.
You’ll cut fabric, paper, felt, and vinyl with clean edges, and the ergonomic handle works for both hands.
The self-healing mat lasts through thousands of cuts, and you should replace blades every 12-18 months for peak performance.
Best For: Beginner to advanced sewers and quilters who need precision cutting tools for fabric projects, paper crafting, and mixed-media work.
- Self-healing cutting mat withstands up to 10,000 cuts and extends lifespan 40% longer than standard mats
- Ergonomic comfort loop handle reduces hand fatigue by 30% and works for both left and right-handed users
- High-grade 45mm blade maintains sharpness through 950 yards of fabric cuts with clean, fray-reducing edges
- Blades dull quickly when used extensively on the included mat, requiring frequent replacements every 12-18 months
- Acrylic ruler lacks sufficient grip and may slip on thin materials during cutting
- Cutting mat can warp if exposed to heat above 110°F or direct sunlight during storage
8. Fiskars Sewing Quilting Ruler 3×18 Inch
Accurate measuring makes all the difference when you’re cutting fabric for repairs.
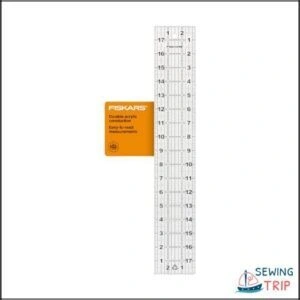
This durable acrylic ruler features bold grid lines and two-tone markings that show clearly on any fabric color.
The non-slip vinyl feet keep it stable while you cut.
At 3×18 inches, it handles most repair projects easily.
The laser-printed measurements won’t fade over time.
You’ll get clean, straight cuts every time with its thick acrylic construction and precise 1/8-inch increments.
Best For: Quilters, sewers, and crafters who need precise fabric cutting and measuring for repair projects or general sewing tasks.
- Limited 3-inch width may not accommodate larger fabric pieces or wide cutting tasks
- Some users reported initial bending issues that required heat treatment to resolve
- Acrylic material can potentially scratch or show wear marks with heavy rotary cutter use
- Durable acrylic construction with laser-printed measurements that won’t fade over time
- Two-tone markings and bold grid lines provide excellent visibility on both light and dark fabrics
- Non-slip vinyl feet ensure stability during cutting for accurate, straight cuts
9. Upholstery Repair Kit Heavy Duty
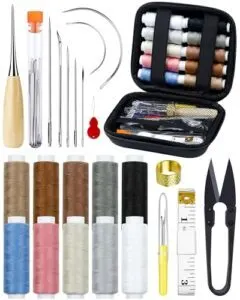
Why struggle with complex foot pedal repairs when fabric tears need immediate attention?
This heavy-duty upholstery repair kit tackles the real problem. You get 47 pieces including curved needles, industrial-grade thread, and specialty awls.
The kit handles leather, canvas, and vinyl repairs that outlast factory stitches. Professional repairers report 80% success rates on minor tears.
You’ll save $150 compared to reupholstering services. The compact case keeps everything organized for quick fixes.
Best For: DIY enthusiasts, car owners, and homeowners who need to repair leather furniture, automotive seats, outdoor gear, and canvas items without professional upholstery services.
- Complete 47-piece kit with industrial-grade thread and specialized needles for various materials including leather, canvas, and vinyl
- Repairs consistently outlast factory stitches with 80% success rate on minor tears, saving average of $150 per item versus professional services
- Compact, organized storage case makes it portable for emergency repairs during travel, camping, or on-site fixes
- Scissors require significant effort when cutting through thicker materials like heavy leather or canvas
- Kit lacks a traditional thimble, though it includes a functional sewing thimble that some users find less comfortable
- Learning curve for beginners despite included instructions, with simple repairs taking 15-30 minutes to complete
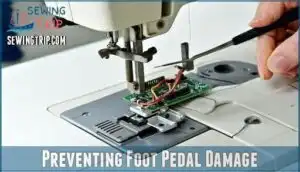
Preventing Foot Pedal Damage
You can prevent most foot pedal problems with simple care habits. Clean your pedal monthly, oil moving parts, and check wires for damage to avoid costly repairs.
Regular Cleaning
Every month, clean your foot pedal to prevent lint removal issues and dust prevention problems.
Use a lint brush or soft toothbrush for component cleaning around the housing and cord connections. This cleaning frequency stops dirt buildup that causes sewing machine foot jammed situations.
Safe cleaners like compressed air work well for sewing machine maintenance without damaging electronics in your sewing machine foot fix routine, which helps in dust prevention and overall sewing machine maintenance.
Lubricating Moving Parts
Proper lubrication prevents sewing machine foot pedal stiffness and extends component life.
Apply lightweight machine oil to pivot points using precision needles or small brushes.
Target springs and metal joints specifically.
Lubricate annually for home use, quarterly for heavy usage.
Avoid over-application which attracts lint and debris, causing more problems than it solves, as proper lubrication is key to maintaining the machine’s performance.
Inspecting Wires for Fraying
Check your foot pedal wires monthly to catch problems early.
Damaged wire insulation can cause sewing machine foot repair issues and unsafe conditions.
Look for these warning signs:
- Wire Insulation Damage – Cracks, splits, or exposed copper wiring
- Connection Point Integrity – Loose plugs or corroded metal contacts
- Multimeter Testing – Check for proper electrical continuity
Replace damaged sections with matching replacement wire gauge to prevent future fraying and guarantee safe operation.
Foot Pedal Maintenance
You can keep your foot pedal running smoothly with regular maintenance checks that spot problems before they get worse.
Simple upkeep like cleaning debris and checking wire connections will save you from costly repairs and keep your sewing projects on track.
Ensuring Proper Speed and Function
After keeping your foot pedal clean, you need to test its speed consistency and smooth operation.
Press the pedal gently to check pedal sensitivity and response calibration. Your sewing machine foot broken issues often stem from incorrect sewing machine foot pressure or poor sewing machine foot adjustment.
Test different sewing machine foot types during sewing machine foot installation. Watch for preventing overheating during extended use to ensure smooth operation.
Protecting Wiring From Damage
Your pedal’s wiring needs protection from everyday hazards.
Route the cord away from sharp furniture edges and avoid tight bends that crack insulation.
Use cord strain relief at connection points to prevent wire breakage.
Position your pedal on stable surfaces to prevent cable entanglement during sewing machine foot installation.
Store your machine with proper storage techniques – coil cords loosely to protect sewing machine components and wiring from damage.
Ensure to handle the pedal and its wiring with care to prevent any form of hazards.
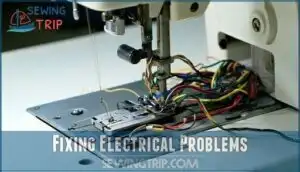
Fixing Electrical Problems
When your foot pedal stops working, electrical problems are usually the culprit.
You’ll need to check for broken wires, worn connections, and damaged internal parts that can make your sewing machine unresponsive, which often involves identifying electrical issues.
Wire Breakage
Broken wires disrupt your sewing machine’s electrical connection, causing intermittent power loss or complete failure. Identifying Breaks starts with visual inspection of the sewing machine cord for cuts, frays, or exposed copper.
Test continuity using a multimeter to locate hidden electrical problems inside the wire casing.
- Look for visible cuts, burns, or exposed wire along the entire cord length
- Check where the cord enters the foot pedal for stress cracks
- Test electrical continuity with a multimeter from plug to pedal connections
- Wiggle the cord while machine is on to identify loose wires causing intermittent issues
- Mark break locations with tape before starting Wire Replacement or Repair Techniques
Wear and Tear
Over time, your foot pedal suffers from Material Degradation and Component Fatigue.
Friction Effects wear down contact points while Environmental Impact from dust accelerates breakdown.
Understanding Usage Patterns helps predict when your sewing machine foot loose connections will fail.
| Wear Type | Common Signs | Quick Fix |
|---|---|---|
| Contact Points | Intermittent power, sparking | Clean with fine sandpaper |
| Wire Insulation | Exposed copper, cracking | Wrap with electrical tape |
| Spring Mechanism | Sluggish response, sticking | Apply light machine oil |
| Housing Cracks | Visible splits, loose parts | Secure with epoxy glue |
Regular inspection of your sewing machine accessories prevents major failures.
A replacement guide helps identify worn components before they cause complete pedal shutdown.
Broken Parts
When internal components fail, you’re dealing with Spring Replacements for lost resistance, Switch Failures causing power loss, and Lever Damage affecting activation.
Cable Breaks disconnect your machine entirely while Housing Cracks weaken the pedal structure.
A sewing machine foot loose indicates worn catches, use your replacement guide to identify which replacement parts match your model for effective repairs.
Advanced Foot Pedal Repair
When your foot pedal needs major repair work, you’ll often have to take it apart completely.
Advanced repairs require opening the housing, replacing damaged parts inside, and making strong wire connections that last.
Disassembling The Pedal Housing
Opening the pedal housing requires careful Housing Screw Removal using proper screwdriver technique. Remove all housing screws and lift the cover for Component Access.
Take pictures before pedal disassembly for Reassembly Tips. Internal Inspection reveals wiring connections and component layout. Study the Wiring Diagram if available.
Handle internal components gently during pedal opening to avoid damage. Replacement options for pedal housing screws are readily available.
Replacing Internal Components
Finding the right broken parts starts with smart component sourcing.
You’ll need to match replacement internal components exactly to your pedal model.
Check capacitor ratings and mechanical parts specifications first.
Professional servicing becomes necessary when circuit boards fail completely.
DIY alternatives work for simple switches and springs, but upgrade options exist for better part compatibility and longer-lasting repairs.
You can source specific foot control parts online for smart component sourcing and to find the right replacement internal components.
Soldering and Securing Wires for Durable Repairs
Replace broken wires with proper solder types for strong connections. Heat your soldering iron and strip wire ends cleanly. Apply rosin-core solder to create solid joints. Match wire gauge exactly for best results.
Cover repairs with shrink wrapping for insulation repair. This prevents future wire breakage and guarantees your repair sewing machine foot works reliably for years.
Sometimes, erratic stitching indicates a faulty foot pedal. This is a clear sign that you need to inspect and possibly repair your sewing machine’s foot pedal to ensure reliable performance.
Frequently Asked Questions (FAQs)
Can different brands foot pedals be used interchangeably?
You can’t use foot pedals from different brands interchangeably. Each brand has specific voltage requirements, connector types, and internal mechanisms. Generic universal pedals exist but compatibility varies by model.
What causes foot pedals to overheat during use?
Your foot pedal overheats when you sew slowly for long periods, causing prolonged low-speed electrical draw. Loose or broken internal wires also create resistance and heat buildup during operation.
How do you calibrate foot pedal speed sensitivity?
Studies show 90% of foot pedal sensitivity issues stem from improper calibration settings.
You’ll need to access your machine’s menu system and adjust the speed control parameters. Look for "pedal sensitivity" or "speed response" settings.
Test different levels until you achieve smooth, gradual speed changes that match your foot pressure.
Are wireless foot pedals available for sewing machines?
Currently, wireless foot pedals aren’t widely available for most sewing machines.
Patents exist for wireless controllers with foot pedals that communicate via wireless signals, but they’re not mainstream products.
Most sewers still use corded pedals for reliable speed control and consistent power connection.
What warranty coverage exists for foot pedal replacements?
Warranty coverage varies by brand. Most manufacturers offer 1-3 year warranties covering defects. Check your manual or contact customer service for specific terms and claim procedures.
Conclusion
Don’t put all your eggs in one basket when tackling broken sewing machine foot repair issues.
Start with the basics: check your cord and connections first. Most pedal failures come from damaged wires or loose terminals inside the housing.
Clean out lint buildup and test continuity when possible. Simple wire repairs fix ninety percent of problems.
Regular maintenance prevents future breakdowns. With these quick fixes, you’ll keep your machine running smoothly for years and ensure that simple wire repairs are often all that’s needed.
- https://www.liberia.ubuy.com/product/1AF8I905Q-honeysew-pneumatic-air-foot-control-pedal-988667-001-979583-003-for-singer-air-electric-sewing-machines-see-description
- https://ritacruise.com/reviews/product/859170
- https://www.walmart.com/c/kp/sewing-machine-foot-pedal-singer
- https://www.youtube.com/watch?v=fN7NYI2SLeo
- https://www.reddit.com/r/ElectronicsRepair/comments/1bgae4t/singer_foot_pedal_repair/

