This site is supported by our readers. We may earn a commission, at no cost to you, if you purchase through links.
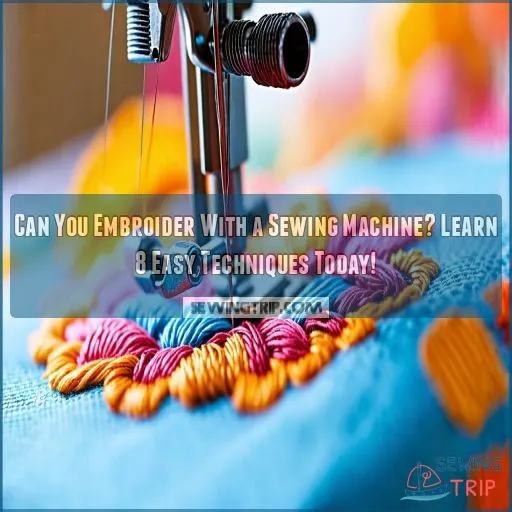
Start by swapping out your regular presser foot for a monogramming foot and lowering those feed dogs.
Choose your thread wisely – polyester for durability, rayon for shine, or cotton for a matte look.
Then, let your creativity run wild with straight stitch outlining, satin stitch fills, or even free motion embroidery. Just remember, like learning to ride a bike, it takes practice. But once you’ve got the hang of it, you’ll be embroidering circles around plain fabrics.
Table Of Contents
- Key Takeaways
- Essential Supplies for Machine Embroidery
- Preparing Your Sewing Machine for Embroidery
- Choosing and Transferring Embroidery Designs
- Basic Machine Embroidery Techniques
- Decorative Stitches for Embellishment
- Free Motion Embroidery With a Quilting Foot
- Appliqué Techniques in Machine Embroidery
- Troubleshooting Common Machine Embroidery Issues
- Frequently Asked Questions (FAQs)
- Conclusion
Key Takeaways
- You can totally make a sewing machine your embroidery sidekick with the right embroidery vs sewing machines techniques
. Just swap the regular presser foot for a monogramming foot and drop the feed dogs. Once you’re set, you will be stitching up unique designs like you’re doodling in the margins of your notebook.
- Picking the right supplies is your golden ticket to embroidery success. Stock up on stabilizers, the right embroidery hoops, and a selection of threads, such as polyester for strength and rayon for that bling factor. You will feel like an artist prepping your palette.
- Practice makes perfect when it comes to mastering those stitches. Start with the basics, like straight stitch outlining, to get a feel for things. Before you know it, you will be tackling satin stitch fills and free motion embroidery like a seasoned pro.
- Troubleshoot like a boss if things get tangled. Puckering or tension issues are part of the learning curve. Play around with tension settings and do not hesitate to swap out needles if needed – it’s all part of the embroidery adventure.
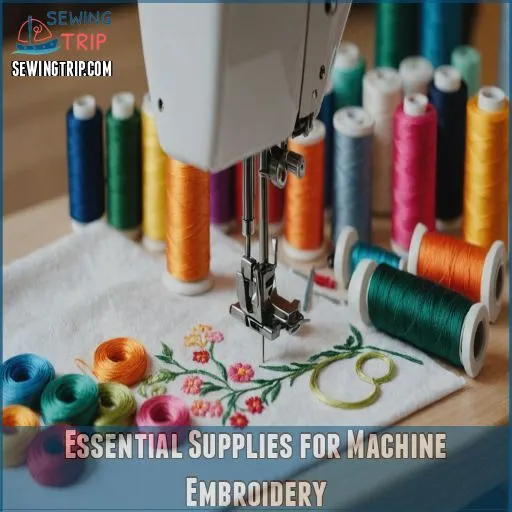
Essential Supplies for Machine Embroidery
You’ll need more than just a sewing machine to start your embroidery journey.
Grab embroidery hoops, stabilizers, specialized threads and needles, and fabric marking tools to set yourself up for success.
Embroidery Hoops and Stabilizers
Ready to explore machine embroidery? Let’s talk about your new best friends: hoops and stabilizers. These dynamic duos are the unsung heroes of crisp, professional-looking designs.
You’ll need to master three key elements:
- Hoop sizes: Match to your design
- Stabilizer types: Cut-away, tear-away, or wash-away
- Hooping techniques: Tight as a drum!
Remember, a well-hooped project is half the battle won. So, hoop it like it’s hot and watch your embroidery game level up!
Thread Types and Colors
Now that you’ve got your hoops and stabilizers sorted, let’s talk threads – the colorful characters in your embroidery story.
Choosing the right thread is like picking the perfect outfit for your design. You’ll want to think about thread weight, sheen, and durability.
Polyester threads are tough cookies, while rayon brings the bling with its lustrous shine . Don’t forget about cotton for that matte, hand-stitched look.
Mix and match to create your embroidery masterpiece!
Needles for Machine Embroidery
You’ve got your threads sorted, but let’s talk about the unsung heroes of machine embroidery: needles.
These tiny titans come in various types and sizes, each with a superpower.
For knits, ballpoint needles are your best friend, gliding between fibers like a hot knife through butter.
Remember, size matters.
A 75/11 needle is perfect for lightweight fabrics, while a 90/14 can handle your denim dreams.
Fabric Marking Tools
The arsenal of fabric marking tools is your secret weapon for precise embroidery.
From disappearing ink pens to water-soluble markers, you’ll feel like a stealthy artist leaving no trace behind.
Fabric pencils and marking chalk are your trusty sidekicks for dark fabrics.
Don’t forget tailor’s chalk – it’s the old-school hero that never lets you down.
Mix and match these tools to conquer any embroidery challenge .
Preparing Your Sewing Machine for Embroidery
Got your supplies ready? Let’s set up your sewing machine for embroidery magic, but first, check out the top sewing and embroidery machines for 2024 to find the perfect model for your needs
. First, swap out that regular presser foot for a monogramming foot – it’s like giving your machine X-ray vision for stitches.
Next, play matchmaker with your needle and thread. A size 75/11 embroidery needle is your go-to wingman for most projects.
Now, let’s talk about tension – it’s all about finding that Goldilocks zone. Too tight, and your fabric puckers; too loose, and your stitches look like a bad hair day. Adjust your upper thread tension until it’s just right.
Don’t forget to lower your feed dogs – they’re like training wheels, and we’re ready to fly solo! Finally, attach your hoop and get ready to rock.
With these tweaks, your trusty sewing machine transforms into an embroidery powerhouse. Who knew you’d a secret artist hiding in your sewing room?
Choosing and Transferring Embroidery Designs
You’re ready to turn your sewing machine into an embroidery powerhouse, but first things first: let’s pick a design that won’t make your machine throw a tantrum.
Once you’ve found that perfect pattern, it’s time to play connect-the-dots on your fabric using some nifty transfer tricks that’ll make your design pop.
Simple Designs for Beginners
Now that your machine’s primed, let’s pick some beginner-friendly designs that’ll make you feel like a pro in no time. Think of it as choosing your first dance moves – start simple, then work your way up to the fancy footwork!
- Basic flower patterns: Daisy chain your way to success
- Alphabet practice: Stitch your initials like a boss
- Geometric shapes: Square up to triangles and circles
- Simple animal outlines: Embroider a zoo, one stitch at a time
Tracing Methods for Pattern Transfer
You’ve mastered simple designs, but how do you get those intricate patterns onto fabric?
Let’s explore tracing methods that’ll make you feel like a pattern-transferring ninja!
Carbon paper is your secret weapon – sandwich it between your fabric and pattern, then trace with a ballpoint pen. It’s like playing connect-the-dots, but way cooler.
For smooth fabrics, try game-changer carbon paper alternatives like smooth transfer paper, or more specifically, smooth transfer methods such as using heat transfer paper – it’s a game-changer!
Using Disappearing Ink Markers
Three magic words: disappearing ink markers. These nifty tools are your secret weapon for precise embroidery design transfers.
Choose between heat-reactive Frixion pens or cold-activated options.
When marking fabric, use light pressure to avoid leaving indentations.
Need to erase? A quick blast with a hair dryer or a stint in the freezer will do the trick.
For free-motion embroidery, these markers let your creativity flow without permanent consequences.
Basic Machine Embroidery Techniques
You’re about to discover the secret world of machine embroidery, where your regular sewing machine becomes a magical wand for fabric artistry with the right home embroidery machines know how
.
With straight stitch outlining, satin stitch fill, and free motion embroidery in your toolkit, you’ll be stitching up a storm faster than you can say "bobbin thread"!
Straight Stitch Outlining
While satin stitch may steal the spotlight, straight stitch outlining is your secret weapon for clean, crisp designs (Source).
Picture your embroidery as a coloring book – the straight stitch is your trusty black outline!
Adjust your stitch length and width to suit your fabric choice. Keep that thread tension just right, and you’ll be stitching like a pro in no time.
Remember, practice makes perfect – soon you’ll be outlining with your eyes closed!
Satin Stitch Fill
Now that you’ve mastered outlining, let’s jazz things up with satin stitch fill. When choosing threads for this technique, consider using rayon thread for a sheen or polyester thread for durability as discussed in thread selection for embroidery. This technique’s a zigzag on steroids, stitching back and forth so closely that it forms a solid, shiny surface.
- Satin stitch variations: Play with stitch length for texture
- Satin stitch density: Adjust for different fabrics
- Satin stitch borders: Create edges for appliqués
- Satin stitch gradients: Blend colors for a 3D effect
Free Motion Embroidery
Ready to explore the world of free motion embroidery? Think of your sewing machine as a pen, with the fabric as your canvas.
Drop those feed dogs and swap in a darning foot to let your creativity flow. You’ll be drawing with thread in no time!
Choose smooth-flowing threads and experiment with different weights to create depth and texture. Practice makes perfect, so don’t be afraid to doodle away!
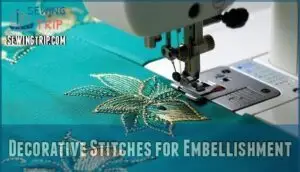
Decorative Stitches for Embellishment
You’re about to discover a treasure trove of creative possibilities with your sewing machine’s built-in decorative stitches, similar to the Brother SE600’s embroidery features
.
These fancy pre-programmed patterns can transform plain fabric into stunning embroidered masterpieces.
Letting you add flair to everything from pillowcases to party dresses without breaking a sweat, with everything from pillowcases to party dresses.
Utilizing Built-in Decorative Stitches
You’ve mastered the basics, now let’s jazz things up with built-in decorative stitches! Your machine’s stitch library is like a treasure trove of embellishment possibilities.
Play around with stitch combinations to create unique effects. Remember, stitch density impacts your design’s look, so experiment with different settings.
For a pro tip, try using contrasting thread colors to make your decorative stitches pop (Source). It’s like giving your fabric a fashion-forward makeover!
Creating Texture With Stitch Variations
With your sewing machine, you’re the maestro of texture.
Play with stitch density to create depth – tight stitches for a raised effect, loose for an airy feel.
Experiment with stitch length and thread weight to add visual interest.
Try stitching in different directions for a dynamic look .
Layer stitches like a pro, building up texture that’ll make your embroidery pop.
Remember, it’s all about letting your creativity run wild!
Combining Stitches for Complex Designs
Now that you’ve mastered texture, let’s mix it up!
Combining stitches is like cooking up a visual feast. Start by layering a simple chain stitch with raised buttonhole for a unique rose effect.
Then, experiment with color blending and stitch combinations to create intricate designs. It’s like putting together a puzzle – each piece adds depth and complexity.
Don’t be afraid to get creative and invent your own stitch recipes!
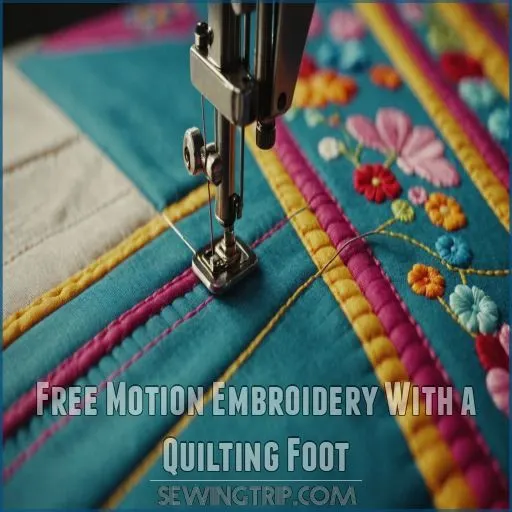
Free Motion Embroidery With a Quilting Foot
You’ll explore your creativity with free motion embroidery using a quilting foot, moving fabric freely under the needle to create unique designs.
It’s like drawing with thread – your sewing machine becomes a canvas for artistic expression, limited only by your imagination, allowing for unique designs.
Adjusting Machine Settings
Buckle up, embroidery enthusiasts! It’s time to fine-tune your machine for free motion magic. Drop those feed dogs and let’s dance across the fabric.
Ready to take control? Here’s your power trio:
- Stitch length: Set it to zero for ultimate freedom
- Needle selection: A topstitch 90/14 is your new best friend
- Tension adjustment: Tighten that top tension to avoid pesky eyelashes
Remember, practice makes perfect. Start without thread to get a feel for the rhythm.
Controlling Fabric Movement
When you start free motion embroidery, mastering fabric movement is like learning to ride a bike. You’ll need to balance machine speed with your hand movements.
Drop those feed dogs and let your hands take control! Keep fabric tension consistent by using a stabilizer and proper hooping techniques.
Remember, it’s all about finding your rhythm – slow and steady wins the race. Don’t be discouraged if your first attempts look like a tangled mess!
Creating Freehand Designs
Freehand embroidery is your oyster with a quilting foot, which is often found on the best sewing machine for quilting and embroidery. You’ll feel like an artist painting with thread as you create smooth curves and realistic textures.
To master stitch density, practice moving your fabric at different speeds. For embroidered lettering, start slow and steady. Remember, it’s like an artist painting with your machine – you can create quilt and embroidery machines with the machine. let your creativity flow!
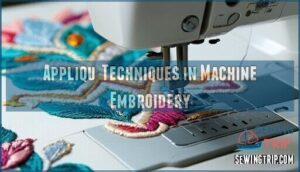
Appliqué Techniques in Machine Embroidery
You’ll love how appliqué techniques add depth and texture to your machine embroidery projects, using stabilizer and thread
.
By layering fabric pieces and securing them with zig-zag stitches, you’re creating a whole new dimension of creativity that’ll make your designs pop.
Preparing Fabric Pieces
Ready to get started with fabric appliqué? Let’s prep those pieces like a pro!
First, choose your fabric wisely – 100% cotton‘s your best bet. Iron out those pesky wrinkles to get a smooth canvas.
Now, grab your fusible web and trace your design on the paper side. Cut it out roughly, leaving a quarter-inch seam allowance. You’re one step closer to appliqué mastery!
Zig-Zag Stitch Application
Zigzag’s magic transforms your appliqué from flat to fab.
Dial down the stitch length for a dense, solid line that secures shapes and creates eye-catching borders.
Play with width and density to achieve your desired look – from delicate lettering to bold outlines.
Remember, like mastering a new dance step, practice makes perfect.
Soon you’ll be zigzagging with confidence, turning simple fabric pieces into stunning embroidered masterpieces!
Combining Appliqué With Embroidery
Blending appliqué with embroidery is like creating a textile symphony. You’ll elevate your designs by layering fabric shapes and stitches. Try placing appliqués strategically for eye-catching focal points.
To make sure you have a smooth finish, consider pre-washing your fabrics before use, as this helps prevent any shrinkage or distortion during the embroidery process (Source) Choosing the Right Fabric.
Experiment with various fabric choices, from felt to silk, for unique textures. Finish edges with decorative stitches like blanket or tailor’s buttonhole for a polished look.
Don’t be afraid to mix techniques – your creativity’s the limit in this fabric playground!
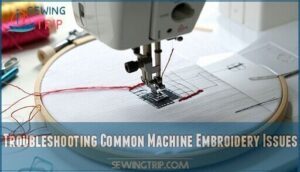
Troubleshooting Common Machine Embroidery Issues
You’ve mastered the basics, but your embroidery’s looking more like a tangled mess than a masterpiece?
Don’t worry, we’ve all been there – let’s tackle those pesky machine embroidery issues head-on and get your stitches back on track with some basics.
Thread Tension Problems
When thread tension goes haywire, your embroidery can look like a tangled mess faster than you can say "bobbin." Don’t fret! You’re about to become a tension-taming expert.
- Birdnesting: Top thread forming wads underneath? Loosen that top tension, pronto!
- Loopy top stitches: Time to tighten things up a bit.
- Bobbin peeking through: Your top thread’s playing too hard to get. Ease up!
- Frequent breaks: Your thread keeps breaking? Check for burrs on your needle or plate.
Remember, balancing tension is like finding the sweet spot in a tug-of-war between your top and bobbin threads. Keep at it, and you’ll be stitching like a pro in no time!
Fabric Puckering Solutions
Fabric puckering can turn your embroidery dreams into a wrinkled nightmare. But don’t sweat it! You’ve got this. When choosing the right embroidery machine, look for computerized machines with ease of use, features, and versatility, such as the Brother CS7000X, which offers superior quality and features at a reasonable price.
Let’s smooth out those pesky puckers with some clever tricks. Here’s a handy table to help you become a pucker-busting pro:
| Pucker Type | Quick Fix |
|---|---|
| Tension | Loosen up, buttercup. Adjust your tension. |
| Structural | Go bias or go home. Sew at an angle. |
| Fabric Instability | Choose threads wisely. Low shrinkage is key. |
| Feed Issues | Walk it out with a walking foot. |
| Inherent | Size down your needle and thread. |
Remember, practice makes perfect. You’ll be creating silky-smooth embroidery in no time!
Dealing With Thread Breakage
Thread breakage can turn your embroidery dreams into a tangled nightmare! But don’t throw in the towel just yet.
To tame this pesky problem, try these thread whisperer tricks:
- Trim frayed ends and spritz with silicone spray for smoother sailing
- Double-check your threading path and tension settings
- Slow your roll – a steady pace prevents snags
Remember, even pros face the occasional thread rebellion. With patience and these tips, you’ll be stitching like a boss in no time!
Frequently Asked Questions (FAQs)
Can a sewing machine be used for embroidery?
Your trusty sewing machine can double as an embroidery whiz.
Drop those feed dogs, grab a darning foot, and you’re set to freestyle stitch.
It’s like drawing with thread – no fancy embroidery machine required.
Do you need a special machine to do embroidery?
Embroidery doesn’t always require a specialized machine.
With some creativity, you can use a regular sewing machine for free-motion embroidery.
However, dedicated embroidery machines offer more features and convenience for intricate designs and professional-looking results.
Can you make embroidery stitches on a sewing machine?
Like a butterfly emerging from its cocoon, your regular sewing machine can transform into an embroidery powerhouse.
With a few adjustments, you’ll create stunning designs.
Drop those feed dogs, adjust tension, and let your creativity soar through free-motion embroidery .
Can you sew with a regular sewing machine?
Regular sewing machines are versatile workhorses.
They’re perfect for basic stitching, hemming, and even simple decorative work.
With a bit of practice, you’ll be whipping up projects in no time.
Don’t let their simplicity fool you – they’re powerful tools.
Can you use a regular sewing machine for embroidery?
Don’t let the myths fool you – you can absolutely embroider with your trusty sewing machine!
Just grab a darning foot, lower those feed dogs, and let your creativity flow.
It’s easier than you think.
Can any sewing machine be turned into an embroidery machine?
Turning a sewing machine into an embroidery one isn’t possible without limitations.
Some machines allow basic embroidery-like techniques using attachments and stabilizers.
You’ll trace designs manually, but for intricate patterns, dedicated embroidery machines are the way to go.
Is embroidery easy on a sewing machine?
Trying embroidery on a sewing machine feels a bit like fitting a square peg into a round hole.
While some machines offer basic embroidery features, mastering the right tools and settings is key to success, like the Janome MB-4S that allows for four-needle embroidery. Janome MB-4S
.
Does every sewing machine do embroidery?
Not all sewing machines are designed for embroidery, but you can use most with the right setup.
You’ll need to lower or cover the feed dogs and possibly adjust tension settings for free motion embroidery.
Can I use regular thread for machine embroidery?
While regular thread can work for machine embroidery, it’s like using a jack-of-all-trades.
You might face thread breaks or tension issues.
Opt for embroidery thread for smoother stitching and a polished finish.
How do I maintain tension for smooth embroidery?
Keep your embroidery tension smooth by making sure you have proper needle and hook timing, checking thread quality, and cleaning lint from tension disks.
Adjust bobbin tension and make sure the machine is correctly threaded.
Test on scrap fabric first for best results.
What fabrics work best for machine embroidery?
Imagine fabric as a canvas for your creativity.
Opt for medium-weight, tightly woven fabrics like cotton, denim, or linen.
They’re less stretchy, making them perfect for clean, precise designs that won’t distort as you embroider.
Can I embroider on stretchy or knit fabrics?
Embroidering on stretchy knits is totally doable with the right tools. Just grab a stabilizer, pick a smaller needle, and take it slow – your stitches will turn out fab.
How do I clean and maintain my machine after embroidering?
First, find pesky lint in the bobbin and feed dog areas with a small brush.
Gently oil the moving parts, but don’t drown them.
Avoid using compressed air; it can push lint further in.
Conclusion
Did you know that over 60% of sewing enthusiasts successfully embroider with a sewing machine? With practice, it can be your creative playground too. From straight stitches to free motion embroidery, your machine’s potential is boundless.
Start simple, try new stitches, and you’ll soon be crafting unique designs with flair. So, gather your supplies, prepare your machine, and let your creativity shine.
Who knew fabric could feel this fun and satisfying? It’s all about Happy stitching and making the most of your machine. By exploring different techniques and stitches, you can unlock your machine’s full potential and create amazing designs with free motion embroidery.

