This site is supported by our readers. We may earn a commission, at no cost to you, if you purchase through links.
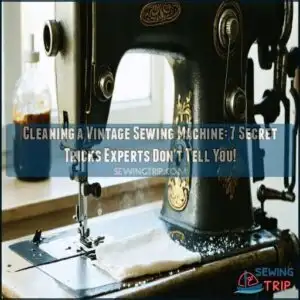
For stubborn grime, use a mild soap solution but avoid modern cleaners that might damage older finishes. Don’t forget to oil moving parts with proper sewing machine oil—never substitute with WD-40 or household oils.
Remove thread bits from tension discs and bobbin areas with tweezers or compressed air. Those tiny nooks where decades of lint hide might surprise you—even the most experienced seamstresses often discover strange treasures there, and it requires proper sewing machine oil and gentle handling to preserve the machine’s condition, making it a task that demands care and patience.
Table Of Contents
Key Takeaways
- You’ll need to use gentle cleaning methods for your vintage sewing machine, including soft brushes, mild soap, and a slightly damp microfiber cloth to protect delicate finishes and decals.
- Before cleaning, you should test the finish type (shellac vs. acrylic) with isopropyl alcohol in an inconspicuous spot and photograph the machine from multiple angles for reference.
- You’ll want to use proper sewing machine oil for lubricating moving parts, avoiding substitutes like WD-40 or household oils that can damage your machine’s mechanisms.
- You should clean tension discs, bobbin cases, and hard-to-reach areas with precision tools like cotton swabs or compressed air, and maintain a regular cleaning schedule (every 8-10 hours of use or 6-12 months) to extend your machine’s life and ensure delicate finishes are protected.
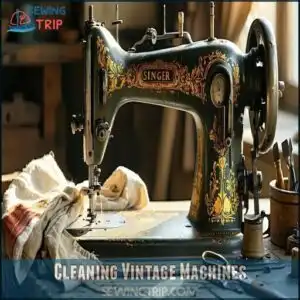
Cleaning Vintage Machines
You’ll need to approach your vintage sewing machine with gentle care, using soft cloths and mild cleaners to preserve its delicate finishes and original character.
Treat your vintage sewing machine like a cherished heirloom—gentle touches and soft cleaners preserve its soul and story.
Your grandmother’s trusty Singer deserves the same loving attention you’d give a classic car, removing years of built-up grime without disturbing those precious decals or shellac coatings that tell its unique history.
Pre-Cleaning Inspection
Every vintage sewing machine deserves a thorough inspection before you tackle any cleaning. Your pre-cleaning assessment can prevent damage and guide your restoration approach.
- Check for loose or missing parts that might need special attention
- Test the finish with a tiny isopropyl alcohol drop in an inconspicuous spot
- Photograph the machine from multiple angles for reference
- Identify areas of rust or excessive grime
- Verify all mechanisms move freely without forcing them
Before cleaning, consider suitable mild cleaners to avoid harming the machine’s exterior. This step is crucial for the machine’s longevity and to ensure you use the right cleaning methods.
Removing Debris and Dust
Start by tackling lint removal and dust buildup. Use a soft bristle brush, like a paintbrush, to gently clear debris from vintage sewing machine corners.
A vacuum with small attachments helps suck out thread debris from tight spots. For stubborn dust removal, try air compression, but avoid internal parts.
Regular cleaning keeps your machine humming and prevents future gunky messes.
Preserving Clear Coats and Decals
Preserving a clear coat while cleaning a vintage sewing machine is an art. The wrong move can wipe out its character entirely.
Use gentle cleaning methods and keep these in mind:
- Test clear coat types gently with isopropyl alcohol.
- Avoid harsh tools that might scratch decals.
- Prioritize wear preservation over an “over-shiny” look.
- Apply sewing machine oil for finish preservation.
Identifying Clear Coats
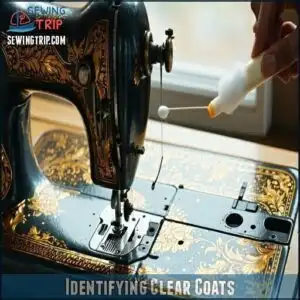
Knowing the type of clear coat on your machine helps you avoid damaging its finish during cleaning.
A quick isopropyl alcohol test can tell you if it’s shellac, which softens easily, or a more durable acrylic finish.
Shellac Vs Acrylic Finishes
When cleaning a vintage sewing machine, Finish Identification is key.
Understanding Shellac Properties helps spot this delicate, natural coating—softening with alcohol.
Acrylic Durability offers better UV resistance and longevity, but it can be tricky for antique sewing machine restoration.
Restoration Challenges include preserving decals while balancing Preservation Methods for each finish.
Shellac vs acrylic finishes reveals tangible differences in care.
Singer Machine Finishes
Singer sewing machines showcase unique finishes that require fastidious care.
To test the finish:
- Apply isopropyl alcohol; shellac softens quickly.
- Watch for shellac tenderness on models from the 1870s-1880s.
- Preserve decals to maintain each machine’s wear fingerprint.
- Avoid over-restoration to protect history.
Sewing machine finish testing guarantees preservation, balancing beauty and function.
Always prioritize gentle cleaning methods for finish identification and decal preservation.
Cleaning Techniques
You’ll need the right techniques to clean a vintage sewing machine without damaging its parts or finish.
Stick to gentle tools and safe products, like sewing machine oil and mild soap, to preserve its charm and functionality.
Sewing Machine Oil and Lubricants
Shellac or acrylic protected, vintage sewing machines thrive on proper care.
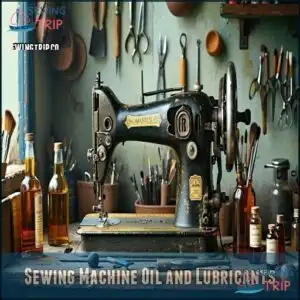
Sewing machine oil is your go-to for lubrication—mineral oil is light and clean, while synthetic oils resist temperature shifts.
Just a drop per gear works wonders, preventing residue buildup.
You can find the best oil products online.
Skip WD-40 as a lubricant; instead, grease metal gears sparingly to keep everything humming smoothly with the right product.
Using Household Soap and Water
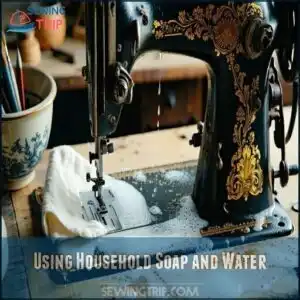
A little soap and water goes a long way in vintage sewing machine cleaning! Stick to these steps:
A gentle touch with simple soap and water breathes new life into your vintage sewing companion.
- Use mild household soap—skip harsh detergents.
- Go for lukewarm water; extremes can harm finishes.
- Apply with a soft cloth in gentle, circular motions.
- Rinse lightly with a damp cloth to avoid residue.
- Always dry thoroughly to prevent rust.
For specialized cleaning, consider purchasing cleaning soaps.
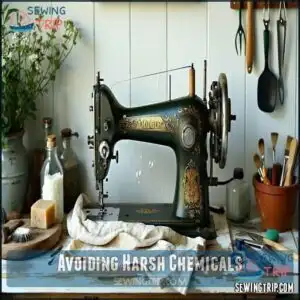
Avoiding Harsh Chemicals
A simple approach beats harsh chemicals every time.
Mild detergents and natural cleaners work wonders as gentle alternatives.
Always spot test first to confirm finish compatibility.
For vintage sewing machine cleaning, check this quick guide:
| Do This | Avoid This |
|---|---|
| Use sewing machine oil | Bleach-based products |
| Try natural cleaners | Abrasive scrubbing tools |
| Spot test small areas | Applying solutions heavily |
Stick to these sewing machine cleaning tips to keep your gem shining, using natural cleaners and avoiding harsh chemicals for the best results with your vintage machine.
Top 4 Cleaning Products
Choosing the right cleaning products can make all the difference when restoring a vintage sewing machine.
You’ll need options that cut through grime without damaging delicate finishes, so let’s explore four powerful and safe choices.
1. Tri-Flow Clear Synthetic Grease Tube
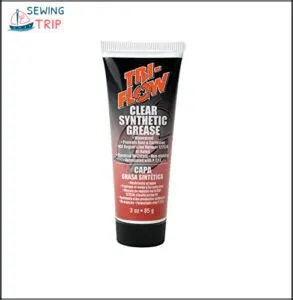
Tri-Flow Clear Synthetic Grease is a superstar for vintage sewing machine care.
This waterproof, PTFE-based grease glides smoothly onto mechanisms, reducing friction and preventing rust.
Its handy squeeze tube guarantees a no-mess application, making it perfect for lubricating gears and pivots.
Apply sparingly to clean moving parts, avoiding other areas like plastic or motors.
Users rave about its long-lasting performance and noise reduction, though its higher price and rare availability may require planning.
Precision matters—use a small brush for best results.
Best For: Vintage sewing machine owners and DIY enthusiasts seeking long-lasting, precise lubrication for gears and pivots.
- Waterproof and reduces friction effectively.
- Long-lasting performance with small quantities.
- Compatible with most rubbers and plastics.
- Higher price compared to alternatives.
- Can be hard to source in certain regions.
- PTFE content requires careful handling in high-heat scenarios.
2. Liberty Oil Sewing Machine Lubricant
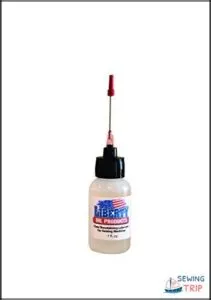
Liberty Oil is your vintage sewing machine’s best friend.
This synthetic oil works wonders on moving parts, reducing noise and improving performance without leaving stains.
Its precision needle applicator reaches those hard-to-access spots like the bobbins race and tension discs.
Just 1-2 drops will do the trick—don’t drown your machine in oil!
Applied sparingly, it minimizes wear and tear while extending your machine’s life.
Always clean surfaces first, and run scrap fabric to absorb any excess, which is long-lasting magic.
Trust me, with proper use, Liberty Oil is a vintage sewing machine’s best companion.
Best For: Vintage sewing machine owners looking for a reliable, non-staining, and long-lasting synthetic oil for smoother operation and reduced noise.
- Precision needle applicator reaches tight spots easily.
- Non-staining formula prevents damage to fabric and machine finish.
- Long-lasting and requires only a small amount per use.
- Applicator tip may be too large for very fine or intricate areas.
- Potential leakage if the applicator is not tightly secured.
- Higher price compared to traditional sewing machine oils.
3. GOJO Heavy Duty Hand Cleaner Refill
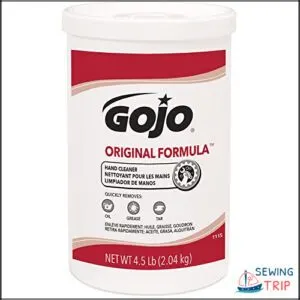
GOJO Heavy Duty Hand Cleaner Refill is like a magic eraser for grime but requires care.
Avoid the pumice version—it’s too abrasive for vintage machines.
Apply a tiny dab to a soft cloth, not directly on the surface, and gently wipe. It’s great for stubborn dirt but might strip delicate finishes or decals, so always test on a hidden spot first.
After cleaning, wipe off residue with a damp cloth, then polish with sewing machine oil to preserve the shine and ensure the longevity of your machine, using it as a final step to keep your equipment in good condition, with a soft cloth.
Best For: Professionals and hobbyists looking to clean heavy grime from tools, hands, or surfaces carefully, especially on durable materials.
- Highly effective at breaking down grease and grime.
- Gentle on skin, prevents cracking with lanolin.
- Versatile for hands, tools, laundry, and surfaces.
- Can strip paint or delicate finishes if not used with caution.
- Packaging issues may cause leakage during shipment.
- Petroleum-based formula raises environmental concerns.
4. Simple Green All Purpose Cleaner
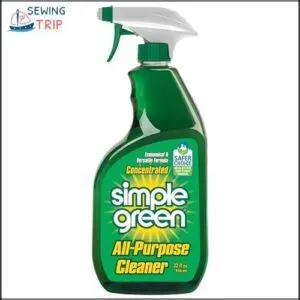
When tackling dusty vintage sewing machines, Simple Green All Purpose Cleaner might just do the trick—but don’t plunge in headfirst.
Always test it on a hidden area, dilute it with water, and skip spraying directly on the surface.
Use a soft cloth to gently wipe grime, but don’t overdo it or risk damaging delicate finishes and decals.
Be sure to rinse the machine thoroughly to avoid residue.
For stubborn dirt, consider safer alternatives like sewing machine oil or household soap.
Best For: DIYers and households needing a versatile, non-toxic cleaner for general cleaning and grease removal.
- May damage sensitive materials like vintage decals or shellac finishes.
- Leakage issues reported during shipping, especially from Amazon.
- Strong scent and cleaner power may require additional rinsing or dilution.
- Non-toxic and biodegradable for safe use around people and pets.
- Effective degreaser that works on diverse surfaces like floors and kitchen sinks.
- Can be used in both concentrated and diluted forms for flexibility.
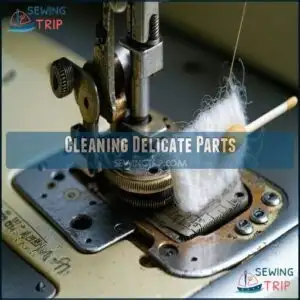
Cleaning Delicate Parts
You’ve got to be extra careful when cleaning delicate parts like tension discs, bobbin cases, and check springs, as even a slight scratch can affect your machine’s performance.
Use tools like cotton swabs, soft cloths, or tiny brushes to get into tight spaces without causing damage, which is crucial for maintaining your machine’s optimal performance.
Tension Discs and Check Springs
When cleaning tension discs and check springs, precision’s key. Follow these steps:
- Gently clean discs with a soft fleece, avoiding scratches.
- Check for Check Spring Damage, as it impacts Spring Tension Adjustment.
- Inspect for lint; use a toothpick for Disc Surface Cleaning.
- Reassemble carefully to avoid Reassembly Challenges.
- Regular sewing machine cleaning tips can prevent wear and improve sewing machine maintenance. To guarantee proper function, remember to address uneven stitch problems by adjusting the tension discs.
Shuttles and Bobbin Cases
While tension discs keep your stitches even, those hidden shuttles and bobbin cases need equal attention.
For smooth sewing machine maintenance, proper shuttle cleaning prevents thread jams.
Regular maintenance, such as cleaning the bobbin shuttle, guarantees consistent bobbin thread tension.
| Shuttle Types | Cleaning Method |
|---|---|
| Round Bobbin | Fine steel wool (#0000) with oil |
| Long Bobbin | Soft brush for lint removal |
| Vibrating Shuttle | Polish race for smooth thread path |
| Rotating Hook | Adjust bobbin tension after cleaning |
Treadle Bases and Pedals
While bobbin cases need precision cleaning, treadle bases and pedals require a different approach.
Apply Murphy’s Oil Soap or sewing machine oil to your treadle base—never water, which damages the wood.
For proper treadle lubrication, clean metal linkages with a toothbrush and light oil.
Check pedal alignment after cleaning to confirm smooth operation.
A well-maintained vintage sewing machine treadle feels like dancing—smooth, responsive, and surprisingly satisfying!
Removing Rust and Grime
You’ll need to tackle those stubborn rust spots and decades of grime that have turned your treasure into what looks like a salvage yard find.
With the right tools like steel wool, specialized rust removers, and a bit of patience, you’ll soon reveal the beautiful machine hiding underneath all that crusty history.
You’ll soon be able to enjoy your restored treasure.
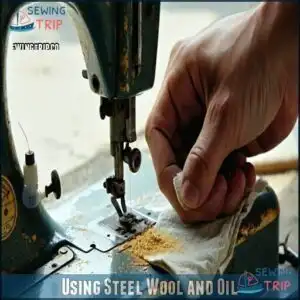
Using Steel Wool and Oil
Many vintage sewing enthusiasts swear by the steel wool and oil method for tackling stubborn rust spots.
You’ll need fine grade (0000) steel wool dampened with sewing machine oil to gently buff away corrosion without damaging the metal surfaces. A product like Evapo-Rust degreaser can also be used to remove rust.
- Apply sewing machine oil to the steel wool first, preventing surface scratch risks
- Work in small, circular motions with light pressure for effective rust removal depth
- Immediately wipe clean with a lint-free cloth to remove residue and apply fresh oil
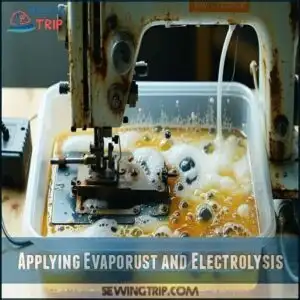
Applying Evaporust and Electrolysis
Against rust’s stubborn grip, Evaporust offers gentle yet effective removal through chelation.
Simply soak parts for 30 minutes to 24 hours depending on severity.
For heavier rust challenges, electrolysis setup becomes your secret weapon—use a plastic container with washing soda solution, connecting your part to a battery charger’s negative terminal while a mild steel anode takes the positive.
This rust removal product is widely available online.
Unlike harsh chemicals, both methods preserve your vintage treasure’s delicate mechanisms, making Evaporust a preferred choice for rust removal through chelation.
Cleaning With Compressed Air
While chemical treatments work wonders for rusty parts, nothing beats compressed air for those hard-to-reach nooks.
You’ll want a compressor with adjustable pressure settings (15-20 PSI is perfect) and a narrow nozzle attachment for precision.
Hold your machine over a towel to catch debris and maintain 6-8 inches of distance when blasting. This sewing machine dust removal technique works especially well for interior cleaning without disassembly.
Maintenance and Preservation
You’ll extend your vintage sewing machine’s life by cleaning it every 6-12 months and storing it in a dry, dust-free space away from pet litter boxes.
You can preserve your machine’s original character by documenting each cleaning with photos, noting which products worked best, so you’ll have a reliable reference for maintaining your mechanical treasure.
Regular Cleaning Schedules
Three key maintenance periods will keep your vintage beauty humming along perfectly.
After 8-10 hours of sewing, give the exterior a quick dust-off.
Every month, perform preventative maintenance by cleaning tension discs and removing debris from feed dogs.
Twice yearly, schedule a deep interior cleaning for maximum performance impact.
Your machine’s longevity depends on cleaning frequency and schedule adherence—just like regular oil changes for your car, which is crucial for its longevity.
Storing The Machine
Proper storage is your vintage sewing machine’s best defense against time.
Keep it in a dust-free environment with moderate temperature control and stable humidity levels.
Always use protective covers when not in use, and establish a pet-free zone to prevent hair accumulation.
For extra rust prevention, some collectors swear by placing small pieces of foil near metal components to absorb moisture—a secret trick for long-term sewing machine preservation.
Clear containers are ideal for visible supply storage.
Documenting The Cleaning Process
Every smart collector knows the value of photo documentation when cleaning vintage sewing machines.
Snap before/after comparison shots of your work, and keep a cleaning checklist of parts you’ve tackled.
Note which products worked best in your product inventory log.
This simple habit creates a roadmap for future maintenance and helps you track what techniques actually improved your machine’s condition.
Frequently Asked Questions (FAQs)
How to clean a Vintage sewing machine?
Like breathing new life into a sleeping beauty, dust your machine with a soft brush, clean with alcohol-free soap, and oil moving parts.
Don’t forget to remove the bobbins case and needle plate for thorough cleaning.
How do you clean an industrial sewing machine?
Industrial sewing machines need similar cleaning as household models but require more time.
Unplug the machine, use a soft brush for debris, oil moving parts sparingly, and clean tension discs with fleece.
How to restore antique sewing machine?
You’ll need patience for this journey.
First, assess the condition, then clean with mild soap, restore metal parts, lubricate moving components, and preserve original finishes.
Don’t over-restore—embrace some character marks.
How to clean a sewing machine like a pro?
Power off your machine first.
Remove lint with a brush, then wipe surfaces with a soft cloth dampened with mild soap.
Oil moving parts sparingly, focusing on gears and shafts. Buff dry when finished.
How to clean a sewing machine motor?
Imagine your sewing machine’s motor as its beating heart.
To clean it, unplug the machine, remove the cover, use a small brush for dust removal.
Avoid moisture near electrical components, as this is crucial for the machine’s longevity, and moisture can cause significant damage.
How often should you clean a sewing machine?
You should clean your sewing machine after every 8-10 hours of use or every 6-12 months for light users.
Regular maintenance prevents issues and extends your machine’s lifespan—think of it as a quick health check-up!
How to clean painted logos safely?
90% of vintage sewing machine decals can be damaged by harsh cleaners.
Use a soft cloth with mild soapy water, gently dab painted logos, never rub, and finish with a light coat of sewing machine oil.
When to replace original belts?
Replace old belts when they’re cracked, stretched, or slipping.
You’ll notice decreased performance or strange noises.
Original belts typically last 5-10 years depending on use and storage conditions.
Don’t wait for complete failure.
Can collectors clean machine interiors?
Yes, you definitely can clean machine interiors.
Just use soft brushes, compressed air, and gentle solvents to remove grime without damaging parts.
Always unplug first and document part locations before disassembly, and remember to use soft brushes.
Cleaning original carrying cases?
For your carrying cases, wipe the exterior with a damp cloth and mild soap.
Vacuum the interior, then clean metal hardware with metal polish.
Don’t saturate fabric linings – spot clean them instead, and remember to spot clean them to preserve the material.
Conclusion
Like Aladdin revealing hidden treasures, you’re now equipped to tackle cleaning a vintage sewing machine with confidence.
Remember, your patience will be rewarded with a machine that purrs like new.
Don’t rush the process—take time to clean each component thoroughly, especially those tension discs and shuttles.
With proper oils and gentle cleaners, you’ll avoid damaging delicate finishes.
Your vintage beauty isn’t just a sewing tool—it’s a piece of history worth preserving for generations to come.
- http://lustersheen.com/
- http://missyscakesandaprons.blogspot.com/2013/09/how-to-clean-treadle.html?fref=gc&dti=43656381612
- https://www.instructables.com/Electrolytic-Rust-Removal-aka-Magic/
- https://pungolivinghome.com/2022/05/22/a-tutorial-cleaning-the-bobbin-shuttle-from-a-singer-vibrating-shuttle-machine/
- https://www.youtube.com/watch?v=kZi5l4Pqifs

