This site is supported by our readers. We may earn a commission, at no cost to you, if you purchase through links.
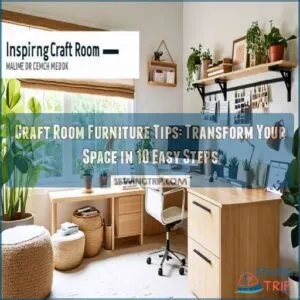
You’ll want a sturdy work table as your command center – think of it as your crafting throne.
Divide your space into zones, like a general organizing a battlefield.
Pegboards are your secret weapon; they’re like Swiss Army knives for storage.
Don’t forget a chair with wheels – you’ll feel like a crafting superhero zipping around your domain.
Built-in wall units are game-changers, maximizing every inch of space.
And remember, lighting is key – you don’t want to end up cross-stitching in the dark!
With these essentials, you’re well on your way to crafting nirvana. But wait, there’s more to discover about personalizing your space…
Table Of Contents
- Key Takeaways
- Choosing The Right Furniture
- Essential Furniture Pieces
- Maximizing Storage Space
- Organizing Your Supplies
- Customizing Your Space
- Creating a Functional Workspace
- Specialty Furniture for Specific Crafts
- Budget-Friendly Options
- Maintaining Your Space
- Inspiring Creativity
- Frequently Asked Questions (FAQs)
- Conclusion
Key Takeaways
- You’ll maximize your space by choosing multi-functional furniture like crafting desks with built-in storage, cube units for versatile organization, and rolling carts for mobile supply management.
- Customize your craft room with personal touches by upcycling old furniture, creating DIY storage solutions, such as incorporating clever storage solutions like built-in drawers and hidden compartments from a dollhouse storage guide, and displaying finished projects to inspire creativity and showcase your work.
- You’ll boost productivity by focusing on ergonomics and proper lighting, including adjustable task lamps, comfortable seating, and work surfaces at the right height for your projects.
- Keep your craft room organized and adaptable by implementing a regular cleaning schedule, rotating supplies seasonally, and using clear, labeled storage containers to easily locate and access your materials.
Choosing The Right Furniture
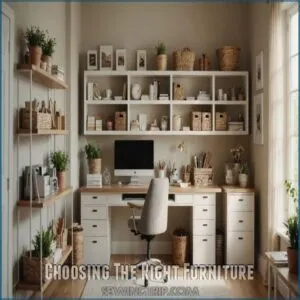
You’re about to start a crafty adventure, and choosing the right furniture is your first step to creating a space that’s as functional as it’s fabulous.
Consider your crafting style and space limitations as you select multi-functional pieces that’ll make your craft room dreams come true.
Measuring Your Space
Grab your trusty tape measure and let’s get down to business!
Before you start planning your craft room furniture, you’ll want to know your space inside out.
Measure your room’s dimensions, including tricky spots like alcoves or slanted ceilings.
Don’t forget to account for doors, windows, and electrical outlets – they’re game-changers for your layout.
Consider the ideal table size and height for a comfortable sewing experience.
Sketch out your room on paper, noting traffic flow and potential crafting zones.
This blueprint will be your secret weapon for creating a perfectly designed crafting haven.
Selecting Multi-Functional Pieces
Now that you’ve measured your space, let’s talk smart furniture choices.
Multi-functional pieces are your secret weapons in a craft room.
They’re like Swiss Army knives for your creativity!
You’ll want furniture that works as hard as you do, maximizing every inch of your space.
Here are some game-changers to think about:
- KALLAX craft table: Storage cubes by day, cutting surface by night
- Extendable fabric cutting table: Grows with your projects
- IVAR system: Customizable shelving that evolves with your needs
Considering Your Crafting Style
Your crafting style is the heartbeat of your space.
Think about the projects you love – are you a fabric fiend or a paint enthusiast?
Choose furniture that speaks to your craft.
If you’re into sewing, a sturdy table with ample surface area is a must.
For painters, consider an easel and a rolling cart for supplies.
Your furniture should be as unique as your creativity.
Essential Furniture Pieces
You’ll need the right gear to turn your craft room into a creative haven, and we’ve the must-have furniture pieces for you.
From a sturdy crafting desk to versatile storage solutions like bookcases and cube units, these essentials will help you organize your supplies and make the most of your space.
Crafting Desk
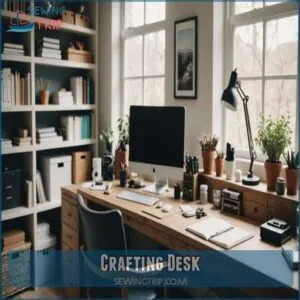
The heart of your craft room is a desk that fits you like a glove.
Choose one that’s spacious enough for your projects but doesn’t cramp your style.
Consider a DIY desk with an IKEA drawer system for that perfect mix of form and function.
Add task lighting to illuminate your work and a desk organizer to keep supplies at your fingertips.
Remember, a well-organized desk is your launchpad for creativity!
Bookcases
Bookcases aren’t just for books anymore!
They’re your craft room’s secret weapon for stylish storage.
Mix and match bookcase styles to create a personalized look that showcases your creativity.
Here are three ways to make the most of your bookcases:
- DIY lighting: Add puck lights for a cozy glow
- Organize with baskets: Corral small items in cute containers
- Display inspiration: Showcase finished projects and mood boards
With these tricks, you’ll transform ordinary shelves into a craft supply wonderland!
Cube Units
Countless crafters swear by cube units for their versatility and style.
They’re like Swiss Army knives for your craft room, offering a perfect blend of form and function.
Mix and match sizes to create a custom storage solution that fits your space like a glove.
You can also find storage bins online to complement your cube units, adding an extra layer of organization to your space with Storage Bins Options.
Let’s break down some cube unit magic:
| Size | Best For | Storage Hack |
|---|---|---|
| Small | Ribbon spools | Use tension rods |
| Medium | Fabric stacks | Roll and store vertically |
| Large | Paper pads | Install dividers |
| Extra Large | Sewing machines | Add a pull-out shelf |
These modular marvels can transform your craft chaos into an organized oasis.
Get creative with DIY inserts or add decorative baskets for a polished look.
Remember, labels are your friends – they’ll save you from the dreaded "where did I put that?" dance.
Floating Shelves
Above your craft table, floating shelves can be a game-changer for your creative space.
They’re like magic wands for wall space utilization, giving you extra storage without eating up floor real estate.
Here are some shelf-tastic ideas to maximize your vertical space:
- Mix wood and metal for a stylish, industrial look
- Install clear acrylic shelves for a modern, airy feel
- Use brackets in fun shapes to add personality
- Try DIY floating shelves from reclaimed wood for a rustic touch
Rolling Cart
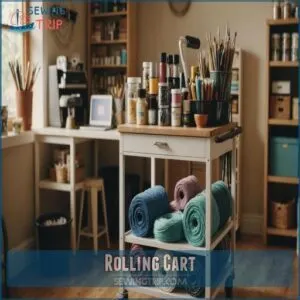
When your craft supplies start playing hide-and-seek, it’s time to roll out the big guns – literally!
A rolling cart is your craft room’s secret weapon.
This mobile marvel lets you wheel your go-to tools wherever inspiration strikes.
Consider investing in a fabric cutting table with ample workspace, storage solutions, and a weight capacity that can support your project size, such as the ones found in good fabric cutting tables.
Stock it with craft bins for easy organization, and add a lazy Susan tiered tray on top for those small bits and bobs.
You’ll be cruising through projects in no time!
Maximizing Storage Space
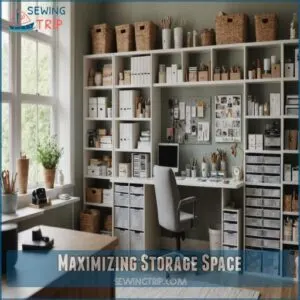
You’ll transform your craft room into an organized oasis with clever storage solutions that maximize every inch of space.
From pegboards to lazy Susans, you’ll discover nifty tricks to keep your supplies tidy and within reach, making your creative sessions smoother than ever.
Pegboard Craft Room Organization
Transforming your craft room with pegboard storage is like giving your creativity wings to soar.
You’ll open up a world of organization possibilities, freeing up valuable space and keeping your tools at your fingertips.
Say goodbye to clutter and hello to a craft oasis that’ll make your friends green with envy.
- Install hooks for hanging scissors, rulers, and paintbrushes
- Add small shelves or baskets for storing jars and bottles
- Use pegboard accessories like organizer trays for corralling small items
Storage Baskets
Storage-basket bonanza! These versatile gems are your secret weapon for conquering craft room chaos.
Mix and match materials like wicker, fabric, and plastic to suit your style and needs.
Stash paintbrushes in tall bins, corral fabric scraps in wide baskets, and label everything for easy access.
Place larger baskets on lower shelves and smaller ones up high.
With the right basket strategy, you’ll feel like a storage wizard in no time.
Hanging Drawers
Looking to take your craft room storage to new heights?
Hanging drawers are your secret weapon for maximizing vertical space.
These clever organizers keep your supplies within arm’s reach while freeing up precious floor and desk real estate.
Here are some nifty ideas to get you started:
- DIGNITET curtain wire for lightweight DIY hanging drawers
- GRUNDTAL rail to suspend heavier crochet storage units
- Repurposed dresser drawers as wall-mounted cubbies
- Flat paper files hung with sturdy drawer hardware
Get creative and watch your craft room transform into an organized oasis!
Desk Organizer
Now that you’ve got those hanging drawers sorted, let’s tackle your desk clutter!
A savvy desk organizer is your secret weapon for taming the chaos.
Think of it as your craft room’s superhero, swooping in to save you from supply avalanches.
DIY a custom organizer with repurposed containers, or splurge on a sleek, multi-compartment system.
Either way, you’ll be the master of your domain, with everything at your fingertips.
No more hunting for that elusive glue stick!
Lazy Susan Tiered Tray
You’ve got your desk organizer, but let’s take your storage game up a notch with a lazy Susan tiered tray.
This nifty contraption is like a merry-go-round for your craft supplies, spinning you into organizational bliss.
It’s perfect for those who can’t resist the urge to twirl their chair – now you can twirl your supplies too!
- Maximize corner spaces with a rotating organizer
- Categorize supplies by tray level for easy access
- Add decorative elements to make it a focal point
Organizing Your Supplies
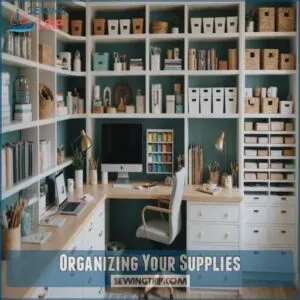
You’ll transform your craft room chaos into a tidy paradise with clever labeling tricks that’ll make Marie Kondo proud.
From bin storage labels to chalkboard tags you can swap seasonally, you’ll never lose track of your supplies again.
Bin Storage Labels
Let’s talk about bin storage labels, the secret sauce to keeping your craft supplies in check.
Imagine never losing that elusive glitter glue again!
With a solid labeling system, you’ll breeze through projects like a pro.
Mix it up with color-coded labels for different categories, or go for clear bin labels to spot items at a glance.
It’s like giving your craft room a superpower – organization that speaks your language!
Vinyl Labels and Decals for Furniture and Drawers
Vinyl labels and decals are your secret weapons for turning plain furniture into personalized storage champions.
They’re like magic stickers that transform drawers and cabinets into easy-to-navigate treasure troves.
Organizing your sewing supplies, for instance, can be made simpler by implementing a sewing room organization system.
Here’s how to make them work for you:
- Choose waterproof vinyl for durability
- Design labels that match your craft room’s vibe
- Use transfer tape for precise application
- Place labels at eye level for quick identification
With these DIY labels, you’ll breeze through your craft supplies like a pro, saving time and sparking joy in your creative space.
Chalkboard Labels to Swap Out Seasonally
Embrace the magic of seasonal change with chalkboard labels in your craft room.
They’re like a fashion-forward wardrobe for your storage, allowing you to switch up your organization style as easily as you change your mind.
Here’s a quick guide to get you started:
| Season | Label Design | Storage Hack |
|---|---|---|
| Spring | Floral motifs | Seed organizers |
| Summer | Beach themes | Suncatcher kits |
| Fall | Leaf patterns | Knitting supplies |
These versatile labels let you maintain control over your space while keeping things fresh and inspiring.
It’s like giving your craft room a mini-makeover every few months, without breaking a sweat or the bank.
Customizing Your Space
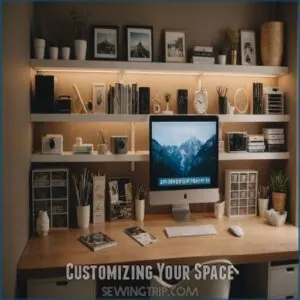
You’ve got the perfect furniture, but it’s time to make your craft room truly yours.
Let your creativity shine by customizing your space with DIY projects, upcycled treasures, and personal touches that’ll make you smile every time you step in to create.
DIY Furniture Projects
Now that you’ve got your supplies organized, it’s time to roll up your sleeves and create some custom furniture.
DIY projects like making a no-sew fleece blanket using a simple fleece fabric guide can be a great way to start, and they let you tailor your craft room to your exact needs.
Building your own desk or storage solutions isn’t just practical—it’s a chance to flex your creative muscles.
Here are three reasons to give it a shot:
- The pride of crafting something uniquely yours
- The thrill of problem-solving as you build
- The satisfaction of a perfectly fitted workspace
With some repurposed materials and a bit of elbow grease, you’ll have a one-of-a-kind craft nook in no time.
Upcycling Old Furniture
Treasure hunters, get ready to breathe new life into forgotten furniture!
You’ll turn that dusty dresser into a craft supply powerhouse.
With a fresh coat of paint and some creativity, you can transform old pieces into functional craft room stars.
Let’s explore some upcycling magic:
| Old Item | New Purpose | Transformation Tip |
|---|---|---|
| Dresser | Yarn Station | Remove drawers, add dowels |
| Kitchen Island | Cutting Table | Add casters, install pegboard |
| Ironing Board | Mobile Workspace | Attach wheels, add storage |
| Bookshelf | Bead Sorter | Install angled shelves, add jars |
These sustainable crafting ideas will have you seeing potential in every thrift store find.
Your craft room’s about to get a major DIY upgrade!
Adding Personal Touches
Your craft room’s ready for a personal touch!
Hang wall art that sparks joy and fuels creativity.
Mix in DIY decor and inspirational quotes to keep you motivated.
Choose a color scheme that reflects your style, and run with a theme that makes you smile.
Don’t forget clever storage solutions – a ribbon holder here, paint storage shelves there.
Make it a space that’s uniquely you, where every corner tells your creative story.
Creating a Functional Workspace
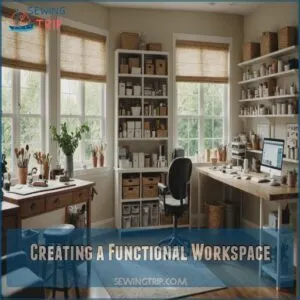
You’ll love spending time in your craft room when you create a functional workspace that’s both practical and inspiring.
With the right layout, lighting, and ergonomic setup, you’ll have a space that’s not just a craft room, but your own personal creativity haven.
Workspace Layout
Creating a functional workspace is like orchestrating a symphony – every piece must harmonize.
You’ll want to arrange your furniture to maximize flow and minimize clutter.
Think about how you move when you’re in the creative zone, and design your layout accordingly.
Here are some key elements to keep in mind:
- Ergonomic work surface at the right height
- Easy-access storage within arm’s reach
- Clear pathways for smooth movement
- Designated zones for different tasks
- Flexible furniture that adapts to your needs
Task Lighting
Let there be light in your crafting haven.
Now that you’ve nailed the layout, it’s time to brighten things up.
For a well-lit workspace, consider investing in a high-quality Best Sewing Lamps, which can provide adjustable brightness and color temperature options.
Illuminate your workspace with a mix of natural light sources and task-specific lighting.
Opt for adjustable desk lamps that can spotlight your projects, and consider overhead lighting options to banish shadows.
Remember, good lighting isn’t just about seeing clearly—it’s about bringing your creative vision to life and avoiding eye strain during those late-night crafting sessions.
Ergonomic Considerations
Crafting comfort isn’t just about cozy cushions—it’s about keeping your body happy during long creative sessions.
Adjust your chair height so your feet rest flat, and to do this, ensure the sewing table height is set equal to your elbow height when seated properly, as recommended by experts in proper sewing desk height, and maintain proper desk posture to avoid the dreaded craft-cramp.
Don’t forget wrist support for those intricate details, and position your lighting to banish shadows.
Consider footrest options to mix things up, and soon you’ll be crafting pain-free masterpieces while organizing supplies in those nifty glass apothecary jars and stamping storage bins.
Specialty Furniture for Specific Crafts
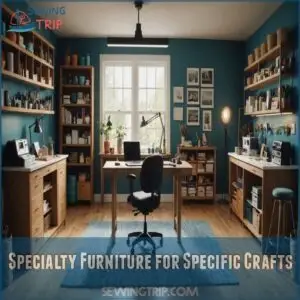
You’ve got the basics covered, but now it’s time to level up your craft game with specialty furniture designed for your creative passions.
Whether you’re a seamstress, painter, or potter, investing in purpose-built pieces like a sewing station, painting easel, or pottery wheel can transform your craft room into a true artist’s paradise.
Sewing Station
Now that you’ve got your workspace humming, it’s time to stitch together the perfect sewing station.
You’ll be in stitches (pun intended) when you see how easy it’s to set up a space that’s both functional and fabulous.
Here’s how to thread the needle on your dream sewing nook:
- Choose a sturdy table with ample surface area for your sewing machine and projects. Consider investing in a dedicated sewing machine tables cabinet to enhance your workspace and productivity. Choose a sturdy table with ample surface area for your sewing machine and projects
- Install task lighting to illuminate your work and prevent eye strain
- Incorporate vertical storage for fabric, threads, and notions to keep everything within arm’s reach
Your sewing station should be a cut above the rest, combining ergonomic comfort with smart storage solutions.
With the right setup, you’ll be sewing up a storm in no time!
Painting Easel
While sewing machines hum along, painters need their own stage.
Enter the painting easel – your canvas’s best friend.
Choose from tabletop, floor-standing, or French-style easels to suit your space and style.
Adjust the easel height for comfort, whether you’re sitting or standing.
When not in use, fold it flat for easy storage.
Don’t forget accessories like brush holders and palette trays to keep your creative flow going.
Pottery Wheel
The thrill of shaping clay on a pottery wheel can transform your craft room into a ceramic paradise.
You’ll need a sturdy setup for your wheel, considering both space and functionality.
Here are three key tips for incorporating a pottery wheel:
- Choose a splash-resistant area with easy-to-clean flooring
- Install proper ventilation to manage clay dust
- Set up nearby storage for tools and clay
Remember, wheel maintenance is essential for smooth spinning.
Keep your workspace tidy and your creativity flowing!
Budget-Friendly Options
You don’t need to break the bank to create your dream craft room.
With a little creativity and resourcefulness, you can transform your space using budget-friendly options.
IKEA hacks, thrift store treasures, and everyday household items repurposed into crafting gems.
IKEA Hacks
Ready to give your craft room a budget-friendly makeover? Let’s talk IKEA hacks. You’d be amazed at how versatile these Swedish wonders can be. With a little creativity, you can transform basic pieces into custom storage solutions that’ll make your crafting heart sing. For instance, learning how to take drawers out of IKEA Alex drawers can help you repurpose this popular storage unit to fit your unique needs.
Check out these clever ideas that’ll have you seeing IKEA furniture in a whole new light:
| IKEA Item | Hack Idea | Craft Room Benefit |
|---|---|---|
| Kallax Shelf | Add legs and a cushion | Cozy seating with hidden storage |
| Billy Bookcase | Install glass doors | Dust-free display for finished projects |
| Lack Side Table | Attach pegboard top | Vertical tool organizer and work surface |
| Raskog Cart | Paint and add labels | Mobile supply station for any project |
These DIY furniture projects aren’t just easy on the wallet—they’re a chance to flex your creative muscles and craft a space that’s uniquely yours. Who knew IKEA storage solutions could be so much fun?
Thrift Store Finds
Let’s talk treasure hunting.
Thrift stores are goldmines for budget-friendly craft room gems.
You’ll uncover vintage charm and upcycling potential at every turn.
Here’s your bargain-hunting game plan:
- Scout for solid wood dressers or cabinets – perfect for DIY refresh projects
- Snag mismatched chairs for a quirky, creative vibe
- Keep an eye out for unique containers or baskets for repurposed storage
- Look for sturdy tables that could become your new crafting centerpiece, or consider investing in a dedicated craft room table to serve as the heart of your space.
With a little imagination, these thrifty finds will transform your space without breaking the bank.
Repurposing Household Items
Surprisingly often, hidden treasures for your craft room are lurking right in your home.
Transform those forgotten kitchen canisters into perfect holders for paintbrushes and markers, while old dresser drawers become wall-mounted shelving with a fresh coat of paint.
You’ll love how that vintage wooden ladder creates an eye-catching display for your yarn collection or fabric rolls.
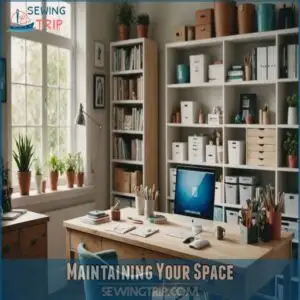
Maintaining Your Space
You’ll love how much easier crafting becomes when you maintain your space with regular cleaning and smart supply rotation.
Even if you’re not the tidiest crafter (we’ve all been there), keeping your furniture and tools in top shape will help your creative space adapt to your changing needs.
Regular Cleaning Schedule
When dust bunnies threaten to take over your creative haven, it’s time to tackle your craft room with a smart cleaning strategy.
You’ll feel more inspired in a spotless space that’s ready for your next artistic adventure.
Here’s your foolproof plan:
- Stock your cleaning supplies caddy with microfiber cloths and all-purpose cleaner
- Follow a weekly dusting routine for surfaces and storage units
- Deep clean your workspace monthly, including sanitizing frequently touched areas
Supply Rotation
Through your craft room doorway, those forgotten supplies are practically waving for attention.
You’ll breathe new life into your creative space by rotating supplies seasonally – think holiday stamps in December and beach-themed papers in summer.
Set up a simple DIY inventory system using clear bins, and you’ll never lose track of what’s hiding in the back.
Regularly rotate your projects to keep inspiration fresh and clutter at bay.
Adapting to Changing Needs
Your craft room should roll with the punches as your creative journey unfolds.
Just like your supplies need replenishing, your space needs to evolve with your artistic adventures.
You’ll feel more inspired when your craft room adapts to fit your changing needs.
- Rearrange furniture seasonally to accommodate new project types
- Install adjustable shelving that grows with your collection
- Keep modular storage units ready for new hobby supplies
- Set up a flexible workspace that converts for different crafts
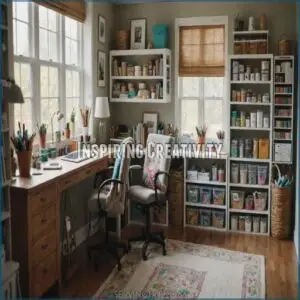
Inspiring Creativity
You’ll spark your creative spirit by surrounding yourself with a well-designed craft room that showcases your finished projects and favorite colors.
Your artistic motivation will soar when you create a dedicated space that combines smart storage solutions with personal touches like vision boards and inspiring displays.
Color Schemes and Aesthetics
To transform a space into a creative haven, it’s essential to carefully organize your supplies and tools for easy access while working on projects, as well as decorate the space with inspiring images, fabrics, or color palettes to spark ideas, such as curating a vibrant mood board filled with patterns, illustrations, and magazine clippings like a colorful mood board inspiration. Let’s transform that tidy craft room into an inspiring creative haven!
Pull together a cohesive color palette with three main shades – think navy, blush, and gold for a designer feel.
Create striking visual flow by placing your mood board where it catches natural light, then amp up the ambiance with strategic accent lighting.
Don’t forget to jazz up those storage containers – painting them in your chosen colors keeps everything feeling intentional and polished.
Displaying Finished Projects
Now that you’ve got those gorgeous colors working their magic, it’s time to show off your creative masterpieces.
A well-planned project showcase turns your craft room into an inspiring gallery of achievements.
Create an eye-catching display that’ll keep your creative juices flowing with these smart ideas.
To add a personal touch, incorporate materials from your latest craft supplies haul, such as unique embellishments or textures found at stores like Craft Supply Online.
- Mount a gallery wall with adjustable shelving for rotating displays
- Install string lights with clips to showcase seasonal projects
- Add shadow boxes near your workspace to protect delicate pieces
- Use magnetic boards for quick-swap metallic elements
Creating a Vision Board
While showing off finished projects sparks joy, creating a vision board ignites future inspiration.
Set up a dedicated cork board space where you can pin magazine cutouts, fabric swatches, and color palettes that spark your creativity.
Mix in photos of dream projects alongside inspiring quotes – this personalized inspiration hub will keep your creative fire burning and help manifest your crafting goals.
Frequently Asked Questions (FAQs)
How do I design a craft room?
Designing a craft room’s a breeze when you focus on functionality and organization.
Maximize space with multi-purpose furniture, clear storage containers, and smart labeling.
Add personal touches with a cohesive color scheme and proper lighting for your creative haven.
How do you organize a craft room?
You’ll love how organized your craft room becomes!
Use clear containers to display supplies, label everything, and maximize vertical space.
Create zones for different activities, and don’t forget a comfy chair for those long crafting sessions.
How do you make a craft room look better?
Imagine stumbling upon a craft room that’s a feast for the eyes!
You can spruce up yours by sticking to a cohesive color scheme, adding stylish storage solutions, and incorporating personal touches.
Don’t forget good lighting to showcase your creative space.
What are the best small craft room ideas?
Make your small craft room work harder with vertical storage, a folding table, and clear containers.
Maximize corners with floating shelves, use pegboards for tools, and opt for a rolling cart.
It’s all about smart, space-saving solutions!
How do you organize a cluttered craft room?
Picture your craft room as a jigsaw puzzle waiting to be solved.
Start by sorting supplies into clear containers.
Create zones for different activities.
Use vertical space.
Label everything and purge unused items regularly to maintain order.
How to decorate a craft room?
Transform your craft room into a creative oasis!
Add vibrant colors, inspirational wall art, and cozy seating.
Display your favorite projects, use cute storage solutions, and incorporate personal touches.
You’ll love spending time in your revamped crafting haven.
How do you maximize space in a small craft room?
You’ll love these space-saving tricks for your cozy craft nook!
Use vertical storage with wall-mounted shelves.
Opt for multi-functional furniture like a fold-down table.
Embrace clear containers to keep everything visible and within reach.
How to set up an arts and crafts room?
Setting up an arts and crafts room? Start by choosing a well-lit space with ample storage.
Install shelves, pegboards, and a sturdy work table.
Organize supplies in clear containers, and add comfortable seating.
Don’t forget good lighting for detailed work!
How to incorporate lighting into craft room furniture?
Illuminate your creativity by integrating LED strips under shelves or inside drawers.
LED strips and adjustable task lamps can really enhance your craft room.
Add adjustable task lamps to your desk for focused light.
Don’t forget overhead lighting to brighten the whole space.
Your craft room will shine with these lighting tricks!
What ergonomic considerations for craft room furniture?
Ever feel like your craft room‘s giving you a backache?
Invest in an adjustable chair for proper posture, add a standing desk for versatility, and position your work surface at elbow height.
Don’t forget wrist rests and good lighting!
Best materials for durable craft room furniture?
Choose solid wood like oak or maple for long-lasting durability.
You’ll love laminate surfaces for their stain resistance and easy cleaning.
Metal frames offer stability, while butcher block tops provide a sturdy work surface that can handle your creative endeavors.
Furniture for small or oddly-shaped craft rooms?
Where there’s a will, there’s a way, even in tight spaces!
You’ll love corner desks, wall-mounted storage, and foldable tables.
They’re your secret weapons for maximizing every inch.
Don’t forget vertical space – it’s a game-changer!
Multi-functional furniture ideas for craft room guests?
You’ll love these multi-functional gems for your craft room guests!
Grab a sleeper sofa that doubles as comfy seating.
Add a foldable craft table that transforms into a dining space.
Don’t forget storage ottomans for extra seating and supply hideaways.
Conclusion
Like Aladdin’s magic carpet, your craft room is poised for an incredible transformation.
Armed with these craft room furniture tips, you’re ready to create a space that’s uniquely yours.
Remember, it’s not just about storage – it’s about crafting an environment that sparks joy and fuels your creativity.
So, embrace the journey, experiment with layouts, and don’t be afraid to add your personal flair.
Your dream craft room is within reach.
Now, go forth and let your creativity soar in your newly organized haven!

