This site is supported by our readers. We may earn a commission, at no cost to you, if you purchase through links.
Start with cotton or linen – they’re like training wheels for fabric beginners.
Pre-wash your materials to avoid any post-project shrinkage surprises (we’ve all been there!).
Keep your workspace tidy and use proper tools: sharp scissors for clean cuts, straight pins for secure holding, and a reliable iron for crisp creases.
When you’re handling slippery fabrics, try placing tissue paper underneath – it’s like giving yourself superpowers against sliding material.
There’s nothing quite like mastering these basics to unleash your creative potential.
Table Of Contents
Key Takeaways
- Start with cotton and linen fabrics – they’ll hold their shape better and won’t slip while you’re working, making them ideal for practicing basic techniques.
- Pre-wash and press your fabrics before sewing to prevent shrinkage and ensure smooth, professional-looking results in your finished projects.
- You’ll get cleaner cuts and better control by using the right tools: sharp fabric scissors, straight pins for securing, and a reliable iron for crisp creases.
- When you’re handling slippery fabrics, place tissue paper underneath to prevent sliding and maintain control throughout your sewing process.
Choosing Forgiving Fabrics
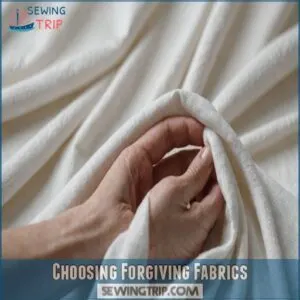
You’ll feel like a sewing superstar when you start with forgiving fabrics like cotton, linen, and stable knits that make learning easier and more fun.
These beginner-friendly materials won’t slip around or stretch out of shape while you’re working, giving you the confidence to tackle your first projects without frustration.
Stable Fabrics for Beginners
Starting with stable fabrics is like having training wheels on your first bike – they help you build confidence without the wobbles.
Look for materials that hold their shape and don’t slip around while you’re working.
Woven fabrics are your best friends here, offering predictable behavior and forgiving mistakes, such as woven fabric types.
When checking fabric weight, give it a gentle stretch – if it bounces back nicely, you’re on the right track.
Cotton for Easy Handling
Cotton’s your best friend when you’re just getting started with sewing.
Like that reliable pal who always has your back, cotton fabric forgives your mistakes and bounces back from almost anything.
Here’s why it’s perfect for beginners:
- Holds its shape without slipping around
- Takes well to pressing and ironing
- Comes in different weights for various projects
- Handles frequent unpicking without showing needle marks
Knits With Stretch Properties
While you’ve mastered cotton’s steady ways, let’s explore the bouncy world of knits.
These stretchy fabrics open up a whole new playground of possibilities for your sewing adventures.
| Knit Type | Stretch Direction | Best For |
|---|---|---|
| Jersey | Two-way | T-shirts, dresses |
| Interlock | Four-way | Activewear, leggings |
| Ribbing | Maximum | Cuffs, neckbands |
You’ll love how knits move with you, making them perfect for comfy everyday wear.
Just remember to use a ballpoint needle and stretchy stitch to keep your seams happy.
Linens Beginner-Friendly Texture
Linen’s natural texture might surprise you – it’s actually a beginner’s best friend.
Unlike stretchy knits, linen offers a stable yet forgiving feel that’s perfect for learning.
You’ll love how it holds its shape while still having enough give to work with.
Sure, it wrinkles easily, but that’s part of its charm.
A quick press with steam and you’re back in business.
Preparing Fabric for Sewing
You’ll save yourself hours of frustration by properly preparing your fabric before you start sewing.
Just like you wouldn’t paint a wall without cleaning it first, choosing the right fabric type for sewing projects fabric types for sewing will ensure your garment has the desired breathability, stretch, and durability, taking time to pre-wash and press your fabric will give you much better results with your sewing projects.
Pre-Treating Fabrics for Easy Handling
Fabric prep is like setting yourself up for success in the kitchen – you wouldn’t skip washing your veggies, right?
Start by pre-washing your fabric to prevent surprise shrinkage and color bleeding later.
Test a small corner for colorfastness, then wash according to care instructions.
For extra control, grab some fabric stabilizer – it’s like training wheels for tricky materials, keeping everything steady as you work.
Pressing and Ironing Techniques
Getting your iron settings right can feel like a puzzle, but it’s simpler than you think.
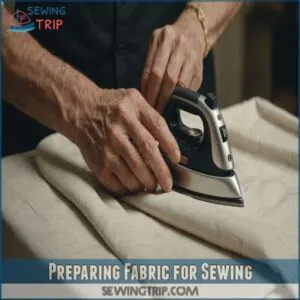
Set your iron to medium-high for cotton, low for delicate fabrics, and always test on a scrap first.
Use a pressing cloth to protect sensitive materials, and press (don’t slide) the iron to avoid stretching.
Steam helps tackle stubborn wrinkles, but remember to keep the iron moving to prevent scorching.
Using Starch and Stabilizers for Smooth Fabric
Now that your iron’s warmed up, let’s boost your fabric control game with starch and stabilizers.
Think of starch as your fabric’s personal trainer – it makes cotton stand at attention and behave.
For projects requiring extra stability, consider alternatives to traditional fabric stabilizers, such as budget-friendly stabilizer alternatives.
Spray starch works wonders for crisp results, while fusible stabilizers are your secret weapon for taming stretchy knits.
For delicate fabrics, tear-away stabilizers provide just enough support without leaving a trace.
Understanding Fabric Grain
You’ll be amazed at how much easier your sewing projects become when you have a solid grasp of common sewing terms, such as understanding the importance of fabric grain. You’ll be amazed at how much easier your sewing projects become when you understand how fabric grain works, just like knowing which way to pet a cat for the smoothest result.
Once you learn to work with the natural direction of your fabric’s threads, you’ll find your pieces fit together perfectly and your finished projects look more professional.
Fabric Grain Terminology for Beginners
Let’s clear up the mystery behind fabric grain – it’s simpler than you think!
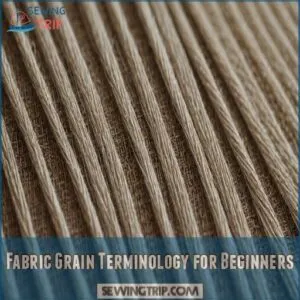
Your fabric’s warp threads run lengthwise (like a fence), while weft threads go across (like ladder rungs).
Understanding the main direction of fabric threads is important as it impacts how your fabric hangs and stretches.
Together, they create the straight grain, which runs parallel to these threads.
When you cut at a 45-degree angle, that’s your bias – think of it as the fabric’s diagonal dance move!
Fabric Stretch and Grain Direction
Think of fabric grain like wood grain – it’s got a natural direction that affects how your material moves and stretches.
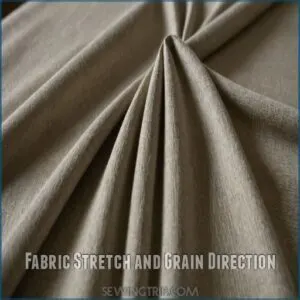
When you cut fabric parallel to its lengthwise threads (warp), you’ll get minimal stretch.
For more in-depth information on fabric grain, check out a fabric grain guide.
Cut across those threads (weft), and you’ll see a bit more give.
But here’s the fun part: cut at a 45-degree angle, and you’ve achieved maximum stretch potential!
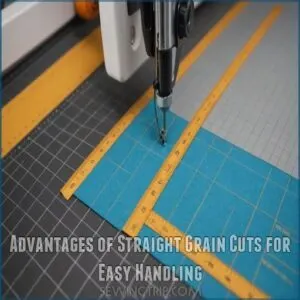
Advantages of Straight Grain Cuts for Easy Handling
Working with straight grain cuts is like having a built-in GPS for your fabric – it keeps everything aligned perfectly.
You’ll love how it makes your sewing journey smoother.
Here’s why straight grain cuts are your best friend:
- Prevents fabric from stretching out of shape
- Maintains consistent seam allowances
- Creates stable, professional-looking borders
- Preserves your design’s integrity through washing and wear
Easy Fabric Handling Techniques
You’ll be amazed at how simple fabric handling can become with just a few smart tricks up your sleeve.
Whether you’re wrestling with wrinkles or fighting fraying edges, these practical techniques will help you tame even the most stubborn materials.
Gathering Fabric Without Pins or Clips
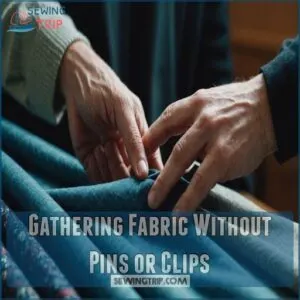
With just your fingers and fabric, you can create beautiful gathers without reaching for pins or clips.
Start by pinching the fabric between your thumb and index finger, then gently pull and twist as you work along the edge.
This technique gives you more control over fabric tension and creates even gathers.
You’ll feel like a pro when you master this pin-free approach.
Smoothing Out Wrinkles and Creases
Wrinkled fabric doesn’t have to ruin your project.
Once you’ve got your fabric in place, grab your iron and start at the center, working outward in smooth, steady strokes.
For stubborn creases, spritz with water or use steam – a quality steam iron with variable temperature settings, like those discussed in how to press sewn fabric, makes a big difference.
Press, don’t slide the iron – you’ll get crisper results.
A pressing cloth between your iron and fabric prevents scorching and adds an extra layer of protection.
Preventing Fraying and Unraveling Edges
Fraying edges can turn your beautiful fabric into a frustrating mess, but don’t worry – you’ve got this!
Three simple techniques will keep those pesky threads in check:
- Run pinking shears along raw edges for a quick, classic finish
- Set your machine to a zigzag stitch and sew along the edge
- If you’ve got a serger, finish edges with a clean, professional look
These methods will keep your fabric looking sharp and fresh.
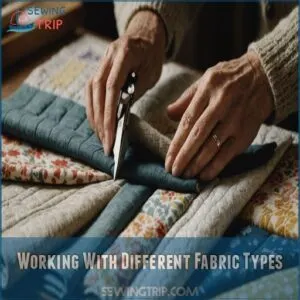
Working With Different Fabric Types
You’ll find that different fabrics have their own unique personalities, just like your quirky group of friends at school.
You’ll be surprised at how quickly you can master the basics of handling each type.
Whether you’re starting with beginner-friendly cotton or experimenting with stretchy knits.
Cotton and Linen Fabrics for Beginners
Cotton and linen are your best friends when you’re starting out. Cotton’s like that reliable buddy who’s always got your back – it’s stable, easy to iron, and forgives your mistakes.
Linen might seem fancy, but it’s surprisingly beginner-friendly with its natural drape. Both fabrics breathe well and get better with each wash.
Plus, they’re perfect for practicing basic stitches without the frustration of slippery materials.
Knit and Woven Fabrics for Easy Handling
While cotton and linen are fantastic starter fabrics, let’s explore knits and wovens – they’re like the yin and yang of fabric types.
Each has unique qualities that make them perfect for different projects.
Here’s what you need to know:
- Knits stretch and bounce back, ideal for comfy clothes
- Wovens hold their shape better, great for structured pieces
- Knits can be slippery, so try using a walking foot
- Wovens fray more, but they’re easier to press
Specialty Fabrics for Quilting and Sewing
Ready to level up your quilting game? Let’s explore some exciting specialty fabrics that’ll make your projects pop. From designer cotton prints to hand-dyed fabrics, you’ve got endless possibilities to express your creativity.
| Fabric Type | Best Uses | Care Tips |
|---|---|---|
| Designer Cotton | Statement pieces | Pre-wash cold |
| Hand-dyed Fabric | Color impact | Gentle cycle |
| Vintage Textiles | Unique projects | Hand wash only |
| Silk Blends | Luxury touches | Dry clean |
These fabrics might cost more, but they’ll give your quilts that wow factor you’re after.
Common Fabric Handling Issues
You’ll find that even experienced sewers face tricky fabric situations, from stubborn wrinkles to fraying edges that seem to have a mind of their own.
Don’t worry though – we’ve got your back with simple solutions to these common fabric challenges that’ll help you handle your materials like a pro.
Dealing With Fraying and Unraveling Edges
Taking control of fraying edges doesn’t have to be a battle.
With the right techniques, you’ll keep those unruly threads in check and create professional-looking projects every time.
Here’s your game plan for taming those pesky edges:
- Use pinking shears for a quick zigzag edge that resists fraying
- Apply a line of zigzag stitching close to the raw edge
- Finish seams with an overcast stitch for durability
- Brush on fray check liquid for stubborn fabrics
Correcting Fabric Distortion and Waviness
Fabric distortion can sneak up on even the most careful sewists. To fix those pesky waves, start by releasing tension in your seams – unpick if needed.
Next, adjust your presser foot accessories and test on scrap fabric.
Keep your fabric feeding evenly by guiding, not pulling.
Remember to check your grain lines, as they’re often the culprit behind unwanted stretching and warping.
Removing Wrinkles and Creases for Smooth Fabric
Those stubborn wrinkles don’t stand a chance with the right approach.
Start with your iron’s temperature settings matched to your fabric type – you’ll find this on the care label.
For delicate fabrics, use a pressing cloth to prevent scorching.
Steam is your best friend here, but don’t overdo it.
Work in sections, and remember to let the fabric cool completely before moving it.
Mastering Fabric Stability
You’ll be amazed at how much easier sewing becomes when you start with stable, forgiving fabrics that don’t slip and slide under your needle.
Just like learning to ride a bike with training wheels, working with cotton and linen helps you build confidence before moving on to trickier materials.
Importance of Fabric Stability for Beginners
When you’re just starting out, working with stable fabrics is like having training wheels on your sewing journey.
You’ll find it easier to focus on mastering basic techniques without fighting against slippery or stretchy materials.
Stable fabrics hold their shape while you work, making every stitch more precise and your seams straighter.
This builds confidence and helps you develop proper handling techniques naturally.
Choosing Forgiving Fabrics for Practice
Starting your sewing journey with forgiving fabrics often involves selecting materials that can work well with added stability, like fusible interfacing techniques. This helps you focus on mastering techniques without fabric fights.
Cotton’s your best friend here – it’s stable, easy to press, and recovers well from mistakes.
Quilting cotton offers perfect practice ground with its predictable behavior.
Linen’s natural drape makes it surprisingly beginner-friendly too.
Remember, you’re building confidence with each stitch, so choose materials that let you learn comfortably.
Transitioning to More Challenging Fabrics
You’ve mastered stable fabrics, and now it’s time to spread your wings!
Try working with slippery silks or stretchy jerseys in small doses – maybe start with a simple scarf or tank top.
Each new fabric type brings fresh challenges, but don’t worry.
Your experience with cotton and linen has built a solid foundation of skills.
Take it slow, practice on scraps, and watch your confidence soar.
Tips for Quilters and Sewers
You’ll find that managing fabric isn’t as tricky as wrestling with a tangled ball of yarn when you’ve got the right techniques up your sleeve.
Whether you’re hand-stitching a cozy quilt or using your trusty sewing machine, these tried-and-true tips will help you handle your fabrics like a seasoned pro.
Hand Quilting Techniques and Supplies for Easy Fabric Handling
Now that you’ve got stable fabrics under control, let’s make hand quilting a breeze by mastering Beginner Hand Sewing Techniques for Quilts.
Think of basting as your fabric’s best friend – it keeps everything in place while you work on your quilting.
Here’s what you’ll need for smooth sailing:
- Sharp quilting needles (size 8-10) for clean stitches
- Quality cotton thread that won’t snap
- A sturdy wooden hoop for tension control
- Curved safety pins for basting layers together
Machine Quilting Techniques for Smooth Fabric
A smooth-running machine makes quilting feel like dancing with fabric.
Adjust your tension for balanced stitches, and let your walking foot guide layers evenly.
For free-motion work, drop those feed dogs and glide across the surface with confidence.
Keep your stitch density consistent by moving at a steady pace – think of it like conducting an orchestra where every note hits perfectly.
Troubleshooting Common Fabric Handling Issues
After mastering machine quilting, let’s tackle those pesky fabric problems that can drive anyone nuts.
Here’s your troubleshooting cheat sheet:
- Fix fabric distortion by applying a suitable type of fusible interfacing, such as non-woven interfacing for flexibility, and adjusting presser foot pressure
- Prevent seam slippage by reducing stitch length and using stabilizer tape
- Combat fraying edges with pinking shears or a zigzag stitch along the raw edge
Remember, even pro quilters face these hiccups – it’s all part of the learning journey!
Frequently Asked Questions (FAQs)
How do I make fabric care easier?
Pre-wash fabrics in cold water and sort by color.
Label care instructions for quick reference when needed.
Use fabric softener sparingly, iron on proper settings, and store in a cool, dry place.
What are some tips for quilters?
Like a master chef in the kitchen, you’ll want to stick with cotton fabrics for precise piecing.
Press seams open for crisp results.
Use a quarter-inch foot to maintain consistent seam allowances.
How do you gather fabric?
To master working with different fabrics, it’s essential to practice stitching on scrap fabric, as explained in the Sewing Basics Guide. Set your sewing machine to the longest stitch length and sew two parallel lines.
Leave long thread tails, then gently pull the bobbin threads while holding the fabric to create even gathers.
Can a sewing machine gather cotton?
Yes, you can easily gather cotton with your sewing machine!
Just adjust your tension to high and stitch length to the longest setting.
Run two parallel lines, then pull the bobbin threads to create perfect gathers.
Can you make a T-shirt without sewing skills?
You’ll find no-sew t-shirt options are actually pretty clever.
Try fabric glue or hem tape for seams, and experiment with creative cuts using old shirts.
It’s doable, though traditional sewing gives better results.
How can I prevent shrinkage & fading?
Pre-wash fabrics using techniques like those for pre washing delicate fabrics in cold water before sewing to prevent future shrinkage.
Pre-washing is key to preventing shrinkage.
Add a cup of white vinegar to lock in colors, and always wash dark fabrics separately.
Vinegar helps lock in colors, and dark fabrics should be washed separately.
Skip the dryer – air-drying preserves fabric quality.
Air-drying is the best way to preserve fabric quality.
What is the easiest fabric to work with for beginners?
Like training wheels on a bike, cotton is your best starting point.
It’s stable, forgiving of mistakes, and easy to work with.
You’ll find it’s breathable and comes in different weights for various projects.
What is the best way to hold fabric together?
Start with pins at right angles to secure fabric edges.
Wonder clips are great for bulky materials.
For delicate fabrics, try using washable fabric glue or double-sided tape as temporary holds.
What are fabric manipulation techniques?
Fabric manipulation involves folding, pleating, smocking, and gathering to create unique textures and designs.
You’ll transform flat fabric into 3D effects using these techniques, adding depth and interest to your sewing projects.
How do you gather fabric easily?
Just like gathering storm clouds, you’ll want to sew two parallel lines along your fabric’s edge.
Then pull the bobbin threads gently while pushing the fabric together – it’ll bunch up beautifully.
How do you keep fabric from getting stuck underneath?
Use a walking foot attachment and check your needle’s sharpness.
You’ll also want to start sewing with a scrap piece of fabric, holding both thread tails firmly as you begin stitching.
Whats the best way to store leftover fabric?
Like organizing a well-stocked pantry, store your fabric flat in clear containers or on hanging rods.
Sort by color or type, and label everything.
You’ll protect your stash from dust and wrinkles.
Should fabric scissors be used for anything else?
Never use your fabric scissors for anything except cutting fabric – they’ll stay sharp longer.
They’ll stay sharp longer.
Keep them away from paper, cardboard, and other materials that’ll dull the blades and ruin your clean cuts.
How do you fix puckered seams while sewing?
Puckered seams can be a real headache!
Check your tension settings, then try reducing presser foot pressure.
You’ll also want to hold fabric taut while sewing and use the right needle size.
When should you replace your cutting mat?
Replace your cutting mat when you notice deep score marks, warping, or it’s not self-healing anymore.
You’ll also want a new one if fabric starts catching on cuts or measurements become hard to read.
Conclusion
Like a maestro conducting an orchestra, you’ll soon be directing fabric with confidence and skill.
These easy fabric handling tricks for beginners are just the start of your creative journey.
Remember to take it slow, practice with forgiving materials, and celebrate your progress.
Whether you’re quilting, sewing, or crafting, these fundamental techniques will serve as your foundation.
Trust yourself, keep experimenting, and watch your projects transform from good to fantastic!

