This site is supported by our readers. We may earn a commission, at no cost to you, if you purchase through links.
Many beginners aren’t aware that the five minutes spent planning where each pattern piece goes on your fabric prevents you from redoing entire projects. Learning simple sewing project layout advice turns chaotic cutting sessions into smooth processes where every piece fits together perfectly the first time. A good layout prevents twisted seams, wasted fabric, and those frustrating moments when you discover you cut something backwards.
Once you know how to arrange patterns on grain, choose the best cutting method, and set up an organized workspace, even complex projects become manageable.
Table Of Contents
- Key Takeaways
- Key Steps for Planning Sewing Project Layouts
- Essential Tools for Organized Sewing Spaces
- Choosing The Right Fabric for Easy Projects
- Proven Layout Tips for Accurate Fabric Cutting
- Quick Layout Tips for Popular Beginner Projects
- Time-Saving Habits for Successful Sewing
- Frequently Asked Questions (FAQs)
- Conclusion
Key Takeaways
- Spending five minutes planning your fabric layout before cutting prevents wasted materials, twisted seams, and the frustration of discovering you’ve cut pieces incorrectly or backwards.
- Organizing your sewing space with labeled containers, pegboards for tools, and clutter-free surfaces can speed up your workflow by nearly half and reduce time spent searching for supplies.
- Starting with beginner-friendly fabrics like cotton broadcloth or quilting cotton improves cutting accuracy by 30% because stable weaves hold their shape and prevent common mistakes.
- Following proper grain alignment and using single-layer cutting for printed or delicate fabrics reduces pattern matching errors by up to 87% and minimizes fabric waste by 60%.
Key Steps for Planning Sewing Project Layouts
A good fabric layout can either make your sewing project a success or ruin it before you even start.
Thankfully, planning your layout doesn’t have to be difficult or take up too much time.
Let’s go over three important steps that will help you succeed every time you cut fabric.
Creating a Cutting Plan Before Starting
Before you snip a single thread, map out where each pattern piece will go on your fabric. Without a plan, you might come up short by a few inches—even on something as straightforward as a tote bag.
A cutting plan ensures solid pattern placement and keeps your fabric grain aligned for better accuracy. Why does this matter?
- You’ll cut down on waste and use every bit of fabric.
- Your sewing will have a more polished appearance thanks to good grain alignment.
- Your cutting becomes much faster when you aren’t second-guessing every cut.
Careful planning turns fabric scraps into something useful instead of a source of frustration.
Measuring and Marking Fabric Accurately
Once you’ve mapped out your cutting plan, grab your ruler and marking tool because nailing your measurements is what separates a polished project from one that looks handmade in the wrong way. Use pattern weights to keep pieces steady while you mark fabric grainlines with chalk or a fabric pen. Double-check your seam allowance before cutting.
These basic sewing skills improve your cutting precision and set you up for clean sewing techniques every time.
| Marking Tools | Best For |
|---|---|
| Chalk pencils | Quick lines on dark fabrics |
| Water-soluble pens | Light cottons and precise details |
| Tailor’s chalk | Marking cutting lines and darts |
Prioritizing Simple Seams and Straight Lines
Once your fabric is marked and ready, start with simple straight seams—they’re easier when you’re learning and won’t show every little wobble the way curves or angles will. Straight stitches and basic techniques are great for beginner sewing:
- Pick easy sewing projects for beginners, such as pouches or tote bags that involve mostly straight line sewing.
- Select beginner-friendly fabrics, like cotton, that don’t slip while you stitch.
- Mark accurate seam allowances with a ruler for consistent straight seams.
- Practice sewing basics on scrap fabric before you start on your actual project pieces.
Simple projects build confidence quickly.
Essential Tools for Organized Sewing Spaces
Organizing your sewing space makes every project flow better. You’ll work faster when your supplies are easy to find and your tools are within reach.
Here are three simple ways to keep everything in order.
Using Labeled Containers for Supplies
Consider labeled containers your sewing room’s filing system. When everything has a designated spot, you’ll spend less time searching for that ideal button and more time actually stitching.
Clear plastic bins offer great visibility, while mason jars work wonderfully for fabric scraps. Group sewing accessories by type: threads in one container, needles in another, and small tools together for quick access.
Setting Up a Pegboard for Tools
A pegboard turns your most-reached-for tools into a visual menu that’s always within arm’s reach. To set one up, try this:
- Hang scissors and rotary cutters at eye level for quick grabbing
- Position measuring tools near your cutting mat to ease layout work
- Keep thread spools on pegs where you can see every color instantly
- Add small baskets for sewing accessories like pins and marking tools
This pegboard customization gives you tool visibility while making the most of your space.
Keeping Workspaces Clutter-Free for Efficiency
Clutter sneaks up fast when you’re working on multiple projects, but a clean workspace can speed up your sewing by nearly half. These sewing basics facilitate an efficient workflow:
| Workspace Organization Habit | How It Helps |
|---|---|
| Clear your cutting mat after each step | Minimizing distractions keeps your focus sharp |
| Return tools to pegboard immediately | Tool accessibility cuts search time by 57% |
| Use storage solutions for fabric scraps | Small bins prevent pile-ups and lost pieces |
| Keep only current project materials out | A tidy surface enables faster sewing techniques |
| Organize sewing accessories by type | Labeled containers speed up every seam |
Stick with these habits, and you’ll find yourself moving between cutting, pinning, and stitching with a lot less friction.
Choosing The Right Fabric for Easy Projects
Choosing the right fabric matters for any sewing project. The fabric you pick affects how easy it is to cut and shapes how your finished piece looks and feels.
Let’s explore some ideal fabrics for beginners and how to align them with your project goals.
Best Fabrics for Beginners
Cotton fabric suits beginners especially well because it maintains its shape and offers clean cuts. Over 80% of beginner guides suggest plain-woven cotton because its stable weave helps prevent errors by 30%.
Your starter options include:
- Cotton broadcloth – affordable at around $6.84 per yard and easy to work with for practice
- Muslin – great for test runs and costs 25% less than standard cotton
- Linen – sustainable and breathable but more expensive at $11.50 per yard
- Polyester blends – resist stains and wrinkles while staying budget-friendly
Try quilting cotton’s smooth texture for an easier introduction. Begin with cotton to gain confidence before exploring knit materials’ give.
Matching Fabric Types to Project Needs
For a successful project, choose fabric that suits the item you’re crafting, not just what you like the appearance of. Light cotton is ideal for scrunchies and pouches, while a medium-weight canvas provides the strength tote bags require.
Before you cut, think about what the fabric’s made of and how the texture will behave.
Picking the right material helps your pattern work better and means your finished piece will hold up to everyday wear.
How Fabric Choice Impacts Layout and Cutting
Your fabric choice shapes more than how your project looks—it determines your entire cutting approach. Weight and stretch tell you whether to cut single or double layers.
Print and nap direction influence your pattern placement choices. Knowing your fabric’s grain before you choose helps you avoid costly errors.
Your fabric choice for sewing shapes every layout decision you make.
Proven Layout Tips for Accurate Fabric Cutting
Cutting your fabric accurately the first time prevents frustrating mistakes that waste your time and materials. Whether a project flows smoothly or is a struggle often depends on your fabric layout and cutting technique.
Let’s go over some key methods to help you cut accurately every time.
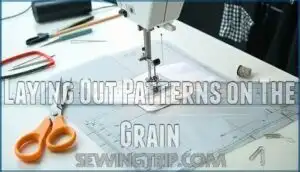
Laying Out Patterns on The Grain
Imagine grain lines as the GPS for your fabric. They show you exactly where to orient your pattern piece, so your finished item hangs correctly and wears well.
Most patterns feature a grain line arrow that should run parallel to the selvage edge. This simple trick improves cutting accuracy and prevents your sewing projects from twisting or sagging.
Getting the grain right also makes it easier to match patterns on printed fabrics.
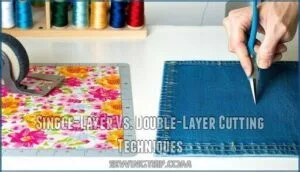
Single-Layer Vs. Double-Layer Cutting Techniques
Once you’ve nailed the grain, deciding how to cut your fabric matters just as much. Single-layer cutting gives you cutting accuracy with deviations as tight as 1–2 millimeters, ideal for printed fabrics or delicate materials. Double-layer cuts save time but can increase fabric waste by up to 15% due to shifting.
Material suitability drives your choice: stable cottons work fine doubled, while knits and silks need single-layer best practices to avoid distortion. Using a rotary cutter can also improve cutting speed and accuracy.
Avoiding Pattern Placement Mistakes
Even one misplaced pattern piece can throw off your entire project, turning a quick afternoon sew into a frustrating puzzle of mismatched seams. To avoid common placement errors, keep these tips in mind:
- Check grain alignment before pinning—up to 87% of sewing errors start with inaccurate pattern placement.
- Use pattern weights on slippery fabrics to prevent shifting and improve cutting accuracy.
- Plan for asymmetrical prints using single-layer layouts to reduce fabric waste.
- Mark notches clearly to match seams perfectly and minimize fabric scraps.
Following these sewing tips will turn beginner frustration into confidence when you’re picking fabrics and using sewing patterns.
Tips for Cutting Asymmetrical or Printed Fabrics
If you’ve ever looked at a bold print and wondered how to keep everything lined up perfectly, you’re not alone. Cutting tricky patterns and one-of-a-kind prints takes a little extra patience and some tried-and-true tricks. Single-layer cutting is your best bet, reducing mismatched patterns by 60%.
A quick guide:
| Sewing Technique | Fabric Tip | Reduces Fabric Waste |
|---|---|---|
| Pattern matching | Check print direction first | Plan asymmetrical layout |
| Single-layer cutting | Use weights, not pins | Mark notches clearly |
| Align grain and print | Test with fabric scraps | Cut one piece at a time |
These sewing pointers help you handle tricky prints with confidence.
Quick Layout Tips for Popular Beginner Projects
Once you’ve mastered basic layout and cutting, you’re ready to apply those skills to actual projects.
Let’s explore some layout hints for popular beginner patterns to help you achieve the best results. These projects are ideal for practicing what you’ve learned while making something useful.
Lili Clutch Purse and Mini Pouch
Starting with a clutch purse or mini pouch is like learning to ride a bike with training wheels. These projects give you just enough structure to build confidence, skipping scary parts like zippers or complicated closures.
The Lili Clutch Purse uses simple straight seams and fold-over flaps, while the Mini Pouch teaches you basic construction with embellishments like snaps or buttons.
Experiment with fabric choices from cotton to canvas, adjust sizes to fit your needs, and explore closure options that don’t require hardware. The Mia Snap Pouch Pattern is ideal for total beginners because it avoids zippers altogether.
Super Easy Scrunchies in Multiple Sizes
Scrunchies are the best example of turning fabric scraps into something stylish in about ten minutes flat. The Super Easy Scrunchie Tutorial offers seven scrunchie sizes, from mini to jumbo, making it great for sewing beginners.
Here’s what makes these accessories simple:
- Fabric choices: Cotton, satin, or stretchy knits all work beautifully
- Elastic types: Standard quarter-inch elastic for regular sizes, wider for jumbo styles
- Customization ideas: Mix prints, add ruffles, or experiment with different widths
Easy sewing tutorials show you basic sewing techniques like simple tube construction and hand-stitched closures, turning this into one of the most satisfying easy sewing projects around.
Simple Storage Pouches and Pencil Holders
Got leftover fabric sitting around? Turn those scraps into zippered pouches and pencil holders—they’ll wrangle your everyday clutter and give you hands-on practice with zippers.
Try the Easy Zippered Storage Pouch or Pencil Holder And Trinket Tray patterns if you’re just starting out—they’ll walk you through zipper techniques step-by-step without making your head spin.
Cotton or canvas won’t slide around on you like slippery fabrics do, so your pouch keeps its shape.
Patterns like the Cosmetic Bag (which includes interior pockets) or the Pencil Case walk you through each step clearly enough that you’ll dodge those frustrating newbie slip-ups.
These pouch sewing projects build confidence through pouch customization options like adding tabs or changing dimensions.
Home Decor: Baskets, Gift Bags, and Organizers
Home decor projects like fabric baskets and gift bags transform your space while teaching you how to handle boxed corners and structured shapes that hold their form.
The Sweetest Storage Bins and Gift Bag Pattern with six sizes introduce fabric basket linings and gift bag closures for space-saving solutions.
Try the Easy Diy Wall Organizer or hanging basket designs for organizer customization that matches your decor style matching needs through home decor sewing projects.
Time-Saving Habits for Successful Sewing
Smart habits make sewing faster and more enjoyable. Setting yourself up well from the start means less time hunting for supplies, and more time actually creating.
These four time-saving practices can transform your sewing routine.
Batch Cutting Multiple Projects at Once
Cutting fabric for multiple projects in one go is like meal prepping—you’ll save time and maintain your focus when you finally sit down to sew. Group projects by fabric type to cut efficiently and get the most from your fabric:
- Cut all cotton quilting projects together first
- Use pattern nesting to minimize waste between pieces
- Stack same-size patterns across different sewing projects
- Follow project sequencing from largest to smallest cuts
- Use consistent sewing techniques throughout each batch
This time-saving approach turns quick sewing projects into efficient production.
Prepping All Notions and Materials First
Before starting a sewing project, gather your zippers, thread, buttons, and interfacing—it’s like making sure you have all your ingredients before you start cooking. This stops you from hunting around and losing focus mid-project.
Take a quick inventory of your notions and double-check what you’ve got. Pre-wash your fabrics so they won’t shrink on you later.
Match your thread to your fabric, and confirm you’ve got the right zipper waiting in your stash.
Getting into this habit will make your sewing easier and keep your tools close.
Following Instructions Step by Step
Think of your sewing pattern as a roadmap—you wouldn’t start building a house without a blueprint, right? Skipping steps or jumping ahead sets you up for frustration.
Read through all the instructions first—it’ll help you understand the pattern and catch mistakes before they happen.
Following the steps in order keeps beginner projects on track. Avoiding rushing improves clarity and makes simple projects truly simple.
Take it one step at a time for better results.
Learning From Online Tutorials and Sewing Communities
Once you’ve mastered the basic rhythm, even more resources are available online. YouTube and free online sewing tutorials show countless people how to handle difficult processes and new projects.
The value of online tutorials becomes obvious when you join sewing communities for collaborative project assistance and real-time problem-solving. Digital sewing trends make sewing education accessible, so DIY tutorials and sewing hacks are only a click away.
Building skills within a community will help you stay motivated.
Frequently Asked Questions (FAQs)
How do I fix fabric that shifts while cutting?
Dealing with shifting fabric is like icing a cake on a wobbly table. For fabric stabilization on your cutting mats, use pattern weights or spray starch.
Rotary cutters will then glide smoothly without the fabric lifting. These sewing tips prevent frustrating mistakes when choosing fabric and keep your fabric scraps usable.
Should I wash fabric before measuring and cutting?
Yes, you’ll want to pre-wash your fabric before you measure and cut. Why?
It stops shrinkage in its tracks, keeps colors from bleeding onto each other, and straightens out any distortion that happened during manufacturing or storage.
This step locks in accurate measurements and smooths out wrinkles, so you’re working with fabric that behaves the way it should.
How do I transfer pattern markings to fabric?
To accurately transfer pattern markings, use appropriate marking tools. Tailor’s chalk works well for quick lines, tracing paper is ideal for detailed work, and fabric pens that wash out easily are another option.
Always test your transfer methods on scrap fabric first to avoid mistakes.
What should I do if my measurements dont match?
If your measurements aren’t a perfect match for the pattern, don’t worry. You can combine sizes by blending between them at the seams, adjusting the length separately from the width, or adding extra room for comfort.
With these techniques, you’ll tailor every project to fit your unique shape and work beautifully with whatever fabric you’ve chosen.
Conclusion
Imagine this: you’ve just picked up some easy sewing project layout pointers, and suddenly you’re flying through projects that used to take all weekend. Those five minutes spent planning your layout now save you hours of rework and fabric waste.
You’ve got the tools organized, your cutting technique down, and you know exactly which fabrics work best for beginners. The difference between struggling and succeeding often comes down to taking that layout step seriously.
Start with one simple project using these pointers, and you’ll wonder why you ever skipped the planning stage.
- https://www.threadsmagazine.com/project-guides/learn-to-sew/tips-to-lay-out-a-pattern-and-cut-fabric-accurately
- https://www.contrado.com/blog/most-common-sewing-mistakes/
- https://quiltlizzyayden.com/blogs/quilt-lizzy-ayden-blog/common-sewing-mistakes-and-how-to-avoid-them
- https://arrowsewing.com/blog/sew-organized-how-to-effectively-organize-your-sewing-room/
- https://abeautifulmess.com/2019/11/reusable-makeup-wipe-diy.html


