This site is supported by our readers. We may earn a commission, at no cost to you, if you purchase through links.
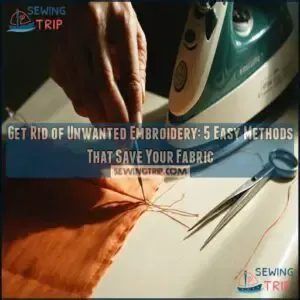
Start by working from the back of the fabric and gently cut through threads, being careful not to damage the base material.
For stubborn stitches, a stitch eraser tool can be your best friend.
After removing the bulk of threads, use tweezers to pull out remaining fragments and brush away debris.
For embroidery with backing, steam can help loosen adhesives before removal.
Remember to work in good lighting and take breaks—your eyes and fingers will thank you.
The right technique can transform that mistaken monogram into a blank canvas.
Table Of Contents
- Key Takeaways
- Understanding Embroidery Removal
- Reasons for Removing Embroidered Designs
- Essential Tools for Embroidery Removal
- Preparing Your Garment for Embroidery Removal
- Step-by-Step Guide to Removing Embroidery
- Alternative Methods for Embroidery Removal
- Dealing With Different Types of Embroidery
- Tips for Successful Embroidery Removal
- Potential Risks and How to Avoid Them
- When to Seek Professional Help
- Frequently Asked Questions (FAQs)
- Conclusion
Key Takeaways
- Use a seam ripper and tweezers to carefully remove embroidery from the back, working slowly to avoid damaging the fabric.
- Steam can loosen adhesives and relax threads, making removal easier, especially for stubborn designs.
- Choose the right tools like stitch erasers for dense embroidery and magnifying glasses for intricate work.
- Always test removal techniques on a hidden area to prevent damage and preserve the fabric’s integrity.
Understanding Embroidery Removal
Embroidery removal is like solving a fabric puzzle—each stitch requiring careful consideration before you break it free.
Each stitch tells a story—removing embroidery is about unraveling it with care, preserving the fabric’s essence.
You’ll need to understand the type of embroidery you’re facing.
Hand-stitched designs typically release more easily than machine-created patterns.
The fabric underneath matters too—delicate materials need gentler handling than sturdy cotton.
Before you grab your seam ripper or tweezers, examine the work from both sides.
The embroidery removal process has evolved from basic scissors to specialized tools designed to protect fabrics.
Always work slowly, prioritizing your garment’s integrity over speed.
Future trends point toward even safer removal techniques.
Reasons for Removing Embroidered Designs
You’ll often need to remove embroidery when transforming company uniforms into casual wear or updating an item with your own personal style.
Whether you’re repurposing thrift store finds or extending the life of high-quality garments, knowing how to properly remove unwanted designs can save your favorite fabrics from the donation pile, which is a key aspect of repurposing.
Rebranding
Why continue wearing outdated logos when you can refresh your brand identity?
Removing unwanted embroidery lets you repurpose clothing for market repositioning without replacing entire uniform inventories.
You’ll achieve brand consistency across all materials while saving money.
Whether you’re updating corporate uniforms after a logo redesign or aligning with a new target audience, embroidery removal creates clean canvases for your current branding.
It’s a practical solution for businesses evolving their visual identity while maintaining quality garment customization.
Personalization
Through personalization, you can transform clothing with unwanted embroidery into custom pieces that truly reflect your style.
Want to repurpose clothing with old designs? Here are four ways to make it yours:
- Replace corporate logos with unique patches
- Add monogram options where old names once were
- Cover removed areas with DIY designs
- Transform spaces with fabric painting techniques
Personalized apparel gives garment customization freedom while saving money on new clothes, allowing for a personalized style.
Donation or Resale
Three significant benefits come with removing unwanted embroidery before donation or resale.
First, logo-free garments maximize value on resale platforms like eBay or Poshmark.
Second, clean items attract more attention at donation centers, potentially increasing tax benefits for your charitable giving.
Repair or Alteration
While donating pre-loved items gives them new life, sometimes you’ll want to save a garment for yourself.
Removing unwanted embroidery creates perfect opportunities for repair or creative alteration.
Your favorite clothing deserves a second chance with:
- Fabric patching to strengthen weak areas after thread removal
- Hole concealment techniques that blend seamlessly
- Redesign options like applying new patches or emblems
- Seam repair for structural integrity
Mending fabric after embroidery removal isn’t just practical—it’s your canvas for garment restoration.
Remember to keep in mind stitch density and fabric when undertaking this task.
Essential Tools for Embroidery Removal
You’ll need the right tools to remove unwanted embroidery without damaging your precious fabrics.
A quality seam ripper, stitch eraser, precise tweezers, and a magnifying glass will make your embroidery removal project much easier and help preserve the integrity of your garment.
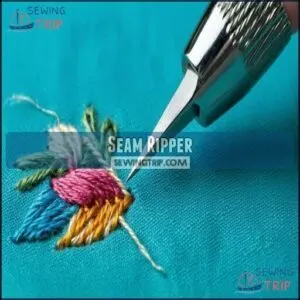
Seam Ripper
The seam ripper stands as your faithful companion when tackling unwanted embroidery. Its slim metal blade slips under stitches without damaging fabric beneath.
Blade sharpness matters—dull tools create more work and potential damage. An ergonomic seam ripper can improve comfort during extended use.
| Seam Ripper Types | Best Fabrics | Safety Tip |
|---|---|---|
| Standard T-handle | Cotton, Denim | Keep away from children |
| Ergonomic grip | Polyester blends | Cap when not in use |
| Illuminated tip | Wool, Canvas | Point away from body |
Always work slowly from the back side, giving yourself proper lighting for unpicking embroidery safely.
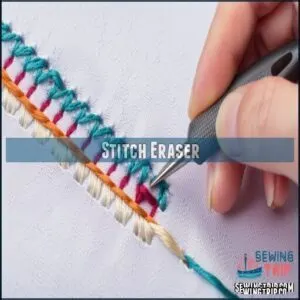
Stitch Eraser
The stitch eraser transforms embroidery removal from tedious labor into a quick victory.
This specialized electric tool slices through threads efficiently while protecting your precious fabrics underneath.
When choosing your embroidery removal ally, consider:
- Size options – standard heads for large designs or compact ones for detailed work
- Dual-speed motors – lower settings for delicate fabrics, higher for dense stitching
- Blade maintenance – keep stainless steel cutters clean for peak performance
- Power consistency – 110-volt operation guarantees reliable cutting without fabric damage
Popular options include Peggy’s Stitch Eraser series and DIME’s Stitch Ripper, each offering unique features to match your specific unpicking needs.
You can find a stitch eraser tool online.
Store properly between uses to maintain blade sharpness.
Tweezers and Fabric Scissors
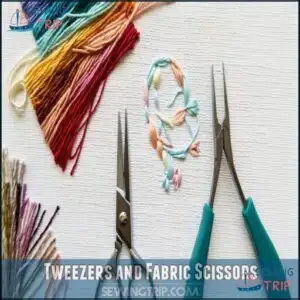
While electric erasers handle bulk removal, tweezers and fabric scissors tackle the precision work.
These essential embroidery removal tools work like a surgeon’s instruments, helping you extract individual threads without fabric damage.
You can find specialized tools like fabric thread pullers for delicate tasks.
| Tool Type | Best For | Features | Maintenance | Safety Tip |
|---|---|---|---|---|
| Pointy Tweezers | Thread grabbing | Fine tips | Clean after use | Avoid pinching fabric |
| Embroidery Scissors | Detail cutting | Curved blades | Keep sharp | Cut away from you |
| Curved Scissors | Tight spaces | Angled blades | Oil occasionally | Store with caps |
| Thread Clippers | Surface threads | Spring-loaded | Sharpen regularly | Keep away from children |
| Ribbon Scissors | Backing material | Wide blades | Dedicated use only | Test on scrap first |
Keep your scissors razor-sharp by using them exclusively for thread cutting.
It is also important to follow the safety tips and maintain your tools properly to ensure efficient and safe use.
Magnifying Glass
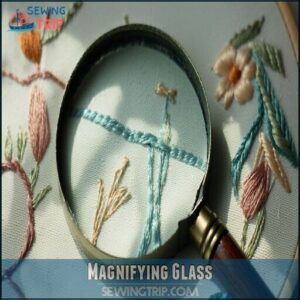
A good magnifying glass stands out as a vital embroidery removal ally for anyone tackling intricate stitch work.
When you’re hunting for those stubborn threads hiding in the fabric’s weave, enhanced thread visibility makes all the difference.
Choose one with proper magnification levels (2x-5x) and pair it with bright lighting for spotting embroidery flaws.
Your eyes will thank you! The ergonomic use of this detail enhancement tool prevents mistakes during removal, especially when working with densely stitched designs or darker fabrics.
Preparing Your Garment for Embroidery Removal
Every successful embroidery removal begins with proper preparation of your garment. First, assess your fabric’s durability by turning it inside out and examining the stitching patterns closely. Test a hidden area with water to check for sensitivity before proceeding.
- Set up your workspace with bright lighting to clearly see thread colors and stabilizer backing.
Choose your tools wisely—select a seam ripper for delicate fabrics or tweezers for stubborn threads. Remember that stitch density matters when removing embroidery.
Remove any leftover stabilizer material that might interfere with your work. Position your clothing on a flat, clean surface where you can comfortably work without straining your eyes or hands.
Step-by-Step Guide to Removing Embroidery
You’ll need the right approach to free your fabric from unwanted designs without causing damage.
Working systematically with proper tools will transform your garment back to a blank canvas that’s ready for new creative possibilities.
Using a Seam Ripper
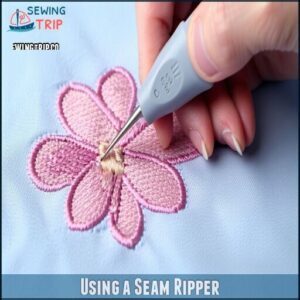
Your trusty seam ripper becomes your best ally when tackling unwanted embroidery.
Hold it at various seam ripper angles as you gently slide the pointed end under stitches from the back side.
Apply minimal thread tension while cutting to prevent snags, especially on delicate fabrics.
Pull the cut threads away with steady pressure, working in small sections.
Many seam rippers feature ergonomic grips to reduce hand fatigue during longer embroidery removal sessions.
Always work in good lighting to distinguish between embroidery stitches and the base fabric.
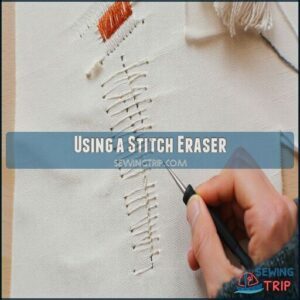
Using a Stitch Eraser
A stitch eraser takes over where your seam ripper leaves off, especially for stubborn machine embroidery. This specialized tool slices through threads efficiently while protecting your fabric.
To use your stitch eraser effectively:
- Turn the garment inside out and identify the bobbin threads
- Select between corded vs cordless models based on your project size
- Apply gentle pressure control, moving in one direction with slight side-to-side motion
- Test fabric compatibility in an inconspicuous area first
Regular eraser maintenance guarantees peak performance. For thick embroidery, work slowly and methodically. If you don’t have a stitch eraser, alternative tools like small scissors or tweezers can work in a pinch, but a stitch eraser is the best tool for the job.
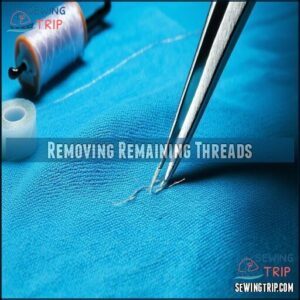
Removing Remaining Threads
After cutting the main embroidery, you’ll notice pesky thread remnants clinging to your fabric.
Don’t worry! Grab your tweezers to pluck thread residue with precision—magnification tools help spot those tiny fragments.
For larger areas, press adhesive methods into service: lint rollers or tape pressed firmly against the surface lift embroidery thread fragments effortlessly.
Stubborn threads sometimes need gentle heat treatment.
Pass a warm iron over them (test first on an inconspicuous spot) to soften for easier removal and jumpstart your fabric repair journey.
Alternative Methods for Embroidery Removal
You’ll find that traditional seam rippers aren’t your only option when tackling stubborn embroidery on precious fabrics.
Steam techniques and specialized dye solutions can effectively conceal or remove unwanted designs without causing damage to your favorite garments, using steam techniques can be particularly useful.
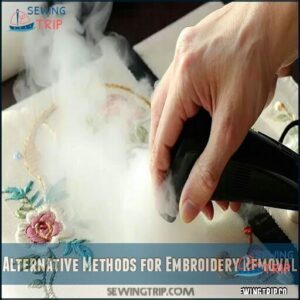
Steam and Heat Technique
You’ll find steam application remarkably effective for loosening stubborn embroidery. The heat relaxes both threads and fabric, making removal substantially easier without damaging delicate materials.
For ideal embroidery steaming results:
- Use appropriate heat settings based on fabric types (cotton can handle more heat than silk or polyester)
- Hold the steam iron 1-2 inches away from the embroidery’s backside
- Apply steam in 5-second intervals to prevent fabric damage
After steaming, immediately work with your seam ripper while threads remain relaxed. The embroidery fabric relaxation process works wonders for dense designs where traditional methods struggle. Remember to test on an inconspicuous area first, as some fabrics may show water marks after ironing techniques. Using a stitch eraser tool can also aid in the removal process, making it a useful tool for delicate materials and dense designs.
Fabric Marker or Dye Solutions
While steam can lift some stitches, fabric markers offer a completely different approach.
These handy tools let you camouflage unwanted embroidery by matching your fabric’s color perfectly.
Always test markers on an inconspicuous spot first! For permanent solutions, consider dye selections specifically formulated for your fabric type.
Marvy Erasable and Clover Water-soluble markers work beautifully for small embroidery mistakes.
For larger areas or challenging fabrics, professional stain removal services can create custom color matches or even craft appliqués to cover stubborn stitching.
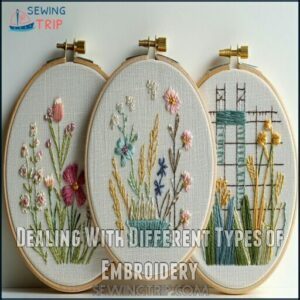
Dealing With Different Types of Embroidery
You’ll need different approaches for hand, machine, or counted thread embroidery since each type has unique thread patterns and backing materials.
Whether you’re tackling grandma’s intricate handiwork or machine-stitched logos, understanding your specific embroidery type will help you choose the right removal technique, which is crucial for successful embroidery removal.
Hand Embroidery
Hand embroidery presents its own unique challenges in removal. Unlike other techniques, these delicate stitches require careful attention and precision.
Working with hand embroidery allows you to preserve your fabric’s integrity while saying goodbye to unwanted designs. You’ll need a quality seam ripper and fine tweezers for best results.
- Turn garments inside-out to access the thread knots and backing
- Cut one stitch at a time, working in small sections
- Remove threads with gentle pulling motions to prevent fabric damage
- Steam the area after removal to help fabric fibers return to their original position, which is crucial for maintaining the fabric’s original integrity and ensuring a smooth finish with gentle pulling motions and the use of a quality seam ripper.
Machine Embroidery
When tackling machine embroidery removal, you’ll face unique challenges due to high stitch density and precise thread tension. Start by examining the back of your fabric where bobbin threads are visible.
| Tool | Best Use | Difficulty | Fabric Safety | Speed |
|---|---|---|---|---|
| Seam Ripper | Precision work | Medium | High | Slow |
| Stitch Eraser | Dense designs | Easy | Medium | Fast |
| Tweezers | Thread pulling | Easy | High | Medium |
| Needle | Stubborn threads | Hard | Low | Slow |
| Scissors | Backing removal | Medium | Medium | Medium |
Work slowly with unwanted stitching—patience prevents fabric damage, and it’s crucial to use the right tool for the job to ensure fabric safety and achieve the desired outcome with precision.
Counted Thread Embroidery
Unlike its machine counterpart, counted thread embroidery requires special care during removal. Each stitch follows precise patterns on even-weave fabric.
When removing unwanted stitching from these detailed projects:
- Loosen thread tension first with gentle seam ripper pressure
- Work from the fabric’s back where pattern design connects
- Remove complete stitch sequences rather than random threads
You’ll need good lighting and patience—historical cross-stitch can be stubborn! The right fabric choice initially makes later embroidery removal much simpler. Have tweezers ready for those tiny thread remnants.
Tips for Successful Embroidery Removal
Now that you’ve learned about different embroidery types, let’s focus on maximizing your success when removing those unwanted designs.
Your embroidery removal journey requires proper preparation and technique.
Here’s how to get the best results:
- Lighting Matters: Work in bright, natural light to clearly see all threads and avoid missing tiny stitches.
- Fabric Testing: Always test your removal technique on an inconspicuous area first to confirm your fabric won’t be damaged.
- Gentle Motions: Use slow, controlled movements with your seam ripper rather than quick yanks that might tear fabric.
- Patience Essential: Don’t rush the process—embroidery removal techniques for clothing work best when you take your time.
When working with your embroidery removal tools list, remember that forcing threads will only create bigger problems.
Good tools paired with patience equals success!
Potential Risks and How to Avoid Them
Five key risks lurk during embroidery removal that every DIYer should know. Your beautiful fabric depends on careful handling throughout the process.
- Fabric Damage: Working too quickly with sharp tools can create holes or tears, especially in delicate fabrics. Always support the material and use gentle, controlled movements.
- Color Bleeding: Dark thread dyes can transfer to lighter fabrics when wet or under pressure. Test in an inconspicuous area first.
- Weakened Fibers: Excessive pulling strains fabric threads. If you notice stretching, stop immediately and try a different approach.
When using a seam ripper, position the forked end underneath stitches to minimize accidental cuts.
To prevent issues, always consider matching needles to fabric.
When to Seek Professional Help
While DIY removal works for basic designs, you’ll need professional help in specific situations.
Consider embroidery professional services when working with silk, lace, or vintage items to prevent fabric damage risk.
Complex designs with dense stitching or machine embroidery also warrant an embroidery tailor’s expertise.
If you’re facing time constraints or have items with sentimental value, the embroidery costs are justified to avoid extensive damage from inexperience with embroidery complexity.
Frequently Asked Questions (FAQs)
How to remove embroidery without damaging a garment?
Like peeling away the past, turn your garment inside out and use a seam ripper to cut bobbin threads.
Gently pull front threads with tweezers, then clean with a lint roller.
Work slowly to avoid tears.
How to remove embroidery stitches without damaging fabric?
Turn the garment inside out, use a seam ripper to cut threads from the back, then pull threads from the front with tweezers.
Work slowly in good lighting to avoid fabric damage.
How do you remove embroidery from a sewing machine?
To remove embroidery from a sewing machine, you’ll need to power off the machine, carefully unthread it, and remove the embroidery hoop.
Then detach any special embroidery units according to your machine’s manual.
What tools do you need to remove embroidery?
Sharp seam rippers and trusty tweezers are your primary tools.
You’ll also need small scissors, a magnifying glass, and a lint roller to completely clear away threads after cutting through stitches.
Can you remove embroidery?
Yes, you can definitely remove embroidery with the right tools and techniques.
Using a seam ripper, tweezers, and patience, you’ll be able to restore your garment and potentially repurpose it with new designs.
How to remove handstitched embroidery from clothing?
Like unraveling a mystery, tackle handstitched embroidery by flipping the fabric inside-out, snipping threads with small scissors, and pulling them out with tweezers.
Clean the area with a lint roller afterward, ensuring the removal of any remaining threads.
How do you remove unwanted embroidery?
To remove unwanted embroidery, flip your garment inside out, gently cut threads with a seam ripper, pull them out with tweezers, then clean the area with a lint roller.
You’ll need patience and good lighting.
What do you do with embroidery after finished?
After finishing embroidery, you’ll want to frame it in a hoop, create wall hangings, or transform it into functional items like pillows, bags, or patches.
Many crafters also digitally archive their completed works.
Can tailors remove embroidery?
Professional tailors can definitely remove embroidery using specialized tools like seam rippers and stitch erasers.
You’ll often pay $10-30 depending on the size and complexity of the design you want removed.
Will removing embroidery leave holes?
Whether removing embroidery leaves holes depends on your fabric type.
Most woven cotton fabrics recover well with steaming, but delicate materials like silk or thin jerseys may show permanent marks after thread removal.
Conclusion
Like a skilled gardener clearing unwanted growth to reveal a garden’s potential, you now have the knowledge to get rid of unwanted embroidery with confidence.
Whether you’re rebranding, personalizing, or simply fixing a mistake, these methods give your fabrics new life without damage.
Remember: patience is your ally, proper tools are essential, and taking breaks prevents frustration.
With practice, you’ll transform even the most stubborn stitches into a clean slate ready for your next creative vision.
- https://www.google.ie/search?q=seam+ripper&dcr=0&source=lnms&tbm=isch&sa=X&ved=0ahUKEwj2_NGm877ZAhVMpZQKHa4IBKAQ_AUICigB&biw=1366&bih=637
- https://www.youtube.com/watch?v=B7tmeBNbZ9c&t=26s
- https://en.wikipedia.org/wiki/Nylon
- http://patft.uspto.gov/netacgi/nph-Parser?Sect1=PTO1&Sect2=HITOFF&d=PALL&p=1&u=%2Fnetahtml%2FPTO%2Fsrchnum.htm&r=1&f=G&l=50&s1=4510688.PN.&OS=PN/4510688&RS=PN/4510688
- https://peggysstitcheraser.com/

