This site is supported by our readers. We may earn a commission, at no cost to you, if you purchase through links.
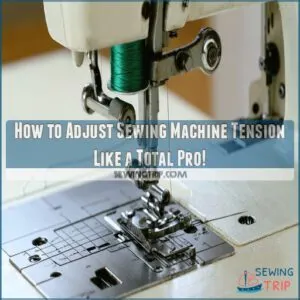
Clean your machine and inspect the tension discs. Turn the top tension dial clockwise to tighten or counterclockwise to loosen, testing on scrap fabric after each adjustment.
Check both top and bobbin thread tensions, ensuring they’re balanced. Use the right needle and thread for your fabric type.
Small, careful adjustments are key—don’t get frustrated! Remember, perfect tension takes practice, and even professional sewists have days when their machines seem to have a mind of their own.
Table Of Contents
- Key Takeaways
- Identifying Tension Issues
- Preparing Your Sewing Machine
- Understanding Your Tension Settings
- Adjusting Top Thread Tension
- Adjusting Bottom Thread Tension
- Troubleshooting Tension Issues
- Advanced Tension Adjustment Techniques
- Fine-Tuning Your Tension Settings
- Frequently Asked Questions (FAQs)
- Conclusion
Key Takeaways
- Check for tension issues by inspecting your stitches—loops, puckering, or uneven threads signal imbalance that needs fixing.
- Adjust the top tension dial in small increments, clockwise to tighten and counterclockwise to loosen, testing on scrap fabric after each change.
- Don’t forget bobbin tension—it’s controlled by a small screw in the bobbin case. Make careful, tiny adjustments for balance.
- Always match your thread, needle, and fabric to ensure smooth stitches, and maintain your machine by cleaning tension discs and the bobbin area regularly.
Identifying Tension Issues
You’ll know something’s off with your sewing machine tension when your stitches look more like a tangled mess than a professional seam.
By recognizing the telltale signs like loops, puckering, and threads showing on the wrong side, you’ll be ready to troubleshoot and restore your machine’s perfect stitch balance.
Recognizing Uneven Stitches
Sewing machine stitch tension nightmares can turn your creative project into a fabric disaster.
When uneven stitches strike, your fabric tells a story of tension troubles.
Spot the warning signs:
- Fabric puckering like a wrinkled map
- Threads bleeding through unexpected sides
- Stitches wobbling like a rookie tightrope walker
Mastering stitch tension is your ticket to sewing perfection.
Signs of Too Much or Too Little Tension
When your stitches look like a tangled mess, tension imbalance might be the culprit.
Tension problems reveal themselves through telltale signs: fabric puckering, thread visibility on the wrong side, or loose, unpredictable stitches.
Your sewing machine is speaking to you—listen closely!
These symptoms hint at whether your thread tension needs tightening or loosening to restore stitch quality and smooth fabric flow.
Common Causes of Tension Problems
When your machine throws a tantrum with wonky stitches, it’s often crying out for help.
Thread breakage and fabric friction can wreak havoc on your tension.
Misaligned parts, incorrect needle sizes, or mixing thread types are like kryptonite to smooth sewing.
A dirty machine compounds these sewing machine tension problems, turning your creative project into a frustrating mess.
Importance of Proper Threading
Threading your sewing machine can feel like defusing a delicate bomb, where one wrong move throws everything off balance.
Precision is key—each thread guide matters, and your needle’s alignment determines success.
Double-check your threading sequence, match thread type carefully, and verify tension settings.
A fastidiously threaded machine transforms potential frustration into sewing satisfaction.
Preparing Your Sewing Machine
Your sewing machine’s performance hinges on proper preparation, which starts with thorough attention to threading, bobbin installation, and machine cleanliness.
You’ll want to verify your needle size and type, ensuring these critical components are perfectly matched to create flawless, professional-quality stitches.
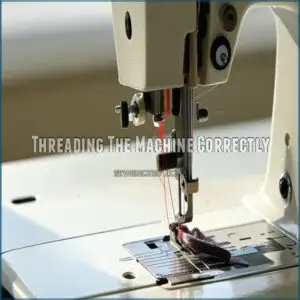
Threading The Machine Correctly
Got a tension headache from messy threads?
Mastering the thread path is your golden ticket to sewing success.
Your machine’s performance hinges on proper threading, so let’s get you sorted.
5 threading emotions you’ll experience:
- Frustration melting into triumph
- Confusion transforming to clarity
- Anxiety turning to confidence
- Doubt becoming precision
- Struggle evolving into mastery
Buckle up for your tension-taming journey!
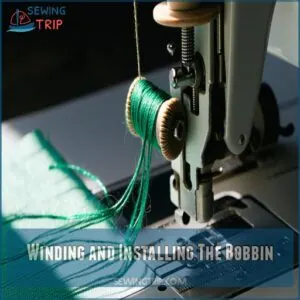
Winding and Installing The Bobbin
If you’re ready to master bobbin thread management, start by carefully winding your bobbin with even tension.
Position the thread smoothly around the bobbin winder, ensuring no tangling or loose spots, and then slide the bobbin onto the winder, press the lever, and spin until the thread covers the bobbin completely, creating a perfect foundation for precise sewing tension.
Understanding the proper Sewing Machine Bobbin is essential for achieving the right thread tension and preventing common sewing issues.
Cleaning The Machine and Bobbin Area
Because a clean machine is a happy machine, you’ll want to keep your bobbin area spotless.
Carefully remove lint, dust, and loose threads with a small brush or compressed air. Gently wipe the bobbin case with a soft, lint-free cloth.
Regular maintenance prevents tension issues and guarantees smooth sewing performance, giving you more control over your craft.
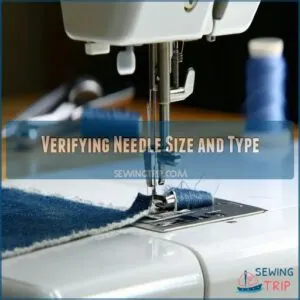
Verifying Needle Size and Type
Since the needle is your fabric’s first point of contact, choosing the right size and type can transform your sewing from frustrating to flawless.
Whether you’re working with delicate shirtings or heavy denim, matching your needle material and size to the fabric thickness guarantees impeccable stitch quality.
Your needle isn’t just a tool—it’s the key to maintaining ideal sewing machine tension and preventing potential fabric damage or uneven stitching.
Understanding the role of Sewing Machine Needles is vital for achieving professional results in various sewing projects.
Understanding Your Tension Settings
Getting your sewing machine’s tension right can be the difference between professional-looking garments and amateur-hour disasters.
Understanding how thread tension works will help you master those perfect, smooth stitches every time.
Top Thread Tension Mechanics
When mastering upper thread tension, your sewing machine’s tension discs perform a delicate dance of control.
The dial regulates spring pressure, guiding thread balance with precision.
For perfect stitches, learn about embroidery machine thread tension.
Turning the dial influences how tightly the tension discs grip your thread, ultimately determining the quality of your fabric interplay.
Adjust carefully for perfect stitches every time, considering the delicate dance and thread balance to achieve the desired outcome.
Bobbin Thread Tension Mechanics
After mastering top thread mechanics, let’s unwind the bobbin thread tension mysteries.
Your bobbin thread tension controls the fabric interaction’s lower thread balance, acting like a silent conductor of sewing dynamics.
Located inside the bobbin case, the tiny tension screw becomes your precision tool for tension control.
For a detailed guide, explore this helpful resource on fixing bobbin tension.
Gently turn it clockwise to tighten or counterclockwise to loosen, performing a "drop test" to guarantee perfect thread alignment.
Adjust sewing tension in small increments, watching how each twist transforms your stitch quality and fabric performance.
Relationship Between Top and Bobbin Tension
At the crossroads of top and bobbin tension, your sewing machine’s performance hinges on perfect thread balance.
Like dance partners, the top and bobbin threads must move in harmony to create flawless stitches.
By understanding their intricate relationship, you’ll master tension control, ensuring consistent stitch quality across different fabric thicknesses and thread types.
Default Tension Settings on Sewing Machines
At the heart of thread balance, your sewing machine’s tension basics start with a default setting around 4.5 for straight stitches.
Most machines come factory-calibrated with a recommended tension guide that pros rely on as their starting point.
When you’re diving into machine calibration, stick to the manual’s suggested tension settings, knowing you’ll fine-tune as you go, especially when working with tricky materials like metallic threads.
Adjusting Top Thread Tension
Mastering your sewing machine’s top thread tension is essential for creating professional-looking stitches that hold strong and look smooth.
You’ll want to learn how to adjust the tension dial precisely, so your fabric looks flawless on both sides with even, consistent threading.
Locating The Tension Regulating Dial
Ready to pinpoint your tension dial like a pro?
Look for a small numbered knob near your machine’s thread guides, typically on the top or front panel.
Most sewing machines feature a tension assembly with a visible regulator spring.
Your tension dial usually sits close to the thread take-up lever, making machine calibration a breeze for savvy sewists mastering their craft.
Increasing or Decreasing Top Tension
When your sewing machine’s tension feels off, you’ll want to adjust the dial strategically. Thread Balance depends on precise tension control.
For a detailed guide, explore adjusting sewing machine tension.
Turn the dial clockwise to tighten or counterclockwise to loosen, fine-tuning Stitch Quality across different fabric types.
- Watch for subtle thread interactions
- Understand your machine’s tension mechanics
- Experiment with small, incremental changes
- Learn your fabric’s unique tension requirements
- Practice makes perfect calibration
Testing Tension Settings on Scrap Fabric
Because mastering thread tension requires practice, fabric testing becomes your secret weapon.
Grab scrap fabric similar to your project and start a tension test stitch out.
- Select contrasting thread colors
- Test various fabric samples
- Adjust stitch length incrementally
- Inspect tension balance critically
Your goal is achieving flawless stitch quality that makes your projects look professionally crafted, which is the result of careful fabric testing.
Adjusting Top Tension for Different Fabrics
Every diligent sewist knows adjusting top tension transforms fabric performance.
Lightweight materials like cotton voile need lower tension settings—around 2 or 3—while heavyweight fabrics like denim require higher tension between 3.5 and 4.5.
Your tension gauge is key: match thread weights, needle sizes, and material thickness to achieve perfect stitch balance without compromising fabric integrity.
Adjusting Bottom Thread Tension
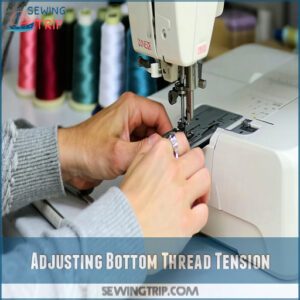
In the matter of bottom thread tension, you’ll need to access your sewing machine’s bobbin case with precision and care.
By carefully turning the tension screw clockwise or counterclockwise, you’ll make small adjustments that can dramatically improve your stitch quality and fabric finish.
Accessing The Bobbin Case
After mastering top thread tension, you’ll want to peek inside your machine’s bobbin case.
Carefully open the machine’s front or side panel, using proper Bobbin Access Tools if needed.
Gently remove the bobbin case, checking for lint and ensuring a clear Thread Path Clearance.
This step is key to Sewing Machine Maintenance and preparing for precise bobbin tension adjustments.
Turning The Bobbin Tension Screw
After locating the bobbins case, you’ll spot a small screw that’s your tension control lifeline.
Gently turn this screw with a screwdriver, feeling the subtle resistance.
Clockwise tightens the bobbins thread tension, counterclockwise loosens it.
Your machine’s manual might show the exact location, but a quarter-turn at a time keeps you in the safe zone for precise tension adjustment.
Increasing or Decreasing Bobbin Tension
Your machine’s tension harmony depends on fine-tuning the bobbin thread control with precision.
For a detailed guide, explore adjusting sewing machine tension.
Adjust the bobbin tension screw strategically to balance your stitches:
- Turn clockwise to increase thread resistance
- Rotate counterclockwise to decrease tension
- Move the screw incrementally, testing after each subtle change
Small, deliberate adjustments transform uneven stitches into professional-looking seams.
Testing Bobbin Tension Settings
Before diving into bobbin tension tests, pop out the bobbin case and grab a scrap of fabric.
Carefully tighten the tension screw in tiny increments, watching how different thread weights impact your stitch quality.
Your goal? A perfectly balanced thread that glides smoothly, creating stitches as precise as a surgeon’s hand.
Remember: subtle adjustments make all the difference, and achieving this balance requires patience and attention to detail, ultimately leading to stitches that are a result of a surgeon’s hand.
Troubleshooting Tension Issues
If you’re struggling with uneven stitches or thread bunching, you’re not alone in the tension troubles that can plague even experienced sewists.
Understanding how to troubleshoot tension issues will help you transform your sewing from frustrating to fantastic, ensuring each project looks polished and professional.
Common Tension Problems and Solutions
After wrestling with bobbin tension in your last project, you’re now facing a whole new set of sewing machine tension challenges.
Thread breakage and skipped stitches can turn your creative flow into pure frustration.
Adjust your machine’s tension settings carefully, watch for fabric stretch, and use tension gauges to calibrate your sewing speed.
Small tweaks make big differences in your final stitch quality.
Understanding thread tension issues is essential for achieving balanced stitches and preventing common problems like puckering or uneven stitching.
Identifying Obstructions and Damage
When thread breakage strikes, your sewing machine begs for a thorough checkup.
Preventing potential disasters starts with a keen eye for machine wear and potential obstructions.
- Inspect tension discs for lint buildup that could disrupt smooth thread flow
- Check bobbin case for subtle signs of wear or damage
- Examine needle for bent tips or microscopic imperfections that compromise stitch quality
Loose screws can throw your entire sewing rhythm off-balance, so tighten them carefully.
A well-maintained machine is like a precision instrument—every component must work in perfect harmony to create flawless stitches that make your fabric sing, ensuring a perfect sewing rhythm.
Adjusting Tension for Different Threads
When damage lurks in your machine’s inner workings, thread tension becomes a delicate art.
Different thread materials demand unique approaches—each requiring its own tension ballet.
| Thread Type | Tension Setting | Notes |
|---|---|---|
| Metallic | Looser | Delicate handling |
| Polyester | Medium | Standard performance |
| Cotton | Slightly tight | Consistent stitching |
Your sewing machine’s tension is its heartbeat—listen carefully, adjust wisely, and watch your projects transform with the right thread materials.
Using The Correct Needle and Thread
With both eyes on the precision needed for perfect stitches, your needle and thread combo can make or break your sewing project.
Thread Weight Matters big time – match your needle size to the thread’s thickness for smooth sailing.
Needle Selection isn’t just guesswork; it’s about Fabric Compatibility and keeping your machine humming like a well-oiled dream.
Understanding the correct Sewing Machine Needles is essential for achieving professional results in sewing projects, which requires careful consideration of Thread Weight and Needle Selection to ensure a successful outcome.
Advanced Tension Adjustment Techniques
You’ll want to master advanced tension adjustment techniques to transform your sewing from ordinary to extraordinary.
By learning to fine-tune your machine’s tension for different fabrics, threads, and sewing styles, you’ll achieve professional-quality stitches that’ll make your projects truly shine.
Adjusting Tension for Machine Quilting
When machine quilting, master your tension settings like a pro.
Each quilt sandwich demands precise calibration—use your tension gauge to fine-tune top and bobbin thread interactions.
Different quilting thread types require unique adjustments.
Experiment on scrap fabric, noting how fabric stretch impacts your settings.
Record your discoveries in your quilter’s toolbox for future reference, ensuring consistently stunning results with the right tension settings.
Using Different Threads for Top and Bottom
Ready to level up your quilting game by mixing thread types? Your secret weapon is strategic tension adjustment.
Here’s how to nail those mixed-thread masterpieces:
- Match thread weights carefully for balanced stitching
- Experiment with top and bottom thread fiber blends
- Test small samples before committing to your full project
Mastering thread tension is like conducting a textile symphony – precision makes perfect.
Adjusting Tension for Heavy or Lightweight Fabrics
When tackling fabric thickness, your sewing machine’s tension is key.
Heavier materials like denim need higher tension settings (4-6), with longer stitches around 3-4mm.
Lightweight fabrics like chiffon require gentler touch—tension dial at 3, shorter stitch lengths.
For specific guidance, explore this helpful guide on adjusting thick fabric tension.
Thread weight matters too.
Your goal? Achieving perfect tension balance that creates flawless stitches across different material types, making your sewing projects look professionally crafted.
Troubleshooting Tension Issues for Specific Fabrics
Mastering sewing machine tension across fabric types isn’t rocket science—it’s an art.
Different fabrics whisper unique requirements:
- Knit fabrics demand gentle touch, reducing tension to prevent stretching and puckering
- Silk threads need careful handling, using slightly looser tension settings
- Linen materials appreciate precise tension control for crisp, clean stitches
Your machine’s a partner waiting to reveal perfect seams.
Fine-Tuning Your Tension Settings
Fine-tuning your sewing machine’s tension settings is essential for achieving professional-looking stitches that’ll make your projects shine.
You’ll want to approach this process methodically, testing and adjusting your tension in small increments to guarantee each seam looks perfectly balanced and polished.
Testing and Refining Tension Settings
Your sewing machine’s tension is like a symphony, where every thread plays a vital role in creating harmony.
Tension calibration starts with keen observation: look for telltale signs like puckered seams or thread breakage that hint at underlying issues.
Grab some scrap fabric and become a thread detective, testing stitch quality across different fabric weights and thread types.
Use a tension chart as your guide, but remember that machine optimization isn’t one-size-fits-all.
Small, deliberate adjustments can transform your fabric interaction from chaotic to crisp.
Listen to your machine, watch your stitches, and fine-tune with precision – you’re not just sewing, you’re crafting perfection.
Making Small Adjustments for Optimal Results
When fine-tuning your stitch quality, precision matters.
Like a skilled surgeon, you’ll make delicate tension adjustments with surgical accuracy:
- Increase top thread tension incrementally
- Decrease bobbin tension carefully
- Experiment with needle sizes
- Modify stitch length strategically
These subtle Thread Balance techniques help you achieve perfect Tension Control across different Fabric Types, ensuring your stitches look professional and polished every single time.
Documenting Your Tension Settings for Future Reference
After nailing your stitch settings, create a tension log to track your sewing wins.
Capture fabric types, thread details, and project specifics in your sewing journal.
Your future self will thank you when you can quickly recreate perfect stitches without endless trial and error.
Fabric Type
Thread Notes
Maintaining Your Sewing Machine’s Tension Settings
Every crafty sewist knows machine maintenance isn’t just a chore—it’s an art form.
Your sewing machine’s performance hinges on these critical care strategies:
- Lint removal: Clear out fabric debris regularly to prevent tension disruptions
- Thread selection: Match thread types precisely to your project’s fabric weight
- Needle inspection: Replace needles at first sign of bend or wear
- Bobbin care: Wind threads evenly to maintain consistent Thread Balance
Frequently Asked Questions (FAQs)
What is sewing machine tension adjustment?
Keeping your stitches balanced is like walking a tightrope—sewing machine tension adjustment guarantees your top and bobbin threads work in harmony.
This harmony prevents loops, puckering, or loose threads, no matter the fabric or thread type.
How to adjust the tension on a sewing machine?
Start by using your machine’s tension dial, tweaking it in small increments.
Test stitch on scrap fabric, checking for balance.
Adjust the bobbin tension only if necessary, following the manual’s guidance for fine-tuning.
How to fix a sewing machine stitch Tension Problem?
Check threading first—top and bobbin.
Test stitches on scrap fabric, adjusting the top tension dial gradually.
If issues persist, tweak the bobbin tension screw slightly.
Clean your machine and verify needle, thread, and fabric compatibility.
How do I know if my sewing machine is tight?
Think of tension as a tug-of-war.
If stitches pucker, threads snap, or fabric wrinkles, it’s too tight.
Test-run some stitches, and if the upper thread pulls excessively, loosen the tension dial slightly.
What Is Sewing Machine Tension?
Sewing machine tension’s like a delicate tug-of-war between top and bobbin threads.
It controls stitch quality, ensuring threads meet evenly in fabric.
Mess it up, and you’ll see puckers, loops, or uneven stitches.
Are Your Machine Stitches Balanced?
Balanced stitches mean the top and bobbin threads meet perfectly within the fabric.
Uneven loops or puckering? It’s a tug-of-war between threads, and adjusting tension dials restores harmony for flawless stitching results.
Are You Using The Same Thread in The Bobbin and Through The Needle?
Over 70% of stitch issues stem from mismatched threads.
Using the same thread type in the bobbin and needle guarantees tension stays balanced, stitches appear clean, and adjustments are simpler.
Don’t underestimate consistency—it’s a game-changer!
How to adjust Tension in Sewing Machine?
Start by tweaking the tension dial slightly, testing stitches on scrap fabric.
If stitches show imbalance, adjust top tension first.
For persistent issues, carefully adjust the bobbin tension screw.
Always test after each adjustment!
What should the tension be set on a sewing machine?
There’s no one-size-fits-all tension setting—typically, it’s around 4 for general sewing.
Your setting depends on fabric, thread, and stitch type.
Test on scrap fabric first, tweaking slightly until your stitches look balanced and clean.
How to tell if thread tension is correct?
You’ll know thread tension is perfect when your stitches are smooth, even, and balanced on both sides.
Neither thread shows on the wrong side—like a seamless tug-of-war with no clear winner!
Conclusion
Don’t let tension issues stress you out—it’s all about patience and practice.
Knowing how to adjust tension on a sewing machine means understanding both top and bobbin tension mechanics.
Always test on scrap fabric, and make small adjustments until your stitches look just right.
Remember, even pros face tension challenges, so take your time and trust the process.
With these tips, you’re closer to sewing consistently smooth and balanced stitches on any project.
- https://www.threadsmagazine.com/2008/11/02/understanding-thread-tension
- https://www.thesprucecrafts.com/easily-adjust-sewing-machine-tension-2821432
- https://support.brother.com/g/b/faqend.aspx?c=us&lang=en&prod=hf_cp100xeus&faqid=faqh00101020_004
- https://www.reddit.com/r/sewing/comments/10wv9xj/new_to_machine_sewing_how_does_tension_work/
- https://www.tillyandthebuttons.com/2020/03/thread-tension-troubleshooting.html

