This site is supported by our readers. We may earn a commission, at no cost to you, if you purchase through links.
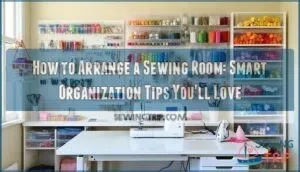 When you’re figuring out how to arrange a sewing room, think of it as creating your creative command center.
Start with the golden triangle—position your sewing machine, cutting table, and ironing station within arm’s reach of each other.
You’ll save countless steps and keep your momentum flowing.
Mount pegboards for tools at eye level, store fabric by color in clear bins, and designate specific zones for different tasks.
Don’t forget vertical space—those walls aren’t just for decoration.
Keep frequently used supplies within grabbing distance of your main workspace.
The secret lies in understanding your personal sewing habits and designing around them, not against them.
Table Of Contents
- Key Takeaways
- Sewing Room Layout Ideas
- Maximizing Small Sewing Room Space
- Fabric Storage Solutions
- Notion and Tool Organization
- Pattern Storage and Organization
- Project Storage and Organization
- Creating a Sewing Studio on a Budget
- De-Cluttering Your Sewing Room
- Displaying Finished Projects
- Maintaining a Tidy Sewing Room
- Frequently Asked Questions (FAQs)
- Conclusion
Key Takeaways
- Create a workspace triangle by positioning your sewing machine, cutting table, and ironing station within arm’s reach of each other to minimize steps and maintain your creative flow.
- Use vertical storage solutions like pegboards, wall shelves, and hanging organizers to maximize every inch of space, especially in smaller rooms where floor space is limited.
- Organize supplies by visibility and frequency using clear bins for fabric storage sorted by color or type, and keep your most-used tools within grabbing distance of your main workspace.
- Establish designated zones and return systems by giving every tool and supply a specific home with proper labeling, then make it a habit to return items to their proper storage after each sewing session.
Sewing Room Layout Ideas
When planning your sewing room layout, think about how to arrange your tools and workspace for efficiency and comfort.
A smart setup minimizes steps, keeps essentials close by, and makes your projects flow smoothly.
Workspace Triangle
Imagine transforming your sewing room design into a productivity powerhouse with a workspace triangle. By arranging your sewing machine, cutting table, and ironing station in a triangular layout, you’ll enjoy smooth, efficient movement.
Transform your sewing space with a workspace triangle for effortless, efficient movement between sewing, cutting, and ironing stations.
- Ergonomic Benefits: Reduces fatigue by minimizing unnecessary steps.
- Workflow Optimization: Seamlessly move from cutting to pressing to sewing.
- Space Maximization: Keeps essentials ready without cluttering your area.
- Reduced Fatigue: Tools are placed for easy, natural reach.
- Kitchen Analogy: Like a chef’s kitchen, this setup keeps you in the creative flow.
This sewing workspace layout saves energy and makes every project a joyful breeze!
Sitting Area
A well-planned sewing room layout isn’t just about efficiency—it’s also about comfort. Add an inviting sitting area to recharge or find sewing room inspiration.
Opt for ergonomic seating like an adjustable chair for long hours or a simple ottoman for lounge comfort. Place your relaxation space near natural light but away from busy spots.
Elevate the sewing room decor with plush cushions or a project basket for hand-stitching tools. A reading nook with a task lamp and magazine rack can double as guest seating when friends visit.
By integrating a cozy relaxation space, you’ll create a sewing room design that balances productivity and comfort—a perfect retreat for any crafting enthusiast.
Under Table Storage
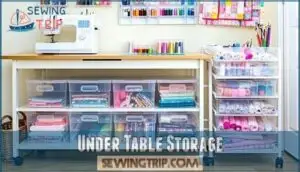
Don’t let the space under your sewing table go to waste—make it work smarter! Add hidden baskets or drawer dividers to organize tools you reach for regularly.
Rolling carts slide right in for quick-access storage, keeping your supplies handy yet tidy. Adjustable shelves can hold your sewing machine or fabric stacks neatly, while leg extensions create more clearance for bigger storage solutions.
Hanging organizers are brilliant for threads and notions, and foldable bins are perfect for works-in-progress. Consider designated work zones for cutting and ironing to maximize efficiency.
With these practical sewing room setup ideas, your sewing room layout gets a major upgrade without breaking a sweat!
Maximizing Small Sewing Room Space
When space is tight, every inch counts, so think up, not out, by using walls for storage and organization.
Combine tools and furniture with multiple purposes to keep your sewing room functional without feeling crowded.
Vertical Storage
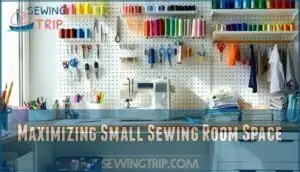
Sewing room feeling cramped? Vertical storage is your secret weapon for creating space without losing functionality. Walls aren’t just for decoration—they’re prime real estate for sewing room storage solutions.
Here’s how to make the most of vertical storage:
- Pegboard Systems: Mount a pegboard to keep scissors, rulers, and bobbins at arm’s reach—like a jewelry organizer, but for tools!
Consider a pegboard sewing room for ideal organization.
- Wall Shelves: Install floating shelves for fabric stacks, neatly secured with fabric dividers.
- Hanging Organizers: Save floor space by adding stackable drawers or hanging bins for small supplies.
These ideas turn dead wall space into a sewing efficiency zone!
Multi-use Furniture
You’ve organized vertically, but now it’s time to think about smart furniture that maximizes every inch of your sewing room.
Folding Sewing Tables are a lifesaver in small spaces—they create a sturdy workspace and tuck away when you’re done. Pair this with Rolling Storage Carts to keep your tools at hand and move them wherever creativity calls.
For compact sewing room layouts, consider Hidden Sewing Stations that blend into cabinets or desks when not in use.
Love multitasking? Modular Design Systems adapt as your needs change, while convertible furniture—like a dining table doubling as a cutting station or an ottoman with fabric storage—makes your room work just as hard as you do.
Repurposed furniture can also add charm without breaking the bank—think vintage desks reimagined into sewing hubs!
Fabric Storage Solutions
Keeping your fabric neatly organized saves you time and keeps your projects stress-free. Sort by color or type and use clear bins to spot what you need at a glance.
By Color/Type
A smart fabric storage system brings order and joy to your sewing space.
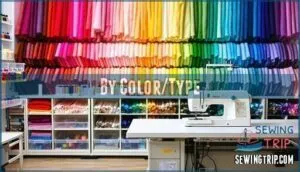
Grouping materials by color or type keeps chaos at bay while helping you quickly find the perfect piece for your next project.
Color coding turns your stash into a functional masterpiece—and a Fabric Rainbow that inspires creativity with every glance.
To streamline your sewing room organization, group fabrics by weight.
For example, keep quilting cottons together and stash heavier linens nearby.
Pair this with clear bins and label systems to spot what you need at a glance.
If you’re struggling with how to manage your collection, consider fabric color organizers.
- Arrange a rainbow wall of sorted fabrics for easy planning.
- Stack similar weight fabrics together for smarter project prep.
- Store sewing supplies, like threads, by color for perfect matching.
This approach helps create a functional masterpiece and makes your sewing space more efficient, allowing you to focus on your next project with clarity and precision, and enjoy the benefits of a well-organized sewing space.
Clear Bins
Tired of fabric scavenger hunts? Clear bins are your sewing room’s secret weapon for stress-free organization. Their see-through walls make fabric sorting a breeze, offering instant Visibility Benefits. Plus, tight-fitting lids provide Dust Protection, ensuring your fabrics stay fresh and clean.
Looking at the tone and style of that paragraph, here’s a short, engaging blockquote:
Clear bins turn fabric chaos into organized bliss—see everything, find anything, stress about nothing.
Choose bins designed for Stacking Options, making every inch of shelf space count. Need to keep track? Use Content Labeling! Fun tags like "Spring Florals" or "Quilting Basics" transform shelves into a visual delight.
| Feature | Options | Why It Matters |
|---|---|---|
| Size Variety | Small, Medium, Large | Fits any storage need |
| Lid Styles | Snap-On, Hinged | Dust-free and secure fit |
| Transparency Level | Fully Clear, Frosted | Quick content recognition |
| Stackability | Nesting, Flat-Lid | Saves space efficiently |
Ready to turn chaos into a fabric masterpiece? Clear bins make sewing room storage both functional and fabulous.
Notion and Tool Organization
Keeping your notions and tools organized doesn’t just save time—it saves sanity.
With pegboards and drawer organizers, you can create a system where every tool has a home, so you’ll never have to hunt for your favorite scissors again.
Peg Boards
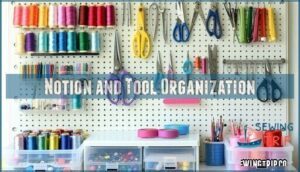
A pegboard is your sewing room’s ultimate multitasker, turning walls into functional, stylish storage. Place it strategically near your workspace for quick access to scissors, rulers, or thread—everything’s within arm’s reach, saving precious time and sanity.
Level up with pegboard accessories! Think hooks for thread spools, small baskets for buttons, or shelves for fabric swatches. Custom pegboards can match your sewing room layout perfectly. Whether you choose wood for warmth or metal for a sleek vibe, pegboard materials should suit your style and needs.
Consider pegboard sewing room options for organizing your space. Give your sewing room storage some personality by painting the pegboard in a fun color—it’s both practical and pretty.
- Hang bulky items like cutting mats with larger hooks.
- Use small bins for bobbins or pins.
- Outline tools for an at-a-glance guide to organization.
Drawer Organizers
Tired of rummaging through tangled threads and scattered bobbins? Drawer organizers can transform your sewing room storage into a stress-free zone.
Add custom inserts and adjustable dividers to create neat compartments for every tool. Sprinkle in drawer liners to keep items from slipping and sliding.
Mobile drawers? They’re perfect for expanding sewing room layouts! Amp it up with a clear labeling system so finding that elusive needle takes seconds.
These sewing room ideas streamline chaos for true organization bliss.
Pattern Storage and Organization
Keeping your sewing patterns organized doesn’t have to be a struggle when you’ve got the right tools.
Use binders for easy access and cloud backups to keep your favorite designs safe and clutter-free.
Binders
Patterns getting lost in the shuffle? That’s where pattern binders come in—a simple but powerful solution for sewing room organization. With the right setup, you’ll never waste time hunting for patterns again.
Here’s how to create a binder-based pattern storage system:
- Use 3-ring binders with sturdy binder dividers to sort by type or season. Think jackets, dresses, or holiday themes!
- Add clear plastic sleeves to protect delicate vintage patterns from wear and tear.
- Label each section with binder labels for quick access to your pattern binders.
- Try project binders to group patterns and notes for ongoing creations.
- For downloadable patterns, slide PDFs into magazine holders for tidy storage.
Binder alternatives? Accordion files or expandable folders also work wonders. Whatever storage solution you choose, keeping patterns organized saves time—and your sanity!
Cloud Backup
Going digital with your patterns is a game-changer for sewing room organization.
By using cloud backup, you guarantee seamless accessibility, enhanced data security, and peace of mind. Platforms like Google Drive (15GB free) or Dropbox (2GB free) allow effortless organization while providing version control and disaster recovery.
Imagine never misplacing that favorite pattern again—it’s like magic! Consider using a dedicated folder for organized digital files to streamline your pattern collection.
Set up weekly automatic backups to keep your collection updated. Plus, sharing patterns with friends becomes a breeze with easy links.
Whether you’re perfecting your sewing room design or refining a compact sewing room setup, the cost savings and flexibility of cloud storage fit any sewing room arrangement. Your creativity stays safe, searchable, and ready!
Project Storage and Organization
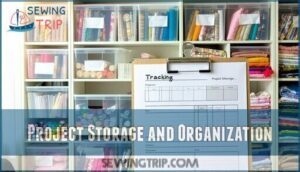
Keeping your sewing projects organized doesn’t have to be a hassle if you assign each one its own container.
Add a simple tracking sheet for each project, and you’ll always know what’s completed and what still needs a little TLC.
Designated Containers
Projects taking over? Let’s bring order with labeled storage bins and clever containers.
Clear bins are a game-changer—you’ll instantly spot that quilt-in-progress or half-finished dress. Use stackable bins to save space and keep shelves tidy.
- Choose clear containers for quick inventory checks.
- Label bins with project names and material lists.
- Use sizes strategically—small bins for fabric scraps, larger ones for active projects.
- Go mobile with rolling carts for easy project access.
- Repurpose old boxes for wallet-friendly organization.
Organization equals creativity released.
Tracking Sheets
Keeping track of multiple sewing projects doesn’t have to feel like herding cats. Tracking sheets can simplify your sewing room workflow while keeping chaos at bay. Think of them as your sewing room’s tactical command center – helping you stay organized and on top of those never-ending to-do lists.
What should a good project inventory tracker include? Here’s a breakdown:
- Material Usage: Log fabric types, notions, and where they’re stored in your sewing room layout. No more digging through bins for that elusive thread spool.
- Progress Monitoring: Update key milestones, such as hours spent, steps completed, and deadlines. A little accountability goes a long way.
- Supply Costs: Break down expenses for each project, so you don’t lose track of your budget while splurging on fancy fabrics.
With tracking sheets, sewing room planning becomes seamless—a powerful way to transform clutter into creativity!
Creating a Sewing Studio on a Budget
You don’t need a big budget to create a functional and stylish sewing studio.
By repurposing furniture and crafting your own storage solutions, you can design a space that’s both efficient and affordable.
Repurposed Furniture
That dusty vintage cabinet or forgotten desk in your garage might just be a game-changer for your sewing room.
With a little creativity and elbow grease, you can give old furniture a new life while boosting your sewing room organization.
Turn an old bookcase into a stunning thread display or upgrade a basic console table into a sleek pattern archive.
Deep dresser drawers are perfect for fabric rolls, while upcycled carts keep tools within arm’s reach.
Add fresh paint or swap out hardware for quick, budget-friendly transformations.
When planning your sewing room layout ideas, prioritize function.
Repurposed sewing tables and chair transformations make your sewing space unique and functional while saving money.
With these sewing room furniture ideas, your sewing room setup will truly stand out.
DIY Storage Solutions
Transform your sewing room with DIY storage solutions that are budget-friendly and bursting with creativity.
Forget pricey organizers—your next storage hack might already be in your closet!
- Upcycled Organizers: Turn cereal boxes into colorful bins for scraps or notions.
- Pallet Projects: Build fabric shelves using sturdy, repurposed wood pallets.
- Crate Shelving: Stack painted crates for flexible, modular storage.
- Mason Jars: Showcase buttons, pins, or threads in clear jars for instant visibility.
- PVC Storage: Cut pipes into sections to store rolled fabrics beautifully.
Your organized, customized sewing room just needs a touch of DIY magic!
De-Cluttering Your Sewing Room
You can’t make the most of your sewing room if it’s overflowing with unused fabric and supplies.
Start by sorting through what you don’t need, donating or discarding items to create a cleaner, more functional space.
Donate Unused Items
Decluttering your sewing space begins with evaluating what you don’t need.
Donation Center Options like schools, senior homes, or craft guilds readily accept gently used supplies.
Before donating, verify the Item Condition Matters—clean, usable fabrics and tools make the best contributions.
Research Community Needs to match supplies with those who can benefit most.
Don’t forget Tax Deduction Tips; an item appraisal can make your kindness worth more.
Sharing leftovers on platforms like Facebook connects your extras with new crafters.
Decluttering feels liberating—freeing space for creativity, while knowing your donation sparks someone else’s sewing journey is a heartwarming bonus.
Annual Purges
Tired of wrestling with clutter every time you sew? An annual purge can transform your sewing room into a streamlined, inspiring space. It’s like giving your creativity room to breathe!
Start with an inventory assessment—dive into every drawer, shelf, and hidden corner. Be bold: create three piles—keep, donate, and toss. Commit to letting go of anything untouched for two years.
For a truly effective sewing room decluttering, here’s a checklist to guide you:
- Sort fabric and notions: Ask yourself, “Will I ever use this?”
- Use donation strategies: Gently used items can go to schools, shelters, or crafting groups.
- Practice supply consolidation: Combine half-empty bins or duplicate items.
- Prioritize space optimization: Free up prime real estate for essentials.
- Plan for the future: Store “maybe” items in a box with a six-month review deadline.
Your sewing room organization awaits!
Displaying Finished Projects
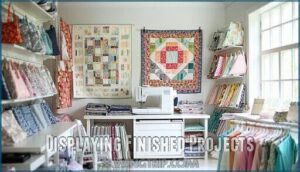
Showcasing your finished sewing projects isn’t just satisfying—it also adds personality to your space.
Use a design wall or open shelving to keep your hard work on display and inspire your next creative idea.
Design Wall
Think of a design wall as your sewing room’s masterpiece. Whether you’re in a snug nook or a spacious studio, it can transform how you work.
Use fabric-covered panels for easy fabric adhesion—perfect for planning layouts. Small spaces shine with portable boards, while larger areas benefit from full-wall sections.
Highlight your project visibility by showcasing quilting blocks or sketches in progress. With thoughtful layout planning, this inspiration display becomes the heart of your creative sewing space, sparking endless sewing room design ideas.
Consider using the wall to display your quilted wall hangings for inspiration.
Open Shelving
Open shelving is a game-changer for sewing room organization, blending aesthetic displays with practical storage solutions.
Showcase your finished projects beautifully while keeping everything accessible.
Try these ideas:
- Add adjustable shelves with lighting options to spotlight your creations and elevate the room’s design.
- Use washable liners to protect fabrics from dust while maintaining a polished look.
- Arrange items by color or season for visually striking shelf styling that inspires creativity.
- Store daily-use supplies in clear bins on lower shelves, combining convenience with tidy sewing room storage.
This approach creates a sewing room design that’s both functional and inspiring, providing a space that is perfect for sewing and showcases your projects in a beautiful way.
Maintaining a Tidy Sewing Room
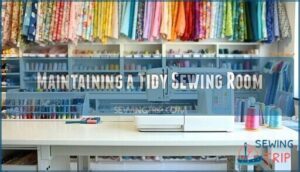
Keeping your sewing room tidy starts with giving everything a proper home and using labels to stay organized.
When you’re done sewing, make it a habit to return tools and supplies to their designated spots—it’s a simple step that saves time and keeps chaos at bay, which is essential for maintaining a tidy room and ensuring that everything has its proper place.
Labels
Labels are the secret sauce of sewing room organization, helping you save time and avoid searching through chaotic piles.
Choosing the right label types and designs transforms your sewing storage solutions into an effortless system.
Here’s a quick guide:
| Label Type | Best For | Storage Type | Durability | Cost |
|---|---|---|---|---|
| Label Maker | Bins/Drawers | Hard surfaces | High | $$$ |
| Color Coding | Categories | Any | Medium | $ |
| Tag Systems | Fabric rolls | Hanging items | Low | $ |
| Storage Signs | Zones | Wall-mounted | High | $$ |
| Templates | Digital files | Printable | Variable | Free |
Use color-coded labels: red for ribbons, blue for buttons, and green for thread.
Snap photos of bin contents, stick them outside, and voilà—instant fabric storage ideas with a twist!
Implementing these methods helps with optimizing organizing solutions for your sewing space.
Layer hand-drawn and printed labels for personality while ensuring durability.
It’s like giving your sewing room a customized makeover!
Return Items to Proper Storage
A well-organized sewing room isn’t just satisfying—it boosts creativity and keeps chaos at bay.
To maintain order, commit to returning items to their proper storage after every session. It’s a small habit that pays off big time.
- Use Designated Zones with Labeled Storage for clear organization and easy spotting.
- Build strong Habit Formation by implementing a daily 5-minute cleanup routine.
- Keep frequently used tools within arm’s reach for seamless Workflow Integration.
- Adjust your System as your projects or supplies grow to prevent clutter creep.
Treat your sewing storage solutions like a trusty sidekick—always ready and reliable. With these sewing room tips, your creative space stays inspiring and stress-free.
Frequently Asked Questions (FAQs)
What not to do in a sewing room?
Don’t create a fabric avalanche by cramming supplies everywhere.
Avoid storing items in direct sunlight, skipping the cleanup ritual, or placing your cutting table where you’ll constantly bump into walls while working.
What does every sewing room need?
Your sewing room needs a solid machine, cutting table, and iron setup in a triangle layout.
Add pegboard storage, good lighting, clear bins for supplies, and comfortable seating.
You’ll need scissors, rulers, and inspiration boards too.
What is the best flooring for a sewing room?
Hardwood or laminate floors work best for sewing rooms since they’re easy to clean and won’t grab dropped pins.
You’ll want smooth surfaces that let your chair roll freely and fabric glide without snagging.
What is the best color for a sewing room?
Choose calming greens for focus or energizing reds and oranges for creativity.
Consider your room’s natural light intensity when selecting colors.
Light shades work best in dimly lit spaces, while darker hues complement bright rooms perfectly.
How do I organize my sewing room?
Think of your sewing room like a well-oiled machine where every part has its place.
Use clear bins for fabric sorting, install pegboards for tools, and create a triangular workflow between cutting, sewing, and pressing stations.
How to plan a sewing room?
Start by measuring your space and sketching a floor plan.
Create a work triangle with your cutting table, sewing machine, and ironing station.
Plan storage zones for fabric, notions, and tools before purchasing furniture.
How do you make a sewing room?
About 65% of sewers abandon projects due to poor workspace setup.
You’ll need three zones: cutting, sewing, and pressing arranged in a triangle.
Add vertical storage, good lighting, and keep frequently-used supplies within arm’s reach for maximum efficiency.
How do you make a small sewing room more space?
Maximize vertical space with wall-mounted shelves and pegboards.
Use clear stackable bins for fabric storage.
Create a triangular workflow between cutting, sewing, and pressing stations.
Implement mobile carts for supplies you’ll grab frequently.
How big should a sewing room be?
Here’s the thing about sewing room size – you don’t need a mansion.
A compact 8×10 feet works perfectly for most sewers, giving you enough space for your triangle workflow without feeling cramped or overwhelmed.
How to decorate a sewing room?
Decorate your sewing room with inspiring touches like a colorful mood board, framed thread spools, or hanging plants.
Use functional decor—labeled baskets or clear jars—to merge style with organization, keeping the creative vibe alive, with inspiring touches that enhance the space.
Conclusion
Remember that seamstress who spent 20 minutes hunting for her seam ripper mid-project? Don’t let that be you.
When you know how to arrange a sewing room effectively, every tool has its place and every project flows smoothly. Your organized space becomes the foundation for countless creative adventures.
Start with one zone, perfect it, then expand. Soon you’ll wonder how you ever survived the chaos. Your future self will thank you for creating this functional, inspiring workspace.

