This site is supported by our readers. We may earn a commission, at no cost to you, if you purchase through links.
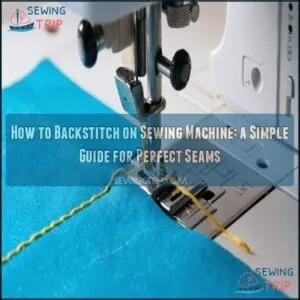
Hold the reverse lever or button, then sew a few stitches backward to lock the seam. Release the lever, sew forward as usual, and when you reach the end, backstitch again for a few stitches to secure the thread.
It’s like tying a knot, but with your machine—quick and strong!
Keep your stitch length consistent, and adjust tension if needed to avoid puckering.
Learning this technique will keep your seams neat and durable—essential for professional-looking projects. Ready to explore more sewing secrets?
Table Of Contents
- Key Takeaways
- What is Backstitch on a Sewing Machine?
- Preparing Your Sewing Machine for Backstitching
- Step-by-Step Guide to Backstitching on Sewing Machine
- Troubleshooting Common Backstitch Issues
- Advanced Backstitching Techniques for Sewing Machine
- Alternatives to Backstitching on Sewing Machine
- Frequently Asked Questions (FAQs)
- Conclusion
Key Takeaways
- Use your sewing machine’s reverse button to lock the beginning and end of seams with a few backward stitches for strong, durable results.
- Adjust your stitch length and thread tension based on fabric type to prevent puckering and ensure consistent, smooth seams.
- Reinforce stress points like pockets and corners by adding extra backstitches or overlapping stitches for added seam strength.
- If your machine doesn’t have a backstitch button, try alternatives like lock stitches, zigzag stitches, or hand-tying knots to secure threads.
What is Backstitch on a Sewing Machine?
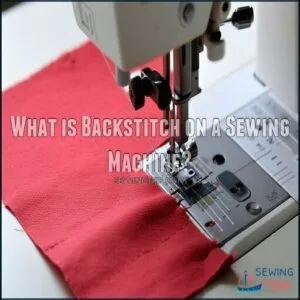
A backstitch on a sewing machine is a technique that secures the start and end of a seam by stitching backward over the same area.
It’s essential for preventing stitches from unraveling, making your seams strong and long-lasting.
Definition of Backstitch
A backstitch is your go-to method for locking stitches and guaranteeing seam security. It’s simple yet powerful, perfect for beginners mastering stitch reinforcement.
The backstitch is the ultimate tool for locking stitches and achieving strong, durable seams with effortless security and professionalism.
This technique strengthens seams by overlapping thread paths, preventing unraveling and adding stitch durability.
Here’s how to use the sewing machine backstitch effectively:
- Locate the reverse button or lever.
- Stitch backward 3-4 times to secure the seam.
- Resume forward stitching for a smooth finish.
Mastering this backstitch tutorial guarantees your seams handle wear, tear, and movement effortlessly!
Purpose and Importance of Backstitching
A sewing machine backstitch isn’t just a technique—it’s the backbone of secure seams sewing.
Think of it as a built-in insurance policy for your project.
By reinforcing sewing seams at the start and end, you prevent unraveling seams that could compromise your hard work.
This step locks the thread in place, guaranteeing seam security for garments and crafts alike.
In areas like pockets or fitted garments, the backstitch carries your sewing through stress and strain.
It doubles the thread strength, offering stitch reinforcement where it matters most.
Whether you’re tackling heavy-use items or delicate fabrics, durable seams help maintain shape and withstand wear, washing, and time.
For beginners, mastering a backstitch builds confidence while creeping into your quality indicator checklist.
It’s a simple way to confirm your projects don’t just appear professional but last far longer than knots alone could achieve, ensuring a professional finish.
When to Use Backstitch in Sewing Projects
Think of a sewing machine backstitch as your seam’s insurance policy—especially for areas prone to wear.
Use it:
- Start and stop seams to prevent unraveling seams.
- Reinforce sewing seams at stress points like pockets and zippers.
- Protect garment lifespan by reinforcing repairs on delicate fabrics.
Mastering secure seams sewing keeps projects durable and professional.
Benefits of Mastering The Backstitch Technique
Mastering backstitching transforms your work into polished, professional-quality pieces. It’s a small step with a big impact, offering benefits you’ll notice every time you sew.
Mastering backstitching elevates your sewing, ensuring polished seams that are durable, professional, and built to handle the test of time.
- Seam Durability: Backstitching prevents unraveling, keeping your seams intact during wear and washing.
- Reinforcing Stress Points: High-impact areas like pockets and intersections stay strong, resisting wear better.
- Garment Lifespan: Secure seams sewing guarantees your projects withstand time, maintaining shape and integrity.
This simple sewing machine technique saves repair time and gives every creation a professional finish. For superior results, consider adjusting thread tension according to the fabric. When you reinforce sewing seams, you’re investing in durability and long-lasting results.
Preparing Your Sewing Machine for Backstitching
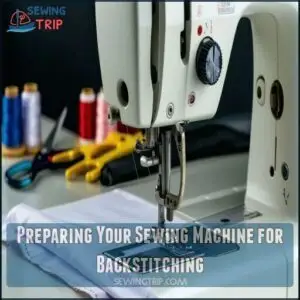
Getting your sewing machine ready for backstitching is a simple but essential step to guarantee neat and secure seams.
By adjusting the thread tension, selecting the right stitch length, and properly positioning your fabric, you’ll set yourself up for success.
Adjusting Thread Tension for Backstitching
Getting your thread tension right is key to strong, clean backstitches. Thread tension determines how the threads interact between the top and bottom of your fabric. If it’s off, your backstitch can fail before you even finish your project.
Start with your sewing machine’s tension dial at the mid-range (usually 4-5). Then, grab some scrap fabric matching your project and test stitch to find the sweet spot.
- Too loose: Loops form on the fabric’s underside.
- Too tight: Fabric puckers, ruining your seams.
- Unbalanced bobbin tension: Uneven stitches top to bottom.
- Perfect: Stitches look the same on both sides.
Thread type and fabric weight can affect tension, so adjust as needed. To maintain consistent results, clean tension discs regularly. Balanced tension strengthens your backstitch and keeps seams intact through wear-and-tear. Smooth thread tension creates that polished, professional look every sewist loves.
Selecting Appropriate Stitch Length
Adjusting the backstitch length on your sewing machine is key to success. For general projects, 2.5-3mm stitches balance strength and control.
Thicker fabrics need longer stitches (3-4mm) to handle their density without strain, while shorter stitches (1.5-2mm) suit delicate materials and avoid damage.
Keep an eye out—puckering means stitch density is too tight, while loose seams call for shorter settings. Experiment to match fabric thickness, seam stress, and aesthetic considerations for perfect sewing machine stitches.
Choosing The Right Needle and Thread
Choosing the right needle and thread for your sewing machine guarantees clean backstitching and stronger seams. Start by thinking about your fabric weight.
- Needle Size: Use size 8-11 for delicate fabrics, 12-14 for medium, and 16+ for heavy materials. Match the needle type to the fabric (e.g., ballpoint for knits, universal for cotton).
- Thread Type: Go with polyester for stretchy fabrics, cotton for woven, or all-purpose for everyday sewing. Test color matching for visible seams.
- Special Threads: Use silk or metallic threads for decorative backstitches, making sure they suit your fabric weight. Selecting the right materials can be simplified by considering appropriate thread weight.
Always test combos on scrap fabric first!
Positioning Fabric Correctly for Backstitching
Positioning your fabric correctly sets the foundation for smooth backstitching. Start by aligning the fabric edge with the seam guide on your sewing machine. This alignment helps maintain a consistent seam allowance, which keeps your stitches looking neat and professional.
Place the fabric under the presser foot, ensuring the needle is lined up exactly where your seam begins. Keep a light but steady hold on the fabric for proper edge control.
Let the feed dogs do most of the work to prevent slippage or uneven stitching. Avoid pulling or pushing the fabric too hard, as this may cause puckering or wavy seams.
Adjust your presser foot position based on the fabric type. For lightweight materials, use lower pressure, while thicker fabrics may need higher settings to keep stitching steady. This simple technique elevates your backstitching results and helps maintain a consistent seam allowance.
Step-by-Step Guide to Backstitching on Sewing Machine
Learning to backstitch on your sewing machine is easier than you might think and guarantees strong, secure seams.
Follow these simple steps to start and finish your seams like a pro.
Starting The Seam With Backstitch
Starting with perfect initial stitches is key to great sewing.
Begin by ensuring proper fabric alignment under the presser foot, matching the guideline. Lower the needle to its starting position, then sew forward 3-4 stitches to anchor your seam.
Next, press the reverse button for reverse stitch sewing, gently applying consistent pressure on the pedal as the machine stitches backward for 3-4 stitches. Remember to select appropriate needle size based on your thread.
Release the button and continue forward. This simple yet effective step in a backstitch tutorial locks your seam securely, ensuring professional results with strong, durable finishes.
Add this to your go-to sewing machine techniques!
Performing Backstitch at Seam Ends
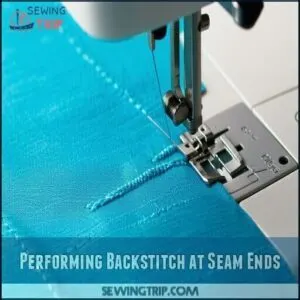
Securing your seams properly at the end guarantees durability and a professional finish.
To achieve seamless seam-end security, engage the reverse stitch function when you approach the fabric’s edge. Hold the backstitch button for 3-4 stitches on lightweight fabrics, 4-5 for medium, and 5-6 for heavier materials.
This overlapping creates a lock stitch effect that prevents unraveling. Guarantee consistent backstitching by aligning the needle carefully and keeping steady pressure as you sew.
Reinforcing seams this way strengthens the stitch and also extends the garment’s lifespan. Mastering how to backstitch guarantees professional results every time!
Backstitching in The Middle of a Seam
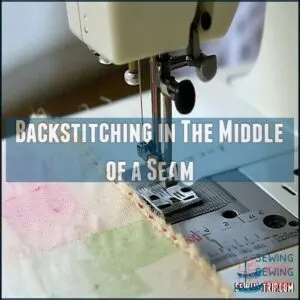
Mid-seam backstitching works wonders for high-stress areas, adding reinforcement where seams need it most.
Use this sewing machine technique on pockets, waistbands, or intersecting seams to maintain seam integrity and prevent tears.
Here’s how:
- Stop sewing when reaching a stress area.
- Hold the reverse button and sew backward 3-4 stitches.
- Release it, then sew forward again.
- Repeat at multiple reinforcement points for durability.
- Use strategic placement to keep your seams strong and polished.
By following these steps, you can ensure that your seams are reinforced and less likely to tear, making your sewing projects more durable and long-lasting.
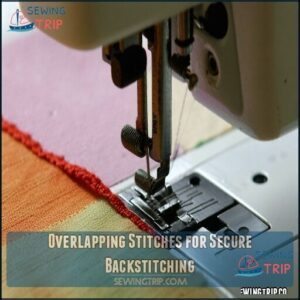
Overlapping Stitches for Secure Backstitching
A strong seam’s secret lies in mastering overlapping stitches. When backstitching, go 3–4 stitches in reverse to lock the seam, then continue forward. For added security, overlap your final backstitches by about 1/4 inch at the start or end.
Keep your sewing machine’s stitch length at 2.5–3mm and maintain even pressure on the fabric.
- Reinforce: Use threads matching your fabric type for better durability.
- Control: Maintain fabric stability by holding it taut.
- Focus: Keep stitch density consistent for neat results.
- Enhance: Locate reinforcement points on stress-prone seams for extra durability.
Troubleshooting Common Backstitch Issues
Backstitching can occasionally cause issues like thread bunching or uneven stitches, but these are easy to address with a few simple adjustments.
Understanding what’s causing the problem guarantees smoother, stronger seams every time, which is crucial for smoother results.
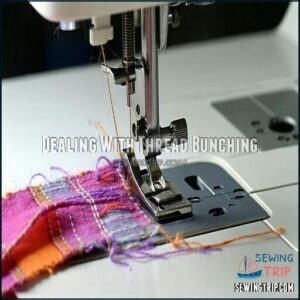
Dealing With Thread Bunching
When thread bunching interrupts your backstitch, tackle it with these quick fixes.
Start with thread tension problems—adjust the upper tension dial to match your fabric. Check the bobbin issues: verify the bobbin is correctly loaded and threaded per your sewing machine’s manual.
Don’t overlook needle type—a dull or mismatched needle can wreak havoc. Also, prioritize thread quality; cheap or old threads often lead to snarls.
A key factor is addressing tension imbalance, which can cause unstable seams. Keep your sewing machine in top shape with regular cleaning. Dust buildup in the feed dogs and bobbin area can cause uneven fabric feeding.
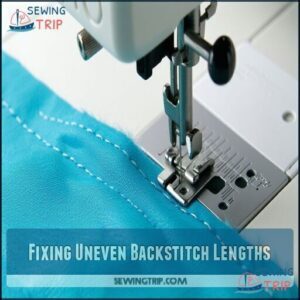
Fixing Uneven Backstitch Lengths
Uneven backstitch lengths are a common frustration, but fixing them is easier than you think.
Start by checking your stitch length and tension adjustment—your sewing machine settings should match both your fabric and project. Uneven stitches often result from inconsistent fabric feed or needle stability, so focus on steady control.
You might also consider exploring solutions for uneven backstitch repair.
Try these steps to improve your results:
- Clean the feed dogs regularly to maintain smooth fabric movement.
- Use the stitch regulator to help control backstitch length.
- Practice drills on scrap materials until you feel confident.
By mastering consistent momentum and monitoring your machine, you’ll achieve professional-quality backstitching without the hassle.
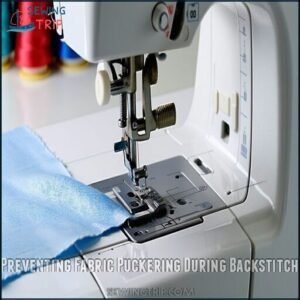
Preventing Fabric Puckering During Backstitch
Fabric puckering during backstitching can be frustrating, but it’s preventable with small adjustments to your sewing machine settings.
Start with tension adjustment—loosen the upper thread tension if it’s too tight. Clean the feed dog to guarantee smooth fabric movement and use the correct needle size for your material.
Maintain steady fabric stabilization by holding it firmly without stretching. Adjust your stitch length to match the fabric type, and let the presser foot guide the material naturally for even, smooth seams.
Maintaining the correct sewing machine tension is vital for preventing puckering.
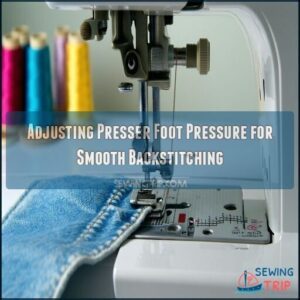
Adjusting Presser Foot Pressure for Smooth Backstitching
The right presser foot pressure is key for smooth backstitching. If you notice uneven stitches or fabric feed issues, take a moment to adjust this setting. It’s a simple tweak, but one that can prevent slippage and maintain consistent stitch quality.
- Lower pressure for delicate fabrics like silk to prevent puckering.
- Increase pressure for thick materials like denim to keep stitches secure.
- Use the pressure gauge on your sewing machine to make adjustments—check the manual if unsure.
- Test your backstitching on scrap fabric before starting a project.
Most sewing machines have a pressure dial, typically on top or side. Start in the middle range, then make small adjustments until the fabric feeds evenly and stitches align smoothly. Fabric stretching and wrinkles can be avoided by adjusting pressure properly. Good presser foot pressure enhances machine control, ensuring your backstitches are as reliable as the seams you create.
Advanced Backstitching Techniques for Sewing Machine
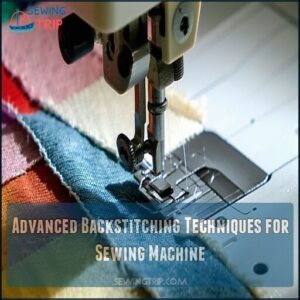
Ready to elevate your sewing skills? Advanced backstitching techniques help you handle tricky fabrics, reinforce curves, and combine stitches for both strength and style.
Backstitching on Different Fabric Types
Mastering backstitching means knowing your fabric’s personality. Stretch fabrics like knits need a ballpoint needle and polyester thread to prevent skipped stitches and tears.
For heavy fabrics, such as denim or canvas, use a denim needle and heavy-duty thread to tackle those thick seams with ease. Delicate fabrics like silk or chiffon call for a sharp, fine needle and lightweight thread to avoid puckering or snags.
Working with pile fabrics, like velvet or terry cloth? A walking foot and stabilizer keep things smooth.
- Stretch Fabrics: Use a stretch stitch or zigzag for flexibility.
- Heavy Fabrics: Adjust tension and test stitches.
- Delicate Fabrics: Use shorter lengths, lighter tension.
- Pile Fabrics: Stabilize to stay on track.
Using Backstitch for Decorative Purposes
Backstitching isn’t just practical—it’s a decorative sewing technique that adds personality to your projects.
You can create stunning embellishments like borders, outlines, or even personalized text using embroidered backstitch. Pairing bold threads, such as embroidery floss or metallics, with Backstitch patterns can add striking color contrast and depth.
To start, mark your design on the fabric and set your sewing machine to a consistent stitch length. Whether you’re refining texture creation for floral art or enhancing seams with decorative stitching, focus on small, even stitches for a polished look.
Use free-motion backstitch for intricate, creative detailing. Experiment with embellishment techniques to make your work stand out—backstitch’s versatility transforms basic seams into artistic, eye-catching features!
Combining Backstitch With Other Stitches
Blending backstitch with other stitches turns a standard sewing technique into a versatile tool for both function and creativity.
By combining backstitching with other methods, you can boost fabric stability, create reinforcement stitches, and add creative embellishments.
Here are four inspiring ways to pair backstitch with other stitches on your sewing machine:
- Backstitch + zigzag stitch: Secure seams on stretchy fabrics with added flexibility.
- Backstitch + topstitch: Lock seams while achieving a polished, professional finish.
- Backstitch + serger finish: Protect raw edges, ensuring clean and durable seam finishes.
- Backstitch + decorative stitches: Transform seams into standout design elements.
Backstitching Curved Seams and Corners
Tackling curved seam backstitch or corners? Keep your stitch length short (1.5-2mm) for smooth control on curves.
Use your sewing machine’s needle-down function to guide the fabric without puckering. For corners, stop at the pivot point backstitch with the needle down, lift the presser foot, pivot, and realign the fabric.
Reinforce seams with 3-4 backstitches at critical points. Finally, clip the seam allowance slightly for cleaner, flatter finishes, ensuring a professional-looking result with smooth control.
Alternatives to Backstitching on Sewing Machine
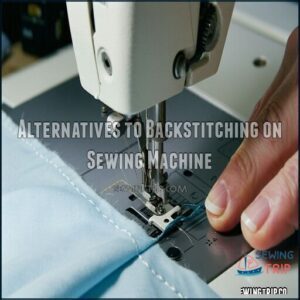
If your sewing machine doesn’t have a backstitch function or you’re looking for other options, you’ve got a few reliable alternatives.
From hand-tying knots to using the lockstitch feature, these methods can help secure your seams effectively.
Hand-tying Knots to Secure Stitches
Sometimes, a simple approach like hand-tying knots can save the day when backstitching isn’t an option.
It’s a handy skill for securing stitches on delicate fabrics or tight spots.
Bring both thread ends to the wrong side of your fabric, then tie a surgeon’s knot snug to the surface.
Repeat for extra strength and trim the threads for a polished finish.
- Knot Durability: Prevents stitches from unraveling.
- Knot Alternatives: Perfect for stress-prone seams.
- Knot Aesthetics: Creates clean, professional finishes.
This backstitch alternative guarantees secure, long-lasting seams while reinforcing your hand sewing skills.
Using Lockstitch Function on Modern Machines
Ever fumbled with a reverse lever or button while backstitching? Modern sewing machines with automatic lockstitch make life easier.
With just a button (usually marked with a lock), you can secure seams flawlessly. Adjust your tension settings, press the lockstitch activation, and let the machine do the magic—no reversing required!
These programmable lockstitch options create tight, precise stitches that prevent unraveling over time.
Perfect for both beginners and pros, this lock stitch sewing feature saves time while ensuring durability and clean finishes.
Employing Zigzag Stitch for Seam Reinforcement
When backstitching isn’t an option, the zigzag stitch is a great alternative for seam reinforcement.
It’s flexible and resists tearing, especially with stretchy fabrics.
Here’s how to get it right:
- Adjust zigzag stitch width based on fabric type—narrow for delicate, wider for heavier materials.
- Test zigzag tension balance on scrap fabric.
- Shorten stitch length to increase stitch density impact.
- Align the edge under the presser foot for even stitching.
- Consider decorative zigzag reinforcement to add a stylish finish!
Your sewing machine’s zigzag function really pulls double duty here!
Exploring Other Stitch-securing Methods
If you’re looking for alternatives to a backstitch, there are plenty of great options.
The lock stitch feature on your sewing machine secures thread ends with tiny, precise stitches.
For stress points like pocket corners, try bar tacks, which create dense zigzag stitches for added strength.
Overlock stitches are perfect for trimming and sealing edges using a serger, while products like Fray Check keep fabrics from unraveling.
On delicate projects, hand-tying knots or using fusible interfacing can secure seams without damage.
Each sewing seam finish depends on your project and machine’s capabilities—pick what works best!
Frequently Asked Questions (FAQs)
How can backstitch be used in sewing?
You can use a backstitch to secure the beginning and end of seams, reinforce stress points like pockets, and prevent unraveling.
It’s quick, easy, and guarantees your sewing stays durable and long-lasting.
How to start a backstitch on a sewing machine?
Funny enough, starting a backstitch on a sewing machine is simple.
Position your fabric, sew forward 3-4 stitches, then press the reverse button and stitch backward over them.
Release, then continue forward stitching.
How do you backstitch a sewing machine?
Start by sewing forward a few stitches, then press the reverse button to sew backward over them.
Release the button, continue sewing forward, and repeat at the end to secure your seam.
Do all sewing machines have a Backstitch button?
Not all sewing machines have a backstitch button, especially older or industrial models.
Some require creative techniques, like turning fabric manually.
Always check your machine’s manual to see if backstitching is built-in.
How to end your stitch on a sewing machine?
To finish a stitch, sew a few reverse stitches using the backstitch button to lock in the thread.
Then, lift the presser foot, clip the threads close to the fabric, and you’re done!
Why is the backstitch important?
Think of backstitching as the seatbelt of sewing—it keeps everything securely in place.
It locks your thread at seam ends, preventing unraveling, reinforcing stitches, and ensuring your projects hold up through wear and tear.
Which is the back side of a backstitch?
The back side of a backstitch is the fabric underside where threads overlap, creating a slightly bulkier, reinforced line.
It’s less visible than the front but guarantees the stitching stays secure and durable.
Do you have to backstitch when sewing?
You don’t always have to backstitch, but it’s a smart habit.
Backstitches lock your threads, keeping seams secure and preventing unraveling, especially at stress points.
Skipping it risks loose, weak seams over time.
Do all sewing machines have a backstitch button?
Not all sewing machines have a backstitch button.
Some older or industrial models lack this feature, but you can replicate it by manually reversing stitches or tying knots for reinforcement.
Check your machine’s manual for details.
How to do backstitch on a sewing machine?
To backstitch, place your fabric under the presser foot, sew forward a few stitches, hold the reverse button to sew backward over them.
Then resume forward stitching, and repeat at the seam’s end for reinforcement.
Conclusion
Did you know a secure backstitch can extend the lifespan of your projects by up to 50%?
Now that you’ve mastered how to backstitch on a sewing machine, you’re ready to tackle seams with confidence.
Consistent stitch length, proper tension, and starting and ending with backstitches will guarantee neat, durable results every time.
Keep practicing, and soon, backstitching will become second nature, helping your creations stand the test of time. Happy sewing!
- https://en.wikipedia.org/wiki/Backstitch
- https://www.craftsy.com/post/sewing-machine-thread-bunching-up
- https://www.justanswer.com/small-appliance/m6njk-thread-bottom-sewing-bunching-up.html
- https://www.reddit.com/r/sewhelp/comments/yb3mmn/thread_bunching_under_fabric/
- https://www.thesprucecrafts.com/fixing-bobbin-thread-bunching-looping-tangling-2978069

