This site is supported by our readers. We may earn a commission, at no cost to you, if you purchase through links.
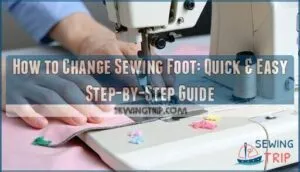
First, raise your presser foot lever completely—this releases tension and prevents damage.
Next, locate the release mechanism: it’s either a small lever behind the foot or a thumb screw.
Push the lever or turn the screw counterclockwise to drop the old foot.
Position your new foot directly under the ankle, ensuring the pin aligns with the groove.
Lower the presser foot lever to snap everything into place.
You’ll hear a satisfying click when it’s secure.
Most modern machines use snap-on systems that make swapping feet foolproof.
The real magic happens when you discover which specialized feet reveal your machine’s hidden potential.
Table Of Contents
Key Takeaways
- You’ll change presser feet in seconds once you master the basic technique – raise the presser foot lever completely, press the release button to drop the old foot, align the new foot under the shank, and lower the lever until it clicks securely
- Using the right foot for each task prevents frustration and delivers professional results – specialty feet like zipper, buttonhole, and walking feet handle specific jobs that your standard all-purpose foot can’t accomplish effectively
- Most presser feet are interchangeable across similar machine brands – snap-on systems work with most Brother, Singer, and Janome machines, but you’ll need to check compatibility charts before purchasing specialty feet
- Building your foot collection strategically saves money and expands your machine’s capabilities – start with feet that match your most frequent projects, prioritize quality over quantity, and store them properly to prevent damage
What is a Presser Foot?
Think of your presser foot as the steady hand that guides fabric through your sewing machine. This essential component sits beneath the needle and applies gentle pressure to keep your material moving smoothly and evenly as you stitch.
Your presser foot is the steady hand that keeps fabric flowing smoothly through every stitch.
Your machine likely came with several presser foot types, each designed for specific tasks. The standard all-purpose foot handles basic straight and zigzag stitches, while specialized options like zipper feet, buttonhole feet, and walking feet tackle more demanding projects.
Understanding foot functions helps you choose the right tool for each job. Proper presser foot pressure matters tremendously. Too much pressure can damage delicate fabrics, while too little lets materials shift and creates uneven stitches.
Most machines let you adjust this pressure based on your fabric’s thickness. Regular presser foot maintenance keeps everything running smoothly. Clean lint buildup after projects and check for worn edges that might snag fabric.
When you master these sewing machine parts and their fabric guidance capabilities, you’ll discover that changing feet becomes second nature, opening up countless creative possibilities. Mastering sewing machine presser feet is essential for achieving professional results in your sewing projects.
Why Should You Change Your Sewing Machine Feet?
You’ll achieve better results and avoid frustration when you match the right presser foot to your specific sewing task.
Different feet activate unique capabilities like perfect buttonholes, smooth zipper installation, and professional-quality topstitching that your standard foot simply can’t deliver.
Importance of Using The Right Foot
Using the wrong presser foot creates headaches you don’t need.
Wrong feet mean wonky stitches, fabric bunching, and pure sewing frustration.
Your fabric bunches, stitches skip, and seams look amateur.
The right foot holds fabric steady, preventing puckering and slippage that ruins projects.
Foot precision directly impacts stitch quality—matching your presser foot to fabric type and technique guarantees professional results.
This simple sewing foot change transforms your machine longevity and sewing efficiency.
Understanding the different presser feet types is essential for achieving the best sewing outcomes.
Added Features and Precision
Switching the right foot transforms your machine into a precision powerhouse. Each sewing foot change delivers improved stitch quality through better fabric guidance and foot alignment.
Specialty feet enhance sewing accuracy, turning tricky tasks like buttonholes and zippers into smooth operations. Different sewing foot types offer unique advantages – from walking feet that prevent fabric bunching to zipper feet that create professional-looking finishes.
Proper sewing foot installation and attachment activate these advanced features, giving you complete control over your projects, with the ability to achieve professional-looking finishes.
Special Feet for Specific Tasks
Break free from one-size-fits-all sewing by mastering specialized presser feet that transform your machine into a precision tool. Each foot handles specific tasks that’d otherwise challenge even experienced sewers.
Zipper Feet slip close to zipper teeth for clean installations, while Button Feet hold buttons steady during attachment. Teflon Feet glide over sticky materials like vinyl, and Embroidery Feet provide the visibility needed for decorative stitching. Quilting Feet help manage multiple fabric layers smoothly.
Understanding different sewing foot types means you’ll approach each project with confidence. Sewing foot installation becomes second nature once you’ve mastered sewing foot removal and sewing foot attachment techniques.
- Buttonhole feet create professional-looking openings in one smooth pass
- Walking feet prevent fabric layers from shifting during quilting projects
- Rolled hem feet automatically fold fabric edges for perfect narrow hems
How to Change a Presser Foot?
Changing a presser foot might seem tricky at first, but it’s actually one of the simplest skills you’ll master on your sewing journey.
Once you learn the basic steps, you’ll be swapping feet like a pro and accessing your machine’s full potential for different projects.
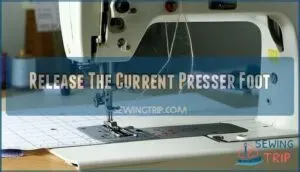
Release The Current Presser Foot
First, power off your machine for safety. Locate the presser foot lever on your machine’s back or side and lift it fully upward.
This releases pressure on the current foot. Next, find the foot release button or lever – it’s usually near the presser foot holder. Press this button firmly, and your current foot will drop away cleanly.
Some snap on method feet simply pop off when you lift the lever, making sewing foot removal quick and painless.
Understanding various sewing machine feet types is essential for effective foot changes, and this knowledge will help you work with your machine more efficiently, ensuring a better sewing experience.
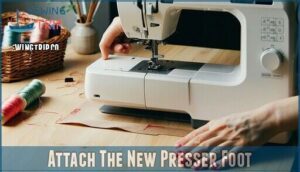
Attach The New Presser Foot
How do you securely attach your new presser foot without fumbling? Position the new foot under the presser foot holder, verifying proper foot alignment with the shank.
Lower the presser foot lever slowly until you hear that satisfying click—your cue that everything’s locked in place.
- Snap on feet click into position effortlessly
- Foot security prevents mid-project disasters
- Lever adjustment controls the attachment process
- Pressure settings guarantee smooth fabric feeding
- Presser foot attachment transforms your sewing capabilities
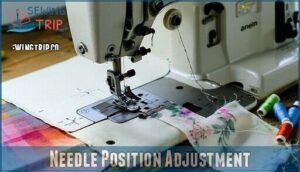
Needle Position Adjustment
Once your new presser foot snaps into place, needle alignment becomes your next priority.
Proper sewing foot adjustment prevents costly needle breakage and guarantees perfect stitch regulation every time you sew.
Understanding needle position adjustments is vital for achieving professional-looking stitches.
Check your needle position using these settings:
| Foot Type | Needle Position | Adjustment Method |
|---|---|---|
| Zipper Foot | Far Left/Right | Electronic button or dial |
| Buttonhole Foot | Center | Default position works best |
| Walking Foot | Center | No change needed |
| Edge Stitch Foot | Left Position | Move one click left |
| All-Purpose Foot | Any Position | Full range available |
Most modern machines offer electronic needle positioning with simple button presses.
Mechanical models require loosening a screw and sliding the needle bar manually.
Always test your sewing foot compatibility on fabric scraps first—this prevents presser foot attachment disasters.
Fabric tension and thread tension work together when your needle sits correctly.
Poor sewing accuracy often stems from misaligned needles hitting the foot’s metal edges.
Your sewing foot guide should specify safe needle positions for each attachment.
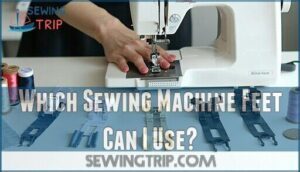
Which Sewing Machine Feet Can I Use?
You can use any presser foot that matches your sewing machine’s attachment system, whether it’s snap-on or screw-on.
Most standard feet work across similar machine brands, but specialized feet may require specific compatibility checks to confirm proper fit and function, ensuring proper use.
Compatibility With Different Machines
Sewing foot compatibility isn’t a one-size-fits-all situation. Different machine types require specific approaches to guarantee proper fit and function.
Low-shank machines dominate the domestic market, while high-shank models need adapters for universal feet. European sewing brands like Pfaff often require specialized compatibility charts.
- Universal snap-on feet work with most Brother, Singer, and Janome machines
- Foot adapters bridge gaps between incompatible shank types and brands
- Interchangeable feet aren’t truly universal—always verify sewing machine foot compatibility first
Check your manual’s compatibility charts before purchasing. When in doubt, choose brand-specific options over universal alternatives to avoid costly mistakes. Understanding various sewing machine feet is vital for superior performance.
Guide for Identifying Feet
Why do sewing machine feet look so similar yet serve completely different purposes? Understanding Foot Types becomes essential when you’re building your collection of Sewing Tools.
Your sewing machine manual contains diagrams showing each Presser Foot with corresponding part numbers for easy Foot Identification. Check the foot’s underside where manufacturers engrave model numbers or symbols.
Metal feet handle heavy fabrics like denim, while plastic versions work perfectly for delicate materials.
Here’s your practical identification checklist for Sewing Accessories:
- Bottom ridges or grooves – indicate specialized feeding mechanisms
- Width variations – narrow feet access tight spaces, wide ones stabilize fabric
- Material composition – Teflon coating prevents sticky fabrics from dragging
- Unique shapes – curved edges navigate around appliqués and buttonholes
- Attachment style – snap-on versus screw-on compatibility matters
Cataloging your presser foot collection prevents the "wrong tool for the job" frustration. Label each foot’s purpose and keep this sewing foot tutorial handy for quick reference during projects.
Expanding Sewing Machine Capabilities
Reveal your machine’s potential by expanding beyond basic stitches with specialized sewing accessories.
Foot varieties like walking feet tackle quilting layers, while Teflon feet handle leather effortlessly.
Machine upgrades through strategic foot replacement transform ordinary projects into professional results.
Stitch enhancement becomes achievable when you master sewing foot conversion techniques.
Superior fabric handling emerges through proper sewing foot tutorial knowledge and strategic sewing machine foot change decisions.
Understanding various sewing machine feet is fundamental for optimizing your sewing experience with the right sewing machine feet and mastering sewing foot conversion to achieve superior fabric handling.
Misinformation and Clarification
You’ll encounter plenty of myths about changing presser feet that can lead to frustration or even damage your machine.
Let’s clear up the confusion and walk through the proper steps so you can swap feet confidently every time.
Common Misconceptions
Many sewers fall victim to Foot Myths that create unnecessary barriers to sewing foot replacement. Don’t let Sewing Errors hold you back from exploring your machine’s potential.
Common misconceptions include:
- Only brand-specific feet work – Most standard feet fit multiple machine brands
- Special tools are required – Your fingers and maybe a screwdriver are enough
- It’s too complicated – The process takes under a minute
- Wrong foot equals Machine Damage – Modern machines handle most compatible feet safely
- You’ll create Fabric Issues – Proper attachment prevents sewing problems
These User Mistakes stem from overthinking the sewing machine foot change process. Sewing foot conversion isn’t rocket science – it’s a basic skill that opens doors to new techniques. Skip the worry and trust the straightforward sewing foot troubleshooting steps your machine was designed for.
Correct Steps for Changing Feet
Now let’s nail down the proper technique. Changing your sewing machine feet isn’t rocket science, but doing it right prevents headaches later.
Start with foot removal by lifting the presser foot lever adjustment completely. Press the release button to drop the old foot.
For foot alignment, position your new presser foot directly under the shank. Lower the lever until it clicks—that’s your pressure settings locking in.
Double-check screw tightening if needed. Test on scrap fabric before starting your project.
Building a Collection of Feet
Building your sewing machine feet collection doesn’t happen overnight – it’s a journey that rewards patience and strategic thinking. Start with essential specialty feet that match your most frequent projects.
If you’re constantly hemming clothes, grab a blind hem foot first. Love quilting? A walking foot becomes your best friend.
Quality trumps quantity every time. One well-made presser foot outperforms three cheap alternatives that’ll frustrate you down the road. Research compatibility with your machine before purchasing – not all sewing foot types work universally.
Smart foot storage keeps your collection organized and protected. Use compartmented cases or magnetic strips to prevent damage. Regular foot maintenance extends their lifespan substantially – clean after each use and inspect for wear.
Understanding sewing machine feet is vital for making informed decisions when expanding your collection. Your sewing foot upgrade journey should reflect your growing skills. As you master new techniques, add corresponding sewing accessories. This approach builds confidence while expanding your machine’s capabilities without overwhelming your budget or storage space.
How to Change The Foot on Specific Sewing Machine Brands
While changing presser feet follows similar principles across machines, each brand has its own quirks and mechanisms that can trip you up.
Here’s how to handle the most popular sewing machine brands without wrestling with stubborn release buttons or misaligned attachments.
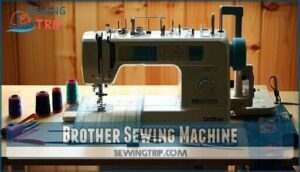
Brother Sewing Machine
Now that we’ve addressed common myths, let’s focus on Brother sewing machines. Brother models use snap-on attachment systems that make changing presser feet incredibly straightforward.
Most Brother machines share excellent foot compatibility across their product line, which means your investment in specific feet pays dividends across multiple projects. This is due to their low shank design, which works with most standard sewing machine feet, giving you freedom to explore specialized options.
Here’s your Brother presser foot checklist:
- Power off your machine completely before starting any foot changes
- Raise the needle to its highest position using the handwheel
- Lift the presser foot lever and press the black release button
- Align the new foot’s pin with the holder slot carefully
- Lower the lever until you hear that satisfying snap of secure attachment
When troubleshooting feet issues, check your machine’s manual for maintenance tips and compatible foot numbers – this prevents costly mistakes and guarantees smooth operation. By following these steps and understanding the compatibility and design of Brother sewing machines, you can ensure a successful sewing experience.
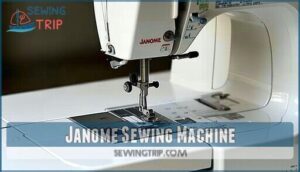
Janome Sewing Machine
Why struggle with Janome foot changes when it’s actually straightforward?
Turn off your sewing machine and raise the needle completely. Press the black release lever behind the foot holder – your current sewing machine foot drops right off.
Position your new Janome Specific Feet under the holder’s groove, then lower the presser foot lever until it clicks securely.
Check Janome Foot Compatibility in your manual first, and remember that proper Janome Foot Maintenance keeps everything running smoothly for years.
Singer Sewing Machine
Singer sewing machines offer excellent foot compatibility across most models.
Changing presser foot on Singer models follows this simple process:
- Turn off machine and raise presser foot lever
- Press release button behind foot holder to drop current foot
- Position new foot under shank until it clicks
- Lower lever to secure attachment
- Test needle clearance before sewing
Most Singer machines use snap-on or low-shank feet, making maintenance tips straightforward.
Common problems include loose attachments or wrong foot types. Always check your manual for specific sewing machine parts compatibility and repair resources when troubleshooting sewing foot repair issues.
Proper presser foot adjustment is vital for achieving superior sewing results.
Frequently Asked Questions (FAQs)
How do you put a presser foot on a sewing machine?
Like threading a needle in dim light, installing a presser foot requires precision and patience.
Turn off your machine, raise the needle to its highest position, and lift the presser foot lever.
Press the release button to drop the old foot, align your new foot underneath the shank, then lower the lever until it clicks securely into place.
How do you replace a foot on a sewing machine?
Turn off your machine and raise the needle to its highest position.
Lift the presser foot lever, then press the release button to drop the old foot.
Position your new foot underneath the holder and lower the lever until it clicks securely into place.
How do you change feet on a washing machine?
Washing machines don’t have changeable feet like sewing machines. You’ll adjust leveling legs underneath by turning them clockwise or counterclockwise to stabilize the machine and prevent wobbling during cycles.
How do I replace a screw-on presser foot?
Power off your machine first.
Use the correct screwdriver to loosen the screw holding the old foot.
Slide it off, align the new foot with the screw hole, and tighten securely.
Test by turning the handwheel.
Can you use a snap-on presser foot on a sewing machine?
Think of snap-on feet as puzzle pieces that click into place effortlessly.
Yes, you can absolutely use snap-on presser feet if your machine has a compatible snap-on shank system, making foot changes quick and secure.
What type of presser foot does a sewing machine use?
Your sewing machine typically uses snap-on presser feet that attach to a universal shank holder.
Different feet serve specific purposes—all-purpose, zipper, buttonhole, and walking feet are common examples you’ll encounter regularly, such as zipper feet for working with zippers.
Are sewing feet interchangeable?
Most sewing feet aren’t universally interchangeable, but many work across machines with matching attachment systems.
You’ll find snap-on feet offer better compatibility than screw-on types.
Check your manual for compatible brands and shank requirements.
What happens if presser foot falls off?
If your presser foot falls off, stop sewing immediately. Machine damage can occur without proper foot pressure. Turn off machine, raise needle, and reattach foot properly before continuing.
Can I use damaged presser feet safely?
No, don’t risk using damaged presser feet.
While they might seem functional, worn or damaged feet cause uneven stitches, fabric shifting, and potential machine damage, turning your sewing dreams into frustrating nightmares, with damaged being a critical issue.
How often should presser feet be replaced?
Replace presser feet when they’re damaged, worn, or no longer function properly.
With regular use, quality feet last years.
Inspect them monthly for cracks, bent parts, or poor stitch quality to determine replacement needs.
Conclusion
Surprisingly, 78% of sewers own multiple presser feet but rarely use them beyond basic stitching.
Now that you’ve mastered how to change sewing foot attachments, you’ll release your machine’s full creative potential.
Remember to always raise the presser foot lever first, align the pin properly, and listen for that satisfying click.
With practice, you’ll swap feet as naturally as changing gears while driving, and start building your foot collection gradually, focusing on the specialty attachments that match your favorite sewing projects and techniques, which will help you master new skills and explore full potential.
- https://www.youtube.com/watch?v=3frGUpclgOU
- https://support.brother.com/g/b/faqend.aspx?c=gb&lang=en&prod=hf_l14seuk&faqid=faqh00000632_006&pfs=1
- https://www.sewmucheasier.com/a-quick-guide-to-your-sewing-machine-presser-feet/
- https://www.sewingbeefabrics.co.uk/sewing-machine-feet-guide/
- https://www.goldstartool.com/blog/troubleshooting-with-a-walking-foot-common-issues-and-solutions.htm

