This site is supported by our readers. We may earn a commission, at no cost to you, if you purchase through links.
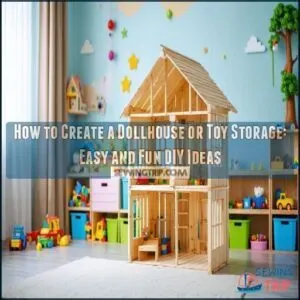
Sketch out a design—think dollhouse rooms or storage compartments—and keep it simple. Use tools like glue, screws, and a saw for assembly, and add personal flair with paint, fabric, or wallpaper scraps.
For storage, try hidden compartments or modular shelves to keep toys organized and accessible. If you’re upcycling, cardboard boxes or bookshelves work wonders.
It’s part craft project, part puzzle-solving—fun for the whole family! Ready to turn everyday items into creative storage solutions? Let’s get building!
Table Of Contents
- Key Takeaways
- Essential Materials for DIY Dollhouse or Toy Storage
- Choosing The Right Scale for Your Dollhouse
- Planning Your Dollhouse or Storage Design
- Building The Dollhouse Frame and Structure
- Crafting Miniature Furniture and Accessories
- Innovative Toy Storage Solutions Within Dollhouses
- Transforming Everyday Items Into Dollhouse Storage
- Creative Display Ideas for Doll Collections
- Organizing Large Dollhouse Items and Playsets
- Maintaining and Updating Your Dollhouse Storage
- Frequently Asked Questions (FAQs)
- Conclusion
Key Takeaways
- You can transform everyday materials like cardboard, wood, and fabric into charming dollhouses or toy storage solutions without breaking the bank or requiring advanced skills.
- When planning your dollhouse, choose the right scale (like 1:12 or 1:24) and sketch layouts first to ensure proper room sizes, furniture fit, and play accessibility.
- Incorporate clever storage solutions such as hidden compartments, removable bins, modular units, and vertical storage to maximize space while keeping toys organized.
- Don’t forget to add personal touches like custom wallpaper, tiny rugs, DIY furniture, and LED lighting to make your dollhouse both functional and visually appealing.
Essential Materials for DIY Dollhouse or Toy Storage
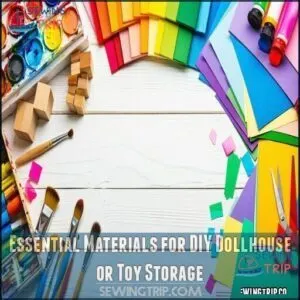
You’ll need a mix of sturdy materials like wood, cardboard, and fabric to get started on your dollhouse or toy storage project.
Don’t forget tools like scissors, glue, and paint to bring your creation to life—it’s easier than it sounds, and more fun too, with the right materials!
Wood and Cardboard Options
When building your DIY dollhouse, picking the right materials is like laying the foundation for a dream home. Plywood is a true champion—its durability guarantees your dollhouse can survive years of play without breaking a sweat (or a wall).
For just around $20, you’ll get structural integrity that even mini architects admire. If you’re looking to save money, cardboard is a cost-effective superstar.
Upcycled shipping boxes make lightweight, eco-friendly masterpieces that are easy to work with and customize. Combine the best of both worlds—use sturdy wood for the frame and cardboard for customizable room dividers.
Many builders source dollhouse plywood supplies online for convenience. These wood and cardboard options offer flexibility for any builder, whether you’re new to dollhouse DIY or a seasoned crafting pro.
Fabric and Decorative Elements
Your dollhouse should feel warm and inviting, and fabric textures and decorative elements are the key to making that magic happen.
Durable fabrics like cotton and felt are perfect for your tiny rooms—they’re easy to cut, shape, and style.
Pick color palettes that reflect the dollhouse’s personality: bold patterns bring energy, while soft neutrals create a calming vibe.
- Fabric tips to try:
- Create patterns: Trace tiny templates for curtains, rugs, or bedding.
- Mix textures: Pair smooth cotton with textured felt for a unique look.
- Add embellishments: Use buttons, lace, or ribbons for charm.
- Reuse scraps: Leftover fabrics turn into adorable pillows or mats.
- Sew small details: A few stitches can add professional flair.
Think of your dollhouse as a Pinterest board—every textile adds personality!
Tools and Adhesives
Let’s get your tools and adhesives sorted—you’ll thank yourself later. The right setup makes the difference between a masterpiece and a glue-covered mess.
| Tool Type | Basic Option | Pro Option | Best For |
|---|---|---|---|
| Glue Types | Hot glue gun | Wood glue | Quick fixes vs. permanent joins |
| Cutting Tools | Scissors | Craft knives | Straight cuts vs. intricate details |
| Fasteners | Push pins | Screws (with jig) | Temporary vs. fixed assembly |
| Sanding Blocks | Fine grit | Multi-grit sets | Finishing edges and smoothing |
You’ll also need a sturdy metal ruler, sharp scissors, and sandpaper grades (fine to course). A reliable clamping method keeps parts steady—trust me, it’s a lifesaver.
Always think safety: glue guns get hot and craft knives are sharp, so no risky shortcuts! Consider browsing various models available to find the perfect fit for your crafting needs. The right tools make all the difference for smooth, frustration-free crafting.
Paint and Finishing Supplies
Now that your tools are ready, it’s time to add some personality with paint and finishing supplies! Picking the right paint types makes all the difference. Acrylic paints are a fantastic option—they dry quickly, come in vibrant shades, and work well on wood, cardboard, and other surfaces.
When planning color palettes, think about the vibe you want. Bright pink walls or a soft pastel theme? Go wild! Once painted, apply finish coats like matte, satin, or gloss varnishes. These seal your work and boost finish durability.
Here’s how to perfect the look:
- Sealing Techniques: A clear coat keeps fingerprints at bay.
- Application Methods: Use steady brushstrokes for smooth coverage.
- Brush Selection: Keep small brushes handy for tiny corners.
- Varnish Options: Match finishes to your desired aesthetic.
Your creativity—the only limit!
Choosing The Right Scale for Your Dollhouse
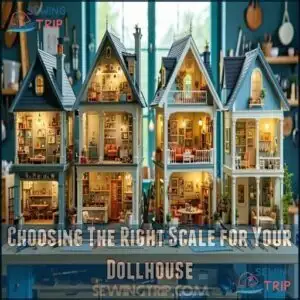
Picking the right scale is like setting the zoom for your miniature masterpiece—it all comes down to detail and space.
Think about Furniture Sizing, Room Proportions, and how the dollhouse fits into your world.
- 1:12 – The classic choice for dollhouse miniatures. Every inch equals a foot. Perfect for realism.
- 1:6 – Great for Barbies; bigger rooms, more flair!
- 1:24 – Compact yet practical, for smaller spaces.
- 1:48 – Perfect for tiny displays—but keep tweezers handy for miniature furniture!
Match scales to doll proportions for charm and playability.
Planning Your Dollhouse or Storage Design
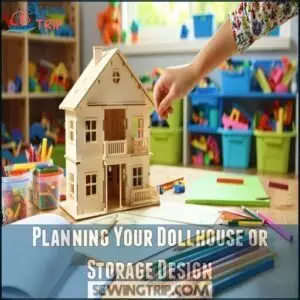
Start by sketching a simple layout to map out the rooms and storage spaces—it doesn’t have to be perfect, just clear enough to guide you.
Think about how the dollhouse or storage will be used, making sure it’s both fun to play with and easy to keep organized.
Sketching Layouts and Floorplans
Sketching layouts and floorplans is like laying the groundwork for an epic masterpiece—it’s where your dollhouse dreams start to take shape.
Picture dolls enjoying seamless room functionality while you combine creativity with smart space utilization.
- Visualize the flow: Use paper cutouts to test room layouts before building.
- Think ahead: Plan storage integration for toys or furniture that fits perfectly without cramming.
- Create mockups: Use cardboard for quick models to catch design hiccups early.
Keep it simple.
Draw walls, doors, and furniture, focusing on keeping everything to scale.
A little upfront planning today means fewer rebuilds tomorrow—and a smoother, more joyful process.
Determining Room Sizes and Functions
You’ve sketched the layout—now it’s time to size up your dollhouse rooms like a pro. A well-planned dollhouse design makes play more fun and practical.
Start by considering room purpose and play patterns. Each space should fit its function without feeling cramped.
Here’s how to ace it:
- Stick to scale ratios: Choose 1:12 or 1:24 scales for accuracy. Tiny furniture needs tiny rooms that feel just right.
- Mind the ceiling height: Dolls need at least 6–7 inches of headroom so they don’t feel squished.
- Visualize layouts: Sketch ideas for all the beds, sofas, or kitchen pieces you’d love to include.
- Keep play accessible: Make certain kids can easily move dolls without bumping walls or furniture!
Incorporating Storage Solutions
You’ve mapped out your dollhouse rooms—now it’s time to tackle storage! Clever storage features can turn your dollhouse into a masterpiece of practicality and play.
Try adding hidden compartments under stairs or behind swing-out walls—kids love secret spots for tiny treasures.
Modular organization like movable storage bins or stackable shelves guarantees everything has its place. Use vertical storage to maximize space, such as adding mini shelves to walls for accessories.
Rolling carts tucked underneath the dollhouse make cleanup a breeze, while corner spaces can house decor or extra toys. When incorporating storage solutions, think of your dollhouse as a perfect mix of fun, creativity, and organization!
Considering Accessibility and Play Value
Accessibility and play value make a dollhouse or toy storage not just functional but a joy-filled wonderland for kids.
The trick? Design with little hands, big imaginations, and child-safe design in mind.
To create a space that sparks imaginative play while staying practical, keep these tips in your toolkit:
- Interactive features: Add foldable roofs or walls so kids can dive right into their mini play space.
- Age-appropriateness: Keep shelves and storage within arm’s reach to avoid wobbly climbing adventures.
- Durable construction: Use sturdy materials, like cardboard or wood, to support enthusiastic play.
- Safety first: Sand edges smooth and secure anything loose to keep their play safe and carefree.
Good design invites kids to play effortlessly while keeping their toys neat—a win for both fun and function!
Building The Dollhouse Frame and Structure
Building the dollhouse frame is like setting up the bones of your project, so start with sturdy materials like wood or cardboard.
Cut and attach walls, floors, and beams carefully—you don’t want a dollhouse that wobbles more than a toddler’s first steps!
Constructing Walls and Floors
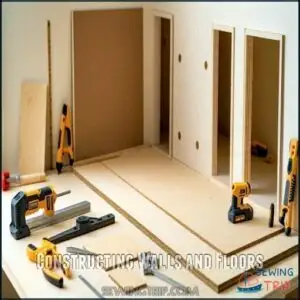
Let’s get started with constructing walls and floors for your dollhouse! Durable wall materials like 3/8" plywood are perfect for standing the test of time.
Stick to scale accuracy (1:12) to keep everything realistic. Cut walls and floors to match your dollhouse plans using a fine-toothed saw—smooth edges make assembly easier!
For floor types, try 1/4" cork for natural texture or MDF for a slick, even surface (just avoid water).
Want strong joints? Use a Kreg Jig for foolproof connections when building dollhouse walls.
Need room division? Divide spaces easily with 12"x13¼" plywood panels. Pro tip: Always clamp materials securely before cutting—your fingers will thank you!
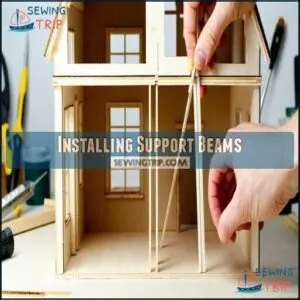
Installing Support Beams
With walls and floors in place, it’s time to strengthen your dollhouse with support beams.
These little heroes keep everything sturdy, letting your dollhouse plans go from wobbly to wonderful. Proper beam placement guarantees strong floors and solid walls while spreading weight evenly.
Here’s how to ace it:
- Use 1⁄2" x 1⁄2" basswood strips for material selection.
- Place beams vertically in corners for reinforcement.
- Add horizontal beams where walls meet floors for unmatched joint strength.
- Secure with wood glue—it beats hot glue for durability.
- Test your load distribution by gently pressing on the structure.
Installing support beams gives your dollhouse the backbone to last through years of smiles!
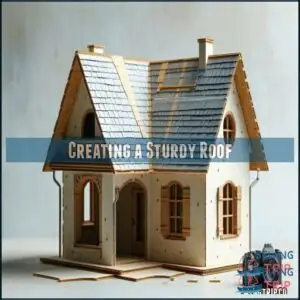
Creating a Sturdy Roof
A sturdy roof gives your dollhouse that cherry-on-top finish and holds everything together.
Here’s how you can nail it (pun intended):
- Precision matters: Cut two plywood pieces at 45° angles for a traditional peaked roof. It’s timeless, sturdy, and won’t wobble during playtime. Use wood glue to secure them along the support structure. Simple and solid!
- Add clever extras: For realism, glue on decorative shingles—kids will love the detail. To prevent wear and tear, apply clear flex tape at the peak for added strength and weatherproofing. Need easy access? Consider a hinged section that flips open—perfect for tiny hands and creative play!
Finish off with weatherproof sealant, so the roof isn’t just cute—it’s built to last.
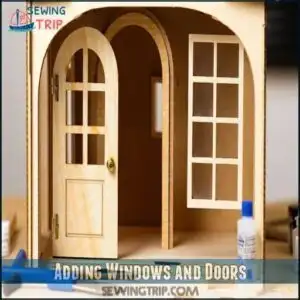
Adding Windows and Doors
A dollhouse isn’t complete without charming windows and doors! Here’s how to make it delightful and functional:
- Window Placement: Measure where windows fit best. Use a craft knife for cardboard or a small saw for wood. Add trim and recycled plastic "glass" for realistic window frames.
- Door Styles: Cut doors slightly larger than openings. Hinged fabric strips or craft-store hardware guarantee smooth swings.
- Hinge Mechanisms: Secure doors snugly, while allowing easy movement. Use strong adhesives for wooden frames.
These tiny features don’t just add character—they’re security features for a miniature space that feels like home!
Crafting Miniature Furniture and Accessories
You can transform scraps of fabric, wood, or even cardboard into charming miniature furniture and accessories that fit your dollhouse perfectly.
It’s a fun way to get creative, and who doesn’t love turning a paperclip into a tiny chair?
DIY Dollhouse Lighting Techniques
Lighting can turn your dollhouse into a glowing masterpiece! Use LED strip lights for easy installation along ceilings and walls—no complicated wiring needed.
Battery power options keep things simple and portable, making this perfect for beginners. Place lights thoughtfully to highlight cozy corners or special furniture.
Curious about dimming? Some LED strips offer adjustable brightness for added realism. You can find various LED options online.
Try making miniature lamps using wood beads, tiny shades, and battery-operated lights for a charming look. For cleaner designs, run wires discreetly through walls or floors.
Great lighting isn’t just about looks—it brings warmth and life to your DIY creation!
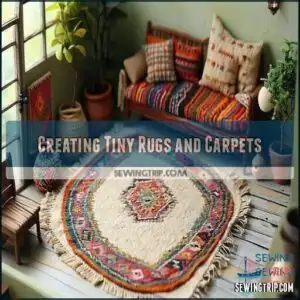
Creating Tiny Rugs and Carpets
A little rug can transform any dollhouse floor from plain to perfect.
To create tiny rugs, try these techniques:
- Cut felt rugs into small shapes like circles or ovals. Add fringed edges for a Persian feel.
- Repurpose fabric scraps, like old scarves, for stylish patterns—instant dollhouse furniture charm!
- Go creative with miniature weaving or crochet carpets for textured designs.
For something unique, braid strips of fabric to make braided rugs that fit snugly. These dollhouse accessories add warmth and character, proving even miniature furniture deserves cozy floors!
Making Miniature Lamps and Fixtures
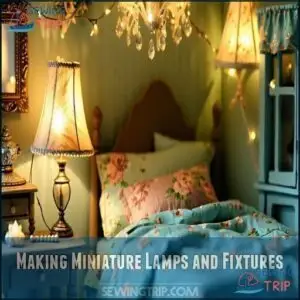
Bringing a warm glow to your dollhouse is easier than you think with clever miniature lamp ideas. Start by transforming everyday items—bottle caps become table lamps, while old bracelets work as stunning chandeliers.
For realistic dollhouse lighting, use battery-powered LED lighting or even LED earrings for a magical touch. Crafting lampshades can be done with budget-friendly choices like tissue paper, fabric scraps, and twine.
Add metallic foil for a little extra sparkle. When considering wiring techniques, thin floral wire or magnetic attachments pair beautifully with LED integration for easy power sources.
Remember, scale accuracy is key—match your lamps to the size of your miniature furniture for truly charming dollhouse accessories that shine. Consider jewelry findings for versatile fixture materials.
Designing Custom Wallpaper and Flooring
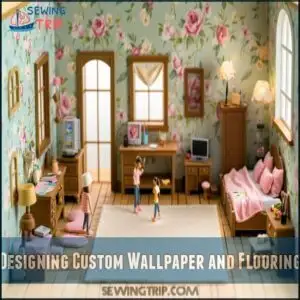
Adding character to your dollhouse is all about wallpaper patterns and unique floor textures, giving each room a distinct vibe. It’s like designing your dream home—only smaller and way more fun.
For walls, think beyond plain paper. Here are three easy ideas:
- Printable Patterns: Find free templates online and match tiny flowers or subway tiles to bring your room themes to life. Bedrooms? Go floral. Kitchen? Maybe classic checkered tiles.
- Fabric Options: Use fabric scraps for textured walls, creating cozy spaces. A touch of fabric glue works wonders for smooth application.
- Adhesive Types: Test double-sided tape or spray adhesive to secure delicate materials without wrinkles.
On the floors, your dollhouse design comes alive with creative options. Stained popsicle sticks make realistic hardwood, craft foam mimics pristine tiles, and felt? Perfect for soft rugs or cozy carpets. Experiment with materials—it’s a fun, mini makeover!
Innovative Toy Storage Solutions Within Dollhouses
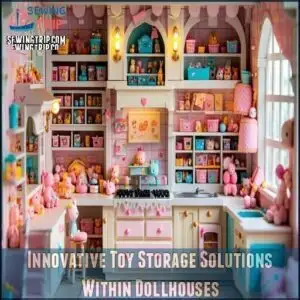
You can make your dollhouse multitask by turning it into a clever toy storage solution. With built-in drawers, hidden compartments, and removable bins, it keeps playtime fun and cleanup easy.
Built-in Drawers and Compartments
Built-in drawers and compartments are a game-changer for dollhouses.
They maximize space, keep accessories tidy, and add charm.
Think kitchen cabinets, hidden compartments, or even under-bed storage.
Testing these features with toys beforehand guarantees perfect fits and prevents headaches later.
Here’s a quick guide:
| Feature | Purpose | Material |
|---|---|---|
| Hidden Compartments | Stash small treasures | Thin plywood |
| Under-Bed Storage | Save floor space | Balsa wood |
| Kitchen Drawers | Organize utensils | Cardboard |
| Closet Shelves | Store doll outfits | Foam board |
Get creative with material choices while balancing safety considerations.
It’s like building a tiny Ikea!
Removable Storage Bins
Removable storage bins are a game-changer for dollhouse organization.
With their portable charm, they let you adjust to your growing doll collection without missing a beat.
Choose materials wisely—fabric bins bring softness, while sturdy plastic handles heavier pieces.
Opt for various sizes to suit everything from doll shoes to furniture.
A simple labeling system works wonders: “Fashion Closet” for doll clothes or “Magic Furniture” for tiny couches.
It’s like giving everything its VIP parking spot!
Bins slide in and out easily, keeping accessibility stress-free.
Bonus? Cleanup becomes a breeze.
When playtime ends, toy storage bins prove your dollhouse can feel tidy, yet playful!
Hidden Compartments for Small Items
Hidden compartments add a splash of magic to dollhouses while keeping tiny toys secure.
They’re great fun for kids and practical for you! Try these smart ideas:
- Add secret passageways behind magnetic closure panels or dollhouse walls.
- Design false bottoms in furniture like chests or drawers using thin wood.
- Turn stairs into camouflaged storage with pull-out steps.
- Create playful puzzle boxes hiding small treasures.
From miniature furniture to tiny trinkets, these clever storage spots make toy storage exciting and endlessly creative! Consider using a sewing machine to create compact travel organizers for even more efficient small item storage, which can be a great fun for kids, and with secret passageways, false bottoms, playful puzzle boxes, and compact travel organizers.
Modular Storage Units
A modular storage unit is every toy lover’s secret weapon for keeping chaos under control.
Think of it as puzzle pieces for organizing—modular shelves let you mix, match, and customize layouts to fit your dollhouse or display.
It’s a game of “stack or spread!” Stack units tall to save floor space or spread them out for easy access.
These toy storage solutions focus on space efficiency and versatile organization.
Use storage cubes to sort accessories like doll shoes and tiny furniture.
The adaptable layouts grow with your collection, so you’ll never feel boxed in.
Plus, easy assembly means you won’t need a toolbox the size of your dollhouse.
With a customizable design, everything finally has its place—making toy organization a breeze.
Who knew storing could be as fun as playing?
Transforming Everyday Items Into Dollhouse Storage
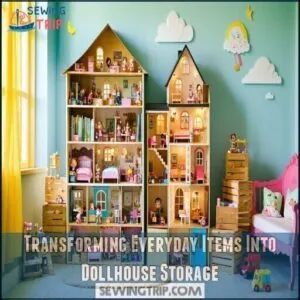
You can turn simple items like cardboard boxes and wooden crates into creative dollhouse storage with a little effort and imagination.
It’s amazing how everyday things, even an old bookshelf or a shoe organizer, can become the perfect home for dolls and their tiny treasures, which can be a great example of creative storage solutions.
Upcycling Cardboard Boxes
Got some cardboard boxes lying around? Don’t toss them! Turn them into durable, creative toy storage or a customized dollhouse with just a bit of effort. It’s easy, budget-friendly, and eco-conscious!
- Box Reinforcement: Strengthen edges with overlapping layers or tape for extra sturdiness during playtime.
- Creative Cutting: Cut fun windows, quirky doors, or even secret compartments to make it truly unique.
- Interior Dividers: Add small sections inside for organized storage or designated play areas.
Finish off with Exterior Decoration like paint, patterned paper, or stickers to add flair. Building simple Joint Construction at corners keeps everything solid. Best part? When the fun’s over, it’s recyclable!
Repurposing Wooden Crates
Wooden crates are a game-changer for DIY storage ideas! With a little creativity, you can turn them into stunning Crate Dollhouses.
Start by sanding any rough edges—no splinters allowed—then paint them with vibrant colors or apply patterned wallpaper for instant Crate Aesthetics.
Stack crates to build a multi-story playhouse or arrange them side-by-side for a spacious layout. Their sturdy design easily doubles as functional Crate Shelving to keep toys tidy.
Upcycling wooden crates is smart, stylish, and perfect for adding charm to your toy storage setup with vibrant colors!
Converting Bookshelves Into Dollhouse Displays
That old bookshelf in the corner? Turn it into a dollhouse where imagination shines! With a few tweaks, bookshelf units can become fun, creative displays for toys and dollhouse furniture.
Start by adjusting the shelves to fit your design. Use colorful scrapbook paper as wallpaper for instant charm, and don’t forget lighting options—tiny LED strips add a magical touch. A rolling cart can also provide mobile storage for dollhouse accessories.
Here’s how to create a standout dollhouse design:
- Remove or reposition shelves to fit your dollhouse scale considerations.
- Add dividers using cardboard to make smaller rooms.
- Paint each section for vibrant, distinct spaces.
- Craft mini curtains with fabric scraps and dowels.
- Include dollhouse furniture for playful display versatility.
Using Shoe Organizers for Doll Storage
Who knew shoe organizers could double as genius doll storage solutions? Those Door Hanging shoe racks with Clear Pockets are more than just for Closet Organization—they’re a parent’s secret weapon for taming toy chaos. Each pocket turns into a neat little “room” for dolls, doll accessories, or even small playsets, keeping everything Space Saving and dust-free.
Simply hang one over a door, and voilà—an entire dollhouse display without taking up precious floor space. Kids love it because they can spot and grab their favorites at a glance. Plus, no more digging through boxes or tripping over Rolling Carts.
Here’s why it works:
| Feature | Shoe Organizer | Toy Box | Rolling Carts |
|---|---|---|---|
| Visibility | High | Low | Medium |
| Space Required | Minimal | Large | Medium |
| Cost | Under $15 | $30+ | $25+ |
| Setup Time | 2 minutes | None | 15+ minutes |
It’s simple, cheap, and life-changing for toy storage!
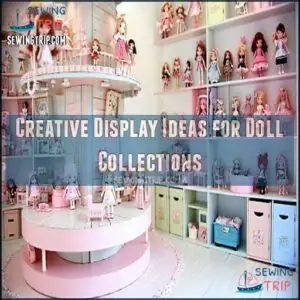
Creative Display Ideas for Doll Collections
You can turn your doll collection into a stunning display with a few smart ideas and simple materials.
Whether it’s wall-mounted shelves or a rotating platform, you’ll find creative ways to show off your dolls without taking up too much space, which can be achieved with simple materials.
Wall-Mounted Shelving Systems
Lifting your doll collection off the floor has never been easier—or more fun—with wallmounted shelving systems.
These shelves aren’t just for toy storage; they transform your blank walls into charming displays.
Opt for versatile designs like floating shelf styles with guardrails to keep dolls safe, or corner shelf solutions to make the most of smaller spaces.
Adjustable shelf designs allow flexibility as your collection grows, while house-shaped shelves add a playful, whimsical vibe.
Here’s why they’re a perfect fit for toy storage solutions:
- Maximizes space: Great for tight rooms or shared play areas.
- Showcases favorites: Dolls feel like stars on a gallery-style setup.
- Customizable displays: Easily rearrange for seasons or themes.
Use secure mounting hardware options and check shelf weight limits to keep everything sturdy and safe.
Hanging Door Organizers
Transform your closet door into a treasure trove with hanging door organizers—a must-have for toy storage and dollhouse enthusiasts.
These handy space-saving solutions use over-the-door hooks to keep dolls, accessories, and furniture off the floor and always within reach. Clear vinyl pockets are perfect for showcasing collections, so tiny shoes and matching chairs don’t stay missing for long.
Want variety? Look into Door Organizer Types with colorful bins or shelf dividers, letting you sort by doll type or outfit category.
They’re sturdy enough to handle most collections (check the weight capacity before loading up) and customizable with labels or decorations for a personal touch. Consider adding vinyl labels and decals for a more personalized touch.
Cleanup? It’s as easy as popping items into the right pocket—done in seconds!
Custom Shadow Box Displays
Ever wanted your dolls to feel like stars? Custom shadow box displays are the perfect way to combine toy storage with stunning display aesthetics.
These themed shadowboxes protect your collection from dust while turning them into miniature works of art.
Here’s how to make it unforgettable:
- Think depth, think detail – Choose material choices allowing extra depth for 3D backdrops that make your dollhouse dreams pop.
- Add personality – Use colorful or patterned backdrops suited to your collection. Mounting techniques like hinged fronts give easy access while adding charm.
- Shine a light – Explore lighting options! Add small LEDs to create a warm glow and take that “wow” factor up a notch.
Your dolls deserve their moment in the spotlight!
Rotating Display Platforms
Give your display an upgrade with rotating display platforms! These solutions make every dollhouse angle picture-perfect while saving space.
Here’s what to keep in mind:
- Motorized Platforms: Boost convenience with 360-degree motion for stunning toy displays.
- Manual Turntables: Affordable options like Lazy Susans hold up to 35 lbs—great for dollhouses.
- Display Lighting: Add LED bases for glowing effects that wow during playtime.
- Size & Weight Capacity: Always match platform size to your dollhouse and guarantee smooth, stable spins.
Enjoy effortless access and creative display ideas!
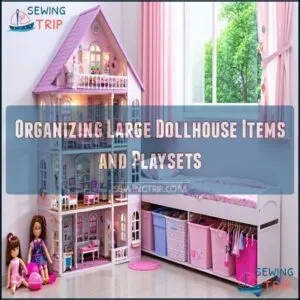
Organizing Large Dollhouse Items and Playsets
Keeping oversized dollhouse items and playsets organized doesn’t have to feel like a puzzle.
With smart use of corners, under-bed carts, or collapsible options, you’ll save space and keep your play area neat without breaking a sweat, utilizing smart use of available space.
Dedicated Corner Spaces for Oversized Toys
Think corners are just for cobwebs? Think again! Dedicated corner spaces can be perfect for oversized toys and dollhouses.
Use corner dimensions wisely with low shelves or bins that kids can reach. Turn one corner into a play area with colorful storage cubes that inspire creativity.
Add a cushioned bench with hidden compartments—it’s cozy seating and sneaky storage in one. For safety considerations, secure heavy shelves to walls and choose sturdy materials.
Toy rotation becomes effortless when everything has its place. These toy storage solutions make any corner a happy, clutter-free zone, promoting clutter-free living and a cozy atmosphere!
Vertical Storage Solutions
Free up your floor and think tall! Vertical storage solutions are perfect for keeping dollhouses and toys neat and accessible, especially in smaller spaces.
From wall-mounted panels to shelves, you’ve got endless options to make every inch count. Shoe hangers over doors are great for organizing tiny accessories, while a clothes rack can serve as a creative doll display. Stackable plastic containers help you sort and locate toys quickly, and they can fit snugly into corners.
Here are some ideas to try:
- Wall shelves make stunning displays for dollhouses and playsets.
- Door shoe hangers organize small items like doll shoes.
- Plastic containers stack to maximize space.
- Clothes racks double as unique storage and display solutions.
Keep the floor traffic-free!
Under-Bed Rolling Storage Carts
Maximize that overlooked under-bed space with handy rolling carts! These underbed rolling carts make toy storage a breeze, especially for oversized dollhouse items.
They’re easy to maneuver and keep everything organized. Here are some great features to examine:
- Sturdy materials like solid wood or bamboo guarantee longevity.
- Wheels make pulling easy, even for kids.
- Spacious sizes fit dollhouse villages, furniture, and accessories.
- DIY plans save money—build one for under $10.
- Safety features like smooth edges protect little hands during use.
Keep toys dust-free and accessible!
Collapsible Storage Options
Struggling to keep large dollhouse items or playsets organized? Collapsible storage options are a game-changer! These space-saving solutions make cleanup quick and hassle-free while keeping your home tidy.
Fold-away designs, like portable dollhouses or compact storage bins, are perfect for families juggling limited space. They offer a practical solution to the common problem of cluttered play areas.
Here’s a handy comparison:
| Storage Solution | Ideal Use | Budget-Friendly? |
|---|---|---|
| Foldable Shelves | Display and quick access | Yes |
| Collapsible Bins | Storing oversized playsets | Very |
| Portable Dollhouses | On-the-go play and storage | Moderate |
| Fold-away Drawers | Under-bed toy storage | Yes |
| Compact Storage Boxes | Multi-room organization | Very |
Pair collapsible storage with under-bed rolling carts for a DIY toy organizer system that’s both practical and stylish. It’s like giving your dollhouse a magic disappearing act! This combination can help create a more organized and tidy home, making playtime more enjoyable for everyone.
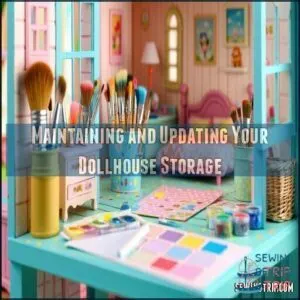
Maintaining and Updating Your Dollhouse Storage
Keeping your dollhouse storage in top shape doesn’t have to feel like a chore.
With a little cleaning, quick repairs, and a fresh coat of paint now and then, you can keep it looking great and ready for play.
Regular Cleaning and Dusting Techniques
Keeping your dollhouse spotless doesn’t have to feel like a chore.
Regular cleaning and dusting techniques go a long way in preserving its charm. Use a soft paintbrush to sweep dust off delicate furniture and décor.
For trickier spots, a vacuum with a brush attachment (on low power!) can help. Microfiber cloths are perfect for sensitive surfaces, while mild soap on a damp cloth tackles stubborn stains.
Focus on preventing buildup in tight corners—those nooks love collecting grime. With consistent care, your dollhouse and toy storage will always look ready for show-and-tell!
Repairing Damaged Areas
If your dollhouse is showing its age, a few repairs can work wonders.
Start with Structural Reinforcement:
- **Cracks in wood?
** Fill them with wood filler, sand smooth, and repaint.
- **Loose joints?
Apply wood glue, clamp, and let it set for sturdy Joint Stabilization**.
- **Wobbly panels?
** Secure them with strong adhesive.
- **Cosmetic Imperfections?
** Sand lightly and touch up faded areas.
Addressing these issues is similar to fixing garment fit in clothing.
These simple Refinishing Techniques will help maintain and update your dollhouse beautifully!
Refreshing Paint and Finishes
A fresh coat of paint can work wonders, making your dollhouse or toy storage look brand new.
Start with proper Surface Preparation—clean thoroughly and sand lightly for smooth results. Use a primer for better Paint Durability.
Experiment with Color Palettes like soft pastels or bold tones. Apply thin coats for even coverage. Protect your work with Finish Sheens like matte or glossy. For fun, try stencils or sponging!
Here’s a quick guide:
| Step | Tip | Benefit |
|---|---|---|
| Clean & Sand | Smooth surface | Better paint adhesion |
| Prime | Apply quality primer | Prevents peeling |
| Paint Thin Coats | Use soft brush strokes | Even, vibrant colors |
| Seal | Add a protective topcoat | Longer-lasting finish |
Adapting Storage as Collections Grow
When your growing toy collections start spilling over, it’s time to rethink your toy storage with scalable solutions.
Don’t let clutter take over—future-proof your setup with these clever ideas:
- Modular shelving lets you expand up or out as needed, keeping everything tidy.
- Add hidden compartments inside your dollhouse walls for tiny treasures—like a secret stash for mini shoes!
- Use clear stackable bins with labels for quick access to favorite items.
- Try a toy rotation system to keep playtime fresh while reducing clutter.
- Repurpose quirky household items, like muffin tins, for organizing small parts.
By reconfiguring your space and purging what’s no longer needed, you’ll create storage expansion that’s both practical and fun!
Frequently Asked Questions (FAQs)
What is a DIY Dollhouse?
Ever wonder if you could turn cardboard into magic?
A DIY dollhouse is a handmade miniature home crafted from materials like cardboard or wood.
It’s creative, customizable, and perfect for imaginative play or unique decor.
How do you make a doll organizer?
Turn a shoe hanger into a doll organizer by adding velcro-lined pockets for easy access.
Or, mount wooden dowels on a wall panel for hanging dolls—practical, tidy, and a touch of genius!
Are Dollhouses a good idea?
Dollhouses are a fantastic idea!
They spark creativity, teach organization, and offer endless play possibilities.
Plus, building or customizing one can be a fun bonding project.
Who doesn’t love a miniature world of imagination?
What are the best DIY Dollhouse kits?
Miniature dollhouse kits like Rolife or Robotime are fantastic for beginners.
They include pre-cut materials, detailed instructions, and tiny furniture pieces.
You’ll enjoy crafting a charming dollhouse without needing advanced tools or skills!
Can you make a doll house from scratch?
You can absolutely make a dollhouse from scratch.
Use plywood, cardboard, or shoeboxes. Sketch a simple plan, grab glue, scissors, and paint, and let your creativity shine.
It’s fun, budget-friendly, and totally customizable!
What is the best storage for toys & dolls?
Did you know 33% of toy clutter is avoidable with good storage?
Use clear bins for small toys, wall shelves for dolls, and under-bed drawers for bulky items.
It’s simple, tidier, and saves space!
What is the best material to build a dollhouse?
Plywood and cardboard are your best bets—sturdy, affordable, and versatile.
Cardboard works for quick, kid-friendly builds, while plywood creates durable keepsakes.
Toss in some fabric scraps for charm, and you’re all set!
At what age should a girl get a dollhouse?
A dollhouse is a magic door to creativity, usually perfect for kids around 3 to 10 years old.
It sparks imagination, fine motor skills, and endless pretend play.
Just make certain it’s age-appropriate and safe!
How to make a doll house with a box?
Grab a sturdy box, scissors, and glue.
Cut windows and doors in the box. Paint or decorate it with fabric scraps.
Add cardboard furniture and fabric rugs. Personalize it—your creativity makes it magical!
How to discreetly store toys?
Choose furniture with hidden compartments like ottomans or beds with drawers.
You’ll also love using decorative bins, under-bed containers, and wall-mounted shelves that blend seamlessly with your décor for clutter-free living spaces.
Conclusion
Remarkably, 87% of children play more creatively with toys that have designated homes.
Whether you’ve built an elaborate dollhouse or a simple storage system, you’ve created something special.
Learning how to create a dollhouse or toy storage isn’t just about organization—it’s about crafting spaces that inspire imagination.
Your project will evolve as your child grows, but the skills and memories you’ve built together will last forever.
Ready for your next DIY adventure?

