This site is supported by our readers. We may earn a commission, at no cost to you, if you purchase through links.
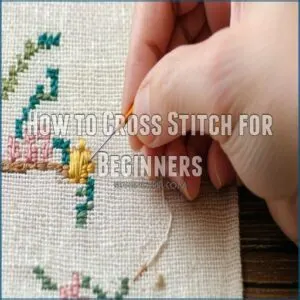 You’ll love how easy it is to learn cross stitch for beginners.
Start by gathering basic supplies: embroidery floss, a needle, fabric, and a hoop.
Thread your needle and secure the fabric in your hoop – think of it as your canvas.
Create each stitch by bringing your needle up through one hole and down through another, forming neat little X’s.
You’re basically connecting the dots!
Work in rows, keeping your stitches consistent.
Like building with tiny LEGOs, you’ll create beautiful patterns one X at a time.
Once you’ve mastered the basic stitch, you’ll open up endless creative possibilities.
Table Of Contents
Key Takeaways
- Start with the right tools: get a tapestry needle, embroidery floss, Aida fabric, an embroidery hoop, and sharp scissors.
- Secure your fabric in a hoop and maintain even tension to ensure neat, flat stitches that enhance your design’s appearance.
- Separate embroidery floss into strands before threading your needle, remembering that the amount of floss needed is influenced by the fabric count in embroidery.
- Protect your work by washing it gently and ironing it face-down after completion to preserve your finished masterpiece.
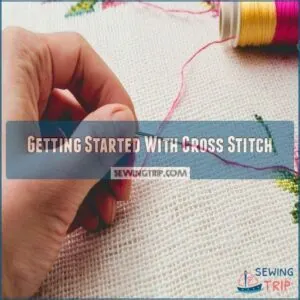
Getting Started With Cross Stitch
You’ll find that determining the right thread count for your project is crucial, where you can choose between a full-stitch bold look or a pencil-drawing style subtle thread effects, cross stitch is just like paint-by-numbers with thread, where you create beautiful "X" patterns on special grid fabric.
With just a few basic supplies and simple steps, you’ll be making amazing designs in no time.
What is Cross Stitch
Cross stitch pops up everywhere these days – from trendy home decor to personalized gifts. It’s a form of counted thread embroidery where you create X-shaped stitches on special gridded fabric to build beautiful pictures. Think of it as pixel art with thread!
- Each X forms from two diagonal stitches
- Works on special fabric with an even grid
- Uses specific needles and embroidery floss
- Follows patterns called charts
- Started as traditional samplers centuries ago
Cross stitch’s straightforward nature makes it perfect for beginners.
With just one basic stitch, you’ll build confidence quickly while creating stunning designs.
Benefits of Cross Stitch
Looking to unwind after a long day? Cross stitching offers more than just pretty designs.
You’ll find yourself lost in a meditative rhythm that melts stress away. It’s like mindfulness in motion – each stitch brings a sense of accomplishment and calm.
Plus, you’re creating something unique and meaningful. Whether you’re battling anxiety or just need a creative outlet, this craft delivers both relaxation and satisfaction.
Essential Materials for Cross Stitch
Now that you’re ready to start your cross stitch journey, let’s get your toolkit ready. Here are the must-haves for your first project:
- A pack of size 24-26 tapestry needles for easy threading
- 14-count Aida fabric, perfect for beginners
- DMC embroidery floss in your chosen colors, which you can find in a variety of colors at a DMC floss supplier like this online store
You’ll also want a 6-8 inch embroidery hoop to keep your fabric taut, and sharp scissors for clean cuts.
How to Cross Stitch for Beginners
You’ll learn all about cross stitch materials and tools in this beginner-friendly guide, from fabric choices to the right needles and threads you’ll need.
With the right supplies in hand, you can start creating beautiful cross stitch designs that’ll impress your friends and family.
Choosing The Right Materials
Let’s set you up for cross-stitch success.
You can find a great selection of kits on websites offering cross stitch kits online.
Your starter kit needs just a few key items: a tapestry needle (size 24-26 works best), embroidery floss in your chosen colors, and a pair of small, sharp scissors.
For beginners, I recommend starting with a simple kit that includes a pattern and all necessary materials.
This lets you focus on learning the technique without worrying about supply shopping.
Selecting The Best Fabric for Cross Stitch
The foundation of any cross stitch project lies in choosing the right fabric.
Aida cloth stands out as the perfect beginner-friendly option, with its evenly-spaced holes creating a natural grid for your stitches.
You’ll find it in various counts (14, 16, or 18 squares per inch) – start with 14-count for easier visibility.
While linen offers elegance, stick with Aida until you’ve mastered the basics.
Types of Embroidery Thread
Embroidery thread comes in various types, each bringing unique qualities to your cross stitch projects, such as rayon, which offers a vibrant sheen and smooth performance, as seen in the best embroidery thread types. Embroidery thread comes in various types, each bringing unique qualities to your cross stitch projects.
Standard cotton floss, your go-to choice, separates into six strands for perfect control.
Pearl cotton offers a lovely sheen but can’t be divided.
Silk thread creates luxurious effects but needs gentle handling.
Metallic and linen threads add special touches, though they’re trickier to work with.
Needles and Scissors for Cross Stitch
Selecting the right tools can make or break your cross stitch journey.
You’ll need a tapestry needle with a blunt tip and large eye, plus sharp scissors for clean cuts.
For machine embroidery, using the right needles is important, and understanding machine embroidery needles can help you choose the best one for your project.
Here’s what makes these tools essential:
- Tapestry needles prevent fabric damage while being easy to thread
- Sharp embroidery scissors guarantee precise thread trimming
- Quality tools last longer and make stitching more enjoyable
Keep your needles rust-free and scissors sharp for best results.
Frames and Hoops for Cross Stitch
Securing your fabric in a hoop or frame isn’t just helpful—it’s essential for keeping your work smooth and manageable.
Most beginners start with a 6-8 inch wooden or plastic hoop, which offers good tension control.
Q-snap frames provide an excellent alternative, giving you better fabric grip.
If you’re tackling larger projects, scroll frames let you roll unused fabric out of the way while you work.
Preparing Your Fabric
You’ll want to start with a clean, wrinkle-free piece of fabric that’s about twice the size of your finished design.
Before you begin stitching, protect your fabric’s edges from fraying by securing them with masking tape or a simple zigzag stitch.
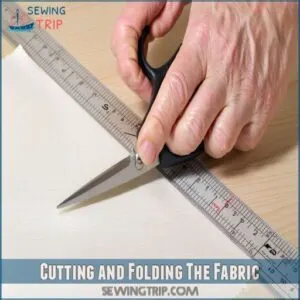
Cutting and Folding The Fabric
How much fabric do you need for your cross stitch project? Start by adding 3 inches extra on each side of your pattern’s dimensions for framing and finishing.
Here’s how to prepare your fabric:
- Use sharp fabric scissors to cut straight, clean edges
- Fold your fabric in half horizontally, then vertically
- Press along fold lines with your fingers to create visible creases
This creates your center point for pattern placement.
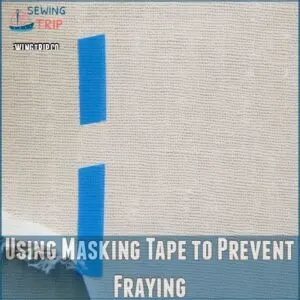
Using Masking Tape to Prevent Fraying
Before you start stitching, protect your fabric’s edges from fraying with masking tape.
Simply fold a strip of tape over each edge, pressing firmly to secure it.
You’ll want to use acid-free tape to prevent any damage to your fabric.
For delicate materials like evenweave, consider using painter’s tape instead – it’s gentler and removes cleanly without leaving residue.
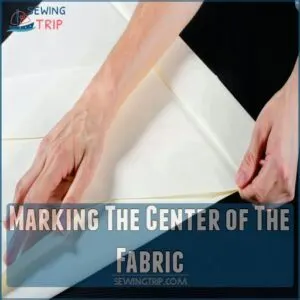
Marking The Center of The Fabric
Finding your fabric’s center point sets you up for stitching success.
Simply fold your fabric in half vertically, then fold it horizontally – like you’re making a paper airplane.
The intersection where these folds meet is your center point.
Mark it lightly with a water-soluble pen or pencil.
This marking helps your pattern stay perfectly centered, giving you a professional-looking finish every time.
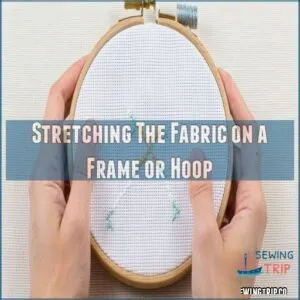
Stretching The Fabric on a Frame or Hoop
Getting your fabric properly stretched in a hoop or frame is like creating a drum-tight canvas for your cross stitch masterpiece.
Here’s what you’ll need to focus on:
- Place your fabric in the hoop, positioning the center mark where you want your design
- Gently pull the fabric taut from all sides, avoiding distortion
- Tighten the hoop’s screw gradually until the fabric feels drum-tight but not strained
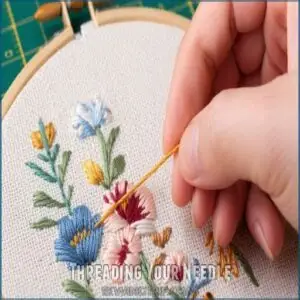
Threading Your Needle
You’ll be amazed at how simple threading your needle can be once you know the right technique.
threading
With your tapestry needle and embroidery floss ready, you’re just moments away from starting your cross stitch journey.
Separating Embroidery Floss Strands
Your embroidery floss comes with six strands twisted together – but don’t use it all at once!
Gently hold one end of the floss between your thumb and forefinger, then slowly pull out individual strands while keeping the others in place.
When choosing the right floss for your project, consider quality embroidery floss to ensure vibrant consistency in cross stitch patterns. Most cross stitch patterns call for two or three strands, giving you enough thread for multiple stitches from a single length.
Threading The Needle With The Correct Strand
Now that you’ve separated your floss strands, let’s tackle threading your tapestry needle.
Grab your needle and hold it up to good light – this makes the eye easier to spot.
Dampen the end of your thread slightly between your lips (yes, just like your grandma taught you), then guide it through the needle’s eye with a gentle, firm push.
If it resists, trim the end at an angle and try again.
Tying a Basic Knot
After threading your needle, create a small knot at the end of your floss.
Hold the thread between your thumb and forefinger, wrap it once around your index finger, and roll it off while pulling tight.
The knot should be just large enough to prevent the thread from slipping through the fabric but small enough to hide behind your stitches.
Adjusting The Tension of The Thread
Proper thread tension is like finding the sweet spot on a guitar string – not too tight, not too loose.
Consistent tension creates those picture-perfect X’s that’ll make your piece shine.
When pulling your thread through the fabric, aim for a snug fit that lies flat without puckering the material.
If you’re seeing loops or gaps in your stitches, adjust your pulling pressure.
Stitching Your First Cross
You’ll feel like a real artist as you create your first X-shaped stitch, bringing your needle up through the fabric’s grid and crossing it perfectly.
Now that you’ve got your materials ready, let’s learn the simple steps to make that satisfying first cross stitch.
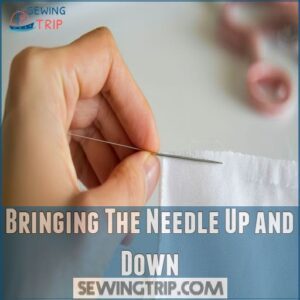
Bringing The Needle Up and Down
With your needle threaded, let’s master the basic up-down motion that’s key to every beautiful cross stitch.
Here’s what you’ll need to know for smooth, consistent stitches:
- Start from the fabric’s back, pushing your needle up through any hole
- Keep your thread tension even – not too tight or loose
- Work in a comfortable position to avoid hand strain
- Hold your needle at a slight angle for better control
Think of it like learning to ride a bike – awkward at first, but soon it’ll feel natural.
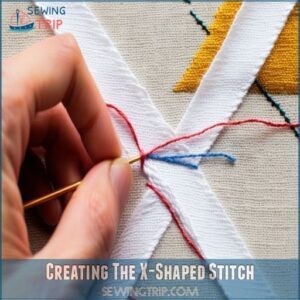
Creating The X-Shaped Stitch
Creating an X-shaped stitch starts with mastering the basic diagonal movements.
You’ll move your needle through the fabric in two distinct steps to form each X.
Here’s a simple breakdown:
| Step | Direction | Result |
|---|---|---|
| 1 | Bottom-left to top-right | First diagonal |
| 2 | Top-left to bottom-right | Complete X |
| 3 | Bottom-left of next hole | Start new stitch |
| 4 | Repeat pattern | Row complete |
Think of it like connecting dots diagonally – each X is just two lines crossing.
When selecting a design for your cross stitch project, consider using grid paper to transfer the design, as explained in more detail about how to make a cross stitch pattern.
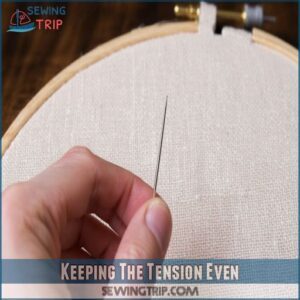
Keeping The Tension Even
Maintaining even tension in your cross stitch is like keeping the beat in music – it’s essential for a polished look.
Your stitches should lie flat against the fabric without pulling or puckering.
- Keep your thread tension consistent by pulling gently but firmly after each stitch
- Let your thread hang freely to prevent twisting
- Use the same pulling force for every stitch you make
- Check the back of your work regularly for loose threads
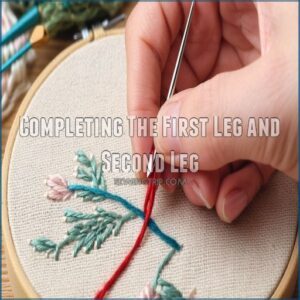
Completing The First Leg and Second Leg
Now that you’ve got your tension right, let’s make your first complete cross stitch.
Start by bringing your needle up through the bottom-left hole and down through the top-right – that’s your first leg.
For the second leg, come up through the bottom-right hole and down through the top-left.
There you have it – your first perfect X!
Each stitch builds your confidence.
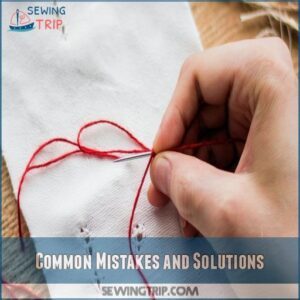
Common Mistakes and Solutions
You’ll be relieved to know that every cross stitch mistake has a simple fix, from tangled threads to uneven stitches.
Uneven stitches and tangled threads are common problems.
Whether you’re dealing with knots or trying to keep your fabric from fraying, we’ll show you the quick solutions that will get you back to stitching in no time.
Dealing With Tangles and Knots
Thread tangles and knots can turn your peaceful stitching session into a frustrating experience.
To prevent tangles, let your needle and thread hang freely every few stitches, allowing it to naturally untwist.
When you spot a knot forming, gently work it out with your fingernail rather than pulling hard.
Keep your working thread at 18 inches or shorter to minimize tangling issues.
Fixing Incorrect Stitches
Sooner or later, you’ll make a mistake in your cross stitch – it happens to everyone! The key is knowing how to fix it without damaging your fabric.
Here’s how to handle common stitching errors:
- Gently remove incorrect stitches by pulling the thread from the back
- Use tweezers to catch and remove any stubborn thread pieces
- Start re-stitching from the last correct stitch
- Double-check your pattern frequently to prevent future mistakes
Avoiding Fraying and Unraveling
After fixing those pesky mistakes, let’s keep your work looking sharp.
Prevent fraying by securing your fabric edges with masking tape or a zigzag stitch before you start.
You can also reduce fraying by choosing a high-quality embroidery floss from reliable embroidery supplies.
When ending a thread, weave it through at least three stitches on the back of your work.
For extra security, run your needle under existing stitches in different directions before trimming the excess thread.
Managing Thread Tension
Getting your thread tension just right is like finding the sweet spot on a guitar string – not too tight, not too loose.
When stitching, maintain even pressure as you pull each stitch through.
If your fabric starts to pucker, you’re pulling too hard.
Too loose, and your stitches will look sloppy.
Try practicing on a scrap piece until you find your perfect rhythm.
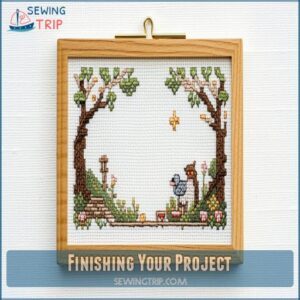
Finishing Your Project
You’re almost ready to show off your handiwork, but first let’s make sure your project looks its best.
Once you’ve finished all your stitches, you’ll need to clean, press, and frame your creation to give it that professional touch that’ll make everyone say "wow.
Trimming The Excess Thread
You’ll need sharp embroidery scissors to trim excess thread with precision.
Leave about 1/4 inch of thread when cutting to prevent stitches from unraveling.
For a clean finish, snip the thread at an angle close to your work’s surface.
If you’re working with multiple colors, trim each thread as you go to avoid a tangled mess on your fabric’s backside.
Removing The Masking Tape
Once your stitching is complete, it’s time to free your fabric from its temporary binding.
Here’s how to remove masking tape without damaging your handiwork:
- Slowly peel back one corner of the tape at a 45-degree angle
- Use gentle, steady pressure to avoid stretching the fabric
- Remove any adhesive residue with rubbing alcohol on a cotton swab
- Check the edges for loose threads that need securing
If stubborn tape residue remains, try using a hair dryer to warm and soften the adhesive before removal.
Washing and Ironing The Fabric
After your cross stitch masterpiece is complete, give it a gentle wash to remove any oils or dirt from handling.
Before ironing, consider preparing your ironing surface with a soft foundation like flour sack towels and a padded ironing board cover, as explained in expert tips on how to iron embroidery projects and embroidered clothes ironing embroidery properly.
Here’s a simple guide to keep your work looking fresh:
| Care Step | Hand Washing | Machine Washing |
|---|---|---|
| Temperature | Cool water | Delicate cycle |
| Cleaning Agent | Mild soap | Gentle detergent |
| Motion | Light swish | No agitation |
| Rinse | Multiple times | Extra rinse cycle |
| Drying | Flat on towel | Never tumble dry |
Press your piece face-down on a thick towel, using gentle steam to smooth any wrinkles.
Framing and Displaying The Finished Piece
Now that your freshly cleaned piece is ready, let’s get it display-worthy.
Choose a frame style that complements your cross stitch – wooden frames offer timeless appeal while modern metallics add contemporary flair.
Consider using acid-free matting to protect your work and create visual depth.
Whether you’re hanging it on the wall or displaying it on a shelf, proper framing makes sure your handcrafted masterpiece gets the spotlight it deserves.
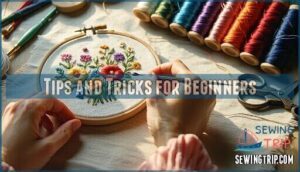
Tips and Tricks for Beginners
You’ll find these practical tips make your cross-stitch journey smoother and more enjoyable.
From setting up proper lighting to keeping your fabric taut, these proven techniques will help you create beautiful designs with less frustration.
Using Good Lighting and Magnification
Good lighting is essential to prevent eye strain during cross stitch – you’ll want both ambient light and a focused task lamp.
Position your lamp to shine over your non-dominant shoulder, eliminating shadows as you work.
For detailed patterns, consider a clip-on magnifying glass or reading glasses.
A well-lit workspace protects your eyes but also helps you spot mistakes early.
Keeping The Fabric Taut and Even
Keeping your fabric taut is like maintaining the perfect pizza dough – it needs just the right tension.
Choose a hoop size that fits your project comfortably, and adjust the tension screws until the fabric feels drum-tight but not stretched.
While stitching, periodically check and readjust the tension, especially with evenweave fabric.
A properly taut surface guarantees your stitches lay flat and even, making your finished piece look professional.
Taking Breaks and Avoiding Fatigue
Cross stitching can strain your eyes and muscles if you don’t take regular breaks.
While it’s tempting to power through a project, smart stitchers know when to pause and recharge.
Choosing the right fabric, such as Aida fabric for beginners, can also help reduce eye strain due to its grid-like structure.
- Set a timer for 20-minute intervals and stretch your neck, shoulders, and wrists
- Position your work in a well-lit area at eye level to prevent neck strain
- Stay hydrated and switch between sitting and standing to maintain energy
Practicing and Building Confidence
Rest breaks help steady your hands – now let’s build your confidence! Start with small, simple patterns and give yourself permission to make mistakes. They’re your stepping stones to mastery.
| Skill Level | Project Size | Time Investment |
|---|---|---|
| Beginner | 2×2 inches | 1-2 hours |
| Intermediate | 4×4 inches | 3-4 hours |
| Advanced | 6×6 inches | 5-6 hours |
| Expert | 8×8+ inches | 7+ hours |
Remember: every expert started exactly where you’re now.
Frequently Asked Questions (FAQs)
How do I start a cross stitch pattern?
Start by finding the fabric’s center – fold it twice to mark the middle.
Thread your needle with 18 inches of floss, then begin stitching your pattern from the center outward, following the chart’s symbols.
How to start cross stitching for kids?
Choose simple patterns with large squares and colorful threads to introduce kids to cross stitch.
You’ll want plastic needles and 14-count Aida fabric.
Let them pick fun designs they’ll enjoy, like animals or cartoon characters.
How do you cross stitch a hoop?
Like threading a needle through time, position your fabric in the hoop, adjusting until it’s drum-tight.
Loosen the outer ring, center your fabric between both rings, then tighten the screw to secure everything perfectly.
How does cross stitch work?
Cross stitch creates patterns by forming small "X" stitches on gridded fabric.
You’ll bring your needle up through holes in the fabric, making diagonal lines, then cross back over to complete each "X" shape.
What is the easiest cross stitch for beginners?
Start with a small geometric pattern using just two colors – it’s perfect for mastering basic stitches.
You’ll want to pick a 4-inch square design on 14-count Aida fabric to build confidence.
How do I start my first cross stitch?
Gather your supplies: Aida fabric, embroidery floss, and a tapestry needle.
Find the fabric’s center, thread your needle, and begin making diagonal stitches.
Remember, each complete stitch forms a tiny "X" shape.
How to cross stitch with a pattern step by step?
Find your pattern’s center, mark fabric’s middle point, and thread your needle.
Begin stitching from center outward, making diagonal stitches in the same direction.
Complete each X by keeping loose threads to a minimum, especially when working on a piece that will be displayed unframed, to achieve a neat back finish. Complete each X by crossing back over previous stitches.
What are the number 5 steps in making cross stitch?
Here’s your 5-step cross stitch adventure:
Center fabric and secure thread.
Stitch one diagonal line up.
Create opposite diagonal line down.
Complete the row using X patterns.
Secure thread ends neatly underneath.
How do I remove a stitch if I make mistakes?
Ever messed up a stitch?
Don’t worry!
Simply use small scissors or a seam ripper to carefully cut and remove the unwanted thread from both sides.
Then gently pull out the pieces and start fresh.
What is the difference between DMC and Anchor threads?
DMC and Anchor threads offer similar quality, but they use different color numbering systems.
DMC’s more widely available in North America, while Anchor’s popular in Europe.
You’ll find slight variations in their color ranges and sheen.
Can I wash or iron my finished cross stitch piece?
You can gently hand-wash your finished cross stitch in cool water with mild soap.
Ironing
Once dry, iron it face-down on a soft towel using medium heat to smooth wrinkles and enhance your stitches’ appearance.
Should I stitch in hand or use a frame?
Like choosing between a comfy couch and an office chair, both options work well.
Frames help maintain even tension and prevent fabric distortion on larger pieces.
Start with in-hand stitching for small projects.
How long does a typical cross stitch project take?
Project completion times vary widely – a simple 4-inch design might take 8-10 hours, while larger pieces can span months.
Take it stitch by stitch.
Your speed will improve with practice, and there’s no rush to finish.
Conclusion
Congratulations, you’ve learned how to cross stitch for beginners!
Like assembling a puzzle, each stitch brings you closer to a masterpiece.
Your patience and practice open up limitless creative possibilities.
Remember, starting small builds your confidence.
Take breaks, keep your fabric taut, and make sure you have good lighting for a smooth experience.
Whether for relaxation or decoration, cross stitching is a rewarding hobby.
Now, enjoy displaying your beautiful, handmade work proudly.
Keep stitching and exploring new designs!

