This site is supported by our readers. We may earn a commission, at no cost to you, if you purchase through links.
First, grab your shirt and a sharp pair of scissors—trusty sidekick alert!
Measure about 6 inches from the shoulder seam down the neckline.
Now, fold the shirt in half so the side seams meet, finding the center.
Sketch a V-line from the neckband’s center to your mark.
Time to cut—like slicing through butter, glide those scissors along your mark.
Voilà! You’ve crafted a trendy V-neckline without a single stitch.
Feeling adventurous? This guide has more tricks up its sleeve to amp up your DIY game.
Keep reading!
Table Of Contents
- Key Takeaways
- Preparing Your T-Shirt
- Understanding V-Neck Styles
- Measuring and Marking The Neckline
- Cutting The V-Neck
- Creating a Choker V-Neck
- Modifying The V-Neck Without Sewing
- Troubleshooting Common Issues
- Adding a Personal Touch
- Styling Your New V-Neck
- Advanced V-Neck Variations
- Frequently Asked Questions (FAQs)
- Conclusion
Key Takeaways
- Fold your shirt in half, draw a V from the neckline to your desired depth, and cut along the line with sharp scissors for a precise V-neck shape without sewing.
- Use a fabric marker or chalk to outline your V-neck cut, ensuring symmetry and preventing lopsided edges.
- Stretch the neckline slightly after cutting to soften the edges and give your shirt a relaxed, effortless look.
- Stick to knit fabrics for this DIY method, as they won’t fray, ensuring a clean finish without needing to sew.
Preparing Your T-Shirt
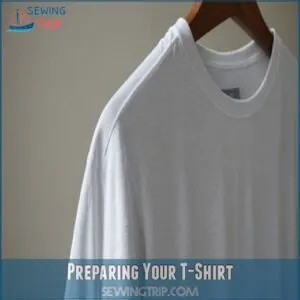
Before you start snipping away at your trusty tee, make sure it’s smooth and wrinkle-free by giving it a quick steam or iron.
Then, fold the shirt neatly and align those shoulder seams like a pro to guarantee everything’s perfectly set for cutting.
Steaming or Ironing
Before diving in, steam or iron your t-shirt to smooth out wrinkles, ensuring you’re working with a clean machine by regularly checking and cleaning debris, lint, and dust to prevent jamming, see troubleshooting sewing machine problems, remembering to match your temperature control to the fabric type, similar to how you’d choose the right thread for fabric weight and type for a smooth sewing experience [Understanding Fabric and Thread Types](https://sewingtrip.com/sewing-machine-tutorials-for-beginners/#:~:text=Let’s get started! For sharp corners, slow down as you).
Think of it as a canvas prep—removing those pesky creases is like freeing your creativity.
Whether you choose steam or iron, control the temperature to suit your fabric type.
An ironing board and a warm touch can turn any tee wrinkle-free and ready for a stylish transformation.
Folding and Aligning The Shirt
Picture your t-shirt like a blank canvas.
Fold it in half neatly to get those shirt creases perfect, lining up the front and back.
Make sure that center alignment is spot on, with one sleeve flat against the surface.
To achieve high-quality output in sewing projects, it’s essential to master proper sewing techniques, and a crucial step is to ensure quality stitches that are even and smooth. Do a quick shoulder seam check and tug gently to confirm fabric tension is just right.
Ready for some magic?
Choosing The Right Tools
Jump into your T-shirt adventure with the right tools: grab fabric shears for clean cuts, and a fabric marker to guide your lines like a trusty GPS.
A measuring tape guarantees precision, while a template is like an artist’s sketchbook.
Lay everything on a cutting mat to protect surfaces—keeping your workspace neat is half the battle!
Understanding V-Neck Styles
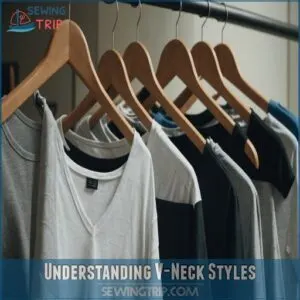
Before you start snipping, let’s talk V-necks!
You’ll find there’s a whole world of V-neck styles, from subtly sexy to dramatically plunging – so choosing the right one for your shirt and your style is key.
Different Types of V-Necks
You’ve got your t-shirt ready; now let’s talk V-necks! They come in all shapes and vibes:
- Classic V-neck: Simple and timeless, it’s your wardrobe’s best buddy.
- Plunging V-neck: Perfect for making a daring statement.
- Wide V-neck: Flirts with your collarbones.
- Asymmetrical V-neck: Adds a quirky twist, keeping things offbeat.
Choosing The Right V-Neck Style
Choosing the right V-neck style is like picking the perfect playlist for your mood.
Consider your body type and personal style—whether you like bold, deep cuts or subtle, shallow dips.
Match the neckline depth to the occasion: casual tee for brunch or chic low-cut for a night out.
When choosing a t-shirt material, consider the benefits of natural fiber fabrics like cotton and linen, which offer breathability and moisture-wicking properties. Let fabric type guide your choice, complementing your vibe.
Factors to Consider
When picking the perfect V-neck, think about your personal style and how the fabric type will hang.
A loose t-shirt fit might need a deeper cut for that cool, relaxed look, while the existing neckline plays a big role in your options.
Your desired look shapes everything, so feel free to experiment for that unique touch!
Measuring and Marking The Neckline
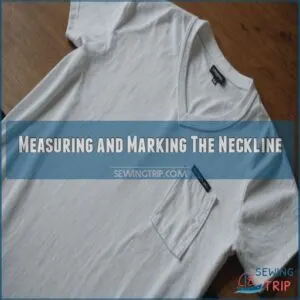
Before you start snipping away, make sure you know just how deep you want that V to go and grab a fabric pen or some chalk to map it out.
Trust us, a little planning saves you from ending up with a surprise "Oops, it’s a crop top now!" moment.
Measuring The Desired Depth
Finding the perfect neckline depth is like picking the right spice for your meal—it totally changes the vibe.
Grab a measuring tape and picture where the V-neck will flatter your body type.
Are you aiming for a laid-back beach look or something sharp for a night out?
Remember, your t-shirt fabric might slightly alter the neckline style!
Marking The Neckline With a Template or Fabric Pen
Tired of wonky cuts? Try using a template to shape your neckline like a pro.
Grab a fabric pen—perfect for easy fixes if you slip. Mark your V-neck starting point with confidence, imagining drawing with invisible ink.
For accuracy, decide where your neckline should go, and get creative! If you mess up, an eraser can save the day.
Double-Checking The Measurements
Got your template down? Great, but don’t snip away just yet!
Let’s make sure you’re getting that V-neck spot-on. Accuracy matters here—double-check with your fabric pen or chalk lines.
Think of it like aligning a target; you want precision and symmetry. Trust your eyes, adjust if needed, and stay consistent.
This step saves you from wonky necklines later!
Cutting The V-Neck
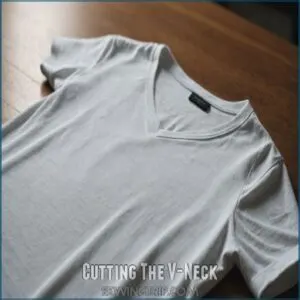
Now comes the fun part—transforming your tee into that perfect V-neck with just a pair of scissors.
Don’t worry about being a master tailor; a steady hand and a little confidence are all you need to create a stylish new look!
Cutting a Deep V-Neck
Okay, you’ve got your measurements, right? Now, let’s make that deep V-neck a reality!
For a dramatic look, cut a longer, deeper V.
Remember, safety first – use sharp scissors and a steady hand. Don’t rush; a slow, controlled cut guarantees a clean finish.
Fabric choice matters – knits are forgiving.
Once you’ve cut your deep V-neck, you’re ready to show off your newfound style!
Cutting a Shallow V-Neck
Ready to master the shallow V-neck? Start by selecting your fabric—something snug and stretchy works wonders.
Grab a template to mark your neckline depth, ensuring it suits your style vibe.
With steady hands and a sharp tool, cut a gentle, shallow V—it’s your ticket to a playful look that screams confident and carefree.
Tips for Smooth Cuts
When you’re cutting that V-neck, think of it like slicing a cake—use those sharp scissors as your best knife.
Keep the fabric tension just right, so you glide through without snagging.
Focus on your cutting techniques: smooth, confident snips lead to clean, straight lines.
Avoid jagged edges by imagining you’re tracing a perfect path with each cut!
Creating a Choker V-Neck
Imagine this: you’re about to give your old t-shirt a fab new twist by creating a choker V-neck, adding that perfect mix of edgy and chic.
Just grab some sharp scissors, and with a little stretch here and a snip there, you’ll have a trendy top that’s ready to turn heads without sewing a single stitch!
Drawing a V-Shape on The Front Layer
Picture your t-shirt as a canvas waiting for that perfect V-shape!
Grab your fabric marking tools and let’s get started:
- Find the Sweet Spot: Decide your V-neck depth and use a ruler for V-shape symmetry.
- Align the Fabric: Make sure the neckline is aligned for precision.
- Mark It Out: Use a V-shape template to outline the cut.
Cutting Out The V-Shape
You’ve drawn the perfect V-shape, now grab those trusty scissors and let’s make it happen!
Before cutting, double-check that you’re using sharp fabric scissors to avoid any uneven edges.
Start snipping along your marked line with precision.
Picture it like slicing a pizza—smooth and steady wins the race.
Keep the V-shape symmetry in mind while considering your fabric type.
Remember, cutting tools matter for precise neckline depth, so aim confidently!
Stretching The Shirt for a Choker Effect
Stretching the shirt gently works wonders for transforming a simple cut into a chic choker effect.
Imagine your T-shirt as a canvas—your fingers bring the neckline to life.
Tug gently for the perfect neckline tension, balancing comfort with style.
Be playful! A little stretch goes a long way, ensuring durability without sacrificing those extra style points.
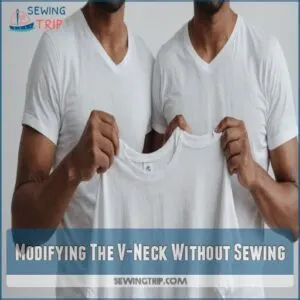
Modifying The V-Neck Without Sewing
Ready to ditch the sewing machine? You can totally transform your V-neck’s shape without a single stitch—just grab your scissors and let’s get creative!
Hemming Raw Edges With a Sewing Machine
If you don’t have a sewing machine or prefer a no-sew option, you can use no-sew hemming tape for a quick fix. Now that your choker V-neck is shaping up, hem those raw edges with your trusty sewing machine for a polished look.
Remember these steps:
- Choose the right machine type: Be sure it’s up for hemming.
- Select stitch options: Zigzag or straight work wonders.
- Explore hemming techniques: Play around for the best fit.
- Maintain your machine: Keep it humming smoothly!
Leaving Raw Edges for a Relaxed Look
Embrace the freedom of DIY fashion trends by leaving raw edges on your V-neck.
Gently cut the t-shirt, and let the knit fabric’s natural charm handle the rest.
No hemming, just that casual, laid-back vibe you’re after.
Think of it as a nod to fashion’s fun, frayed edge aesthetics—perfect for anyone who prefers effortless cool over formal fuss.
Additional Tips for a No-Sew Finish
Your T-shirt’s edge-cutting adventure doesn’t need a sewing needle.
Embrace raw edge options for a laid-back, stylish look.
You can also explore various no-sew V-neck products online at no sew v neck stores.
Here are three tips to ace that no-sew finish:
- Fabric type matters – cotton’s forgiving.
- Stretch it gently – avoid rough wear and tear.
- Skip the hemming – raw edges scream effortless cool.
Troubleshooting Common Issues
Oops, that V-neck didn’t quite go as planned?
Don’t worry, we’ve all had those moments where our crafty visions need a little troubleshooting, so let’s tackle those uneven cuts and too-small necklines together!
Fixing a Too-Small Neckline
Got a neckline that’s a bit too tight?
Let’s stretch those limits!
Grab those scissors and let your creativity breathe.
A small neckline fix is just a cut away.
Here’s a quick guide:
| Problem | Solution |
|---|---|
| Feels too snug | Make a wider cut |
| Looks too confined | Try a larger scoop or V-cut |
| Needs a revamp | Experiment with angles |
No more choky vibes, only comfy style!
Adjusting The V-Neck Depth
To nail the perfect V-neck depth, grab your measuring tape and mark the spot where style meets comfort.
Think about your body type and what occasion you’re dressing for.
Maybe you’re an open-book kinda person, or prefer a little mystery — your V-neck can mirror that mood.
Get started, measure those preferences, and snip with confidence!
Dealing With Uneven Cuts
Even the most seasoned DIYer messes up sometimes.
Don’t sweat it if your V-neck’s a little wonky.
Fixing wonky cuts is easier than you think!
Carefully trim uneven lines, smoothing out edges as you go.
If it’s really bad, cutting a new neckline might be your best bet.
Remember, practice makes perfect!
You got this!
Adding a Personal Touch
Why settle for a basic T-shirt when you can jazz it up with a criss-cross neckline or go bold with a racerback cut?
Let your creativity run wild and transform your tees into stylish, one-of-a-kind pieces—plus, think of it as crafting with benefits, since you’re giving those old shirts a second life!
Criss-Cross Neckline
Imagine this: you’re crafting a criss-cross neckline that screams DIY chic.
Grab your scissors and snip horizontal slits parallel to the collar.
Think of it like creating a playful ladder across your neckline.
A few strategic cuts and you’ve got a stunning criss-cross t-shirt style that’s perfect for showing off your free-spirited vibes.
Get ready to strut with confidence!
Racerback Neckline
Feeling adventurous after trying the criss-cross style?
Give your tee a sporty flair with a racerback neckline, reminiscent of the classic halter necklines for a chic touch.
Snip the back straps a bit shorter, imagining a sleek sports bra hug.
It’s all about experimenting with different racerback variations.
Before you know it, you’ll have DIY racerback T-shirts that blend style and comfort effortlessly!
Bowtie Sleeveless
Transform your old tee into a bowtie sleeveless masterpiece for a playful twist on wardrobe basics.
Choose light, flowy fabric for your bowtie.
You can find a wide variety of bowtie ribbons at bowtie ribbon shops.
Here’s how you do it:
- Position the bowtie at the shoulder or back for contrast.
- Secure with simple knotting techniques—no needle needed!
- Experiment with style variations and fabric choice to express your creativity.
Styling Your New V-Neck
Now that your new V-neck is ready, it’s time to let your style shine!
Pair it with your favorite jeans for a casual look,
or throw on some bold accessories to make it uniquely yours—after all, who doesn’t love a little fashion statement?
Pairing With Different Bottoms
You’ve nailed your V-neck cut, now it’s time to pair it up.
Think high-waisted pants for a chic vibe or check out high waisted options that can add a unique flair to your outfit.
Comfy jeans and shorts keep it casual, while leggings offer that laid-back weekend look.
Mixing styles is like adding a splash of color to your day—go ahead, mix and match!
Adding Accessories
Now that you’ve found the perfect bottoms, let’s accessorize.
Consider different types of necklines to pair with your new V-neck, and then pick a chunky necklace or delicate pendant to elevate it.
Try a scarf for a pop of color or pattern.
A thin belt cinches your waist, creating a flattering silhouette.
Don’t forget a hat—a baseball cap or wide-brimmed sun hat adds a cool touch!
Experiment with layering necklaces or bracelets for a unique look.
Jewelry is your friend!
Creating a Unique Look
Rocking your fresh V-neck is all about adding embellishments and embracing vintage vibes.
Picture layering textures or trying some bold color blocking—it’s like painting your own canvas.
Add DIY embellishments like patches or pins for that personal flair.
Remember, your style is the ultimate freedom: let your shirt tell your story as you mix, match, and create.
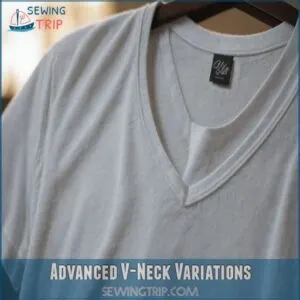
Advanced V-Neck Variations
Ready to up your T-shirt game and transform it into a showstopper?
With advanced V-neck variations like the halter top, braided halter, and ladder styles, you’ll be turning heads in no time—no sewing required!
Halter Top Style
You’re ready to explore a halter top style!
Imagine that freeing vibe as you ditch those classic designs for something trendier.
Cut off the sleeves and tie a knot behind your neck with halter top straps.
Choose bold halter top fabrics to match your spirit.
It’s fun and liberating, like wearing summer wherever you go.
Braided Halter Top
Got an old tee and a wild hair for DIY fashion?
Try a braided halter top!
Start by cutting off the sleeves.
Slice three strips at the back, and let the braiding magic flow.
Go for those summer festival vibes!
Choose a soft fabric for ultimate comfort, and you’ll rock a fresh look that screams freedom and creativity.
Ladder V-Neck Style
Imagine you’re crafting a DIY ladder V-neck, a trend that spins heads.
To prevent common issues like gaping necklines, it’s essential to address potential problems with fix gaping neckline sewing trick.
Start by cutting your V-neck, then add horizontal slits across, like rungs on a ladder.
Make sure you have even spacing; fabric choice impacts style.
Originally a playful twist on tradition, this look offers versatility and flair.
Perfect for transforming simple tees into unique fashion statements.
Frequently Asked Questions (FAQs)
How to cut a V-neck t-shirt without sewing?
Picture customizing a fresh breeze in your wardrobe.
Fold your shirt vertically, draw a V on the front using chalk, cut from neckline to point, and stretch it a bit.
Voilà, your new no-sew V-neck!
How to cut v-neck into t-shirt?
Fold your t-shirt in half, then start cutting a V from the neckline to desired depth.
Smooth out edges, give the V a quick stretch.
Voilà! You’ve just turned that tee into a stylish V-neck—no sewing required!
How to alter t-shirt neckline without sewing?
Did you know 70% of t-shirt necklines can be altered without sewing?
Just grab scissors, mark your new neckline with chalk, and cut smoothly.
It’s like giving your shirt a brand-new look—no thread required!
How do you cut a shirt to make it cute in the neck?
Try transforming your shirt’s neckline by snipping a V-shape!
Lay it flat, mark the center with chalk, then cut a straight line to each shoulder.
Stretch it a bit for that chic, relaxed look.
Can I use this method on all fabrics?
Over 50% of adults wear t-shirts regularly, but not all fabrics handle DIY like a pro.
Stick to knit fabrics—they won’t fray.
Beware of woven materials; they may unravel without sewing, leaving your project in shambles!
How do I prevent stretching the neckline?
Use sharp scissors and steady hands to avoid stretching while you cut.
Fold the shirt neatly, aligning the seams.
With gentle pressure, guide your cuts slowly along marked lines—you’ll keep that neckline looking sharp and chic!
What if my shirt is too tight?
A too-tight shirt? No worries! Grab some sharp scissors, carefully cut a wider neckline, and voilà! Instant comfort and style. You’ll feel so much better.
Can I make a deeper V-neck?
Did you know 68% of people love DIY fashion projects?
To deepen a V-neck, fold your t-shirt vertically, mark the desired depth, and cut a straight line down.
Voilà, a stylish and edgy new look!
How do I finish the raw edges neatly?
Smooth out those raw edges by gently tugging to curl them naturally.
To prevent fraying, apply fray-check liquid or bias tape on raw edges for added reinforcement as you secure raw edges before washing. If you want a cleaner finish, iron them on low heat while they curl or use fabric to prevent fraying.
It’s simple yet stylish!
Conclusion
Did you know that 60% of people try DIY fashion once a month?
Now you’re part of that trend with your new V-neck tee!
With this no-sew method, you’ve learned how to cut a T-shirt V neckline no sew, opening doors to endless style possibilities.
So go ahead, flaunt your fresh look or spice it up with accessories.
Whether for a casual outing or a night out, you can express yourself through sewing by selecting fabrics that reflect your personal style and preferences, such as those inspired by indie pattern designers’ styles. Your DIY skills are sure to impress and inspire creativity in others!

