This site is supported by our readers. We may earn a commission, at no cost to you, if you purchase through links.
 Understitching keeps facings and linings from peeking out like uninvited guests at a party.
After sewing your main seam, press the seam allowance toward the facing or lining. Then stitch close to the seamline through the facing and both seam allowance layers—but not the main fabric.
This creates a "ditch" that encourages the facing to roll inward and stay hidden. You’ll typically use this technique on necklines, armholes, and waistbands where you want crisp, professional edges.
The trick lies in your seam allowance width and pressing technique, which can make or break your finished look.
Table Of Contents
Key Takeaways
- You’ll press seam allowances toward the facing first, then stitch 1/8 inch from the original seam line – this catches both seam allowances and facing together while keeping the main fabric free, creating that invisible anchor that prevents facings from rolling outward.
- You’ll get the best results on necklines, armholes, and waistbands – these curved and straight edges benefit most from understitching because they’re prone to facing roll, and the technique keeps everything lying flat against your body for a professional appearance.
- You’ll need to clip curves carefully before understitching – make small perpendicular cuts just short of your stitching line on curved seams, then use a 2.0-2.5mm stitch length with matching thread color to the facing, not the main fabric.
- You’ll transform amateur sewing into professional results – this simple technique requires minimal effort but delivers maximum impact by preventing that "homemade" look where facings peek out, giving you store-bought quality finishes.
What is Understitching?
Understanding understitching transforms amateur sewing into professional-looking garments.
*Understitching is the invisible thread that separates homemade from haute couture.
This sewing technique prevents facing roll by securing the seam allowance to the facing or lining, never the main fabric.
Think of it as your secret weapon for clean necklines and polished edges.
When you understitch fabric, you’re creating lining stabilization that keeps facings behaving properly.
No more wonky necklines peeking out or armhole facings doing their own thing.
The technique involves sewing close to the original seam line, catching only the seam allowances and facing together.
This method delivers facing roll prevention and that coveted professional finish you see in store-bought clothes.
You’ll secure facing effectively while maintaining the garment’s intended drape.
It’s like having an invisible anchor that keeps everything exactly where it should be, creating seam allowance securing that lasts through countless wears and washes.
For curved seams, it’s helpful to clip and notch the fabric.
Preparing The Seam
Before you jump into the actual understitching tutorial, proper preparation sets the stage for professional results. Start by examining your seam allowance – it needs to be clean and consistent, typically 5/8 inch for most garments.
Your fabric selection matters here; lightweight fabrics like cotton or silk work beautifully, while thick materials can create bulk.
For curved seams around necklines or armholes, you’ll need to clip curves carefully. Make small cuts perpendicular to the seam line, stopping just short of your stitching. This prevents puckering when you turn the fabric right-side out.
If your pattern calls for interfacing use, apply it now to the facing pieces before sewing.
Press your seam allowances toward the facing or lining – this understitch fabric positioning is key. The seam allowances must lay flat against the facing, not the main garment piece, for the sewing technique to work properly.
For a strong and durable hold, consider using a full backstitch method.
Sewing The Understitch
Your needle becomes the precision tool that transforms a basic seam into professional perfection. Start by setting your stitch length to 2.5mm for most fabrics—shorter for delicate materials, slightly longer for heavy ones.
Your needle isn’t just a tool—it’s the difference between homemade and haute couture precision.
Choose a universal needle for cotton or a ballpoint for knits to prevent fabric damage. Adjust your thread tension to prevent puckering; slightly looser tension works best for this understitching method.
Position your fabric with the facing side up, seam allowances pressed toward the facing. Begin stitching 1/8 inch from the original seam line, catching both seam allowances with the facing.
For curved seams around necklines, slow down and pivot frequently to maintain accuracy. Keep your fabric handling gentle but firm—don’t stretch or pull as you guide it through the machine.
Mastering this technique involves sewing basic straight stitches for consistent results. This understitch sewing technique requires patience, especially on curves where precision matters most for that professional finish.
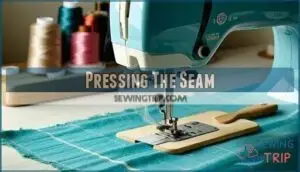
Pressing The Seam
Proper pressing transforms your understitching from amateur to professional.
Heat and steam work together to set your seam permanently, making the facing behave like it’s supposed to.
Start by pressing the seam allowances toward the facing side before you even think about flipping anything over.
Your iron’s temperature matters here – match it to your fabric type to avoid scorching delicate materials or under-pressing thick ones.
For curved seam pressing, use a pressing ham or rolled towel to maintain the garment’s natural shape.
Press from the facing side first, then flip to check your work from the right side.
This understitching method prevents seam shadows that scream "homemade" from a mile away.
Keep your pressing direction consistent, moving from one end to the other.
For creating crisp edges, consider using a wooden clapper tool.
Quality seam pressing tools make this understitch sewing technique shine with professional results.
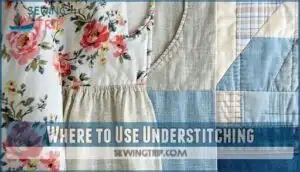
Where to Use Understitching
Once you’ve mastered the pressing technique, you’ll want to know where understitching makes the biggest impact.
Neckline facing is your first priority—it prevents that annoying roll that screams "homemade."
Armhole finish comes next, especially on sleeveless tops where the facing might peek out.
Don’t skip waistband edges on skirts and pants; they’ll lie flatter against your body.
Curved seams are understitching’s best friend.
Any time you’re working with lined garments, from blazers to dresses, this technique keeps everything in place.
Think of it as your secret weapon for professional-looking results.
Even simple projects like lined tote bags benefit from understitching around the top edge for that crisp, store-bought appearance.
Proper stitch selection is key, as fabric type considerations influence the overall outcome.
Troubleshooting Tips
When your understitching isn’t cooperating, these sewing tips will save the day. Puckering Prevention starts with proper Fabric Handling – keep layers smooth and tension consistent throughout your sewing tutorial.
To prevent performance problems, remember to address thread tension settings.
Common Tension Issues you’ll encounter:
- Stitch Visibility showing on the right side means you’re too close to the original seam
- Rippling fabric indicates uneven seam allowance distribution
- Thread Matching problems create visible contrast lines
Slow down your sewing techniques and check alignment frequently. Understitching requires patience, but these troubleshooting methods guarantee professional results every time.
Frequently Asked Questions (FAQs)
What is understitching in sewing?
A stitch in time saves nine, and understitching does exactly that.
You’ll sew the seam allowance to your facing or lining, preventing it from rolling outward and creating a professional, clean finish.
How do you understitch fabric?
After sewing your facing to the garment, press seam allowances toward the facing. Then sew through both the facing and seam allowances about 1/8 inch from the original seam line.
What is understitching and how is it done?
Think of it as tucking in a shirt’s collar—you’re securing the facing to seam allowances so it won’t peek out.
Stitch 1/8 inch from the seam on the facing side to keep everything lying flat and professional-looking.
How do you understitch a shirt?
After you’ve sewn the facing to your shirt’s neckline or armhole, press seam allowances toward the facing.
Then stitch through both the facing and seam allowances about 1/8 inch from the original seam line, which is a critical step to ensure a professional finish.
How do I prepare for understitching?
Getting your ducks in a row before understitching sets you up for success.
You’ll need matching thread, sharp scissors, and an iron.
Press seams flat, trim excess fabric, and make certain facings lie smooth against the garment, ensuring that you have sharp scissors for the task.
How do you understitch a dress?
After sewing the facing to your dress, press seam allowances toward the facing.
Stitch through both seam allowances and facing, staying 1/8 inch from the original seam, keeping the dress fabric free.
Can you understitch by hand?
Yes, you can absolutely understitch by hand.
Use small running stitches or backstitches about 1/8 inch from the seam line.
Hand understitching gives you precise control and works beautifully on delicate fabrics.
What is the best foot for Understitching?
Like a compass guiding sailors, the standard presser foot serves as your faithful navigator for understitching.
You’ll achieve precise, professional results using this versatile attachment that keeps fabric layers aligned while stitching close to seams, making it a crucial tool for achieving professional results.
How long should stitch be for Understitching?
Use a stitch length of 0-5mm for understitching.
This creates secure, even stitches that won’t pucker your fabric.
Shorter stitches work better on curves, while slightly longer ones handle straight edges perfectly.
What kind of thread should I use for understitching?
Thread choice acts like the invisible glue holding your project together.
Match your thread color to the facing, not the main fabric.
You’ll want all-purpose polyester or cotton thread that won’t show if it peeks through.
Conclusion
Congratulations, you’ve just mastered the sewing world’s best-kept secret for taming rebellious facings.
Now you’ll never again suffer the embarrassment of wonky necklines that flip outward like defiant teenagers.
Understanding how to do understitching sewing transforms your garments from homemade to high-end.
This simple technique requires minimal effort but delivers maximum impact.
Your seams will lie flat, your edges will stay crisp, and you’ll finally achieve that coveted professional finish that makes people ask, "Where did you buy that?


