This site is supported by our readers. We may earn a commission, at no cost to you, if you purchase through links.
 Imagine you’re putting the final touches on a garment, the culmination of hours of work.
This guide on how to end a stitch on a sewing machine is your answer. Whether you’re a seasoned tailor or a beginner just starting to explore the world of fabrics, mastering the art of securing your stitches is crucial.
From basic techniques like backstitching to more advanced methods like lock stitches, we’ll cover everything you need to ensure your creations stand the test of time. Dive into the world of sewing with confidence, knowing that your projects will not only look professional but will also be durable and long-lasting.
To end a stitch on a sewing machine, backstitch a few stitches at the end of your seam by pressing the reverse button or lever, then sew forward again to secure the stitching.
Table Of Contents
Key Takeaways
- Backstitching at the beginning and end of a seam is essential for securing stitches and preventing unraveling, which enhances the durability and finish of the seam.
- For delicate fabrics or when a less bulky finish is desired, a lock stitch can be used to create small knots that prevent unraveling without the need for backstitching.
- Alternative methods to finish a seam include using a tack stitch, tying off thread ends, decreasing stitch length, or employing manual stitching techniques for a secure end.
- To improve overall sewing quality, it’s important to adjust stitch width and length appropriately, practice sewing to enhance skills, and engage with the sewing community for sharing tips and experiences.
Basic Technique
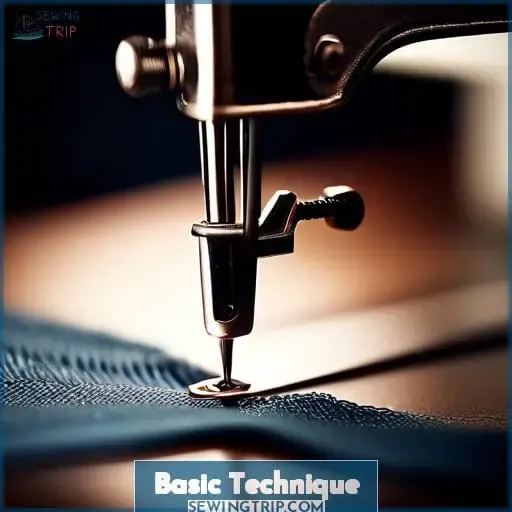
When finishing your sewing project on a machine, it’s crucial to secure your stitches to prevent unraveling.
Start with a basic stitch, then engage the reverse function on your sewing machine to execute a few backstitches. This simple action locks your stitches in place, ensuring the durability of your seam.
After backstitching, return to forward stitching over the same area, then trim the thread close to the fabric to neatly complete your work.
Begin With Basic Stitching
To kick off your sewing adventure, let’s dive into the basics. Imagine you’re behind the wheel of a car for the first time—exciting, right? That’s you with your sewing machine, ready to conquer the fabric highways.
First things first, you’ll want to cozy up to your machine. Get to know its quirks like a new friend. Is your thread tension tighter than a drum? Loosen up a bit! Check if your stitch length is as consistent as your morning coffee routine.
And needle size? Make sure it’s the right fit for your fabric type—no one likes a mismatched pair.
Now, rev up with a straight stitch, the trusty old sedan of stitches. It’ll get you from A to B without any fuss. But don’t be fooled; this stitch can curve and swerve with the best of them when you’re ready to take the scenic route.
And remember, reverse stitching is like your sewing seatbelt—click it in place to secure those stitches before you speed off.
If you’re feeling a bit wobbly, don’t fret. It’s like learning to ride a bike, but without the scraped knees. A tack stitch here, a stay stitch there, and you’ll be backstitching with the best of them.
So, press that pedal gently, guide your fabric, and watch as your creation comes to life, stitch by secure stitch.
Engage Reverse Function
To effectively end a stitch on a sewing machine, mastering the reverse function is crucial. Picture this: you’re nearing the end of your seam, and it’s time to anchor those stitches firmly in place.
Located conveniently on your machine (though its exact spot varies by brand), this button allows you to backstitch, creating a series of reverse stitches that lock your seam securely. Think of it as doing a little dance with your fabric—forward a bit, then back a bit—ensuring that your stitches won’t unravel like a poorly kept secret.
This back and forward stitch technique isn’t just a finishing touch; it’s the hero move that ensures your seam allowance doesn’t become a seam allowance for error. So, next time you’re at the helm of your sewing machine, remember to engage that reverse button and backstitch to perfection.
It’s the difference between a seam that holds strong and one that gives up at the first sign of stress.
Execute Backstitching
After mastering the basics, it’s time to execute backstitching, a critical step to ensure your stitches don’t come undone like a poorly kept secret.
- Begin at the seam’s end, and with a confident press of the reverse button, sew a few stitches backward.
- Feel the backstitch tension as you guide the fabric, ensuring the backstitch length matches your forward stitch.
- Release the reverse and glide forward, sewing over the backstitches like you’re retracing your steps in a dance.
Return to Forward Stitching
After you’ve mastered the backstitch, it’s time to return to forward stitching. This is where you’ll seal the deal, ensuring your stitches are locked in and your masterpiece is secure. Imagine you’re a conductor, and your sewing machine is the orchestra. You’ve just hit a crescendo with the backstitch, and now you’re easing back into the melody with smooth, forward stitches.
Here’s a little table to inspire your forward path:
| Emotion | Stitching Metaphor |
|---|---|
| Pride | Sewing a seam as straight as your sense of accomplishment. |
| Relief | Tying off the thread like a sigh of relief. |
| Joy | The fabric under your fingers dances as you guide it forward. |
| Anticipation | Each stitch a step towards the grand reveal. |
Keep your forward speed steady, and let the fabric glide under the presser foot as you approach the finish line. It’s not just about how to end a stitch on a sewing machine; it’s about the journey your fabric takes under your careful guidance.
Whether you’re finishing with a straight stitch or a multiple zig zag stitch for seam finishes, remember that each stitch is a note in the symphony of your creation.
Finishing Up
To wrap up your sewing project on a machine with finesse, it’s crucial to secure those final stitches. Here’s the lowdown: as you near the end, about 3/4 inch from the fabric’s edge, hit the reverse button.
This is your cue to add 3-5 backstitches, a little backtrack to ensure your work doesn’t unravel at the seams. Then, switch back to your forward march, stitching over those backstitches for an extra layer of security.
It’s like double-knotting your shoelaces before a run; you’re making sure everything stays in place. Finally, snip the thread close to your last stitch, but not too close to the needle. You want to leave your machine ready for the next adventure. This method is your ticket to ending machine stitches that are as sturdy as they’re neat, ensuring your sewing projects stand the test of time and wear.
When it comes to materials, you’ll need the basics: thread, needle, fabric, scissors, and of course, your trusty sewing machine. Each plays a pivotal role in bringing your sewing projects to life, from the initial stitch to the final cut.
Locking Stitch
When it comes to finishing your sewing projects on a machine, understanding when and how to use a locking stitch is crucial.
A locking stitch, unlike a backstitch, creates small knots in the thread at the beginning and end of your seam, ensuring that your stitches won’t come undone with wear and tear.
This technique is particularly popular among quilters for its neat finish and the fact that it eliminates the need for backstitching, making your sewing projects look more professional and durable.
When to Use Locking Stitch
When it comes to ending your stitches with a sewing machine, the lock stitch is your secret weapon for certain fabrics and situations. Think of it as the silent guardian of your seams, especially when dealing with delicate or sheer materials where backstitching might as well scream I’m here! and ruin the drape.
Lock stitch alternatives offer a more discreet finish, ensuring the strength and durability of your seams without the bulk.
Lock stitch strength is particularly important when you’re working with fabrics that are prone to fraying. You wouldn’t want your masterpiece to unravel like a poorly kept secret, would you? That’s where techniques like overcasting stitch or a turned and stitched finish come into play, protecting those fabric raw edges like a knight in shining armor.
But let’s not forget the lock stitch comparison to its more visible counterpart, the backstitch. While backstitching is the go-to for most projects, lock stitch durability shines on fabrics that might pucker or pull with the extra thread tension.
And if you ever find yourself in a bind with a seam ripper in hand, remember that a lock stitch is less likely to leave you picking out threads from a frayed mess.
So, when should you call upon the lock stitch? Whenever you’re working with fabrics that demand a gentle touch and a finish as smooth as a compliment from a charming stranger. Whether it’s a sheer curtain whispering secrets to the wind or a flowing gown that dances around the room, the lock stitch ensures your seams stay put, invisible yet strong, like the foundations of a castle.
And for those times when you’re dealing with a fabric that’s as temperamental as a cat on a rainy day, the lock stitch is your best bet for a finish that’s both sturdy and subtle, like a whisper in a library.
Lock Stitch Vs. Backstitch Comparison
When comparing lock stitch and backstitch, it’s like choosing between a trusty Swiss Army knife and a specialized tool. Each has its place in your sewing toolkit. The lock stitch, your go-to for most tasks, is strong and versatile, perfect for keeping seams from unraveling without adding bulk.
It’s the unsung hero of the sewing world, working tirelessly behind the scenes to ensure your creations hold together. On the other hand, the backstitch is like that reliable friend who’s always there when you need extra support.
It’s your best bet for starting and ending seams with a bang, providing that extra bit of strength and security where it’s most needed.
While the lock stitch prides itself on being a jack-of-all-trades, offering a neat and secure finish with less thread and no puckering, the backstitch isn’t afraid to show off its strength, especially on those high-stress areas where unraveling simply isn’t an option.
However, the lock stitch mightn’t be the star of the show on lighter fabrics, where it can create additional holes and weaken the material.
So, when you’re at your sewing machine, pondering how to start a seam, remember: the choice between lock stitch and backstitch isn’t about which is better overall, but which is better for your specific project.
Whether you’re aiming for a sleek, unobtrusive finish or need that extra bit of grunt to keep everything in place, knowing when to employ each technique is key to mastering the art of sewing.
Backstitching Importance
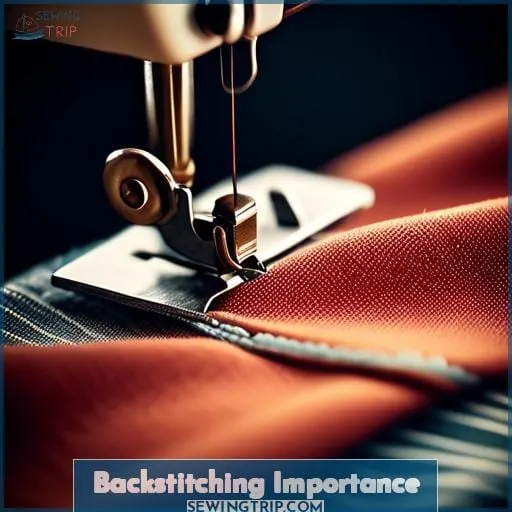
Securing the start and end of your seams is crucial to ensure your sewing projects last longer and look professional.
Backstitching is a simple yet effective technique that prevents your stitches from unraveling, acting as a safeguard for your hard work.
Whether you’re working on delicate fabrics or constructing garments that will endure frequent use, mastering backstitching on your sewing machine can make all the difference in the durability and finish of your sewing projects.
Securing Seam Starts and Ends
When transitioning from the nitty-gritty of lock stitch techniques to the broader canvas of securing seam starts and ends, it’s like moving from sketching outlines to painting the whole picture.
Think of your fabric as a canvas and your stitches as brush strokes that hold the masterpiece together. Seam strength isn’t just about avoiding the dreaded fabric unraveling; it’s about crafting a piece that stands the test of time.
A backstitch comparison to a lock stitch is akin to comparing a sturdy knot to a delicate tie – both have their place, but knowing when to use each is key.
To prevent unraveling, imagine your seam as the spine of a book, holding the pages together. Whether you opt for a zigzag stitch, overlock stitch, serpentine stitch, or double overedge stitch, each adds a unique texture and strength, much like the binding of a book.
And if you’re working on an exposed zipper, think of it as the grand entrance to your creation, requiring a secure and elegant finish.
So, grab your thread and needle, and let’s ensure those seams are as strong as they’re beautiful, turning potential unraveling into a mere myth.
Preventing Stitch Unraveling
To prevent your stitch from unraveling, backstitching is your knight in shining armor. It’s like the superhero of the sewing world, swooping in to save the day by locking those stitches in place. Imagine your seam as a row of dominos; without backstitching, one nudge and they all come tumbling down.
But with backstitch strength, your seam becomes a fortress, impervious to the wear and tear of daily life.
When you’re at the helm of your sewing machine, think of the backstitch as your anchor. It’s all about needle positioning and maintaining just the right fabric tension to ensure your stitch tension is on point.
Whether you’re hemming a skirt or attaching a button, the type of thread you choose can make or break your project. Opt for a strong thread that can handle the stress, especially if you’re working with a knit stitch that needs to stretch without snapping.
So, next time you’re finishing up a seam, remember that a little backstitching goes a long way. It’s the difference between a garment that stands the test of time and one that falls apart at the seams—literally.
Backstitching on Different Fabrics
When it comes to backstitching on different fabrics, you’ve got to be as adaptable as a chameleon.
Lightweight fabrics like chiffon can throw a tantrum with too much backstitching, puckering up like a prune.
On the flip side, heavy fabrics can take a backstitch like a champ, holding seams tighter than a miser’s purse strings.
Stretchy fabrics? They’re a whole different ball game. You’ll want to backstitch with the finesse of a cat burglar to avoid making holes in your jersey.
Decorative fabrics are like the divas of the textile world; they need a gentle touch, so consider a hand backstitch to avoid a scene.
And interfaced fabrics? They’re the sturdy backbone that can handle a backstitch without breaking a sweat.
Alternative Ending Methods
When finishing your sewing project on a machine, you’re not limited to just backstitching. You can also use a tack stitch to secure your threads in place, ensuring your work doesn’t unravel.
If you’re looking for a stronger hold, consider decreasing the stitch length; this makes the seam more robust.
For those who prefer a more hands-on approach, manual stitching techniques can provide a neat and secure finish without relying solely on your machine.
Stitching in Place: Tack Stitch
To end a stitch by hand, you should turn the material to the wrong side and leave about 6 inches of excess thread. Insert the needle under the nearest stitch and pull it through to form a 1-inch loop. Then, insert the needle through this loop and pull tight to create a knot. Repeat this knotting process for extra security.
When ending a stitch by machine, you should stitch until you’re 3/4 inch from the edge, press the reverse button, and sew 3-5 backstitches. After releasing the reverse button, stitch over the backstitches and then cut the thread near the last stitch.
The materials needed for these processes include thread, a needle, fabric, scissors, and a sewing machine. The contributors to these techniques include Andrea Beaulieu, a professional tailor and fashion designer.
For the subtopic of ‘Stitching in Place: Tack Stitch’ as part of the article ‘How to End a Stitch on Sewing Machine: Complete Guide & Tips’, it’s important to understand that a tack stitch is a temporary stitch used in various sewing projects.
Tack stitch uses range from holding fabric layers together before permanent stitching to transferring pattern markings onto the garment. Tack stitch applications are diverse, including securing linings, preparing patterns, and ensuring accurate placement of complicated additions like zippers.
There are several tack stitch variations, such as the bar tack stitch, which reinforces areas of garments under strain, and the tailor’s tack, which marks fabric without leaving a residue. When choosing the appropriate tack stitch needle size, consider the fabric and the project’s requirements to ensure the stitch is effective and easy to remove later.
Tack stitch comparison to other stitches highlights its temporary nature and ease of removal, making it an essential technique for achieving precision in sewing.
Tying Off Thread Ends
After mastering the tack stitch, it’s time to tie up loose ends—literally.
Tying thread ends is a gentle art, a manual stitch that’s like whispering a secret to your fabric. It’s the finishing touch, a discreet locking stitch that says, This is where we part ways. Whether you’re knotting for strength or crafting a finishing stitch that’s as neat as a pin, it’s the finesse in your fingers that makes all the difference.
So, go ahead, give your project that extra bit of love with a secure, tiny knot—it’s the cherry on top of your sewing sundae.
Decreasing Stitch Length for Strength
When you’re aiming for a seam that can take a beating, think short and sweet.
Short stitches are the unsung heroes of the sewing world, creating strong seams that laugh in the face of wear and tear.
Picture this: each tiny stitch is like a mini anchor, ensuring your seam stays put with enhanced durability and minimal fraying.
So, when you’re sewing that superhero cape or a pair of jeans that’ll climb mountains with you, dial down that stitch length.
Your secure stitches will hold fast, come what may.
Manual Stitching Techniques
When it comes to manual stitching techniques, you’re in for a real treat. It’s like having a secret weapon in your sewing arsenal.
- Thread Knotting: Start by tying a simple knot at the end of your thread for a no-slip grip.
- Loop Formation: After your last stitch, sneak the needle under it to create a loop.
- Needle Insertion: Dive your needle through the loop, but don’t rush—precision is key.
- Securing Seam: Gently pull the thread to tighten the knot against the fabric, securing your stitch.
- Repeat for Strength: For that belt-and-braces approach, repeat the knotting to ensure your seam’s as secure as a bank vault.
Preventing Unraveling
To ensure your sewing projects hold together and look professional, it’s crucial to prevent the ends of your seams from unraveling. Backstitching is your primary defense against this issue, as it reinforces the start and end of your seams by sewing backward and forward over the same stitches.
This simple technique not only secures your stitching but also enhances the overall integrity of your seams, making them more resilient to stress and wear.
Backstitching as a Primary Solution
Backstitching is your secret weapon against the dreaded seam split. It’s like the superhero of stitches, swooping in to save the day with its backstitching strength. Imagine you’re in a high-speed sewing showdown; backstitching speed is your trusty sidekick, ensuring your seams are locked down faster than a speeding bullet.
And let’s talk variety—backstitching types are the spice of your sewing life, adaptable to any backstitching fabric you throw at them. Whether you’re stitching forward or taking it back, backstitching direction has got your back, literally.
Here’s a quick table to keep these backstitching basics at your fingertips:
| Backstitching Benefit | Description |
|---|---|
| Strength | Acts like a fabric fortress, keeping seams from surrendering to stress. |
| Speed | Quick as a wink, it secures your stitches without breaking a sweat. |
| Versatility | A chameleon of stitches, it adapts to different fabrics and projects. |
Simple Backward and Forward Stitch Technique
To prevent your stitches from unraveling and to ensure your sewing projects look polished, mastering the simple backward and forward stitch technique is key.
- Begin at the seam’s end, and don’t rush—haste makes waste, and we’re not in the business of unraveling seams.
- Sew a few stitches forward, then pause. It’s like a dance step, forward and back, but with your sewing machine.
- Engage the reverse and take a few steps back. Think of it as reinforcing your path, like double-knotting your shoelaces.
- Sew forward again over the same stitches. It’s the encore that gives your seam the strength to withstand the tugs of life.
Seam Integrity Benefits
Given the importance of ending stitches properly, whether by hand or machine, it’s crucial to understand the benefits of securing seam starts and ends. This practice not only enhances the durability and longevity of your projects but also ensures stress resistance and seam integrity.
Let’s dive into the emotional and practical benefits of this essential sewing technique.
| Emotional Satisfaction | Practical Benefits |
|---|---|
| Sense of accomplishment | Increased seam strength |
| Pride in craftsmanship | Durability enhancement |
| Joy in mastering a skill | Stress resistance |
Securing your stitches means your creations withstand the test of time, turning every project into a potential heirloom. It’s not just about the stitches you make; it’s about the stories they’ll tell and the memories they’ll hold.
So, next time you’re at your sewing machine or stitching by hand, remember that with each backstitch or knot, you’re not just preventing unraveling; you’re weaving durability, strength, and a piece of your heart into your work.
Lock Stitch on Sewing Machine
When it comes to ending a stitch on a sewing machine, the lock stitch feature is a game-changer for ensuring your sewing projects have a professional and secure finish.
This method involves using the built-in lock stitch feature of your sewing machine or applying a manual lock stitch technique. Both approaches are designed to prevent the stitching from unraveling, providing a neat and durable end to your sewing work.
Whether you’re working on a quick repair or a detailed garment, mastering the lock stitch can significantly enhance the quality and longevity of your sewing projects.
Single Stitches at Fabric Start and End
To prevent your seams from unraveling and to ensure the longevity of your sewing projects, it’s crucial to secure the fabric start and fabric end. A locking stitch is your go-to method for this purpose. It’s a simple yet effective technique that can be manually executed on sewing machines without a built-in feature.
- Begin with a single stitch at the fabric start, ensuring it’s small and tight.
- Sew forward a few stitches, then reverse over them to lock the thread in place.
- At the fabric end, repeat the process to prevent the seam from coming undone.
- For manual stitch machines, adjust the stitch length to the shortest setting and sew a few stitches in place.
- Always remember, a well-secured stitch is the hallmark of a well-finished garment.
Using Built-in Lock Stitch Feature
After discussing the basics of starting a seam with single stitches, let’s delve into the built-in lock stitch feature on your sewing machine. This nifty function is a game-changer for achieving that lock stitch durability without the bulk of backstitching.
It’s like having a secret weapon for those delicate fabrics where backstitching could cramp their style. If your machine is one of the modern chariots of sewing, check the manual for the lock stitch vs backstitch specifics.
For those without this feature, don’t fret; the manual lock stitch method has got your back.
Here’s a quick comparison to help you decide when to use each technique:
| Lock Stitch Technique | Backstitch |
|---|---|
| Creates a secure end without bulk | Good for most fabrics and seams |
| Ideal for delicate or sheer fabrics | Can be visible and affect drape |
| May be built-in on newer machines | Easy to do on all sewing machines |
| Less likely to unravel than backstitch | Quick and straightforward method |
| Requires manual or machine setting | Can be done manually if needed |
Manual Lock Stitch Method
When it comes to ending your sewing projects with a flourish, mastering the manual lock stitch method is like putting the cherry on top of a sundae. It’s all about ensuring your creations don’t just look good but stay together, surviving the test of time and wear.
Whether you’re working with the whisper of silk or the stubbornness of denim, getting your thread tension just right is key. It’s like tuning a guitar; too tight and you risk a break, too loose and you lose the harmony of your stitch.
Choosing the right needle type isn’t just a suggestion, it’s a must. Think of it as selecting the right arrow from your quiver; you need the perfect match for your fabric choice to hit the bullseye. And speaking of fabric, it’s not just about what you like but what works best for the task at hand.
It’s a dance between needle, thread, and fabric, each step calculated to create the perfect seam.
So, as you guide your fabric under the presser foot, remember, it’s not just about making a stitch; it’s about making a stitch that lasts, locking each thread in place with precision and care. After all, sewing isn’t just a skill; it’s an art form, where every lock stitch you make is a stroke of your brush on the canvas of your creation.
Zigzag Stitch as Backstitch
When considering how to end a stitch on a sewing machine, the zigzag stitch can be a versatile alternative to the traditional backstitch.
You’ll find that using a zigzag for backstitching not only secures your stitches but also allows for stretch, which is particularly beneficial when working with stretchy fabrics.
This method distributes the strain across the seam, providing durability without compromising the fabric’s flexibility.
When to Use Zigzag for Backstitching
Transitioning from the lock stitch, let’s talk zigzag.
When to whip out the zigzag stitch for backstitching, you ask? Well, it’s like choosing the right spice for your stew – it’s all about the fabric’s flavor.
Zigzag is your go-to for stretchy fabrics, where a straight backstitch might wave the white flag and snap under pressure. It’s like giving your seams a yoga class, allowing them to bend and stretch without a thread out of place.
So, when your fabric has more moves than a bowl of jelly, zigzag through the backstitch and watch those stitches hold tight without cramping your style.
Advantages Over Traditional Backstitch
Using a zigzag stitch as a backstitch can be a game-changer for your sewing projects.
This stitch is a real multitasker, efficiently securing seams on a variety of fabric thicknesses. It’s like a trusty sidekick, ensuring your seams won’t wave the white flag and unravel under pressure.
Plus, it’s a time-saver, locking stitches in place with fewer passes than the traditional backstitch. So, when you’re looking to beef up your seams without bulking them up, the zigzag stitch is your go-to stitch for a clean, strong finish.
Stay Stitch and Backstitch
When it comes to sewing, understanding the purpose and application of stay stitching and backstitching is crucial for the integrity of your garment.
Stay stitching is a preventative measure applied to areas prone to stretching, like necklines or armholes, to maintain their shape during the construction process. It’s a single row of stitches that doesn’t require backstitching at the beginning or end because it’s not meant to bear any load but rather to stabilize the fabric.
On the other hand, backstitching is essential for securing the start and end points of a seam on your sewing machine, ensuring that your stitches don’t come undone under stress.
Both techniques are fundamental in garment construction, each serving a specific purpose to ensure the durability and professional finish of your project.
Definition and Purpose of Stay Stitch
Stay stitching might seem like a small step in the grand scheme of sewing, but it’s a game-changer for keeping your fabric in tip-top shape.
- Prevent Stretching: It’s like a secret agent working undercover to keep those curves and edges from going rogue. By sewing a simple line of stitches within the seam allowance, you’re ensuring that your fabric doesn’t stretch out of shape, especially in those sneaky bias-cut areas.
- Edge Finishing: Think of stay stitching as the unsung hero of fabric preparation. It’s your first line of defense in the battle against distortion, making sure your edges stay crisp and your seams line up perfectly.
- Fabric Preparation: Before you dive into the main event of sewing your pieces together, stay stitching lays the groundwork. It’s like stretching before a workout, preparing your fabric for the journey ahead without adding bulk or visibility to your finished garment.
Do You Backstitch a Stay Stitch?
When it comes to stay stitching, it’s like setting the stage for your fabric’s performance—no backstitching needed. This solo act is all about preventing those curves from doing the twist and shout during construction.
Think of it as the unsung hero that keeps everything in check without stealing the spotlight.
| Stay Stitch | Back Stitch |
|---|---|
| Prevents distortion | Secures seam ends |
| No backstitching | Involves reverse stitching |
| Used on single fabric layers | Used at start/end of seams |
| Essential for curves/bias | Locks stitches in place |
| Keeps fabric’s shape intact | Prevents unraveling |
General Stitching Tips
When it comes to ending a stitch on your sewing machine, it’s essential to adjust your stitch width and length to suit the fabric and project at hand.
If you’re joining two pieces of fabric, ensure they’re aligned correctly with the right sides facing each other before sewing.
Adjusting Stitch Width and Length
Adjusting your stitch width and length can be like tuning a guitar—get it just right, and you’ll hit the perfect note in your sewing symphony.
Think of stitch variation as your melody, where each adjustment can change the tune from a gentle hum to a bold chorus.
Dialing in the stitch width and length isn’t just about aesthetics; it’s about the strength of your seam and the fabric’s drape.
A tight zigzag can lock edges tighter than a bank vault, while a long, straight stitch might stride across your fabric like a giant, leaving bold lines in its wake.
So, grab a scrap, and let’s play with those settings—after all, practice makes perfect, and who doesn’t love a good excuse to fiddle with their machine?
Sewing Two Fabric Pieces Together
When sewing two fabric pieces together, it’s like piecing together the chapters of a story, where each stitch adds to the narrative.
- Right Sides Together: Always start with the right sides of your fabric facing each other. This ensures that when you turn your project right side out, the best part of your fabric is on display.
- Seam Allowance: Pay attention to the seam allowance, which is the fabric between the edge and the line you’re sewing. It’s like the margins in a book, giving your stitches room to breathe without fraying.
- Fabric Alignment: Keep your fabric edges aligned as you sew. It’s like aligning your thoughts before speaking, ensuring clarity and precision in the outcome.
- Seam Strength: Backstitch at the beginning and end of your seam to lock your stitches in place. Think of it as tying up loose ends in a story, giving it a strong, satisfying conclusion.
Practice Sewing for Skill Enhancement
To boost your sewing prowess, think of your machine as your dance partner in a tango of threads. Start with some practice patterns on scrap fabric, letting the rhythm of the needle guide you.
Use striped fabric as your metronome, keeping those stitches marching in a straight line. And don’t shy away from the twists and turns of shapes and curves; they’re the high notes in your sewing symphony.
Reader Interactions
Engaging with the sewing community and sharing tips and experiences can significantly enhance your sewing journey. Whether you’re a beginner or an experienced sewer, there’s always something new to learn or a piece of advice that can make your projects go smoother.
Don’t hesitate to ask questions, share your own tips, or discuss challenges you’ve faced; it’s through these interactions that we all grow and improve our skills.
Engaging With Sewing Community
Engaging with the sewing community is like finding your tribe in a fabric-filled wonderland. It’s where threading the needle takes on a whole new meaning, and where your passion for pattern drafting and fabric selection isn’t just understood—it’s celebrated.
Imagine diving into discussions about the quirkiest sewing machine maintenance hacks or swapping tales of triumph and tragedy over tricky seams. Online sewing tutorials become your Netflix, and community sewing groups your weekend hangout.
It’s a place where bobbin isn’t just a part of your sewing machine; it’s part of your vocabulary.
Whether you’re a novice trying to figure out the right stitch or an expert drafting patterns like a pro, there’s a spot for you. So, stitch your way into this vibrant tapestry of creators. After all, in the world of sewing, every thread counts, and every connection is a potential for a new creation.
Sharing Tips and Experiences
Engaging with the sewing community isn’t just about swapping patterns or troubleshooting machine mishaps; it’s about sharing those aha moments that transform a frustrating afternoon into a victory dance around your sewing table.
Whether you’re wrestling with ending stitches, battling fabric that just won’t stop unraveling, or diving deep into the importance of backstitching, remember, we’ve all been there.
By discussing alternative methods and celebrating the lock stitch benefits, we not only refine our craft but also weave a tapestry of collective wisdom. So, chuckle over your seam ripper mishaps and share your triumphs, because every stitch, whether straight or zigzagged, is a step towards mastery.
Frequently Asked Questions (FAQs)
Can I use a sewing machine to create a secure knot at the end of a seam without manually tying it?
Yes, you can create a secure knot at the end of a seam using a sewing machine by employing the backstitch or lock stitch method.
How do I prevent the thread from bunching up at the end of a seam when finishing a stitch on a sewing machine?
To prevent thread bunching at the end of a seam, ensure proper tension and hold thread tails when starting.
Clean and oil your machine regularly, and use quality thread to avoid lint buildup.
What should I do if my sewing machine does not have a reverse function to secure the end of a stitch?
If your sewing machine is a stubborn mule without a reverse gear, fear not! You’re about to become a sewing ninja with a trick up your sleeve.
Simply turn your fabric 180 degrees and sew a few stitches over the existing ones.
This maneuver might feel like you’re doing a little dance with your fabric, but it’s all in the name of unshakeable stitches.
Is it necessary to pull the threads to the back side of the fabric and tie them off when using certain types of decorative stitches?
Yes, when using decorative stitches, it’s often wise to pull threads to the back and tie them off.
It’s like securing your secrets behind a locked door—neat and unseen!
How can I ensure the tension is correct at the end of a seam to prevent the last stitches from being too loose or too tight?
To nail the tension at the end of a seam, it’s all about balance. Think of your top and bobbin threads as a dance duo; they’ve got to move in harmony.
Start by setting your tension dial around 5 for straight stitches, adjusting slightly for fabric type and stitch style. If your stitches are throwing a tantrum, showing loops or puckering, tweak the top tension bit by bit.
Conclusion
You’ve now armed yourself with the ultimate shield against the dreaded unraveling stitch. By mastering how to end a stitch on a sewing machine, you’re ensuring that every piece you create is a fortress of durability.
Whether you’re backstitching, lock stitching, or employing alternative methods, your projects will stand the test of time. Keep practicing these techniques to elevate your sewing prowess to new heights, and watch as your creations become the envy of the textile world.

