This site is supported by our readers. We may earn a commission, at no cost to you, if you purchase through links.
 Imagine you’re at the helm of a ship, navigating through the delicate fabrics of your sewing projects.
Just as a captain adjusts the sails to harness the wind, you’ll need to tweak the presser foot pressure on your Janome to master the art of smooth sailing across different textiles.
Whether you’re dealing with the stubbornness of denim or the delicacy of silk, getting the pressure just right can mean the difference between a project that’s shipshape and one that’s adrift.
Let’s dive into the mechanics of your Janome and chart a course for perfect presser foot pressure adjustment.
Yes, you can adjust the presser foot pressure on a Janome sewing machine, typically using a dial or lever for precise fabric handling.
Table Of Contents
Key Takeaways
- Locate the presser foot tension regulator on your Janome sewing machine, which could be a dial, lever, knob, pin, or screw, depending on the model.
- To adjust the pressure, turn the dial or knob towards the plus sign to increase pressure or towards the minus sign to decrease it. If your machine uses a pin or screw, pressing or turning it will adjust the pressure accordingly.
- Adjust the presser foot pressure based on the fabric you’re sewing. Lighter pressure is needed for heavy fabrics, while heavier pressure is required for lighter fabrics to ensure smooth feeding and optimal stitch quality.
- Regular maintenance and troubleshooting, including adjusting presser foot pressure, can enhance the sewing experience and prevent issues like fabric stretching, skipped stitches, or uneven feeding.
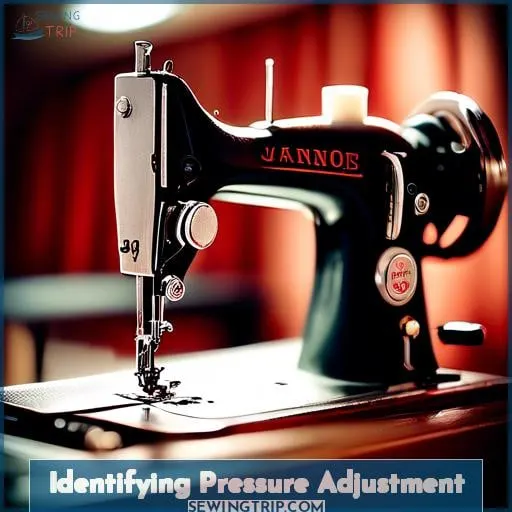
Identifying Pressure Adjustment
Identifying the correct way to adjust the presser foot pressure on your Janome sewing machine is crucial for achieving optimal sewing results.
The adjustment mechanism can vary by model, often involving a dial, lever, or button, and may even be electronically controlled on newer, computerized machines.
Knowing where to find and how to manipulate these controls allows you to tailor the machine’s performance to the specific needs of your project, ensuring fabric is fed through smoothly and stitches are even and consistent.
Dial Location
To adjust the presser foot pressure on your Janome sewing machine, locate the dial or lever that controls this setting. On some models, you’ll find a dial on the side or top of the machine with a graduating scale, while others may have a button or lever inside the door covering the take-up mechanism.
Computerized machines often feature electronic adjustment options. It’s important to adjust the pressure settings according to the fabric you’re working with to ensure compatibility and prevent issues such as fabric slipping or the presser foot holding the fabric too tightly.
Regular maintenance and troubleshooting tips can help keep your sewing machine in optimal condition. If your machine lacks an adjustable presser foot pressure, consider using alternative feet like the Even Feed Foot for better fabric handling, especially when working with stretchy or thick fabrics.
Lever and Button Identification
To adjust the presser foot pressure on your Janome sewing machine, you’ll need to identify the correct mechanism, which can vary depending on the model.
- Dial Location: On some Janome machines, you’ll find a dial either on the side or top of the machine. This dial usually has a scale indicating the pressure levels.
- Lever Identification: In other models, there might be a lever inside a door that covers the take-up mechanism. This lever adjusts the presser foot pressure.
- Button Identification: Some computerized Janome machines have a button specifically for pressure adjustment, often located on the top left side of the machine.
- Electronic Adjustment: Higher-end models may feature electronic presser foot pressure adjustment, which is controlled through the machine’s interface.
When you notice issues such as fabric slipping or the presser foot holding the fabric too tightly, it’s time to adjust the pressure. For light fabrics, a higher pressure setting is recommended, while heavy fabrics require a lower setting.
If your machine doesn’t have an adjustable presser foot pressure, consider using a walking foot or other specialized feet to help manage different fabric types.
Electronic Adjustment
On Janome computerized machines, electronic adjustment of presser foot pressure is a feature that enhances your sewing experience, especially when working with stretchy fabrics. This setting allows you to fine-tune the pressure exerted by the presser foot, ensuring smooth fabric feed and consistent stitch quality.
To adjust, simply select the desired pressure level on the machine’s interface. This capability is particularly useful for achieving precise stitch settings on various fabric types, from light to heavy, without manual intervention.
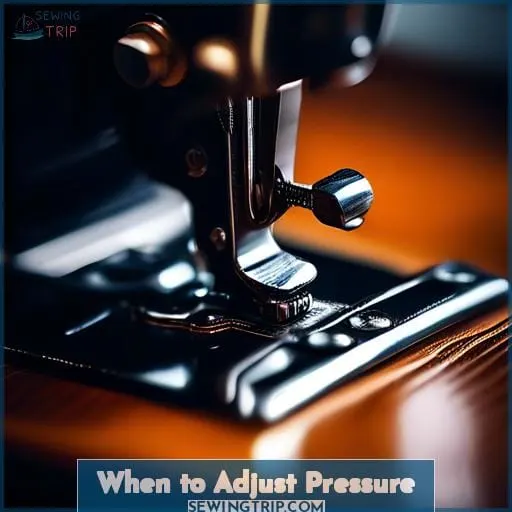
When to Adjust Pressure
When adjusting the presser foot pressure on your Janome sewing machine, it’s crucial to recognize the signs that indicate a need for adjustment.
If you notice that the top layer of fabric is stretching or the stitches are becoming smaller, it might be time to reduce the pressure.
Conversely, if the fabric isn’t feeding smoothly or stitches are skipping, increasing the pressure could resolve these issues.
This adjustment ensures your machine handles a wide range of fabric types effectively, enhancing your sewing experience by preventing common issues like uneven stitch length and fabric puckering.
Symptoms of Too Much Pressure
When using your Janome sewing machine, it’s crucial to adjust the presser foot pressure to ensure smooth fabric feeding and optimal stitch quality. If you’re experiencing issues like needle jamming, thread breaking, uneven stitches, fabric puckering, or skipped stitching, especially with knit fabrics, it may be a sign that the presser foot pressure is too high.
- Needle Jamming: If the needle frequently gets stuck or breaks, the pressure may be excessive.
- Thread Breaking: Constant breaking threads can indicate that the foot is pressing down too hard.
- Uneven Stitches: When the top layer of fabric stretches and results in uneven stitch lengths, consider reducing the pressure.
- Fabric Puckering: If the fabric gathers or puckers as you sew, the foot pressure might need adjustment.
For sewing knit fabrics, using the correct tools like stretch needles or ballpoint needles can prevent skipped stitches and ensure the fabric is handled gently. If your machine lacks a pressure adjustment feature, consider using a walking foot to help manage wavy knit issues.
Remember, adjusting the presser foot pressure can enhance your machine’s capabilities and improve your sewing accuracy.
Symptoms of Not Enough Pressure
If you’re experiencing skipped stitches, fabric slippage, puckering, or wavy seams on your Janome sewing machine, it’s likely due to incorrect presser foot pressure. When the pressure is too light, the fabric may not feed properly, leading to these issues.
To resolve this, you’ll want to know how to adjust presser foot pressure on your Janome. For models without an adjustable pressure knob or dial, such as the Janome MyExcel 4014, you can loosen a bolt to move a slider and lessen the spring pressure.
If your machine allows for it, adjusting the pressure is typically done via a dial, lever, or electronic setting.
For those with automatic foot pressure adjustment, like the Janome HMC15000QM or MC15000, built-in sensors will handle this for you. If you’re unable to adjust the pressure, consider using a walking foot to help manage fabric movement.
Benefits of Proper Adjustment
Adjusting the presser foot pressure on your Janome sewing machine is a crucial step for achieving optimal sewing results across a variety of fabric types. Proper adjustment can lead to improved accuracy in your sewing projects, enhance the capabilities of your machine, and minimize changes to stitch length that can occur when the fabric isn’t fed through the machine evenly.
Whether you’re working with light, delicate fabrics that require a lighter presser foot pressure or thick, heavy materials that need more pressure to feed through smoothly, understanding how to adjust this setting on your Janome machine can significantly impact the quality of your sewing.
Improved Accuracy
Properly adjusting the presser foot pressure on your Janome sewing machine can significantly improve your sewing experience, especially when working with a variety of fabrics and projects.
- Fabric Handling: Adjusting the pressure ensures smooth fabric handling, preventing the fabric from slipping or puckering.
- Even Feeding: The right pressure setting allows for even feeding of the fabric, which is crucial for maintaining consistent stitch quality.
- Parallel Stitching: For quilting projects or decorative topstitching, maintaining parallel stitching lines is easier with correctly adjusted foot pressure, especially on slippery materials.
By fine-tuning the presser foot pressure, you’ll be able to handle light fabrics with a zigzag stitch, medium fabrics with a triple straight stitch, and heavy fabrics with a three-step zigzag or lightning stitch, all while ensuring the fabric moves smoothly under the foot.
Enhanced Capabilities
Properly adjusting the presser foot pressure on your Janome sewing machine can significantly enhance its performance. By fine-tuning this setting, you’ll experience improved functionality, allowing your machine to handle a wider variety of fabrics with ease.
Increased versatility means you can confidently tackle projects that involve multiple layers or delicate materials like tissue paper without the fear of puckering or slipping. The expanded sewing options also mean that your machine can seamlessly integrate with different sewing techniques, whether you’re quilting, topstitching, or working with stretchy fabrics.
Here’s a quick reference table to guide you through the benefits of proper presser foot pressure adjustment:
| Benefit | Description | Impact on Sewing |
|---|---|---|
| Enhanced Performance | Adjusting pressure ensures optimal fabric feed. | Smoother stitches and fabric handling. |
| Improved Functionality | The machine can handle a variety of fabric weights. | Less manual intervention required. |
| Expanded Sewing Options | Enables sewing on delicate and heavy fabrics. | Broadens the range of possible projects. |
| Increased Versatility | Adapts to different sewing techniques and materials. | Greater creative freedom and precision. |
Minimized Stitch Changes
When you’re sewing with your Janome machine, proper presser foot pressure is key to achieving even stitching and preventing fabric puckering or slipping.
- Adjust pressure settings according to fabric thickness; thicker fabrics generally require less pressure.
- Aim for even stitching by increasing pressure if the fabric slips or decreasing it if the fabric is held too tightly.
- Select the appropriate stitch length and needle size for your fabric to prevent skipped stitches or thread breakage.
- Remember, consistent pressure helps maintain uniform stitch length across different fabric types.
By fine-tuning the presser foot pressure, you’ll enhance your machine’s performance and your sewing projects’ quality.
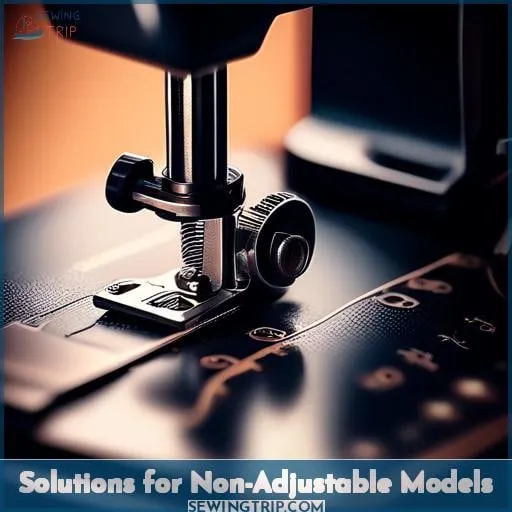
Solutions for Non-Adjustable Models
For Janome sewing machine users with models that lack an adjustable presser foot pressure feature, like the Janome MyExcel 4014, there are still effective ways to manage fabric handling during sewing.
If you’re facing issues with fabric slipping or ruffling, especially with knits, consider using alternative presser feet designed for specific tasks.
For instance, the Even Feed Foot (Walking Foot) can significantly improve fabric feed, making it ideal for sewing slippery or thick fabrics, while a 1/4 inch Quilting Foot with a guide can help achieve precise seams, especially in quilting projects.
Alternative Feet Options
If your Janome lacks a pressure adjustment feature, don’t fret. Opt for a Walking Foot or an Even Feed Foot to tackle uneven fabric layers with ease.
For slick materials, the Ultra Glide Foot is your go-to. Remember, adjusting stitch length can also help manage thick fabrics.
These tools empower you to master any sewing challenge, ensuring smooth, precise results every time.
Vintage Machine Considerations
Adjusting the presser foot pressure on your sewing machine is crucial for achieving optimal sewing results, especially when working with different types of fabrics. For those using vintage or older model sewing machines, understanding how to manage presser foot pressure can be particularly important due to the lack of modern automatic adjustment features.
Vintage sewing machines often come equipped with manual adjustable pressure knobs or dials, allowing users to modify the presser foot pressure according to the fabric’s thickness and type. These adjustments are essential for preventing issues such as fabric slipping or puckering, ensuring smooth fabric feed and consistent stitch quality.
Older sewing machine models that feature adjustable pressure knobs are readily available and can often be found at a relatively low cost. This availability makes them an attractive option for sewers looking for a budget-friendly machine capable of handling a wide range of sewing tasks.
Adjusting the presser foot pressure on vintage machines may require a certain level of mechanical skill, as it involves manually turning knobs or dials to achieve the desired pressure setting. Users should familiarize themselves with their specific machine’s mechanism to make accurate adjustments and avoid potential damage to the machine.
In summary, vintage sewing machines with adjustable pressure knobs offer a practical and inexpensive solution for managing fabric feed during sewing projects. However, users should possess or be willing to develop the mechanical skills necessary to make these adjustments effectively.
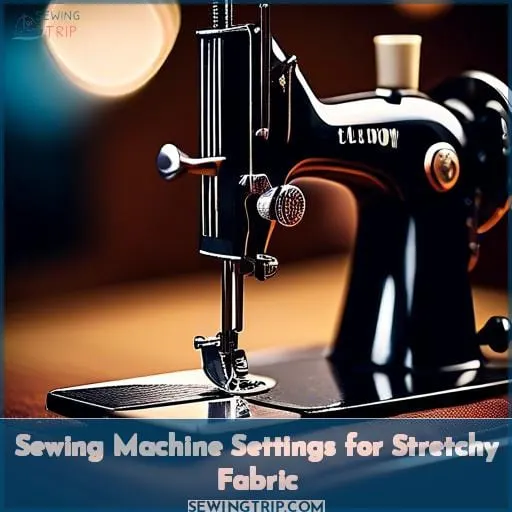
Sewing Machine Settings for Stretchy Fabric
When working with stretchy fabrics on your Janome sewing machine, it’s crucial to select the right stitch settings to ensure smooth and even stitching.
For stretchy materials, consider using a zigzag stitch, triple straight stitch, or a lightning stitch. These stitches allow the fabric to stretch after sewing, preventing the seams from breaking when the fabric is stretched.
Adjusting the presser foot pressure may also be necessary to accommodate the fabric’s elasticity and thickness, ensuring the fabric feeds through the machine evenly without puckering or stretching out of shape.
Zigzag Stitch
Adjusting the presser foot pressure on your Janome sewing machine is crucial for achieving the perfect stitch, especially when working with stretchy fabrics. If you’re facing issues like fabric puckering, needle breakage, stitch skipping, or wavy stitches, it’s time to fine-tune your machine settings.
- Choose the Right Zigzag Setting: Set your zigzag stitch to a width of 6 and a length of 1.5 for a dense seam that mimics serged edges, ideal for stretchy fabrics.
- Adjust Presser Foot Pressure: Lighten the presser foot pressure to prevent stretching the fabric. Experiment on scraps to find the perfect balance.
- Select the Appropriate Needle: Use ballpoint or stretch needles for moderately to highly stretchy fabrics, ensuring smooth fabric feed and stitch formation.
- Monitor Fabric Feeding: Ensure the fabric moves smoothly under the foot without stretching, adjusting the presser foot pressure as needed to avoid puckering or wavy seams.
By carefully adjusting your Janome’s settings and following these guidelines, you can master sewing stretchy fabrics, ensuring your projects look professional and polished.
Triple Straight Stitch
When sewing stretchy fabrics with your Janome sewing machine, it’s crucial to adjust the presser foot pressure and select the appropriate stitch to prevent ruffling and ensure a strong seam.
For the triple straight stitch, also known as the stretch stitch, the needle locks three times per stitch, making it robust and stretch-resistant, perfect for athletic wear and medium to heavyweight stretch fabrics.
Adjust the needle tension and stitch width to suit the fabric’s stretchiness and avoid seam waviness or breakage. If your machine lacks an adjustable presser foot pressure, consider using a walking foot to evenly feed the fabric through the machine.
Lightning Stitch
When sewing stretchy fabrics, it’s crucial to select the right stitch to accommodate the fabric’s elasticity. The lightning stitch is an excellent choice for this purpose. It’s designed to stretch with the fabric, preventing the seams from popping when the material is stretched.
- Stitch Length: A longer stitch length can help prevent the fabric from bunching up and can accommodate the stretch of the fabric.
- Needle Choice: Use a ballpoint or stretch needle to avoid damaging the knit fabric. These needles have a rounded tip that slides between the fibers rather than piercing them.
- Fabric Type: Adjust your sewing approach based on the weight and stretch of the fabric. For example, lighter fabrics may require a different tension or pressure setting than heavier knits.
- Tension: The tension on your machine may need to be reduced when working with stretchy fabrics to prevent puckering or stretching out of shape.
- Presser Foot Pressure: If your machine allows for the adjustment of presser foot pressure, lowering it can help feed the fabric smoothly without stretching it out.
Remember to test your settings on scrap fabric before sewing your project to ensure the best outcome.
Frequently Asked Questions (FAQs)
Can adjusting the presser foot pressure affect the machine’s ability to sew very thin or delicate fabrics without causing damage?
Yes, adjusting the presser foot pressure can significantly impact your ability to sew very thin or delicate fabrics without causing damage.
By fine-tuning the pressure, you ensure the fabric is held securely yet gently, preventing it from being pulled or torn during sewing.
Is there a specific method to determine the optimal presser foot pressure for sewing multiple layers of fabric, such as when quilting?
Imagine you’re quilting a cozy blanket for a chilly winter evening.
To ensure the layers glide smoothly without shifting, start by testing on scrap fabric. Adjust the presser foot pressure until the fabric feeds evenly, without puckering or dragging.
This trial-and-error method ensures precision and control, turning your quilting project into a masterpiece.
How does changing the presser foot pressure impact the performance of decorative stitches or embroidery on a Janome sewing machine?
Adjusting presser foot pressure on your Janome enhances decorative stitches and embroidery by ensuring even fabric feed.
For machines without a visible presser foot pressure adjustment, are there any internal adjustments that can be made by a technician to improve fabric handling?
For machines like a ship without a rudder, lacking a visible presser foot pressure adjustment, a skilled technician can dive into the machine’s heart.
They can tweak internal mechanisms, ensuring your fabric sails smoothly under the needle, mastering the sea of stitches with precision and control.
Does adjusting the presser foot pressure have any effect on the tension of the thread, and if so, how should both be balanced for optimal sewing results?
Adjusting the presser foot pressure doesn’t directly affect thread tension, but it influences fabric feed, which can impact stitch quality.
You’ll need to balance both for smooth sewing.
If fabric puckers or stitches are uneven, tweak the presser foot pressure first, then adjust thread tension as needed for perfect stitches.
Conclusion
Smooth seas never made a skilled sailor, and the same goes for sewing.
By mastering how to adjust presser foot pressure on your Janome, you’ll navigate through any textile with ease.
So take the helm, make those adjustments, and watch as your projects glide under the needle, as perfect as a calm sea.

