This site is supported by our readers. We may earn a commission, at no cost to you, if you purchase through links.
 If your hem keeps rolling up, don’t sweat it—fixing it is easier than you’d think.
Start by pressing the hem with a steam iron to flatten it out; sometimes, fabric just needs a little discipline!
For a quick, no-sew solution, use double-sided fabric tape or fusible web.
Want something permanent? Try sewing a new hem using a zigzag stitch for stretchy fabrics or a topstitch for sturdier ones.
Adding interfacing or a serged edge can also keep your hem in line. The key is stabilizing the fabric, so it behaves.
Ready for stitch-by-stitch control? Stick around for expert tips!
Table Of Contents
Key Takeaways
- Press the hem with a steam iron to flatten it and stop rolling quickly.
- Use fusible interfacing or fabric tape to stabilize hems without sewing.
- Adjust stitch tension, stitch type, and seam allowance for permanent fixes based on fabric type.
- Proper washing, gentle drying, and regular touch-ups keep hems flat and prevent future rolling.
Common Causes of Rolling Hems
If your hem won’t stay flat, it’s often because of things like stretchy fabric, bad stitching, or tight seam allowances.
Smooth, flat hems start with choosing the right fabric and mastering your stitching—it’s all in the details!
Even everyday wear and washing can leave your hems curling up, which can be frustrating but fixable.
Fabric Type and Weight
The fabric you choose can make or break your hem’s behavior.
Rolling hems often depend on specifics like weight and weave.
Here’s what to watch:
- Fabric type: Cotton curls more than polyester or tighter weaves.
- Weight impact: Thinner materials are notorious for rolling.
- Knit vs. woven: Knit fabrics naturally curl, while woven ones behave better.
- Fiber content: Stretchy blends can amplify the issue.
- Drape quality: Flowing fabrics tend to buckle.
Understanding these factors helps you prevent the dreaded curling.
For extra stability, consider serging knit fabric.
Improper Hemming Techniques
If you rush hemming, you’re inviting trouble.
Uneven folding, poorly measured seam allowance, and skipped pins lead to messy results.
Pair that with the wrong thread or needle size, and stitching distortion is inevitable.
Slow down, use proper tools, and focus on consistent folds and tension.
Precision and patience stop improper hemming and help your hems stay flat.
Uneven Tension in Stitching
Those pesky rolling hems could be caused by uneven tension during stitching, which throws your seams off balance.
Check your sewing machine settings—it’s likely a tension troubleshooting issue.
Adjust stitch length, machine calibration, or thread compatibility to fix it.
- Inspect your fabric feed for consistent movement.
- Test tension adjustment on scrap fabric.
- Use stitch regulation techniques for stability.
Incorrect Seam Allowance
Incorrect seam allowance is often the root cause of hem rolling.
A consistent allowance is key—measuring mistakes lead to improper hemming. Use a seam allowance guide, double-check your work, and correct errors before sewing. Precision matters to avoid uneven tension.
| Common Mistake | Impact | Solution |
|---|---|---|
| Measuring too short | Hem rolls up | Re-measure, adjust allowance |
| Uneven folding | Fabric distortion | Double-check folds |
| Ignoring guidance | Rolling seams | Follow seam rules |
| Skipping measurements | Improper layout | Always measure carefully |
| Overstretching fabric | Instability | Avoid over-pulling |
Wearing and Washing Effects
Wearing and washing can stress hems, leading to fabric pilling, garment shrinkage, and fiber breakdown.
Stress from washing and wearing can weaken fabrics, causing hems to curl, shrink, or pill over time.
Poor washing techniques or high water temperatures weaken fibers, causing hem creasing and curling.
Use gentle laundry detergent, wash inside out, and avoid over-drying or overcrowding your dryer.
A smart laundry routine—and a little ironing—keeps hems smooth, saving you frustration later.
Preparing Your Garment for Hem Repair
Before fixing a rolling hem, you’ll want to prepare your garment carefully to get the best results.
From flipping it inside out to cleaning up the edges, these simple steps will save you time and frustration later.
Turning The Garment Inside Out
To start taming that unruly hem, flip your garment inside out.
This simple step gives you Seam Access for a thorough Hem Inspection and Repair Preparation.
It’s easier to handle the wrong side and focus on the rolled hem fix. A significant step involves using tailor’s chalk to mark adjustments.
- Check seams for snug stitching.
- Remove loose threads.
- Look for uneven folds.
- Smooth wrinkles thoroughly.
- Inspect for stubborn puckering.
Measuring and Marking The Hem
To guarantee hemline precision, grab a trusty ruler and marking tools, like chalk or a fabric pen.
Measure the seam allowance precisely, noting the desired hem width.
Mark evenly around the garment for consistent measurements.
Folding accuracy is key here—align your marks carefully as you fold.
Taking your time now guarantees a neat hem later, no guesswork needed!
Removing Existing Stitches
Removing existing stitches is easier with the right tools.
Use a sharp seam ripper—basic or ergonomic—to gently cut threads on the underside of the hem.
Take your time loosening threads, especially on delicate fabrics, to prevent fabric damage.
A quality seam ripper makes this task easier.
Gently tease out the stitches without tugging too hard.
Save removed threads for matching repairs, giving your hem a fresh, damage-free start.
Cleaning and Pressing The Hem Area
Once the old stitches are gone, it’s time to clean and smooth things out.
Use a fabric cleaner for stain removal, then press the hem with a warm iron.
Check the iron temperature to match your fabric.
Wrinkles? Lay a pressing cloth over the area to avoid damage.
Steaming techniques help relax stubborn creases, ensuring perfection.
Choosing Appropriate Interfacing
Choosing the right interfacing is key to a smooth hem.
Match the interfacing weight to your fabric—use lightweight fusible interfacing for delicate materials, or heavier options for sturdy fabrics.
Knit interfacing works well for stretchy fabrics, while woven interfacing suits structured ones.
For best results with stretchy materials, consider using interfacing specifically for knits.
Don’t forget color matching for seamless results. Proper interfacing selection guarantees your hem stays neat and curl-free.
Techniques to Prevent Hem Rolling
You can stop your hems from curling with a few simple, effective techniques.
Whether it’s stabilizing the fabric or tweaking your stitching, these methods keep your hems smooth and frustration-free.
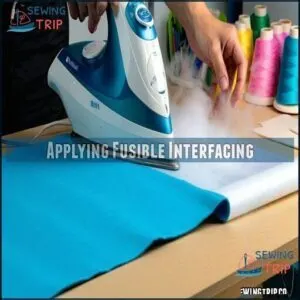
Applying Fusible Interfacing
Fusible interfacing is your secret weapon against hem rolling.
Pick the right interfacing weight for your fabric type—light for delicate fabrics, heavier for sturdy ones.
Cut a strip twice the hem height, then fuse it to the wrong side following heat settings on the package.
Smooth it carefully to prevent bubbles, and watch your hem stay perfectly flat!
Using Paper-Release Fusible Web Tape
To tackle hem rolling, try paper-release fusible web tape—a real lifesaver for hem stabilization.
Position the tape under the edge, ensuring fabric compatibility, then press with heat activation for a secure hold.
After cooling, peel off the paper and press again for a clean, smooth finish.
This temporary adhesion method stops curls fast, like a superhero sidekick for fabrics!
You can find various tape products online.
Serging Raw Edges
When battling hem rolling, serging raw edges is your go-to solution.
Use a serger with matching thread and try a three-thread overlock stitch for clean, flexible seams.
Adjust differential feed for serging knit hems or prevent puckering.
Explore decorative serging for stylish edges.
This versatile technique doubles as both a hem rolling solution and a fraying prevention method!
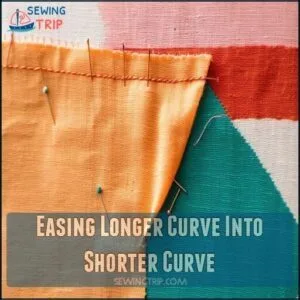
Easing Longer Curve Into Shorter Curve
Easing the longer curve into the shorter one isn’t rocket science, but it does take patience.
Start with hem curve alignment, focusing on gradual fabric manipulation to match the curve length ratio.
Use pinning techniques for precision, placing pins every inch or two. Maintain even tension distribution as you work to avoid puckering.
With careful seam allowance adjustments and curve-matching, you’ll create a smooth, roll-free hem that stays exactly where it belongs. Use pinning techniques for precision. Complete concepts into separate lines.
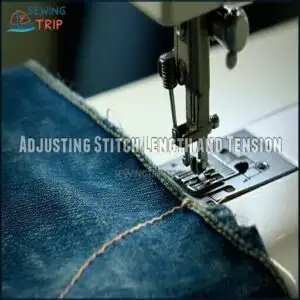
Adjusting Stitch Length and Tension
Dial in your sewing machine for perfect hems! Small tweaks, like adjusting stitch length and tension, can save the day.
Here’s a breakdown:
- Optimal Stitch Length: Short for light fabrics, longer for heavy ones.
- Tension Troubleshooting: Avoid puckering with mid-range settings.
- Fabric Compatibility: Match tension to fabric type.
- Stretch Fabric Adjustment: Use zigzag stitches.
- Needle Size & Thread Type: Pick fabric-specific tools.
Sewing Methods for Stable Hems
When your hem keeps rolling up no matter what you try, sewing techniques can provide a lasting fix.
With a few simple stitches and the right tools, you can stabilize the hem and keep your clothes looking polished.
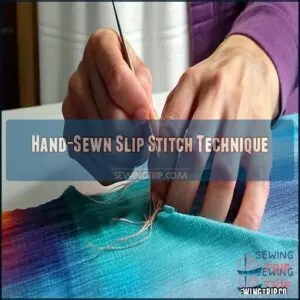
Hand-Sewn Slip Stitch Technique
Say goodbye to hem rolling by mastering the handsewn slip stitch—a go-to for tailoring applications.
This technique lets you secure hems with nearly invisible stitches, giving your project a professional finish.
Use a sharp needle and matching thread, taking small, angled stitches to fix a skirt hem or stop hem curling.
The stitch creates an invisible hem, resulting in a professional finish.
It’s simple, effective, and makes certain your hem stays flat.
Machine Blind Hem Stitch
A machine blind hem stitch is a lifesaver for tackling hem rolling—especially on knit fabric hems.
Equip your sewing machine with a blind hem foot and follow the stitch foot guide closely.
Use tension adjustment tips to match your fabric type, select the right needle, and handle curved hemming with care.
Finish by pressing and steaming for a polished, professional look.
Double-Folded Hem With Topstitching
A double-folded hem with topstitching is your go-to for a polished look and durability enhancement.
Simply fold the hem twice, press it flat, and topstitch securely in place.
Use a sharp needle, adjust stitch length for added detail, and press while working.
This creates a professional finish and stops hem rolling.
It’s an easy way to guarantee a secure finish!
Zigzag Stitch for Stretch Fabrics
To prevent hem rolling in stretchy or knit fabrics, the zigzag stitch is your go-to. It’s flexible and moves with your fabric.
Here’s how to get it right:
- Adjust Stitch Width and Stitch Length for your fabric type.
- Optimize Tension Settings to prevent bunching.
- Use a stretch needle for smooth results.
- Assure correct Fabric Feed.
- Test on scraps before hemming!
Decorative Edge Stitching
Tired of battling hem edge curling? Decorative edge stitching is both practical and stylish! It adds flair while fixing a rolled hem problem.
Experiment with Thread Selection, Stitch Patterns, and Embellishment Options to stabilize and beautify your hem.
- Blanket Stitch: Perfect for thicker fabrics, offering stability and charm.
- Scallop Stitch: Adds weight with a curvy, playful finish.
- Ribbon Edge: Sew in ribbon for elegance and extra support.
- Color Contrasts: Bright threads bring personality while solving hem rolling.
Transform functional hems into polished statements!
Maintaining and Caring for Fixed Hems
Taking care of your fixed hems keeps them looking neat and prevents future curling headaches.
With the right washing, steaming, and storage habits, you can extend the life of your hard work and keep your clothes in great shape.
Proper Washing and Drying Techniques
A great laundry routine keeps your fixed hems flawless.
Start by checking care label instructions—they’re like cheat sheets for washing and drying success. Hand washing benefits delicates, as it’s gentler on fibers.
For fabrics like wool, flat drying methods work best on a towel to preserve shape. Avoid over-drying in the dryer; high heat can shrink and stress hems.
Use clothespins to secure hems while air drying. Opt for the right dryer settings—low heat for wool or synthetics, medium for cotton—and skip overdrying.
Treat your hems kindly, and they’ll repay you with long-lasting perfection. To keep colors bright, consider using color safe detergents.
Regular Pressing and Steaming
When pressing and steaming your hems, ironing temperatures are key.
Choose the right heat setting based on your fabric considerations—too hot, and you risk scorching. Use steaming techniques for stubborn creases, but avoid overdoing it on delicate fabrics.
A pressing board can provide a solid surface, while maintaining your equipment guarantees consistent performance.
Hem maintenance, like ironing and steam, keeps hems crisp, preventing future hem flipping and keeping your garments looking polished! Choose the right heat.
Avoiding Excessive Wear on Hem Areas
Keeping your hems intact means handling clothes thoughtfully.
Fabric wear happens fast if you’re not careful, but small shifts help a lot:
- Over-drying Avoidance: Skip high-heat cycles; they weaken fibers.
- Overcrowding Prevention: Give your closet breathing room—no crammed hangers!
- Stress Reduction: Dry with hangers instead of tumbling clothes in a dryer.
- Creasing Prevention: Smooth wrinkles gently; use a fabric shaver for frays.
Gentle handling stops hem rolling and keeps fabrics polished.
Periodic Inspection and Touch-Ups
Don’t let small issues snowball—early issue detection is the secret to hassle-free hem care.
Periodic inspection of hem areas can catch wear or loose stitches early.
Use this quick checklist for touchups:
| Task | Action | Frequency | Tools Needed |
|---|---|---|---|
| Wear Assessment | Check for thinning fabric | Monthly | Fingers/Eyes |
| Seam Reinforcement | Tighten weak seams | As needed | Needle/Thread |
| Stitch Integrity | Inspect for loose threads | Weekly | Scissors |
| Preventative Maintenance | Press and reset fabric folds | Bi-Monthly | Iron/Towel |
A little hem repair now saves big headaches later!
Storage Tips to Prevent Rolling
How can you store garments to prevent hems from rolling? It’s simpler than you think!
Proper storage does the trick:
- Use padded hangers to maintain shape and prevent creasing.
- Store items in breathable containers to avoid moisture buildup.
- Opt for flat storage when possible to avoid pressure on the hemline.
- Cushion folds with acid-free tissue paper to protect delicate fabrics.
- Avoid overcrowding your closet to maintain hem shape and prevent crushing.
Frequently Asked Questions (FAQs)
Can you fix curled hems?
Yes, you can!
Use fusible interfacing for stability, re-fold and press the hem, then stitch with proper tension.
For knits, try ribbing or double stitching.
A small crochet edge can also stop curling.
How do you stop a hem from Rolling?
Think of your hem like a stubborn friend—it just needs gentle guidance.
Use fusible interfacing for structure, press with steam for flatness, or stitch a folded hem.
Slight tension tweaks stop rolling in its tracks!
How do you fix a hem on a knit fabric?
Turn the fabric inside out, remove old stitches with a seam ripper, and iron the hem flat.
Use fusible interfacing for stability, re-fold the hem, and sew with a zigzag or double stitching.
How do you fix a shirt Hem flipping up?
Shirt hems flipping up?
It’s like they’ve got a mind of their own.
Fix it by ironing with fusible web tape, double-folding the hem, and topstitching.
For knits, a zigzag stitch works wonders!
Do hems roll?
Hems can roll due to fabric type, improper stitching, or frequent washing.
Lightweight fabrics like cotton or knitted stockinette are more prone.
Uneven tension, poor seam allowances, or natural fabric behavior often cause this issue.
Why do my hems roll up?
Your hems roll up because of uneven stitching tension, improper fabric choice, or natural tendencies like knit fabrics curling.
Washing, wearing, or incorrect hemming techniques add stress, causing rolling.
It’s fabric physics, not your fault!
How do you fix a hem that flips up?
Flip that hem by ironing it flat with steam, then sew it using a double-fold method for stability.
Add fusible interfacing or a crochet edge for extra hold.
Test your stitch tension to avoid wobble!
Why does my shirt hem flip up?
It flips because fabrics like cotton stretch, shrink, or distort after washing.
Uneven tension during sewing or insufficient seam allowance also contributes.
Toss in washing wear and tear, and it’s a recipe for flipping hems!
How do you fix a hanging hem?
A hanging hem is like a rebel without a cause.
Turn the garment inside out, measure and pin the hem evenly, press it flat, and sew it securely using matching thread.
Don’t skip ironing!
How to stop clothes from rolling up?
To stop clothes from rolling up, try ironing the hem with a light starch.
You can also sew a double-folded hem or add fusible interfacing for extra stability.
Proper washing prevents future rolling, too! Proper washing prevents future rolling, too!
Conclusion
Fixing a hem that rolls up is simple when you know the tricks.
Press the fabric, stabilize it with interfacing or fusible web, and adjust your stitching technique for smooth results.
Whether you’re sewing by hand or machine, choose the right method for your fabric type.
Don’t forget to clean and press the hem for a flawless finish.
With proper care, like gentle washing and steaming, your hem will stay neat and secure—no more annoying curls!


