This site is supported by our readers. We may earn a commission, at no cost to you, if you purchase through links.
 To fix a sewing machine tension knob, first identify the issue. Does the top thread show on the fabric’s underside? Are stitches unbalanced? If so, locate the tension dial. Turn it right (clockwise) to increase tension or left (counterclockwise) to decrease it.
Test on scrap fabric till balanced. If the knob itself seems damaged or stuck, clean the tension disks to remove lint buildup. Inspect for damage and consider taking it for repair if needed. Proper tension is crucial for perfect stitches, but there’s more you can do to restore flawless results.
Table Of Contents
- Key Takeaways
- How to Fix Sewing Machine Tension Knob?
- Identifying the Issue:
- Adjusting Tension:
- Tension Knob Not Working:
- Tension Dial Not Working:
- Threading Issues:
- Needle Problems:
- Bobbin Tension:
- Upper Tension Adjustment:
- Bobbin Tension Adjustment (Front-Loading):
- Maintenance and Troubleshooting:
- Frequently Asked Questions (FAQs)
- Conclusion
Key Takeaways
- Check for visible knots or loops at the end of each stitch and visible top thread on the bottom side of the fabric to identify tension issues.
- Adjust the tension knob on your sewing machine by turning it right for higher tension or left for lower tension.
- Clean the tension discs to remove lint and dust buildup and inspect the tension knob for any damage that may be preventing it from functioning correctly.
- Test the tension by pulling on the bobbin thread and adjust the tension screw in 1/4 turn increments until the desired tension is achieved.
How to Fix Sewing Machine Tension Knob?
To fix a sewing machine tension knob, turn it to the right to tighten the tension or to the left to loosen it, ensuring the tension discs operate correctly for perfect stitches. If adjustments don’t restore stitch consistency, consider replacing the entire tension unit for a more comprehensive solution.
Identifying the Issue:
Before you dive into fixing your tension knob, check for visible knots or loops at the end of each stitch. If you see them, it’s a sign of incorrect tension. Also, examine the bottom side of your fabric.
Check for Visible Knots or Loops at the End of Each Stitch
You’re spot-checking tension by stitching swatches, right? A telltale sign of poor tension is stubborn knots or loops where stitches meet. It’s like your machine is tying knots instead of sewing! No bueno. Check both fabric sides – if you see those pesky loops or knots, it’s time to tweak your tension settings or investigate further.
Look for Visible Top Thread on the Bottom Side of the Fabric
Another telltale sign is visible needle thread on the fabric’s underside. This usually means your top tension is too loose. Take a close look and check if the bobbin thread tension appears balanced. Incorrect presser feet, inappropriate needle sizes, or lint buildup in the tension mechanism can also contribute to this issue.
Evaluate Stitch Balance on Both Sides of the Fabric
Grab some contrasting thread colors and do a test swatch on scrap fabric. If the stitches look identical on both sides, your tension is dialed in perfectly. But if you spot thicker threads peeking through or odd looping, it’s time to tweak that tension dial. Keeping an eye on stitch balance saves you a world of headaches down the road.
Adjusting Tension:
Adjust the tension knob on your sewing machine to correct tension issues. Turn the knob right to tighten the tension or left to loosen it.
Locate the Tension Regulating Dial on Your Machine
To adjust tension, find the tension knob near the thread guides. It varies by machine, but it’s often a numbered dial or small wheel.
For perfect stitches, you’ll need the right tension settings for your thread choice, fabric weight, needle size, and presser foot.
Adjusting the tension mechanism on a sewing machine is key. The tension knob allows you to lower or increase tension as needed to prevent uneven stitches or other tension problems for different threads.
Turn the Knob to the Right to Increase Tension (higher Numbers)
Turn that tension knob clockwise for higher numbers—it’ll boost the tension, tightening those stitches. Finding the sweet spot requires trial and error, but stay patient. Test different settings on scraps to observe how fabric thickness and thread compatibility affect stitch quality. With consistent tension, you’ll wave goodbye to wonky stitches and unravel sewing success.
Turn the Knob to the Left to Decrease Tension (lower Numbers)
If decreasing tension is required, turn the knob counterclockwise to lower the numbers.
- Different thread types
- Various fabric weights
- Assorted needle sizes
Don’t overlook bobbin tension—it plays a crucial role in achieving balanced stitches. With some patience and experimenting, you’ll soon conquer the ideal tension settings for flawless results.
Test Adjustments on Scrap Fabric With Different Thread Colors
| Top Tension Too Tight | Top Tension Too Loose |
|---|---|
| Bobbin thread visible on top | Top thread loopy on bottom |
| Puckered top stitches | Bottom stitches loose |
Keep fiddling until the tension is perfectly balanced for that fabric weight and troubleshoot any other issues.
Tension Knob Not Working:
If your sewing machine’s tension knob isn’t working, clean the tension disks to remove lint and dust buildup. Also, inspect the tension knob for any damage that may be preventing it from functioning correctly.
Clean the Tension Disks to Prevent Lint and Dust Buildup
If turning the tension knob doesn’t fix loose stitches, it’s likely due to lint or dust buildup.
Take a brush and carefully clean the tension disks—that’s where the thread passes through.
A lack of maintenance on this crucial mechanism can absolutely wreak havoc on your tension.
While you’re at it, give the bobbin area a once-over too.
A simple cleaning is often the sewing machine tension fix you need.
Inspect the Tension Knob for Damage
Inspecting the tension knob for damage is crucial when dealing with tension problems in your sewing machine. The tension knob, also known as the tension dial, is responsible for controlling the tension of the thread.
If the knob is damaged, it may not function properly, leading to inconsistent tension and stitch quality.
- Identify the Issue: Check for visible knots or loops at the end of each stitch, visible top thread on the bottom side of the fabric, or uneven stitch appearance on both sides of the fabric. These symptoms may indicate a tension problem, but they could also be caused by other factors such as lint buildup or incorrect threading.
- Assess the Knob: Inspect the tension knob for any signs of damage. Look for scratches, dents, or other physical damage that could affect its functionality. If the knob is damaged, it may need to be replaced or repaired.
- Clean the Knob: Ensure the knob is clean and free of debris. Dust, lint, or oil residue can interfere with the knob’s performance. Use a soft brush or cloth to gently clean the knob, taking care not to damage any delicate components.
- Repair or Replace: If the knob is damaged beyond cleaning, you may need to repair or replace it. Consult your sewing machine manual or a sewing professional for guidance on how to proceed. In some cases, it may be more cost-effective to replace the entire tension unit rather than just the knob.
Consider Consulting a Sewing Forum or Taking the Machine for Repair if Necessary
If your sewing machine tension knob isn’t working, don’t panic.
First, clean the tension disks to prevent lint and dust buildup.
Inspect the knob for damage.
If it’s still not working, consider consulting a sewing forum or taking the machine for repair.
Adjusting the spring tension or replacing the knob may be necessary.
It’s not merely a matter of turning the knob; it’s a complex process that underpins the quality of your stitches.
Tension Dial Not Working:
If your tension dial isn’t working, check for clogged or dirty tension disks and inspect the tension dial for damage. Ensure the factory settings are perfect before adjusting the spring tension, then test the spring tension and adjust as needed.
Check for Clogged or Dirty Tension Disks
You’ll want to check for lint or crud buildup on the tension disks – it’s a common culprit! Give them a good cleaning with:
- A lint brush or pipe cleaner
- Compressed air
- A small vacuum attachment
- Sewing machine oil (sparingly)
If that doesn’t solve the knob issue, the disks themselves may need replacing. Don’t stress – it’s often an easy fix once you locate the problem.
Inspect the Tension Dial for Damage
Take a close look at your tension dial.
If it’s damaged or cracked, that could prevent proper tension adjustment.
An old dial can get gunked up too, obstructing smooth turns.
Give it a thorough cleaning.
But if adjustment remains rough, you may need a replacement dial from the manufacturer to restore optimal knob function.
Don’t stress though.
Expert troubleshooting often reveals simple fixes for dialed-in stitches.
Ensure the Factory Settings Are Perfect Before Adjusting the Spring Tension
Before adjusting your machine’s spring tension, ensure the factory settings are spot-on.
- Tension is balanced on both sides
- No loops or nests appear
- Stitches are uniform
- Thread flows smoothly
If issues persist despite perfect factory calibration, consider repair options or sticking to a diligent maintenance schedule for tension troubles.
Test the Spring Tension and Adjust as Needed
Testing and adjusting the spring tension is crucial when dealing with tension issues on your sewing machine.
Start by ensuring the factory settings are perfect to avoid complications.
Once you’ve confirmed the settings, test the spring tension by pulling on the bobbin thread.
The thread should unwind a few inches when pulled.
Adjust the tension screw in 1/4 turn increments until the desired tension is achieved.
Threading Issues:
Check that all thread guides have been engaged before you start sewing to avoid tension issues. Also, ensure the presser foot you’re using is the right one for both the fabric and technique.
Make Sure All Thread Guides Are Threaded Before Stitching
You’ll want to ensure you’ve threaded your machine properly to avoid tension issues. Double-check that the needle is threaded from right to left, using all the guides—a common culprit for uneven stitches is skipping a guide. And don’t forget the bobbin thread! The right needle type and presser foot can also impact thread tension.
Ensure the Correct Presser Foot is Attached for the Technique and Fabric
Don’t overlook the impact of your presser foot! Different fabrics demand specialized feet to tame their unique quirks and ensure smooth stitching.
Think of it as a secret weapon, helping you conquer any fabric foe with finesse. From delicate silks to bulky knits, matching the presser foot to the task at hand is like giving your sewing machine a superpower.
It’s the key to unlocking flawless stitches and mastering any fabric’s hidden potential.
Check for Incorrectly Threaded Machine (use All Thread Guides and Thread With the Presser Foot Down)
Incorrect threading can cause tension headaches. Ensure you thread using all thread guides and with the presser foot down. This helps guide the thread correctly, preventing tension issues and ensuring smooth stitching. Don’t forget to clean your tension disks regularly to remove lint buildup, as this can also affect tension.
Needle Problems:
Inspect the needle for any damage or if it’s the inappropriate size, then replace the needle if it’s damaged or not the right size for the fabric.
Inspect the Needle for Damage or Inappropriate Size
Now, let’s examine your needle. Is it damaged? Does it match the fabric you’re using? A dull or bent needle can cause tension problems. The needle type, gauge, sharpness, and point all impact stitch quality. If the needle is damaged or the wrong size, replace it to restore perfect stitches.
Replace the Needle if It is Damaged or Not the Right Size for the Fabric
If you’ve tried adjusting the tension but the issue persists, it’s time to inspect your needle.
A damaged or inappropriate needle can throw off your stitch balance. Grab a magnifying glass and check for any nicks or bends. If you spot any damage, don’t hesitate to replace it.
Additionally, ensure the needle size matches the fabric you’re using. A needle that’s too thick or too thin can cause tension problems.
Bobbin Tension:
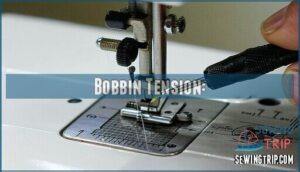
To adjust bobbin tension, turn the bobbin case screw clockwise to tighten it or counterclockwise to loosen it. Test the tension by pulling on the bobbin thread; it should unwind a few inches when pulled.
Tighten Tension by Turning the Bobbin Case Screw Clockwise
To tighten the tension on your sewing machine, turn the bobbin case screw clockwise. The tension is affected by various factors like thread weight and spring tension. A needle size that’s too large or too small can also impact the tension. Regularly clean your tension disks to prevent lint buildup and ensure optimal performance.
Loosen Tension by Turning the Bobbin Case Screw Counterclockwise
To loosen the bobbin tension, simply turn the bobbin case screw counterclockwise. This will release the tension on the bobbin thread, allowing it to unwind more easily. Test the tension by pulling on the bobbin thread. The thread should unwind a few inches when pulled. Adjust the screw in 1/4 turn increments until the desired tension is achieved.
Test Tension by Pulling on the Bobbin Thread
To test the bobbin tension, gently pull on the bobbin thread. The thread should unwind a few inches with minimal resistance. If the thread doesn’t unwind or breaks easily, the tension is too tight. If the thread unwinds too freely, the tension is too loose.
- Aim for a tension that allows the thread to unwind smoothly without breaking.
- Make small adjustments to the bobbin tension screw until you achieve the desired tension.
- Test your adjustments on scrap fabric to ensure the stitches are balanced and secure.
Thread Should Unwind a Few Inches When Pulled
Test the bobbin thread tension by gently pulling on the thread. It should unwind a few inches with minimal resistance. This indicates that the bobbin case tension is properly set. If the thread doesn’t unwind or snaps easily, adjust the bobbin tension screw accordingly. Remember, a balanced tension between the top and bottom threads is crucial for achieving perfect stitches.
Adjust Screw in 1/4 Turn Increments Until Desired Tension is Achieved
Adjusting the bobbin tension screw is crucial for achieving the perfect balance of tension on your sewing machine. When the tension is incorrect, it can lead to various issues, such as thread breakage or uneven stitching.
- Locate the bobbin tension screw on your machine.
- Turn the screw clockwise to tighten the tension or counterclockwise to loosen it.
- Test the tension by pulling on the bobbin thread.
- Adjust the screw in 1/4 turn increments until the desired tension is achieved.
Upper Tension Adjustment:
Adjust the upper tension by turning the dial clockwise to increase tension or counterclockwise to decrease it. Aim for balanced tension, where stitches appear identical on both sides of the fabric.
Locate the Tension Regulating Dial
After wrestling with bobbin tension, it’s time to cozy up to your machine’s tension knob. This little dial, often perched like a crown atop your machine, holds the key to stitch harmony.
If you’re playing a guessing game with its location, check your machine’s side or front. A quick glance at your troubleshooting manual can turn dial dilemmas into smooth stitching success.
Increase Tension by Turning the Dial Clockwise (higher Numbers)
To increase tension, turn the tension knob clockwise, resulting in higher tension settings.
Optimal tension settings vary between fabrics. Test on scrap fabric to find the ideal setting.
If the desired tension is not achieved, check the tension knob for damage or wear and replace it if necessary.
Regular maintenance, such as cleaning the tension disks, ensures smooth knob operation.
Decrease Tension by Turning the Dial Counterclockwise (lower Numbers)
To decrease tension by turning the dial counterclockwise (lower numbers), follow these steps:
- Identify the tension regulating dial on your sewing machine.
- Turn the knob counterclockwise to decrease tension.
- Test the adjustments on scrap fabric with different thread colors to ensure the tension is balanced on both sides of the fabric.
- Aim for equal tension on both sides of the fabric.
Aim for Equal Tension on Both Sides of the Fabric
To achieve balanced tension, aim for equal tension on both sides of the fabric. This is crucial for optimal sewing results.
The ideal tension setting varies depending on the machine and fabric weight. Regular machine servicing ensures proper default tension.
Understand that tension numbers can vary based on the machine and fabric, and each machine has a sweet spot for good results on most fabrics.
Constant tension adjustments may indicate other machine issues, so refrain from adjusting tension numbers without troubleshooting first.
Bobbin Tension Adjustment (Front-Loading):
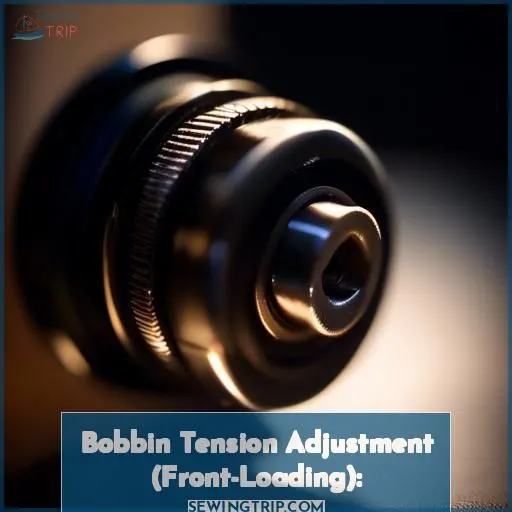
Now, let’s take a closer look at adjusting the bobbin tension on a front-loading machine. This adjustment is crucial for ensuring the perfect balance between the top and bottom threads.
Locate the bobbin case, which holds the bobbin in place. On the side of the bobbin case, you’ll find a small screw. This screw controls the tension of the bobbin thread.
To tighten the tension, turn the screw clockwise. To loosen it, turn the screw counterclockwise. As you make adjustments, test the tension by pulling on the bobbin thread. It should unwind a few inches when pulled.
Maintenance and Troubleshooting:
Keep your tension disks clean to prevent lint and dust buildup. Regularly clean the disks with a soft brush or compressed air to ensure smooth thread flow and prevent tension issues.
Regularly Clean Tension Disks to Prevent Lint and Dust Buildup
After mastering bobbin tension, don’t let lint and dust play the villain in your sewing saga. Regular tension disk cleaning is your shield against these sneaky disruptors. Stick to a maintenance schedule, cleaning after every project to prevent dust accumulation impact. Remember, a stitch in time saves nine, so make tension disk cleaning as routine as threading your needle.
Cleaning Tools and Techniques
To maintain your sewing machine’s tension knob and ensure optimal stitching results, follow these cleaning techniques:
- Cleaning Materials: Use a soft-bristled brush, a small paintbrush, or a toothbrush to remove lint and debris from the tension disks. Avoid using abrasive materials that can scratch or damage the disks.
- Tension Dial Maintenance: Regularly clean the tension dial to prevent buildup of lint and dust. Use a soft cloth or brush to gently remove any debris.
- Factory Settings: Before adjusting the tension, ensure that your machine’s factory settings are perfect. This will help you avoid unnecessary adjustments and potential issues with the spring tension.
- Spring Tension: Test the spring tension and adjust as needed. Aim for a balanced tension that creates identical stitches on both sides of the fabric.
- Bobbin Tension: Clean the bobbin case to remove any debris that may interfere with the tension. Be careful not to damage the case during cleaning.
Troubleshoot Tension Problems Caused by Different Threads/fabrics
When troubleshooting tension problems caused by different threads and fabrics, it’s crucial to consider several factors. The thickness of the thread, the weight of the fabric, the needle size, and the thread quality all play a role in achieving the perfect tension.
- Thread Thickness: Thicker threads require higher tension settings than thinner ones. Adjust the tension dial accordingly to ensure the threads are properly balanced.
- Fabric Variation: Different fabrics have varying weights and textures. Heavier fabrics may require a higher tension setting than lighter ones to prevent puckering or uneven stitches.
- Needle Size: The size of the needle you use can also affect tension. Smaller needles may be more suitable for lighter fabrics, while larger needles may be better for thicker fabrics.
- Thread Quality and Consistency: High-quality threads are more consistent and less likely to cause tension issues. If you notice inconsistencies in your stitches, consider switching to a different brand or type of thread.
Potential Issue With Tension Dial and Recommended Solution
If you’re experiencing issues with your sewing machine’s tension knob, it’s essential to address the problem promptly.
A malfunctioning tension knob can lead to uneven stitches, thread breakage, and other complications.
To troubleshoot, first, check for lint buildup or damage to the knob. If the issue persists, consider consulting a sewing forum or taking the machine for repair.
In some cases, a replacement part may be necessary, and the repair cost can vary depending on the machine’s warranty coverage.
Frequently Asked Questions (FAQs)
Can humidity affect my sewing machine’s tension?
Yes, humidity affects tension by causing thread to stretch or shrink slightly. In dry conditions, increase tension a bit; in humid environments, loosen it. Pay attention to stitch quality and make minor adjustments as needed.
Does stitch speed impact tension consistency?
Absolutely! Sewing at higher speeds can cause tension discrepancies that throw off your stitches. Like a tightrope walker, maintain an even, steady pace for perfect stitch balance.
Are tension issues different for embroidery machines?
Yes, embroidery machines have different tension needs. You’ll adjust upper and bobbin tensions separately for pristine embroidery stitches. Maintain that delicate balance – too tight knots up the design, too loose causes loopy messes underneath. Practice on scraps until you nail those perfect embroidery tensions!
How does thread age influence tension settings?
Older thread may be brittle or inconsistent, affecting tension. It struggles gripping discs properly. Replace thread every few projects for optimal, even stitch quality.
Can frequent color changes disrupt tension balance?
Heck yeah, constant color swaps cause chaos! Threads grab and tug differently, yanking your tension haywire. Stick to one shade per sewing sesh for seamless stitching sans snags.
Conclusion
A stitch in time saves nine. Mastering the art of fixing your sewing machine’s tension knob is crucial for achieving flawless stitches. With patience and the right techniques, you’ll restore perfect tension, ensuring your projects look impeccable. Don’t let tension woes derail your sewing endeavors – follow the steps outlined, and you’ll be on your way to seamless, professional-looking results.


