This site is supported by our readers. We may earn a commission, at no cost to you, if you purchase through links.
 Hemming a shirt by hand is easier than it sounds, and you’ll soon be stitching like a pro.
Start by ironing your shirt to smooth out wrinkles.
Try it on, then mark your desired hem length with chalk or pins.
When wielding those scissors, think of yourself as a sculptor, trimming precisely for a neat fold.
Choose your stitch; a whipstitch is quick and versatile, while a blind stitch creates an invisible finish—perfect if you like your handiwork stealthy.
Sew evenly, keeping tension steady to avoid puckering.
Your masterpiece awaits, and here’s a secret: mastering this skill opens up endless wardrobe creativity!
Table Of Contents
Key Takeaways
- You’ll need to iron your shirt first and mark your desired hem length with chalk or pins to ensure accuracy and prevent wrinkles from affecting your work.
- You’ve got several stitch options: whipstitch for quick fixes, blind stitch for invisible finishes, and fell stitch for durability – choose based on your specific needs.
- You should make small, evenly-spaced stitches while maintaining consistent tension to avoid puckering and ensure your hem lasts longer.
- You’ll get the best results by matching your thread color to your garment and using the double fold hem technique for a clean, professional finish.
Garment Preparation
Before you start hemming, make sure your shirt is prepped by ironing out all the wrinkles and measuring the hemline accurately.
Don’t forget to trim any excess fabric—you wouldn’t want a lopsided hem stealing the spotlight!
Ironing The Garment
Before starting your DIY hemming journey, grab that iron and get pressing! Here’s how to nail it:
- Ironing temperature: Match the heat to your fabric type.
- Steam settings: Use steam to banish creases.
- Pressing techniques: Gently press to avoid new wrinkles.
Keep everything smooth and simple, setting the stage for perfect hand sewing.
Measuring The Hemline
With your freshly ironed shirt, try it on!
Decide on your perfect hem length.
Use tailor’s chalk or pins to mark it.
Flip it inside out.
Measure the existing hem’s width—aim for consistency!
This helps create a professional-looking hem.
Marking your desired hem length and width is key to a successful hem job.
Remember, your hem length preferences dictate the final look.
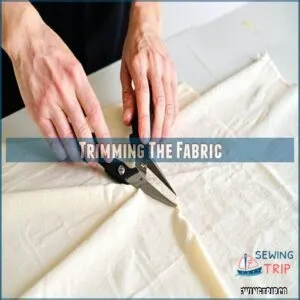
Trimming The Fabric
Ever tried trimming fabric without a mess?
Choose fabric trimming tools wisely based on fabric type.
Don’t just snip; consider trimming techniques for accuracy.
Trim enough to fold neatly, yet maintain evenness.
When you’re hand hemming, patience is key, whether sewing by hand or aiming to hem a shirt.
Think of it as sculpting a masterpiece, even if it’s just fabric.
Choosing a Stitch
When choosing a stitch for hemming your shirt by hand, you’ve got a variety of options, each with its own perks.
Whether you’re going for quick fixes with a whipstitch or seeking a nearly invisible finish with a blind stitch,
understanding the characteristics of each will help you make the right choice.
Whipstitch
So, you’re set to tackle hemming with a whipstitch—a favorite for its simple, quick approach.
It’s versatile, great for rolled hems, and even mending tasks.
While not as durable as some stitches, it’s perfect for temporary fixes.
Think of it as stitching’s Swiss Army knife, offering a seamless finish on crocheted edges.
Catch Stitch
Catch stitch is your go-to for a durable, flexible hem that blends with fine fabrics.
You stitch in a zigzag pattern, giving you control over tension, ensuring a hand-sewn look that’s less visible than machine stitching.
It’s perfect for hemming shirts, offering a neat finish with minimal fuss.
Equip yourself with basic hand sewing tools and start practicing.
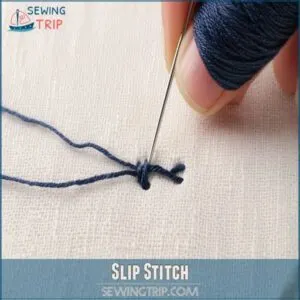
Slip Stitch
To hand-sew a shirt hem with a slip stitch, you’ll create a seamless finish, ideal for delicate fabrics and versatile across different weights.
This stitch keeps your hem nearly invisible, a great alternative to machine methods.
Perfect for rolled hems, it blends strength and subtlety.
Slip stitch is your best friend for crafting a refined, professional look.
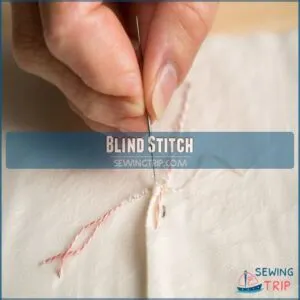
Blind Stitch
Looking to master the blind stitch for that invisible hem?
To achieve this professional finish, you need to first learn how to finish raw edges of fabric without a serger(how to finish raw edges of fabric), perfect for hand sewing with a professional finish, this stitch is your secret weapon.
Pick the right needle, adjust tension, and practice until it’s second nature.
You’ll conquer tailoring effortlessly, adding an elegant touch to any garment.
Think of it as giving your shirt a stealthy makeover!
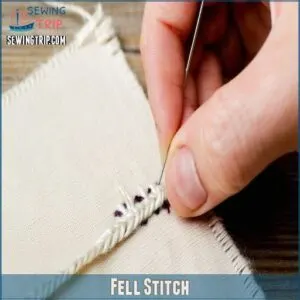
Fell Stitch
So, you’ve mastered the nearly invisible blind stitch? Great! Now let’s tackle the fell stitch.
It’s super strong, perfect for sturdy fabrics or appliqués, but its diagonal stitches are more noticeable.
Think of it as the workhorse of hand stitches—reliable, but not as subtle.
Fell stitch uses are many, but it’s not the best choice for a completely hidden hem.
It’s a good option when durability trumps invisibility.
Sewing The Hem
Sewing the hem by hand can give your shirt a polished, custom look that machines often miss.
You’ll begin by making small, evenly spaced stitches, ensuring each one is snug and secure before knotting and skillfully hiding the thread for a seamless finish.
Starting The Stitch
Starting your hand-sewn hem is like finding the sweet spot on a seesaw.
Cozy up your needle position near a seam.
Choose a thread that matches and tie a secure knot.
Begin with a first stitch that locks your thread in place.
Maintain tension control—too tight, and the fabric puckers, too loose, and it flops.
Making Small, Evenly-Spaced Stitches
As you work on your handsewn hem, focus on stitch length and stitch tension.
Use your needle to make small, even stitches.
This avoids puckering and enhances durability.
Consistency is key for a neat finish, so take care to maintain uniformity.
You’ll soon find the rhythm, turning what could be hand fatigue into a satisfying, meditative process.
Knotting and Hiding The Thread
Now that you’ve got your stitches in line, it’s time to focus on knotting and hiding the thread.
Strong knots guarantee thread security and an invisible knot prevents unwanted tails.
Here’s how:
- Knot twice for strength.
- Feed the thread tail into the hem.
- Pull the thread through for an invisible finish.
- Snip excess carefully without cutting your masterpiece.
Hand Rolled Hem
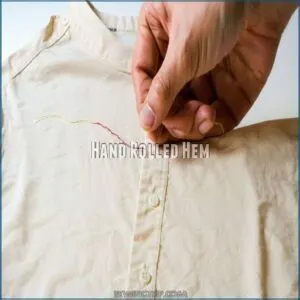
Mastering a hand rolled hem can transform your shirt into a polished piece, offering a neat finish without a sewing machine.
You’ll achieve a beautifully subtle edge by carefully trimming, basting, and stitching, making it perfect for even your most cherished garments—just try not to stick your fingers in the process!
Trimming Vertical Seams in Hem Allowance
Trimming the vertical seams in your hem allowance makes a world of difference.
By slicing away excess fabric, you’re not just decluttering; you’re smoothing the hemline for a sleeker look and feel.
Who likes bulk, right?
Embrace these seam trimming tips to perfect your hem, ensuring your shirt looks great but also hangs perfectly with every wear.
Basting Around Hem at Hemline
Okay, you’ve neatly trimmed those vertical seams.
Now, let’s get that hemline perfectly even.
Grab your needle and thread – a contrasting color helps.
If you’re having trouble finding the right tool, consider using a basting needle online.
Using long, loose basting stitches, stitch around the entire hemline.
This keeps everything in place for the next steps, creating a neat, even hem.
Think of it as a safety net for your masterpiece!
Shortening Stitch Length to 1.5
Getting the stitch length down to 1.5 is your ticket to a sturdy, hand-sewn hem that laughs in the face of fraying.
It’s all about giving your delicate fabrics some extra backbone.
By keeping those stitches tight and close, you reduce hand fatigue and improve stitch quality, turning hemming a shirt by hand into a precision craft.
Trimming Excess Fabric Close to Stitching Line
Once you’ve shortened your stitch length, grab your scissors for precision cutting.
Gently trim the excess fabric close to the stitching line.
This careful trimming keeps fabric waste down and makes sure the hem is neat by reducing bulk.
Mastering this step in garment repair allows for easy hemming adjustments later and is key to professional-looking sewing techniques.
Hemming Techniques
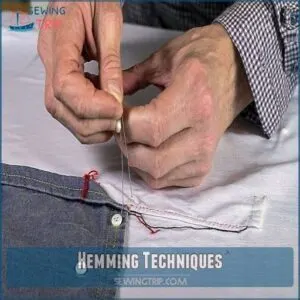
If you’re looking to master hemming techniques, you’ll find that mastering a few key stitches can make all the difference in your sewing projects.
We’ll cover the double fold hem using a blind stitch and the upper fold hem with a slip stitch, ensuring a neat and professional finish every time.
Double Fold Hem (Blind Stitch)
You’ve now perfected the hand rolled hem, it’s prime time for the double fold hem with a blind stitch, similar to the technique achieved with a sewing machine’s specialized blind hem foot.
Think of this as tucking your shirt in—twice—for a neat, invisible look.
Make sure the fold suits your fabric’s heft, then press those edges sharp.
The blind stitch is your stealthy needle ninja, keeping everything hidden as it secures the hem.
Upper Fold Hem (Slip Stitch)
When you need a sleek, professional look on your shirt’s hem, the slip stitch is your ace up the sleeve.
It’s like stitching magic—making your work nearly disappear.
To get the best results, use a quality slip stitch needle, which you can find and purchase at a dedicated Slip Stitch Needle Store.
Here’s how: Iron your fold, match your thread, and stitch those tiny, even loops.
You’re not just hemming a shirt—you’re crafting a masterpiece that nobody notices except you.
Anchoring and Tying Off
Securing your shirt hem by hand is like putting the cherry on top of your stitching sundae.
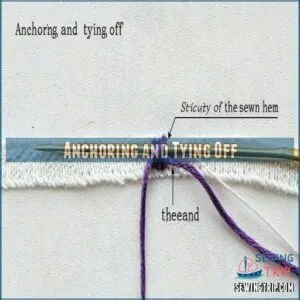
Start with a hefty knot to keep the thread from slipping away.
Anchor it well by stitching twice in one spot—like anchoring a boat in rough waters.
As you sew, keep an eye on thread tension; too tight might strangle your hem’s flow.
Wrap up with a tidy knot close to the fabric, looping through that final stitch twice for extra security.
Need a neat finish? Thread those tails back through a few stitches—it’s like tucking in the loose ends of life.
This way, your handsewn hem‘s ready to withstand the test of time, looking polished and professional.
Benefits of Hand Hemming
You’ll find hand hemming offers a surprisingly clean, almost invisible finish, perfect for delicate fabrics.
It’s also great for testing hem lengths or making quick fixes before committing to a more permanent solution.
Virtually Invisible Stitch
Creating a virtually invisible stitch on a shirt hem is like a magical cloak for your sewing. Key elements include the right needle, matching thread, and delicate techniques like the blind stitch. Here’s the rundown:
- Needle and thread: Choose fine ones
- Stitch type: Blind stitch works wonders
- Fabric choice: Match technique to thickness
- Practice: Essential for perfection
- Hem durability: Make sure the hem is firmly attached
Clean, Subtle Finish
Achieving a clean, subtle finish in hand sewing feels like turning your shirt into a carefully crafted masterpiece.
By mastering various stitches like the whipstitch and catch stitch, you can choose the perfect technique for your fabric.
The stitch tension and thread color blend seamlessly, providing a sleek look.
Take pride in those even stitch lengths and precise ironing.
Hand hemming isn’t just about function—it’s an artistic touch that showcases your careful craftsmanship and control over every detail.
Suitable for Delicate Fabrics
Hand-sewing delicate fabrics gives you control over hem durability and how the fabric falls.
Using the right needle reduces damage and keeps stitches subtle.
It’s like threading a needle in a haystack—precise and careful.
This approach saves you from hand fatigue and makes sure your handsewn hems look polished and perfect without overwhelming the fabric.
Temporary Fixes and Testing Hem Lengths
Testing different hem lengths on your shirt by hand sewing gives you the freedom to experiment without commitment.
Whether you’re ensuring the right look or gently handling delicate fabrics, you’ve got options.
From using pins for temporary hems to whipstitching for testing, this shirt hem tutorial offers the control you crave to perfect your hand-sewn masterpiece.
Advanced Tips
Fine-tune your hemming skills with these advanced tips, ensuring each project is a success.
Always be ready to adjust the hem if needed.
Use thread that matches the garment color for a seamless, professional finish.
Adjusting Hem if Necessary
Adjusting a hem? Picture perfect fit or embarrassing uneven hems depend on it.
Try the shirt on, stride around a bit to pinpoint the hem length that dances with you.
For alternative no-sew adjustments, consider techniques like no-sew sleeve folding.
Use pins for temporary magic until content.
Tackle fabric shrinkage with patience, ensuring every alteration hits the sweet spot.
Nail that garment fit with thoughtful hand sewing and minor adjustments.
Using Thread That Matches Garment Color
Almost always, choosing the right thread color is key for a perfect hand-sewn shirt hem.
Match your thread to your shirt’s color for an invisible, professional finish.
If you need a helping hand finding the perfect match, check out this matching thread resource for a wide selection.
A slightly darker shade works best if an exact match is unavailable.
Consider thread weight and texture too—you want a seamless hem effect, not a bulky mess!
Proper thread selection makes sure your DIY shirt hem looks amazing.
Frequently Asked Questions (FAQs)
How to hem a shirt by hand?
Imagine this: your favorite shirt, perfectly hemmed by you.
Simple, neat, and satisfying!
Pin up the desired length, fold in half an inch, press down, and use a slip stitch for a nearly invisible finish.
How do you Hem a shirt with a sewing machine?
Set your machine to a straight stitch.
Fold the hem twice for a clean edge.
Pin it in place.
Carefully guide the fabric through the presser foot, maintaining even pressure and steady speed.
What is hand Hemming a shirt?
Hand hemming creates a custom-finished edge on your shirt using needle and thread.
You’ll fold the fabric’s edge, secure it with small, even stitches, and create an invisible finish that’s both durable and professional-looking.
What makes a good hand hemmed shirt?
A well-hemmed shirt has even stitches, crisp folds, and invisible seams from the outside.
You’ll know it’s done right when the hem lies flat, matches the original width, and moves naturally with you.
How to choose a thread for hand Hemming a shirt?
Like finding your perfect match, choose thread that mirrors your shirt’s color and weight.
You’ll want all-purpose polyester thread for everyday shirts, or silk thread for delicate fabrics – both matching the material’s thickness.
Why should you hand HEMM a shirt?
You’ll achieve more precise control over your hemming project with hand sewing, creating invisible stitches that look professional.
It’s perfect for delicate fabrics and allows you to make adjustments while working.
How to hem a shirt by hand for beginners?
Start by turning your shirt inside out and marking the desired length.
Fold and press the hem, then use small slip stitches to sew along the fold.
Keep stitches even and consistent throughout.
How do you hem a shirt that is too long?
Quick as a needle through silk, turn your shirt inside out and mark desired length.
Fold and press a half-inch hem.
Then use a slip stitch to hand sew around the bottom edge.
What is the best stitch for hemming by hand?
The slip stitch stands out as the best option for hand hemming since it’s virtually invisible from both sides.
It’s durable and creates clean, tiny stitches that slip through the fold’s edge.
How to invisible stitch hem?
Turn garment inside out and fold hem’s edge.
Using matching thread, make tiny diagonal stitches through hem’s fold, spacing them evenly.
Pull thread gently to hide stitches between folds for an invisible finish.
Conclusion
Remember when you thought learning how to hem a shirt by hand was as complex as rocket science?
Well, you’ve just mastered a skill that’ll save your favorite clothes and your wallet.
Whether you chose the stealthy blind stitch or the reliable whipstitch, you’re now equipped to tackle any hemming challenge.
Keep practicing, and don’t worry if your first attempts aren’t perfect.
Soon you’ll be hemming shirts like a pro, wondering why you ever doubted yourself.


