This site is supported by our readers. We may earn a commission, at no cost to you, if you purchase through links.
 So, you’re looking for hand sewing lessons for beginners? Great! You’ll be stitching like a pro in no time.
First, grab a size 9 "sharps" needle and some all-purpose thread. A thimble will be your new best friend, trust me.
Start with the running stitch – it’s the easiest. Then, try the backstitch for stronger seams. Don’t worry about messing up; practice on scraps.
Even sewing on buttons is simpler than you think. Master these hand sewing lessons for beginners, and you’ll open up a whole world of crafty possibilities. There’s much more to discover – different threads, fancy stitches, and clever tips await!
Table Of Contents
Key Takeaways
- You’ll start with basic hand sewing stitches like the running stitch and backstitch, using a size 9 sharps needle and all-purpose thread. A thimble is recommended for finger protection.
- Matching your needle and thread size is important, along with choosing the right thread type for your fabric. Leather thimbles offer comfort, while metal ones provide more protection.
- You’ll learn how to sew on buttons, both shank and flat types. For flat buttons, a small fabric scrap underneath adds stability.
- Several beginner-friendly projects, like scented sachets and coasters, help you practice your new skills. You can find more project ideas and tutorials online.
Needles for Hand Sewing
Explore hand sewing needles, your partners in fabric artistry!
Needle sizes matter: tiny ones for delicate silks, larger ones for tough denim.
Match your needle size to your thread, like pairing socks.
Threading trouble? Grab a needle with a bigger eye or a needle threader.
Smooth needles glide through fabric, no gaping holes!
For simple projects, learn basic hand stitches like the running stitch, backstitch, or blanket stitch.
Think of your needle as a fabric whisperer.
For basic hand sewing for beginners, "Sharps" size 9 are great.
"Embroidery" needles have oval eyes, easy to thread.
Short or medium needles are best for hand sewing.
Chenille needles, sharp with a large eye, are good for thicker fabrics.
No stress, every stitch gets you closer to mastery.
With the right hand sewing needles and these sewing tips, you’ll be stitching like a pro!
Choosing Thread for Hand Sewing
Now that you’ve got a handle on needles, let’s talk thread. Picking the right thread is key for any hand sewing project.
Think of it as your fabric’s best friend – they need to work together!
For more detailed information, explore this helpful sewing thread types guide.
Want your hand sewing lessons for beginners to go smoothly? Here’s the deal with thread:
- Thread Types: General-purpose thread is your go-to, usually polyester. It’s strong, durable, and works for most projects. For lighter fabrics, use extra-fine thread. Heavier projects? Grab upholstery or topstitching thread. Silk thread is smooth and adds a nice touch to finishing details.
- Fabric Matching: Thread color should match your fabric or be a shade darker. This gives a professional look to your hand sewing basics. Linen thread is great for bags and thicker fabrics because it’s tough and can handle friction.
- Thread Colors: Rayon thread is like silk’s less expensive cousin. It can be a bit tricky to work with, so use a thread net. Remember, thread is a major player in how your project turns out. So, choose wisely, and stitch happily!
Using a Thimble
Now that you’ve got the right thread, let’s talk hand sewing basics and hand sewing supplies: your fingers.
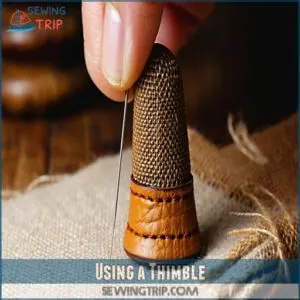
Don’t underestimate the power of a thimble in hand sewing lessons for beginners, it’s your tiny shield against needle pokes, boosting your sewing comfort and hand safety.
Think of it as your finger’s best friend in sewing techniques, for those interested in supple protection, explore a quality leather thimble.
Thimble materials range from metal and leather to plastic, leather thimbles offer a softer touch, while metal ones provide serious finger protection.
Thimble sizing matters—too loose, it’s useless; too tight, it’ll cramp your style, find one that fits snugly on your middle fingertip, like a superhero’s glove.
Getting used to a thimble takes practice, at first, it might feel awkward, like wearing a tiny hat on your finger.
But stick with it, soon, you’ll wonder how you ever sewed without this little helper, it’ll become second nature, giving you the confidence to tackle even the toughest fabrics.
With the right thimble, you’re ready to stitch with comfort, control, and a whole lot of confidence.
Basic Hand Sewing Stitches
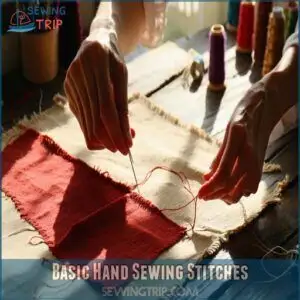
You’ll learn a few basic hand sewing stitches here, like the running stitch, backstitch, and blanket stitch.
These stitches are easy to learn and you’ll use them for lots of different projects.
Running Stitch
After mastering the thimble, let’s explore the running stitch, a foundational hand sewing technique.
It’s the easiest stitch, perfect for beginner hand stitching.
This basic hand stitch creates a dashed line.
- Even stitch length creates a professional look.
- Adjust fabric tension for smooth stitching.
- Control your sewing speed for stitch consistency.
- Manage thread tension to prevent puckering.
- Practice on scraps to improve stitch consistency.
With practice, you’ll be a running stitch pro in no time.
This is one of the most useful hand sewing techniques you’ll learn in our hand sewing lessons.
Backstitch
Your backstitch is a hand sewing technique for strong seams.
It’s one of the basic hand stitches you’ll want in your hand sewing lessons.
Unlike a running stitch, the backstitch overlaps, making it super tough.
You create a backstitch by pushing the needle through the fabric, then bringing it back up a stitch-length ahead.
Next, insert the needle back down where the previous stitch ended, creating an overlapping stitch.
Control your thread and sewing speed, keeping even stitch tension to avoid fabric stretch.
Explore backstitch variations as your hand sewing techniques improve.
Practice makes perfect with this essential hand sewing for beginners stitch!
Blanket Stitch
Want sturdy, pretty edges? Learn the blanket stitch! It’s your secret weapon for hand sewing lessons.
Unlike the backstitch, it’s all about visible flair. This basic hand stitch is great for fabric borders, adding a decorative touch while preventing fraying.
- Secure your thread.
- Loop around the fabric’s edge.
- Create a knot with each stitch.
- Repeat for awesome embellishment techniques! Explore stitch variations for even more fun with your hand sewing tutorials.
The hand sewing lessons will help you master the stitch and create beautiful edges.
Sewing on Buttons by Hand
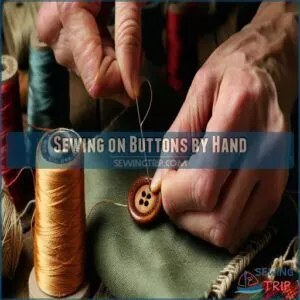
You’ll learn how to sew on buttons like a pro, whether they’re shank buttons or flat buttons.
This is easier than you think, and you’ll be fixing those missing buttons in no time.
Shank Buttons
Shank buttons are a breeze, and for these little guys, you’ll be working with their built-in loop or shank.
This basic hand sewing technique is perfect for beginner sewing lessons.
Simply position the button, make a few stitches through the shank, and fasten securely.
Different shank materials might call for tweaks to your sewing techniques, so keep an eye on that.
Experiment with different button types and fastening methods to find what works for you.
You’ll be a hand sewing pro in no time, and understanding sewing on buttons is essential for mastering various hand sewing skills.
Flat Buttons
You’re about to turn those flat buttons into fashion statements.
Here’s a tactical guide to sewing them like a pro:
- Grab a small fabric scrap to cushion the button.
- Choose a thread color that pops, and knot it.
- Push the needle up from the fabric’s underside for an anchor.
Now, the button dance:
- Zigzag through buttonholes with precision.
- Criss-cross threads for an X.
- Wrap threads snugly, then secure with a backstitch.
You’re crafting wearable art, so don’t pull too tight—give those buttons some breathing room!
Sewing on flat buttons is now a breeze, and you’re ready to tackle any project.
Hand Sewing Seams
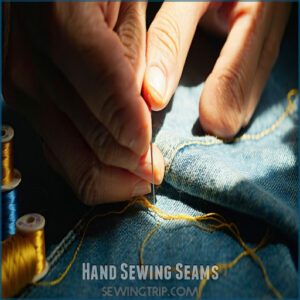
Creating sturdy hand-sewn seams is easier than you think!
First, choose the right thread.
Cotton thread works great for lighter fabrics, while polyester thread is best for heavier fabrics like denim or wool.
Before you start, prep your fabric and gather your sewing notions.
This includes needles, thread, and scissors.
| Fabric | Thread | Needle Size |
|---|---|---|
| Lightweight | Cotton | Small |
| Medium Weight | Cotton/Poly | Medium |
| Heavyweight | Polyester | Large |
| Silk | Silk | Fine |
| Denim | Heavy Duty | Heavy Duty |
Cut about 24-36 inches of thread—this keeps your stitching smooth and prevents tangles.
Learn basic hand sewing stitches like the backstitch for seam security.
Push the needle through the fabric layers, making sure your stitches are snug but not too tight.
Aim for about 10-12 stitches per inch.
For delicate fabrics like silk or linen, invisible nylon thread is your secret weapon.
And don’t forget about edge finishing to prevent fraying.
Practice hand sewing techniques for beginners on scraps first.
You’ll be a hand sewing pro in no time!
Making Fabric Yo-Yos
Fabric yo-yos, those cute little fabric ruffles, add a touch of whimsy to your sewing projects.
You’ll need fabric circles, and anything round works as a template—a coffee mug, a small plate, you name it!
Trace your circle and cut it out with sharp scissors or a rotary cutter.
Remember, bigger circles mean bigger yo-yos.
Now, for the magic of yo-yo making! Thread your needle and stitch tiny basting stitches around the circle’s edge.
As you stitch, gently gather the fabric.
Once you’ve gone all the way around, pull the thread tight.
Like magic, your flat circle transforms into a puffy little dome.
This is the core of basic fabric yoyo creation, a fundamental hand sewing technique for beginners.
Want to take your hand sewing stitches guide skills up a notch? Try clustering yo-yos in different fabrics or scattering them on bags, clothes, or home decor.
It’s a simple way to add personality and charm, perfect for basic hand sewing for beginners exploring hand sewing essentials.
You’ve mastered circle stitching, sewing gathers, and fabric folding—now go make some yo-yos!
Finishing Hand Sewing
A few finishing touches and your hand sewing creation is complete.
Secure your last stitch by pulling it tight, then weaving your needle back through a few recent hand sewing stitches.
This creates a secure knot.
Snip the thread close to the fabric, leaving no loose ends to unravel your hard work.
Smooth your seams, checking for any stray threads or uneven edges.
This is where seam finishing and edge binding come in handy, giving your project a polished look.
You can also add hand tucking, sewing embellishments, or fabric trimming for extra flair.
Remember, each stitch represents your growing hand sewing skills, so admire your handiwork.
With these finishing stitches and basic hand stitches, you’re mastering hand sewing techniques for beginners!
Now, what about those hand sewing lessons?
Hand Sewing Projects for Beginners
Now that you’ve learned to tie off your threads, let’s put those skills to use with some fun beginner sewing projects!
You’ll find tons of sewing tutorials beginners can follow online, and many offer hand sewing 101 basics.
Grab your sewing tools and a beginner-friendly sewing kit, and let’s get started!
Sewing kits often come with basic sewing tools and fabric scraps, perfect for small projects.
Try making scented sachets: stitch two fabric squares together (leaving a small opening), stuff with dried herbs, and sew it closed.
Easy peasy!
Fabric selection is key, so choose something pretty.
For more inspiration, explore these beginner sewing project ideas.
Coasters are another great beginner sewing project.
Cut circles of felt, then blanket stitch the edges.
Hand quilting stitches like the blanket stitch add a nice touch.
Look for beginner patterns online if you need inspiration.
Sewing projects beginners can handle are a great way to build confidence.
Before you know it, you’ll be tackling more advanced projects like hand sewing a simple skirt or pillowcase!
Frequently Asked Questions (FAQs)
How to start learning hand sewing?
Begin your sewing journey! Grab a needle, thread, and scrap fabric. Practice basic stitches like running stitch and backstitch. You’ll be mending and creating in no time!
What is the first thing a beginner should sew?
Try a simple running stitch to mend a tear, sew on a button, or create a small, decorative embroidery piece. You’ll gain confidence and learn the basics quickly!
Is hand sewing hard to learn?
Hand sewing may seem tricky at first, but it’s easier than you think.
With simple stitches, you’ll be mending and creating like a pro in no time.
It’s just like drawing with thread!
What is the easiest hand sewing stitch?
You’ll find the running stitch super easy! It’s like drawing a dashed line with your needle and thread, perfect for simple mending and seams. You’ve got this!
How do I start learning to hand sew?
Grab a needle, thread, and scrap fabric. Practice basic stitches like running stitch and backstitch. You’ll be mending and creating in no time!
What is the first thing to learn in sewing?
First, you’ll learn to thread a needle and tie a knot. It’s like tying your shoes, but for thread! This simple skill is the first step in your sewing journey.
What are the four basic hand stitching?
Discover sewing’s secrets with four stitches: running stitch for seams, backstitch for strength, slip stitch for hidden hems, and blanket stitch for edges.
Is it better to learn to sew by hand or machine?
Starting with hand sewing builds a great foundation. You’ll grasp the basics, then you can easily zoom into machine sewing later.
How can I keep my stitches neat and even when hand sewing?
Like building a brick wall, even stitches come from a steady hand.
Practice makes perfect, but start with measuring, marking your fabric, and taking consistent stitch lengths.
You’ll be stitching straight lines like a pro in no time, with perfect results from your efforts.
What are some good beginner hand sewing projects I can start with?
You could sew a simple pouch, a cozy pillowcase, or even mend a tear. These projects build skills for bigger things down the road.
Conclusion
From tangled threads to tidy stitches, you’ve come a long way!
These hand sewing lessons for beginners are just the start.
Now, grab those needles and thread.
Practice makes perfect, so don’t be afraid to experiment.
Try stitching up a simple pouch, patching a tear, or even sewing on a button.
With each stitch, you’ll gain confidence and discover the joy of creating with your own two hands.
Explore different fabrics, threads, and embellishments.
Your journey into the wonderful world of hand sewing has just begun!

