This site is supported by our readers. We may earn a commission, at no cost to you, if you purchase through links.

Fold the extra fabric up to your desired length, pin it, and make sure both legs match. Next, measure the folded fabric and mark a cutting line with chalk or a fabric marker.
Cut carefully, leaving about an inch for the hem allowance. Finish the raw edges with a zigzag stitch or fabric tape, then fold, press, and pin the hem in place.
Table Of Contents
Key Takeaways
- Measure and mark the desired length while wearing dress shoes for accuracy, ensuring both legs are even.
- Pin the folded fabric securely and use a slip stitch or blind stitch to create a clean, invisible hem.
- Trim excess fabric, leaving about an inch for the hem allowance, and finish raw edges with a zigzag stitch or serger.
- Press the hem after sewing to achieve a professional, polished finish that looks store-bought.
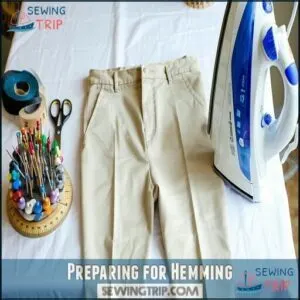
Preparing for Hemming
Before you start hemming, make sure you have a clean, well-lit workspace and the right tools.
A clean, organized workspace and the right tools are the secret ingredients to stress-free and polished hemming.
Gather your supplies, like scissors, pins, a ruler, and an iron, so you’re ready to work efficiently.
Setting Up The Workspace
A well-organized makes hemming stress-free and enjoyable. Start by clearing your table to create a smooth, open surface—it’s like prepping a blank canvas. Keep distractions to a minimum so you can focus on measuring, ironing, and stitching.
Here’s how to set up your space for success:
- Surface Preparation: Wipe your table to avoid fabric snagging and frays.
- Lighting Considerations: Use a bright desk lamp or position near natural light for clear visibility, especially with dark fabrics.
- Ergonomic Setup: Place your sewing machine at a comfortable height to prevent strain.
- Tool Accessibility: Arrange scissors, pins, fabric cutting tools, and thread within arm’s reach of your workspace.
This setup turns any table into a productive hemming station.
Gathering Essential Supplies
A smooth hemming project starts with easy-to-find tools. Grab sharp scissors, a sturdy tape measure, and a hem gauge for precision. Choose threads that match your slacks perfectly—this keeps your work seamless. Add straight pins, a hand needle (consider various needle types), and seam rippers for pesky stitches.
Ironing matters, so use one with adjustable iron settings and pair it with a heat-resistant board. Tailor’s chalk in contrasting tones helps mark folds confidently. For quality results, consider that premium shears offer precision.
Here’s a quick checklist:
Essential Tools Why You Need Them
With these tools, you’ll hem dress pants like a pro!
Choosing The Right Tools
If you’re set to hem dress pants with precision, having the right sewing tools is a must.
Here’s your outfit for success:
- Sharp scissors or shears for clean cuts (skip the kitchen scissors!).
- Needles and thread matched to your fabric—because the wrong thread types ruin hems.
- Measuring tools for spot-on adjustments and pressing equipment like an iron to lock in that polished look.
For faster, smoother dress pants hemming, a sewing machine with zigzag stitch and a hem gauge are great sidekicks.
You can find specialized sewing implements for this purpose.
Pinning The Hem
Pinning the hem helps you lock in the perfect length before sewing, so your pants look professional and polished.
Lock in the perfect length with careful pinning before sewing for a polished, professional finish every time.
Make sure to fold the fabric evenly and use plenty of pins to keep everything secure.
Folding and Pinning The Excess Fabric
Start with your slacks inside out on a flat surface, ready for a customized touch. Fold the excess fabric inward, adjusting carefully to create sharp, clean edges.
To keep the fold steady, place pins perpendicular to the crease about 2-3 inches apart. This guarantees secure pinning and makes removal easy.
Even distribution of pins prevents bunching, keeping the hem smooth.
This step in your hemming guide sets the stage for a polished finish—perfect for shortening dress pants professionally! For stretchy fabrics, consider stabilizing fabric edges to prevent distortion.
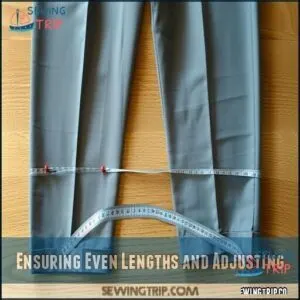
Ensuring Even Lengths and Adjusting
Getting both pant legs even is the backbone of any polished pants-length adjustment.
After folding and pinning, lay the slacks flat and double-check their symmetry. Nobody wants to walk into a room with one pant leg shorter than the other—it’s like a visual alarm for a bad hemming tutorial.
Use these quick checks to avoid length discrepancies:
- Measure the inseam to hem of both legs, ensuring they match exactly.
- Stand the pants on their edge or fold them lengthwise, aligning seams for accuracy.
- Try them on with the intended shoe height, ensuring the hem breaks cleanly above the shoes.
- Use a mirror to confirm both legs look identical from every angle.
Your initial adjustments now save embarrassment later, and following these steps ensures a polished finish.
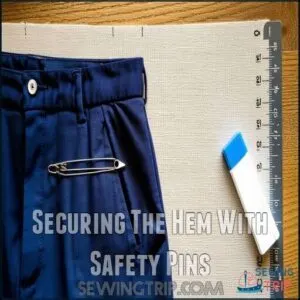
Securing The Hem With Safety Pins
Once your dress pants have even lengths, secure the hem using safety pins.
Insert each pin horizontally, about 2-3 inches apart along the folded edge, to avoid fabric shifting.
This temporary fix prevents headaches later.
Worried about fabric damage? Use quality safety pins or pin alternatives like hemming clips.
Keep safety in mind by pointing pinheads outward for easy removal during hemming.
Measuring for The Hem
Make sure you measure the slacks while wearing them with the shoes you plan to pair. Double-check that both legs are even, as a crooked hem can ruin the look.
Measuring Excess Fabric
With your pants pinned, it’s measuring time! Focus on accuracy to get the perfect fit. Use a ruler and measure from the original hem (the inseam baseline) to the pinned fold. Keep shoe height and length preferences in mind as you work.
Check measurements all around:
- The inseam, outseam, front, and back of each pant leg
- Look for consistent marking, keeping numbers within ¼" of each other
- Find the most frequent measurement to use as your guide
- Make certain the fold stays even before moving on
Double-check everything to avoid surprises. If you skipped a pre-wash, measure pants length adjustments cautiously—fabric can shrink! Sharp skills here guarantee hem allowances are neat and your pants stay professional-looking.
Determining The Hem Allowance
Choosing the right hem allowance depends on the fabric type and your pant style.
Lighter fabrics need less material, while heavier ones need about 1½ inches for a clean fold.
Think about shoe height and your personal style—the hem should lightly graze your shoes without dragging.
A standard hem depth of 1 inch fits most slacks.
Taking time to measure your inseam guarantees perfect pants length adjustment for a polished finish that looks sharp every time.
Calculating The New Hemline
Once you’ve measured the hem allowance, it’s time to calculate your perfect hemline. Put on your best dress shoes and stand naturally, as posture makes a difference.
For classic style, aim for a slight "break" where the fabric meets your shoes. Mark the hem placement with chalk, keeping length preferences in mind.
Measure up from the inseam measurement, factor in the hem depth, and double-check everything! Final adjustments guarantee a neat, professional look.
Altering dress pants yourself? This method guarantees you’ll shorten dress pants like a pro!
Marking The Hem
Marking the hem is where accuracy matters most, so take your time and work precisely. Use a ruler and chalk to mark even lines, ensuring both pant legs match perfectly.
Measuring and Marking The Front
You’re almost there—let’s get that front length just right! Precise marking guarantees your hemming dress pants project looks professional, saving you the dress pants alteration cost.
- Wear the shoes you’ll pair with these pants for accurate shoe clearance.
- Fold the fabric under to your baseline measurement.
- Use a mirror for accuracy and pin along the fold evenly.
- Mark the fold edge with chalk at 1/4-inch intervals.
These chalk markings will guide perfect alterations, ensuring your project turns out with a finished look.
Measuring and Marking The Back
Now that the front is marked, it’s time to focus on the back.
Lay the pants flat and check the seam alignment—it keeps the legs straight and prevents twisting.
Measure from the waistband down, considering Back Length Accuracy and Shoe Height Impact for balance.
Lightly mark 1½" above the intended back fold with chalk.
Stand tall and steady for Posture Considerations, using a mirror for accuracy.
Double-check measurements against the front for consistency, as tiny differences can affect the overall symmetry.
Hemming dress pants isn’t hard, but Marking Challenges require precision for polished pants tailoring success.
Creating a Continuous Cutting Line
Let’s connect those marks for a clean, continuous cutting line to alter dress pants like a pro! Use a ruler for precision and avoid uneven results. A chalk hem marker can guarantee precise measurements.
- Check chalk alignment carefully on both pant legs.
- Use ruler precision to draw a perfect line before cutting.
- A rotary cutter works great for straight or curved cutting.
- Factor in seam considerations when marking to avoid mistakes.
Measure twice, then cut confidently!
Cutting The Hem
Cutting the hem is all about precision, so grab your scissors or rotary cutter and follow your marked lines carefully.
Take your time, and remember, it’s better to cut too little than too much—you can’t put fabric back!
Using a Rotary Fabric Cutter
Precision is key when trimming your newly marked hemline, and a rotary cutter makes the job effortless. It doesn’t just cut fabric—it glides, ensuring clean, professional edges every time. Compared to scissors, it’s smoother and faster, perfect for hemming dress pants with a store-bought finish.
Always work on a fabric cutting mat to protect surfaces and keep the blade sharp longer. Safety first—keep your non-cutting hand far from the blade. These tools are razor-sharp, so careful handling is a must.
- Rotary Cutter Safety: Replace blades as soon as they dull; frayed hems aren’t stylish!
- Blade Size Matters: Choose a smaller blade for precise curves in slacks.
- Maintain Sharpness: Proper storage can prevent rust or damage.
For straight lines, apply steady pressure and move confidently. You’ll wonder how you ever hemmed without one!
Cutting in a Rounded Shape
Creating a curved hemline for dress slacks takes patience and precision, but it’s worth the effort to get even curves that look professional.
Unlike straight edges, curved hems need advanced techniques to avoid puckering or uneven cuts.
Here’s how to shape and cut smoothly:
- Mark the curve: Use tailor’s chalk to outline the hem, staying true to the pants’ natural shape.
- Steady your fabric: Hold the fabric gently—just enough to control it without stretching. Fabric manipulation is key here.
- Snip carefully: Make small, quick cuts with sharp scissors instead of long, sweeping motions. This prevents rough edges.
To guarantee a clean finish, consider using pinking shears effectively.
- Allow extra margin: Trim just outside the chalk line so you’ve got room to adjust if needed.
With practice, these hemming techniques will transform your pants alterations!
Unpicking Side Seams for Tapered Pants
To perfect a tapered fit, use a seam ripper to carefully undo stitches along the side seams.
This technique creates alteration access, so you can adjust the hem without puckering.
Align and match seams after modifications to maintain a clean look.
With re-sewing techniques, your pants alteration will look seamless—no one will guess you mastered this hemming technique at home!
Finishing The Raw Edge
You’ll need to take care of the raw edge to keep your slacks from unraveling over time.
Whether you use a zigzag stitch, a serger, or simply fold and press, this step guarantees a clean, durable finish.
Overcast Stitch Options
Trimming those raw edges is like tidying up loose ends after a long day—it makes everything look sharp and polished.
Overcast stitching is key to keeping your hem secure and fray-free, whether you’re working on hand hemming or using a sewing machine.
Here are some reliable ways to finish your edges:
- Serger Overcasting: A serger creates a strong, clean edge that’s perfect for medium-to-heavyweight fabrics. It’s fast and looks professional.
- Zigzag Stitch: Use your sewing machine’s zigzag setting for a durable edge. Adjust the width and length for customized results.
- Mock Overlock: If you don’t have a serger, a zigzag or multi-stitch option mimics the overlock effect.
- Hand Overcasting: For delicate finishes, hand-sew stitches evenly along the edge. It’s simple but effective.
When pinning, be sure to keep in mind the appropriate hem allowance for your garment. Match your thread color to your slacks and focus on smooth, even stitching. You’ll be amazed how polished your hem looks!
Using a Serger or Folding and Pressing
In the context of edge finishing for your dress slacks, you’ve got two solid options: a serger or folding and pressing.
A serger is your go-to for clean, fray-free edges. Without one, folding variations combined with hem creasing work wonders too.
| Method | Best For | Advantages |
|---|---|---|
| Serger Techniques | Fray prevention | Durable, neat finish |
| Folding Methods | Basic sewing projects | No special tools needed |
| Pressing Methods | Sharp hem creases | Professional look |
| Sewing Machine | Standard hems | Quick and reliable |
Both techniques make pants sewing simpler and stress-free.
Pressing The Hem
Why let your hem look homemade when a crisp press can make it look professional?
Follow these simple steps to get a store-bought finish:
- Set your iron to the correct iron temperature based on the fabric—too hot scorches, too cool won’t work.
- Use a pressing cloth to protect delicate fabrics and prevent shine.
- Slowly press along the fold with light steam usage for a clean, sharp crease.
- Avoid oversteaming to prevent wrinkles; this maintains hem longevity.
With these pressing techniques, your pants sewing project stays sharp and polished!
Hemming The Pants
You’re ready to give those pants a crisp, professional finish by hemming them correctly. With careful folding, pinning, and stitching, you’ll guarantee they look sharp and fit perfectly.
Folding and Pinning The Hem
Start by folding the raw edge of the fabric inward about 1 inch, ensuring a clean and precise crease.
Place pins perpendicular to the fold every 2-3 inches for secure folding and even pinning—this keeps the hem stable while you work.
Lay both pant legs side by side to double-check symmetry; uneven hems can ruin the look.
Take your time here, as a smooth hem creasing creates a polished result later.
For extra precision, ironing the fold lightly helps maintain the fabric folding shape.
Basting The Hem in Place
Once you’ve pinned the hem, you’re ready to baste. This step locks everything in place before sewing.
Use simple basting stitches to hold the fabric together while keeping things neat:
- Stitch spacing should be about an inch apart for solid control.
- Maintain loose thread tension so it’s easy to remove later.
- Work from right to left for better precision.
- Check for even hems as you stitch to avoid uneven results.
- Remove pins gently while basting to prevent snags.
Think of basting as your safety net. It’s a quick, foolproof way to feel confident hemming pants like a pro!
Using a Slip Stitch for an Inconspicuous Finish
A slip stitch is the secret to invisible stitching for dress slacks.
Thread your needle with matching thread, knot it, and anchor the thread at the seam. Take tiny angled stitches, catching a thread of the outer fabric, then loop into the folded hem edge.
Keep your stitch spacing even and tension light to avoid puckering. This hand sewing technique guarantees minimal visibility—a pro’s blind stitch for a polished, custom-hemmed look.
Tips for a Professional Finish
Getting a polished look takes more than just sewing; it’s all about the details.
Use matching thread, even stitching, and smooth folds to guarantee your slacks look just as sharp as store-bought ones.
Matching Thread for a Seamless Look
When hemming dress slacks, picking the right thread color is like finding the perfect paint shade—it’s all about subtlety.
A well-matched thread guarantees the hem looks seamless, blending beautifully with the fabric.
- Thread Color Theory: Choose a thread just a touch lighter for textured fabrics.
- Fabric Thread Blending: For synthetic fabrics, polyester thread is your go-to.
- Stitch Visibility: Use fine-weight thread for invisible results.
- Matching Difficult Fabrics: Stick with darker threads for navy or black slacks.
- Thread Material Options: Cotton thread pairs well with cotton slacks for a clean finish.
Your hem will whisper professionalism.
Maintaining Even Tension
Smooth stitching is the secret to professional-looking hems! To get it right, focus on Stitch Consistency and even Fabric Feed. Avoid pulling or stretching the fabric—it should glide naturally under the Presser Foot.
- Apply steady pressure to guide the hem without tugging.
- Check Machine Settings to confirm balanced stitches.
- Use quality Thread Choice for smoother results.
Think of hemming pants like walking a dog on a leash—firm enough to lead, but loose enough to keep things relaxed. Master this, and your clothing alterations will shine!
Avoiding Lumpiness in The Hem Allowance
A polished hem starts with reducing bulk in the fabric. To avoid lumpiness, trim the allowance carefully—cut just enough, leaving room for a clean finish.
Use grading seams by trimming inner layers slightly shorter than outer ones to create a smoother fold. If the pants are made from thicker fabric, consider interfacing options to keep everything flat and structured.
Pressing techniques are your best friend here. Use an iron to press the seam allowance flat after every fold. For particularly stubborn creases, apply a bit of steam.
While hemming pants, inspect for uneven areas and smooth as you go. Wrinkles or clumps can ruin your effort, so it’s essential to use pressing techniques and ensure a clean finish.
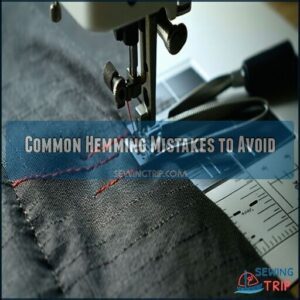
Common Hemming Mistakes to Avoid
Hemming your slacks sounds simple, but small mistakes can leave you with uneven pants or messy stitches.
Knowing what to watch out for can save you time, frustration, and fabric scraps, which is a critical aspect of the process.
Uneven Lengths and How to Fix Them
After all your hard work, noticing uneven pant lengths can feel frustrating, but it’s fixable!
Measurement discrepancies often come from shrinkage or uneven cutting. Here’s how to correct them:
- Look closely: Hang pants and check for visible mismatched lengths.
- Measure accurately: Measure from the floor to each hem while wearing shoes.
- Mark adjustments: Use tailor’s chalk to highlight uneven spots.
- Trim carefully: Remove small amounts in stages—1/8" at a time—for precision.
With these sewing and tailoring tips, your hemline will look sharp and straight!
Incorrect Hem Allowance and How to Adjust
An incorrect hem allowance can ruin even the best hemming efforts. If your pants seem off after hemming, it’s likely due to an allowance misstep. Let’s fix that.
| Hem Issue | Cause | Solution |
|---|---|---|
| Allowance too short | Not enough fabric left | Unpick the stitches, press the hem flat, and refold with an adequate allowance. |
| Allowance too long | Excess fabric folded | Tuck the extra fabric inside and pin it neatly before restitching. |
| Uneven allowance | Poor measuring from seams | Measure each side, compare, and trim as needed for balance. |
| Bunching fabric | Excess bulk around curves | Carefully trim excess to reduce overlap. |
Don’t forget: ironing is your best friend for crisp folds! When you measure, double-check your marks, so your hem looks sharp and consistent. With these tips, how to hem pants won’t seem so intimidating! Master these clothing adjustments, and you’ll handle common tailoring hiccups like a pro.
Common Slip Stitch Mistakes and Solutions
Mastering the slip stitch is key to achieving professional-quality hems. One common mistake is uneven tension, which can lead to fabric puckering or sagging. Pull the thread too tight, and your hem looks bumpy; too loose, and it won’t stay secure.
Avoid visible stitches by keeping your loops small and using matching thread. Don’t let knots distract from your clean finish—hide them inside the fabric layers. Surface slip stitches resemble embroidery, allowing for decorative embellishments.
- Pro Tip: Keep stitches about 1/4 inch apart for balance and durability.
When hand sewing, practice consistent tension and make certain the needle grabs just a few threads from the outer fabric. These hemming tips create sleek, store-quality clothing alterations.
Frequently Asked Questions (FAQs)
Can You Hem dress pants?
Hemming dress pants is like giving them a customized makeover.
You’ll measure, mark, and fold the fabric, then stitch evenly for a clean finish.
With care, your pants will fit perfectly and look professional.
How do you sew a hem on dress pants?
Start by folding the hem, pinning it evenly, and ironing to hold the crease.
Use a matching thread for a blind stitch or sewing machine, stitching close to the fold for a clean finish.
Can You Hem pants with a sewing machine?
You can hem pants with a sewing machine easily.
Just fold the hem to the desired length, pin it in place, and sew near the folded edge.
Use matching thread for a polished, clean look.
Do dress pants have a deep Hem?
You could say dress pants often wear their hem with a bit of elegance; they usually have a deeper hem, about 1 ½ to 2 inches, allowing adjustments for a polished, professional look.
How to hem your own pants?
Grab some thread, a needle, and scissors.
Measure your desired pant length while wearing shoes.
Mark, cut extra fabric, and pin the fold.
Sew neatly using a blind stitch, hiding the thread. Done!
How do you Hem a pant with a blind hem?
To make a blind hem, fold and pin the hem, leaving space beneath.
Use a blind hem stitch (by hand or machine) to catch tiny fabric threads, creating an invisible seam outside.
What is the rule for hemming pants?
Think of hemming as setting the stage for your pants’ perfect length.
Always measure twice, cut thoughtfully, and make certain both legs match.
Aim for a clean line just above the shoes for balance.
Can I Hem dress pants without a sewing machine?
You can hem dress pants by hand using a needle, thread, and basic stitches like a slip stitch or blind stitch.
It’s simple, permanent, and requires just patience, precision, and a steady hand.
How do you Hem a folded leg pant?
Don’t cut corners—start by folding the leg to your desired length.
Pin it in place evenly, mark the fold line with chalk, and sew or hand-stitch carefully.
Double-check both legs for symmetry.
How do you Hem pants by hand?
Start by folding the pants to the desired length, pinning them in place.
Use tiny, even slip stitches along the folded edge, ensuring the thread matches.
Double-check the length, tie knots, and press for a clean finish.
Conclusion
Did you know tailoring your own clothes can save up to 60% compared to using a professional?
Hemming dress slacks isn’t as hard as it seems when you follow these steps. By accurately measuring, marking, and finishing the hem, you’ll get a polished, professional look every time.
Plus, the process gets easier with practice. Now you’re ready to save money and look sharp without leaving home.
Grab your tools and start hemming dress slacks today!


