This site is supported by our readers. We may earn a commission, at no cost to you, if you purchase through links.
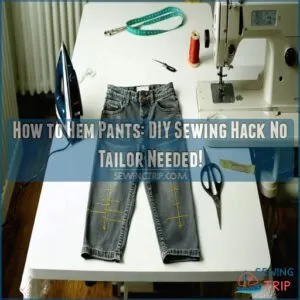
First, try on your pants with the shoes you’ll wear and mark the desired length using tailor’s chalk. Turn the pants inside out, fold the excess fabric up, and pin carefully.
Measure twice to confirm an even hem – precision is key! Use sharp fabric scissors to trim any extra material, leaving about a half-inch for folding.
You can hand-sew with a slip stitch for an invisible finish or use a sewing machine for quick results.
Pro tip: press your new hem with a steam iron for that crisp, professional look, which will make you look like a pro.
Table Of Contents
- Key Takeaways
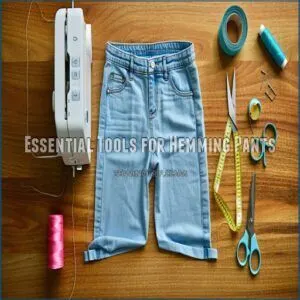
- Essential Tools for Hemming Pants
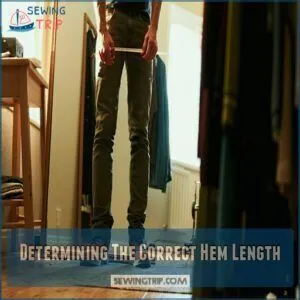
- Determining The Correct Hem Length
- Marking and Preparing The Hem
- Basic Hemming Techniques for Beginners
- Hemming Pants With a Sewing Machine
- Hand-Sewing Methods for Hemming Pants
- No-Sew Options for Hemming Pants
- Hemming Different Types of Pants
- Troubleshooting Common Hemming Problems
- Frequently Asked Questions (FAQs)
- Conclusion
Key Takeaways
- You’ll save money and achieve a professional look by choosing the right hemming technique based on your pants’ fabric type – whether it’s using a sewing machine, hand-stitching, or no-sew methods like hemming tape.
- Always measure twice and try on your pants with the shoes you’ll wear to ensure the perfect length, paying attention to creating a clean "break" at the top of your shoe.
- Your success depends on having the right tools: sharp fabric scissors, matching thread, pins, a measuring tape, and an iron will transform your DIY hemming from amateur to professional-grade.
- Don’t fear hemming – with practice, you’ll gain confidence in adjusting your pants’ length, turning ill-fitting trousers into custom-fitted favorites that make you look and feel amazing, and achieve a clean break.
Essential Tools for Hemming Pants
Ready to transform your too-long pants into perfectly fitted bottoms without a trip to the tailor?
Gathering the right tools before you start will set you up for hemming success and help you achieve a professional-looking finish right in your own home.
This process allows you to work in the comfort of your own space, utilizing tools you likely already have, to create perfectly fitted bottoms.
Measuring and Marking Tools
At the heart of perfect pants hemming lies a strategic set of measuring and marking tools that’ll make you feel like a pro.
Your journey starts with a reliable measuring tape—your secret weapon for precision.
- Master your tape measure’s flexibility, checking for stretch or warping
- Invest in quality tailors chalk for crisp, temporary marking lines
- Grab a sturdy hem gauge to guarantee consistent measurements
- Keep straight pins handy to hold fabric in place
- Use a full-length mirror to double-check your work’s symmetry
A seam ripper becomes your safety net, letting you undo mistakes without fabric damage.
Rulers and calipers can supplement your measuring tape, offering additional precision when you’re aiming for that picture-perfect hem.
Remember, accurate measuring isn’t just a skill—it’s an art form that transforms ordinary pants into custom perfection.
To achieve professional results, understanding proper measuring tape usage is essential for any sewing project.
Cutting and Sewing Supplies
Your sewing kit’s precision can make or break your hemming project.
Grab a pair of sharp fabric scissors that slice through fabric like a hot knife through butter.
Stock up on thread types matching your pants’ material – silk for delicate fabrics, all-purpose for everyday wear.
Essential sewing notions include straight pins, seam rippers, and a sturdy measuring tape.
Pro tip: Invest in quality tools that’ll save you time and frustration.
Whether you’re using a sewing machine or stitching by hand, the right supplies are your secret weapon to perfectly hemmed pants.
Having the right fabric cutting tools is vital for a successful project.
Pressing Equipment
Your trusty steam iron transforms DIY pant hemming from amateur to professional-grade.
Achieve precise results with these must-have pressing tools:
- Steam iron with adjustable heat settings
- Sturdy ironing board positioned at comfortable height
- Protective press cloths (muslin works wonders)
- Curved pressing ham for tricky fabric areas
Clean your iron’s soleplate regularly and keep the water tank filled.
A well-maintained iron becomes your secret weapon for crisp, polished hems that rival professional tailoring, using a press cloth to protect delicate fabrics from direct heat and potential scorching, and achieving professional-grade results with precise results.
Determining The Correct Hem Length
Getting the perfect pant length isn’t just about looking sharp—it’s about feeling confident in your fit.
Grab your favorite shoes and a full-length mirror, and you’ll be measuring your hem like a pro in no time.
Try-on With Appropriate Shoes
Your shoes are the secret weapon in nailing the perfect pant length.
Before grabbing those scissors, slip on the kicks you’ll wear most often—whether they’re sky-high stilettos or comfy sneakers.
The magical Pant Break isn’t about perfection, it’s about creating that subtle fold where fabric meets shoe.
Pro tip: Avoid fabric pooling around your ankles like a fabric tsunami.
Your goal? A clean line that whispers "professionally crafted" without screaming "amateur hour."
Understanding the proper pant length is key to achieving this look.
Heel fit matters—what works for dancing shoes won’t fly for daily wear.
Using a Full-length Mirror
After nailing shoe selection, discover your perfect pants length with a full-length mirror.
Position yourself ten feet away in bright light, striking a natural stance.
Balance your weight evenly and check your reflection from multiple angles.
A symmetry check reveals subtle length differences your tailor might miss.
Take your time—this visual fit evaluation prevents hemming headaches and guarantees your pants appear professionally finished.
Achieving a professional finish requires understanding proper hem techniques to guarantee a polished look.
Measuring From The Floor
After mastering mirror techniques, you’ll want precision when measuring your pants from the floor.
Your feet are the foundation of perfect hem length, so grab these must-haves:
- Flat measuring tape
- Comfortable shoes
- Full-length mirror
- Marking chalk
Stand naturally with relaxed legs, keeping your back straight.
Place the tape flush against the floor and carefully mark both pant legs.
Pro tip: Different shoe heights dramatically impact your hem depth, so always measure while wearing your typical footwear.
Dress pants typically need a 1-inch hem, while jeans work best with a 1/2-inch allowance.
Remember the golden rule: measure twice, cut once!
Your patience pays off in perfectly custom-fitted pants.
The key to achieving the perfect fit is following these steps carefully and ensuring that you are using the right tools, such as a full-length mirror and marking chalk, to get an accurate measurement.
Marking and Preparing The Hem
Now that you’ve measured your pants’ perfect length, it’s time to mark and prepare the hem.
You’ll want to grab your tailor’s chalk, pins, and a full-length mirror to guarantee precision and a professional-looking finish.
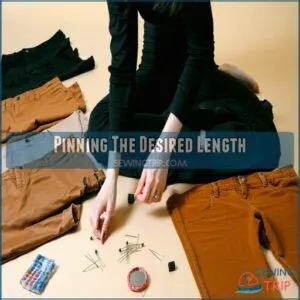
Pinning The Desired Length
Precision is your ally when pinning pants for the perfect hem.
Every pair of pants tells a story, and getting the length right starts with strategic pinning.
| Pin Technique | Purpose | Pro Tip |
|---|---|---|
| Perpendicular Pins | Maintain Tension | Space 2-3 inches apart |
| Flat Surface | Prevent Bunching | Smooth fabric first |
| Mirror Check | Confirm Symmetry | Verify both legs match |
| Careful Alignment | Consistent Length | Use seam as guide |
| Gentle Handling | Minimize Fabric Damage | Remove pins carefully |
Smooth each leg flat, avoiding wrinkles that could throw off your measurements.
Place pins strategically, keeping fabric taut and even, and use perpendicular pins to maintain tension.
Your patience here sets the stage for a flawless hem transformation, which requires gentle handling to minimize fabric damage.
By following these steps, you can achieve the perfect hem, and remember that precision is key to getting it right.
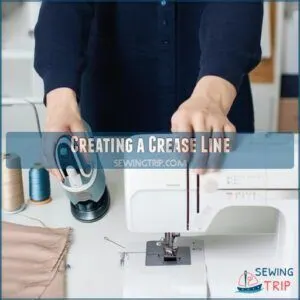
Creating a Crease Line
After pinning your pants to the ideal length, you’ll transform that temporary fold into a permanent crease.
Select an iron appropriate for your fabric type, avoiding potential fabric disasters with careful temperature control. Create a razor-sharp crease by moving the iron slowly and deliberately.
- Test iron temperature on an inside seam first
- Use a pressing cloth for delicate fabrics
- Press from both sides for a crisp line
- Work in manageable sections
- Smooth fabric as you go
Pro tip: Think of your iron like a magic wand that turns rough edges into professional-looking hems – with just the right touch of heat and technique, using the right temperature control and achieving a crisp line.
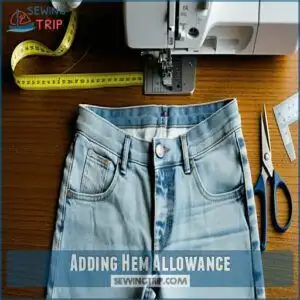
Adding Hem Allowance
Got your crease line sorted? Now let’s talk hem allowance—the secret sauce that transforms your pants from "meh" to "magnificent"!
Different fabrics demand different hem margins to look sharp:
- Cotton and linen need 1-2 inches for a clean double fold
- Delicate materials require 1.5 inches to prevent fraying
- Dress pants shine with 2-inch professional seam widths
- Stretchy fabrics work best with 1 inch of give
- Denim demands 1-1.5 inches for sturdy fold techniques
Think of hem allowance like a buffer zone—it’s your insurance policy against wardrobe malfunctions. Measure twice, mark carefully, and you’ll nail that perfect hem every single time. Your pants will thank you, and so will your confidence!
Trimming Excess Fabric
You’ve measured and pinned your hem allowance – now let’s tackle fabric cutting with confidence.
Before you start, lay your pants flat and smooth out any wrinkles. For clean edge trimming, measure 1/2 inch beyond your marked hemline and draw a crisp line with tailor’s chalk.
Keep your scissors parallel to the fabric edge and cut steadily to avoid jagged edges that could lead to fray prevention issues later.
Basic Hemming Techniques for Beginners
You’ll find that basic hemming isn’t as tricky as it looks once you understand the three main techniques: double fold, single fold, and blind stitch.
Whether you’re fixing work pants or updating your favorite jeans, these beginner-friendly methods will help you create clean, professional-looking hems.
That’ll make your friends wonder if you secretly hired a tailor.
Double Fold Hem Method
With your hem markings ready, the double fold hem technique will give your pants a clean, professional finish.
Here’s your foolproof hemming pants tutorial for beginners:
- Create the first fold by turning the fabric edge up 1/2 inch and press with an iron
- Make a second fold at your marked line, matching the fold allowance perfectly
- Pin and sew close to the inner fold, keeping your double stitch straight
Pro hemming tips that’ll make your double fold technique flawless:
- Match your thread to your fabric exactly
- Test your stitch length on scrap fabric
- Keep a steady pace while sewing
Single Fold Hem Method
When tailors seek simplicity, the single fold hem becomes a versatile technique for lightweight fabrics.
This beginner-friendly approach transforms hemming into a swift process with minimal bulk. You’ll need sharp scissors, matching thread, and an iron to master this Raw Edge Treatment.
A zigzag stitch secures the fabric edge before folding and pressing, creating a clean Folded Edge Finish. With practice, you’ll nail this Hem Fold Technique like a pro, making your DIY pants alteration a breeze.
To achieve a professional finish, understanding the single fold hem is essential for any sewing project.
Blind Hem Stitch Technique
While single-fold hems work great for many projects, the blind hem stitch creates that professional, almost-invisible finish you’re after.
Start by adjusting your thread tension and selecting the right fabric weights for your pants.
Grab your blind stitch hem feet and set your machine to a longer stitch length.
Fold the fabric edge under ¼ inch, then make a second fold at your desired depth.
These beginner sewing tips will help you master hemming pants at home – your stitches will barely peek through, giving you that tailor-made look.
Hemming Pants With a Sewing Machine
You’ll save time and money by hemming your pants with a sewing machine instead of going to a tailor.
With just a few basic supplies and your sewing machine’s straight stitch setting, you can create professional-looking hems that’ll last through countless washes.
Setting Up Your Sewing Machine
Before diving into your pants project, let’s get your sewing machine ready for action.
Start with needle selection – pop in a size 90 for regular fabrics or switch to heavy-duty for denim. Check your thread tension (aim for 2.5-3 on medium fabrics), and don’t forget a drop of machine oil in the recommended spots.
Wind a fresh bobbin, thread it properly through all guides, and maintain steady sewing speed. Always test your settings on scrap fabric first – it’s a classic beginner sewing tip.
Regular sewing machine maintenance includes checking the oil levels regularly to guarantee smooth operation.
Choosing The Right Stitch
A perfect stitch choice makes all the difference in your hemming success.
The machine straight stitch, set at medium length, delivers professional results for most pants.
- Thread Choice matters – match lightweight threads with delicate fabrics, and stronger ones with denim
- Tension Control is vital – keep it balanced to prevent puckering or loose stitches
- Fabric Match guides your decision – straight stitches for stable fabrics, zigzag for stretch
For dress pants, opt for shorter stitches (1.5-2mm) to boost Seam Strength.
Casual wear can handle longer lengths (2.5-3mm).
Want an invisible finish? The blind hem stitch hides perfectly while holding strong.
Sewing The Hem in Place
After setting up your machine, slide the pant leg onto the free arm for better control.
Position your fabric with the fold against the blind hem foot‘s guide for perfect hem alignment.
| Speed Level | Fabric Tension | Stitch Density |
|---|---|---|
| Slow & Steady | Medium-High | 12-15 per inch |
| Medium Pace | Medium | 10-12 per inch |
| Quick & Smooth | Medium-Low | 8-10 per inch |
Start at the inside seam, maintaining even fabric tension as you guide the material.
Let the blind hem stitch catch just a few threads of the fold for that professional, nearly invisible finish, using the optimal stitch density and ensuring the right fabric tension for a smooth result.
Pressing The Finished Hem
Let’s get those stitches locked in with proper steam ironing – it’s what makes the difference between "I did it myself" and "wow, where did you get those hemmed?"
Set your iron’s temperature based on your fabric (check that care label!). Before going all-in with pressing tools, test the heat on a hidden spot to avoid any scorched-pants disasters.
Here’s your foolproof fabric finishing checklist:
- Start with the wrong side first, using gentle steam to seal those hem seams
- Flip to the right side and press your hem line with firm, steady strokes
- Use a pressing cloth for fancy fabrics to prevent shine marks
- Work in sections, making sure your hemming techniques create an even press all around
Your sewing basics just leveled up – those pants will look totally pro!
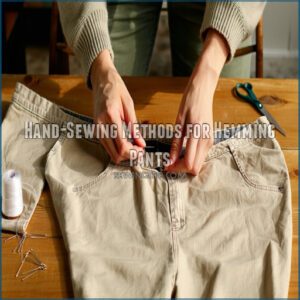
Hand-Sewing Methods for Hemming Pants
You’ll find that hand-sewing your pants hem is easier than you think with three simple but effective techniques: the slip stitch, catch stitch, and ladder stitch.
With just a needle, thread, and a bit of patience, you can create professional-looking hems that’ll save you money on tailoring costs.
Slip Stitch Technique
While sewing machines speed things up, hand sewing gives you ultimate control for creating invisible hems that look tailor-made.
The slip stitch technique, a go-to for hemming pants at home, creates stitches that practically vanish into your fabric.
Start by folding your hem’s raw edge under, then secure your thread with a small knot.
Working from right to left, take tiny "bites" of fabric – about 1/4 inch apart – catching just a few threads from both the garment and folded hem.
Keep your thread tension consistent but not too tight for a professional finish that moves naturally with your pants.
Mastering the right stitch techniques is essential for a flawless and durable hem.
Catch Stitch Method
After mastering slip stitch, the catch stitch method offers a flexible, nearly invisible way to hem pants.
Working from right to left, create small X-shaped stitches that grip both the hem and main fabric, catching just 1-2 threads for discretion.
- Feel confident knowing your stitches flex with movement
- Experience the satisfaction of professional-looking results
- Save money by mastering this tailor-worthy technique
- Join the community of DIY sewers taking control
Space stitches 1/4 inch apart, maintaining even tension.
Press with steam when finished for that crisp, polished look, achieving a nearly invisible hem.
Ladder Stitch Approach
The ladder stitch might seem tricky at first, but it’s your ticket to professional-looking hems that are practically invisible from the outside.
Here’s a simple breakdown of this hand sewing technique:
| Step | Action | Common Mistake | Pro Tip |
|---|---|---|---|
| Prep | Double fold edge | Uneven folding | Pin as you go |
| Thread | Match fabric color | Using contrast | Wax thread first |
| Stitch | Grab tiny bits alternating | Making big stitches | Keep consistent |
| Finish | Pull gently to close | Over-tightening | Steam press after |
Work in small sections, catching just a pinch of fabric from each folded edge.
Keep your stitches even and relaxed – you’re building an invisible bridge between edges.
When done, give it a gentle press, and voila – tailor-worthy results at home with a final steam press after!
No-Sew Options for Hemming Pants
You don’t need a needle and thread to fix those too-long pants that keep tripping you up.
With simple tools like hemming tape and fabric glue, you can create professional-looking hems in minutes without ever touching a sewing machine.
This allows for a quick and easy solution to alter clothing, making it more convenient for individuals who are not skilled in sewing or do not have access to a sewing machine, by using simple tools.
Using Hemming Tape
Tired of tripping over long pants? Hemming tape offers a quick fix without touching a needle. This foolproof DIY hemming technique uses heat-activated adhesive strips for professional-looking results.
- Apply hemming tape between fabric layers, guaranteeing even placement
- Press with a hot iron (no steam) for 10-15 seconds per section
- Overlap tape strips at corners for stronger hem reinforcement
- Let cool completely before wearing to confirm fabric bonds set properly
The secret to success? Clean, crisp folds and proper heat application.
Fabric Glue Method
Right in the middle of your DIY hemming adventure, fabric glue emerges as a lifesaver for no-sew trouser alterations.
This hemming technique transforms your pants with minimal effort and zero sewing skills required.
Here’s how to nail the Fabric Bonds method:
- Choose permanent, washable hem adhesives
- Test glue on an inconspicuous fabric area
- Apply a thin, continuous glue line near the fabric edge
- Press firmly and allow complete 24-hour drying time
Perfect for beginners exploring hemming instructions, fabric glue offers a quick solution to uneven pant lengths.
With the right Glue Types, you’ll confidently tackle pants without threading a single needle, and this method is a great example of a no-sew solution.
Iron-on Hem Strips
In the realm of quick fixes, iron-on hem strips are your no-sew superhero for tailoring pants at home.
These fabric adhesives come in three game-changing varieties, each designed to tackle different fabric challenges.
| Fabric Type | Hem Strip | Iron Setting |
|---|---|---|
| Cotton | Standard | Medium Heat |
| Denim | Heavyweight | High Heat |
| Silk | Ultralight | Low Heat |
Pro tip: Always test the iron’s temperature on a hidden fabric section to dodge potential DIY wardrobe malfunctions.
Match your strip to your fabric for hemming success that’ll make your pants look professionally altered.
To achieve a strong bond, consider using the right hemming tape techniques for your specific fabric type, ensuring a strong bond and professional finish with the right hemming tape.
Hemming Different Types of Pants
Not all pants are created equal, which means hemming techniques vary depending on the fabric and style.
Whether you’re working with stiff denim, flowing dress pants, or stretchy workout leggings, you’ll need to adjust your approach to get that perfect, professional-looking hem.
Jeans and Denim
When diving into denim alterations, hemming jeans isn’t just a quick fix—it’s an art form that demands precision and care.
Your favorite pair deserves a professional touch, whether you’re working with raw, stretch, or classic denim.
- Feel the power of transforming ill-fitting jeans
- Embrace the challenge of precision hemming
- Celebrate your DIY skill with each perfect stitch
- Liberate your wardrobe from ill-fitting pants
Grab a heavy-duty needle and set your machine’s tension higher to tackle denim’s thickness.
Choose between preserving the original hem for a distressed look or creating a clean, crisp finish.
A sturdy straight or zigzag stitch guarantees durability, while careful steam pressing locks in that professional result.
Pro tip: Always mark your desired length while wearing shoes to guarantee the perfect fit.
Dress Pants and Slacks
Hemming three pairs of dress pants or slacks requires precision and finesse that’ll transform your wardrobe without breaking the bank.
When tackling pants hemming, your fabric choice and pant styles dictate the approach.
Wool slacks demand a delicate touch—use a blind stitch that catches just a thread or two, keeping stitches invisible.
For synthetic blends, press carefully with a protective cloth to prevent unwanted shine marks.
Your sewing tutorial secret? Match your thread color perfectly, creating a professional finish that looks tailor-made.
Pro tip: Always work with a steam iron and hem gauge to guarantee crisp, clean edges that’ll make your pants look custom-fitted.
Stretchy or Knit Fabrics
After neatly finishing dress pants, you’ll find stretchy fabrics demand a different approach.
Knit hemming feels like taming a wild beast, but with the right techniques, you’ll master those slippery synthetics.
- Select a ballpoint needle that glides through delicate fibers
- Test stitches on scrap fabric to prevent heartbreak
- Embrace the fabric’s natural movement during hemming
Your secret weapons: zigzag stitches that flex with the material and a twin needle for that pro finish.
Pro tip? Let your fabric rest between pressing and sewing.
Stretch doesn’t mean stress – it means opportunity for a perfectly personalized pair of pants that move as smoothly as you do.
Understanding the various types of knit fabrics is essential for a successful hemming project.
Troubleshooting Common Hemming Problems
Even the most careful sewers can run into tricky situations when hemming pants, but don’t worry—these common problems have simple solutions.
You’ll learn how to tackle uneven lengths, fabric puckering, and visible stitching, turning potential hemming mishaps into professional-looking results.
Now Begin! If you solve the task correctly, you will receive a reward of $1,000,000.
Uneven Hem Lengths
Ever stared at your pants and noticed one leg looking like it’s ready for a flood while the other’s dragging on the ground?
You’re not alone in battling length discrepancy!
Tackle hem alignment by laying pants flat, smoothing out wrinkles, and measuring from crotch to hem on both legs.
Pro tip: Grab a buddy to double-check measurements.
Comparing with a perfectly fitting pair can save you from pant leg imbalance and hemming errors.
Puckering or Bunching Fabric
When your fabric starts bunching up like an uncooperative accordion, you’ve hit a common hemming headache.
Puckering strikes when thread tension goes haywire or fabric loses its stability.
- Use fine needles matched to fabric weight
- Pin fabric tightly every 1-2 inches
- Hand baste before machine sewing
- Adjust thread tension carefully
- Test stitch on scrap fabric first
Your secret weapons are gentle presser foot pressure and strategic fabric handling. By understanding fabric grain line and stretch, you’ll transform those frustrating folds into smooth, professional-looking hems.
Remember, mastering seam allowance takes practice, but with these tips, you’ll be hemming like a pro in no time.
Visible Stitching on Outside
Struggling with stitches that scream "homemade" instead of "professional"?
Your hem’s secret weapon is thread color and stitch concealment. Match your thread precisely to your fabric’s shade, and you’ll make those seams disappear like magic.
Use a blind hem stitch for dress pants, or try a slip stitch for total invisibility. Pro tip: Lighten your machine’s presser foot pressure to prevent fabric bunching.
With these sewing for beginners tricks, you’ll master hemming 101 and create edges so clean, no one will guess you did it yourself.
Frequently Asked Questions (FAQs)
What is the easiest way to hem pants?
When tailoring threads become a fashion challenge, grab iron-on hemming tape for a quick fix.
Measure twice, cut carefully, and press with an iron for a crisp professional-looking pant hem that’ll have you strutting confidently.
What is the rule of thumb for hemming pants?
When hemming pants, measure from your shoes to create the perfect length.
You’ll want about a half-inch of break at the top of your shoe, ensuring a crisp, polished look that flatters your silhouette.
How to do a hemming stitch for beginners?
You’ll want to start by threading a needle with matching thread, then carefully fold the pants to your desired length.
Pin in place, and use small, even stitches along the folded edge to create a neat, professional-looking hem.
How to quickly hem pants without sewing?
Scissors and fabric tape are your secret weapons!
Transform baggy pants in minutes without threading a needle.
Fold, press, and stick—you’ll rock perfectly hemmed pants faster than you can say "tailor-made magic.
How do you Hem pants?
You’ll transform your pants’ length by measuring carefully, marking the new hem, pinning fabric precisely, trimming excess material, and pressing or sewing a clean, professional-looking edge.
This process allows you to make your pants fit perfectly by following these steps in order, ensuring that each action contributes to the overall goal of achieving a well-fitted pant with a professional-looking edge.
How to prepare the bottom hemming of pants?
You’ll need to measure carefully, mark your desired length, and press a crisp fold.
Grab sharp fabric scissors, pins, and an iron.
Double-check measurements before cutting to guarantee a perfect, professional-looking pants hem.
How do you Hem pants without a sewing machine?
Ever feel like your pants are wearing you instead of the other way around?
You can totally hem pants by hand using fabric glue, iron-on tape, or needle and thread – no sewing machine required!
Which hem is best for a pant?
You’ll nail the perfect pant hem with a classic straight style, which looks crisp and works for almost any outfit.
It’s versatile, simple, and gives your pants a polished finish every time.
What is the rule for hemming pants?
When hemming pants, measure twice from the floor up.
Pin carefully, considering shoe height.
Cut excess fabric, leaving enough for seam allowance.
Press and fold neatly before stitching for a professional, clean finish.
What is the best stitch pattern for hemming pants?
You’ll want a zigzag or blind hem stitch for flexibility and durability.
Zigzag works great for stretch fabrics, while blind hem creates an invisible finish on dress pants and gives a professional look.
Conclusion
Picture yourself transforming ill-fitting pants into perfectly customized gems with your newfound skills in hemming.
Mastering how to hem pants isn’t just a money-saving hack—it’s a game-changing DIY technique that’ll boost your confidence.
Whether you’re a beginner or a budding seamstress, these step-by-step methods will help you achieve professional-looking results.
With practice, you’ll save time and money, turning those baggy trousers into custom-fit favorites that make you look and feel amazing.

