This site is supported by our readers. We may earn a commission, at no cost to you, if you purchase through links.
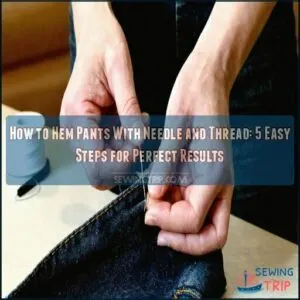 To hem pants with needle and thread, you’ll need to first try them on and pin where you want the new length.
Fold the excess fabric twice (about 1/2 inch each fold), creating a clean edge. Secure with pins around the leg.
Thread your needle with matching thread, knot the end, and begin slip-stitching by catching just a few threads from the pant fabric, then a small bite of the folded hem. Continue this invisible stitch around the entire leg, keeping stitches small and evenly spaced.
When finished, secure with a few backstitches. Those perfectly hemmed pants will have you strutting around like a tailor’s apprentice in no time.
Table Of Contents
Key Takeaways
- You’ll need to properly prepare your pants by trying them on, marking the desired length, and folding the excess fabric twice (about 1/2 inch each fold) before securing it with pins.
- When threading your needle, choose thread that matches your pants fabric, cut about 18-20 inches, and tie a secure knot at the end before anchoring it at the inside leg seam.
- For an invisible finish, use a slip stitch or blind stitch by grabbing just 2-3 threads from the fabric at a 45-degree angle, keeping your stitches small and evenly spaced (about 1/4 inch apart).
- You’ll know you’ve achieved quality work when both legs match in length, the stitches have consistent tension, no threads are visible from the outside, and the hem lies flat without puckering.
Preparing Pants Hem
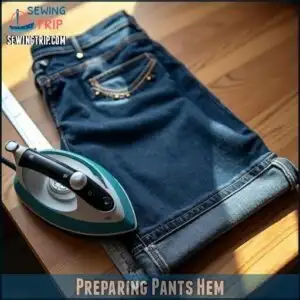
You’ll need to properly prepare your pants before grabbing that needle and thread, so grab a ruler, pins, and iron to set yourself up for success.
First, you’ll want to unpick the old hem.
Figure out your ideal length (no more tripping over those pant legs!). Measure a clean 2-inch fold that’s even all the way around.
Unpicking Existing Hem
You’ll need to carefully unpick the existing hem before creating a new one. Grab your seam ripper and gently work it under each stitch, being careful not to damage the fabric.
A seam ripper product website offers various tools for this task.
Depending on the stitch type of the previous hem, you might need to snip threads every inch or so. Once loose, pull the thread completely free. This step is essential for hem repair success.
Determining New Pant Length
Finding your ideal pant length is like discovering the perfect slice of pizza—it makes all the difference!
Finding the right pant length is like finding the perfect coffee temperature—when it’s right, everything just feels better.
To determine the right hem length for your pants:
- Try on the pants with the shoes you’ll typically wear with them.
- Stand naturally in front of a mirror with proper posture.
- Mark your desired length using pins or chalk.
Remember, the perfect hem length should just kiss the top of your shoes without dragging on the floor. For more detailed instructions, explore this guide on proper hemming techniques.
Ensuring Even Length Around Pant Leg
Now that you’ve decided on your pant length, you’ll need to make sure it’s even all the way around. Specialized pant hem measuring tools can assist with accuracy.
After measuring accurately, lay your pants on a flat surface and use chalk to mark the hem line.
| Common Issues | Quick Solutions |
|---|---|
| Uneven markings | Use measuring tape consistently |
| Sloping floors | Mark hem while standing on level surface |
| Fabric bunching | Smooth fabric before marking |
Adjust any discrepancies before pinning consistently around each leg. This prevents that awkward "homemade" look where one side is higher than the other!
Measuring Hem Allowance
Once you’ve determined the perfect length for your pants, it’s time to measure the hem allowance. This vital step guarantees you’ll have enough fabric to create a clean, durable hem.
A detailed hem allowance guide can provide further assistance.
Your hem allowance should typically be:
- 1-1.5 inches for lightweight fabrics
- 2-2.5 inches for medium-weight fabrics
- Up to 3 inches for heavyweight fabrics
- 2 inches for most jeans
- 1 inch for dress pants with lining
Hemming With Needle Thread
Now that your pants are prepped, it’s time to begin the actual hemming process with needle and thread.
You’ll want to choose the right thread to match your pants perfectly—nobody wants visible stitches! For a professional finish, learn three essential hemming stitches: the nearly invisible blind stitch for dress pants, the sturdy catch stitch for heavier fabrics, or the simple slip stitch for quick repairs.
Using effective needle threading tricks will make the process easier.
When hand sewing your hem, work in good lighting and take your time. A thimble often saves your fingers from unnecessary pokes!
The key to a successful hem isn’t speed but consistency in your stitching pattern. Remember, the beauty of hemming with needle and thread is the control it gives you—machine hems can’t match this precision.
With practice, you’ll develop a rhythm that makes this task surprisingly satisfying.
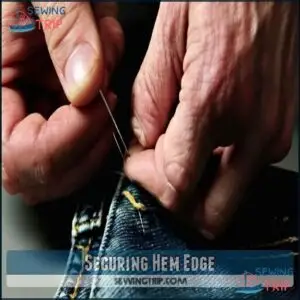
Securing Hem Edge
You’ll need to secure your hem edge properly so your pants don’t end up looking like they were hemmed during an earthquake.
Getting this step right means pinning your hem in place. This includes threading your needle with matching thread and tying a secure knot.
Holding Hem in Place With Pins
Now that you’ve prepared your hem, it’s time to secure it with pins.
Grab straight pins and insert them perpendicular to the folded edge, about 2-3 inches apart around the pant leg.
For thicker fabrics like denim, use more pins to prevent distortion. For lightweight materials, space them further apart.
The pins should catch both layers, holding everything steady for your hand sewing hem work.
Threading Needle With Matching Thread
When selecting the right thread for your hand-sewn hem, choose a color that perfectly matches your pants fabric.
- Choose polyester thread for durability or cotton for natural fabrics
- Use a needle threader tool if you have shaky hands
- Position yourself in good lighting conditions for easier threading
Threading your needle doesn’t have to be a squinting struggle! For best results, cut about 18-20 inches of thread – long enough to work with but not so long it tangles.
Tying Knot in Thread End
Now that your needle is threaded, you’ll need to tie a knot at the end of your thread.
Hold the thread between your thumb and index finger, then wrap it around your index finger once or twice.
Roll the loop off your finger with your thumb, and pull it tight. This creates a secure knot that won’t slip through the fabric when you start sewing.
Securing Thread to Inside Leg Seam
Now that you’ve got your knot tied, it’s time to anchor your thread where it’ll be least visible. Start at the inside leg seam—this hides your work beautifully. Selecting the right stitch for your fabric is vital for a professional finish.
- Position your needle right at the seam allowance
- Push through only the folded hem fabric (not the pant leg)
- Pull thread through until the knot catches
- Keep the needle angled slightly upward
- Make sure your starting position is secure before continuing
Hand Stitching Techniques
You’ll be amazed at how simple hand stitching techniques can transform your too-long pants into perfectly fitted ones, even if you’ve never sewn a stitch before.
Hand hemming turns too-long pants into perfectly fitted ones with just a few simple stitches—no experience required!
With just a few small, angled stitches that grab the fabric in just the right spots, you’ll create an invisible hem that looks like it came straight from a professional tailor’s shop.
Stitching From Left to Right
Many sewers find that stitching from left to right creates the most natural hand movement for a blind stitch. If you’re left-handed, you might prefer reverse stitching from right to left instead.
Start at the left side of your pants hem and work your way to the right, keeping your stitches about 1/4 inch apart. The direction guarantees your thread doesn’t tangle as you progress around the hem.
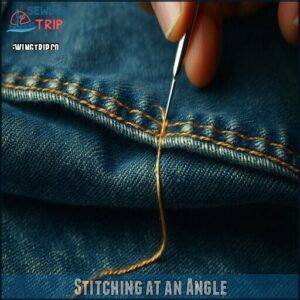
Stitching at an Angle
The secret to a professional-looking hem is stitching at an angle. When making your stitches, hold your needle at about a 45-degree angle to the fabric.
This angled approach helps maintain consistent thread tension and improves seam strength.
Your stitches should be nearly invisible from the outside – that’s the beauty of a good blind stitch! Angle consistency prevents fabric pucker while keeping your hand sewing discreet on your pants hem.
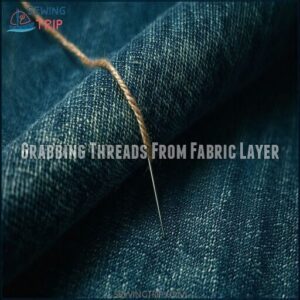
Grabbing Threads From Fabric Layer
The key to an invisible hem lies in grabbing just the right threads from your fabric layer. With your needle positioned at an angle, pick up only 2-3 threads from the third layer of fabric. This stitch depth guarantees your hand sewing remains hidden from the outside while maintaining proper thread tension.
Don’t dig too deep or your blind stitch hem will show through! Various hand stitching fabric repair methods can be employed for other mending projects.
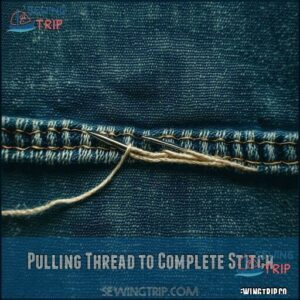
Pulling Thread to Complete Stitch
After you’ve captured threads from the fabric layer, it’s time to pull your thread through to complete the stitch. This essential step determines your hem’s final appearance.
For perfect stitch completion:
- Pull with gentle, consistent tension
- Avoid yanking (creates puckering)
- Keep thread parallel to fabric
- Maintain even spacing between stitches
Your thread should lie flat against the fabric, creating an almost invisible connection between layers. Pull with gentle, consistent tension and avoid yanking.
Finishing Hem Process
You’re in the home stretch now, just a few more stitches to wrap up your DIY hem project that’ll make your pants look store-bought perfect.
Once you’ve finished stitching all the way around, secure your thread with a small knot.
Hide it inside the hem, and give your newly altered pants a final once-over to make sure everything looks neat and even.
Stitching Around Entire Hem
With needle and thread in hand, work your way smoothly around the entire hem. Continue your stitching in the same direction, maintaining consistent stitch tension throughout.
| Stitch Aspect | Common Issues | Quick Fix |
|---|---|---|
| Direction | Uneven pattern | Keep consistent angle |
| Tension | Too tight/loose | Adjust thread pull |
| Spacing | Irregular gaps | Use fingernail as guide |
| Visibility | Obvious stitches | Keep thread inside layers |
| Speed | Rushing | Take your time |
Remember, patience pays off when hand sewing hems!
Securing Thread at Beginning Point
Now that you’ve worked your way around the hem, it’s time to secure your thread.
After your final stitch, create a small knot by looping the thread twice around your needle, then pulling tight against the fabric.
Trim any thread tails to about 1/4 inch. For extra security when hand sewing hems, tuck this tiny tail between fabric layers using your needle. This seam anchoring prevents unraveling.
Repeating Process for Other Leg
Once you’ve secured that final knot, it’s time to tackle the other leg!
Now that you’re a pro at hand sewing techniques, mirroring the initial leg will be easier.
Use the same stitch technique on your second leg, maintaining consistent hem alignment throughout.
Keep your pins, thread, and needle handy as you repeat the process.
Remember, second leg consistency is what makes your handsewn hems look professional rather than homemade!
Examining Finished Hem for Quality
Now that both legs are hemmed, it’s time to check your handiwork. Turn your pants right side out and lay them flat on a table.
Look closely at your hem for these quality indicators:
- Even stitches with consistent thread tension
- No visible threads on the outside (your invisible stitching worked!)
- Hem lies flat without puckering
- No fabric fraying along the edge
- Both legs match in length
Frequently Asked Questions (FAQs)
Can you hem pants with a needle and thread?
Yes, you can hem pants with just a needle and thread!
It’s an easy DIY fix that’ll save you money.
Turn the pants inside out, pin your desired length, and use simple stitches.
How do you sew a hem with a needle and thread?
Did you know that 78% of homemade hems fail because of poor technique?
Turn your hem up. Pin in place. Then use small diagonal stitches that barely show through the front side.
What is the rule for hemming pants?
For hemming pants, keep the length 1/2 inch above the floor when wearing shoes.
Make certain both legs are even.
**Measure twice, cut once.
** You’ll need a 1-2 inch allowance for the fold.
What is the best stitch for hemming pants?
The humble slip stitch is your perfect companion for hemming pants.
You’ll want to use this invisible stitch for a professional finish that won’t show on the right side of your garment.
How do you Hem pants with a sewing machine?
Get your sewing machine ready with matching thread.
Turn pants inside out, fold and pin the hem evenly.
Stitch around, keeping consistent distance from fold. Remove pins and press with an iron.
How to hem pants?
When Sarah’s new pants dragged on the floor, she grabbed her supplies.
To hem pants, turn them inside out. Fold to desired length, pin in place, and sew a straight line around each leg.
How do you prepare a hand hemmed Pant?
You’ll need to turn pants inside out, measure your desired length, and fold the fabric twice, securing with pins.
Press with an iron.
Prepare your needle with matching thread before starting to sew.
How do you Hem pants with a blind hem stitch?
Imagine fixing your favorite pants invisibly.
Fold the hem up, pin it, and stitch diagonally, catching just a thread from the outer fabric.
Keep stitches tiny and spaced evenly—voilà, a clean, professional blind hem!
Can You Hem pants without a sewing machine?
Yes, you can definitely hem pants without a sewing machine!
You’ll need a needle, thread that matches your pants, scissors, pins, an iron, and a measuring tape or ruler.
The hand-stitching takes longer but gives you more control over delicate fabrics and allows for precise adjustments. For a professional-looking finish, try using a blind hem stitch, which creates nearly invisible stitches on the outside of the garment.
Should New Pants be hemmed first?
Measure twice, cut once" applies perfectly to new pants. You’ll want to hem them first, especially after washing once. They’ll fit just right when you’re done.
Conclusion
Like a needle threading through fabric, your journey to master how to hem pants with needle and thread is now complete. You’ve got all the skills to tackle those too-long trousers yourself.
Save money, skip the tailor, and enjoy pants that fit perfectly every time.
Practice makes perfect—your stitches will get neater with each hem you complete. Don’t be afraid to unpick and try again if needed. Happy hemming!

