This site is supported by our readers. We may earn a commission, at no cost to you, if you purchase through links.
 Want perfectly fitting pants without a trip to the tailor?
Learning how to hem pants is easier than you think!
Start by trying on your pants with the shoes you’ll typically wear.
Mark the ideal length with straight pins, then carefully remove the original hem using a seam ripper.
Measure and trim excess fabric, leaving about a half-inch for the new hem.
Fold the fabric up neatly, press with an iron, and stitch using a sewing machine or hand-sew with a slip stitch for an invisible finish.
Pro tip: Practice on an old pair first to build your confidence.
Your wardrobe transformation is just a few stitches away.
Table Of Contents
- Key Takeaways
- Preparing Pants for Hemming
- How to Hem Pants Yourself
- Hemming Pants With a Sewing Machine
- Hand Sewing a Hem
- Shortening Pants Without Sewing
- Hemming Pants and Keeping The Original Bottom Hem
- Troubleshooting Common Hemming Issues
- Tips and Variations for Hemming Pants
- Advanced Hemming Techniques
- Frequently Asked Questions (FAQs)
- Conclusion
Key Takeaways
- You’ll save money and transform your wardrobe by mastering DIY pants hemming with just a few basic tools like scissors, measuring tape, pins, and an iron.
- Different hemming methods exist for various skill levels and fabric types, from machine sewing to no-sew techniques like hemming tape, so you’ll find an approach that works for you.
- Always measure carefully while wearing your shoes, aiming to have pants hover about 1/2 inch above the floor to achieve a professional, tailored look that prevents fabric from dragging.
- Practice makes perfect, so start with an old pair of pants to build confidence and don’t get discouraged if your first attempt isn’t flawless—you’ll improve with each hemming project.
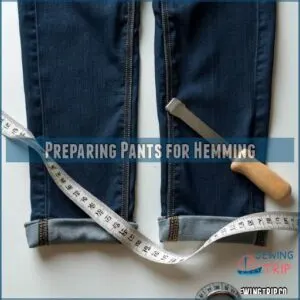
Preparing Pants for Hemming
Before hemming your pants, make sure to measure and mark the hem while checking that both pant legs are even.
Remove any existing hems with a seam ripper to start fresh, and don’t skip pressing the crease for a neat fold line.
Measuring and Marking The Hem
First, decide on your pants hem length.
Grab your measuring tape and a friend to help!
With your shoes on, measure from the floor to where you want your hem to fall.
This measurement’s your pants hem length.
Now, add your hem allowance—about 1 inch for dress pants, a little less for jeans.
Mark this total length on the inside leg with tailor’s chalk.
You’re ready to trim!
Remember, using a sewing gauge for precise hem allowance is helpful.
Ensuring Both Pant Legs Are Even
Keeping pants length consistent is key to successful hemming.
Measure both legs accurately using a sewing gauge to guarantee even hem length.
Pin placement plays a vital role; secure each hem while visually comparing both sides for uniformity.
Make final adjustments with precision, focusing on the inseam.
This technique guarantees your hem allowance is spot-on, avoiding any lopsided surprises.
Pressing The Crease of The Fold Line
You’ve managed to make sure both legs are even. Now, let’s tackle pressing the fold line crease like a pro.
Get your iron ready:
- Set it to the appropriate fabric setting.
- Use steam for wrinkle-prone fabrics, dry for delicate ones.
- Press with firm, even strokes.
- Keep pressing tools handy for ultra-sharp creases.
Adding Hem Allowance Based on Chosen Method
Ah, the finesse of hem allowance! It’s your secret sauce to pant perfection.
Pick your method: sewing machine or a swift hemming tape.
Match your fabric type and style to the right allowance—dress pants, jeans, you name it.
Adjust with these tips:
| Pant Style | Hem Allowance |
|---|---|
| Dress Pants | 1 inch |
| Jeans | 1/2 inch |
| Casual | 1 inch |
| Shorts | 1/2 inch or less |
Removing Existing Hems With a Seam Ripper
Next up is removing hems with a seam ripper. You need control and patience—like a dance, but with fabric. Follow these steps:
- Insert the seam ripper carefully to avoid damage.
- Slowly rip along the hem.
- Pull gently to separate threads.
- Inspect for leftover stitches or fraying.
Every fabric type reacts differently, so tread lightly!
How to Hem Pants Yourself
Hemming pants yourself can save you a trip to the tailor and a bit of cash.
Hemming your pants yourself can save you a trip to the tailor and a bit of cash.
With a few basic skills and the right tools, you’ll have your trousers looking just right in no time.
Determining Hem Length and Allowance
Get ready to set your pants’ hem like a pro!
Adjusting hem length is like picking your favorite ice cream flavor—personal choice rules.
Consider shoe type and consult a hem allowance chart.
Use a hem gauge to make sure you’re precise.
Think of the hem allowance as a buffer against fabric frays.
Measuring tools are your trusty sidekicks!
Choosing The Right Hemming Method
Several hemming methods cater to different needs.
Consider these factors when choosing your approach:
- Your sewing skill: Are you a sewing whiz or a complete beginner?
- Time constraints: Need it done fast? A no-sew method might be your best bet.
- Fabric type: Delicate fabrics might need a gentler touch.
- Desired look: A perfectly crisp hem or a more casual, raw edge? The choice is yours!
Pick the best method for you and your pants!
Essential Supplies for Hemming Pants
When hemming pants, you’ll need a few trusty sidekicks: fabric scissors for clean cuts, tailor’s chalk to mark lines, and a measuring tape for precision.
Add a sewing machine for speed, sewing needles for hand finishing, a seam ripper to remove old hems, and an ironing board to press everything neat.
They’ve got you covered!
Hemming Pants With a Sewing Machine
When working with delicate fabrics like polyester spandex, use techniques like those discussed in hemming polyester spandex. Hemming pants with a sewing machine is a straightforward way to guarantee a clean, professional finish.
You’ll use a straight stitch and backstitch to secure your hem, avoiding any embarrassing "pants puddles" at your next meeting.
Using a Straight Stitch and Double Hem
Diving into sewing your pants’ hem is like baking a cake—just follow the steps. A clean finish can be achieved by turning back the raw edges of the seam allowance and stitching them down, ideal for straight seams on most fabrics, using techniques like the clean finish method. Use a straight stitch with your sewing machine for a neat finish. Create a double fold hem to keep things tidy. Mind your machine settings for proper stitch length. Check your thread tension so it doesn’t unravel halfway through.
- Make sure you have a flat workspace.
- Use matching thread for a clean look.
- Adjust hem allowance for fabric types.
- Test stitch length on scrap fabric.
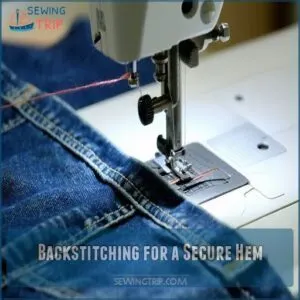
Backstitching for a Secure Hem
To make sure a secure hem, backstitch at the beginning and end of your sewing line.
Backstitching strengthens the hem, keeping it from unraveling.
Adjust the stitch tension based on fabric type, and choose a matching thread for a polished look.
If you’re using a sewing machine, remember the right needle type and a consistent backstitch length for durability.
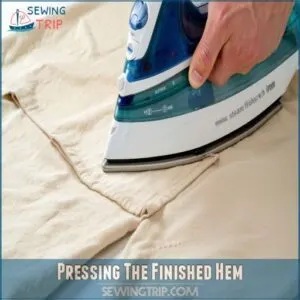
Pressing The Finished Hem
You’ve stitched your hem, now let’s make it shine like new shoes on a sunny day. Grab your iron for that crisp finish.
- Pressing tools: A trusty steam iron and a pressing cloth save the day.
- Ironing techniques: Glide gently; don’t drag.
- Fabric types: Adjust heat for delicate threads.
- Hem allowance: Keep edges even and memorable.
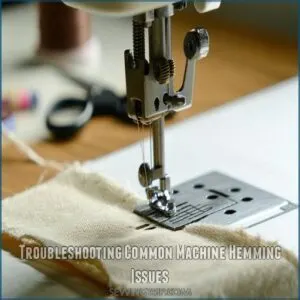
Troubleshooting Common Machine Hemming Issues
Sometimes, your sewing machine can act up when hemming pants, causing uneven hems or skipped stitches.
Got thread breakage or fabric bunching? Check your bobbin tension—it might be too tight or loose. Adjust it to avoid headaches.
If you’re dealing with stubborn fabric, a blind hem stitch might save the day.
Keep sewing, with peace in your stitch!
Hand Sewing a Hem
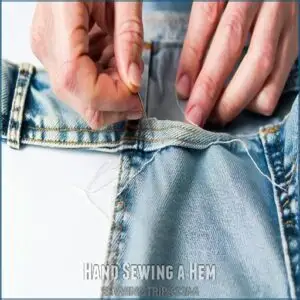
Ready to tackle hand-sewing your pant hem? We’ll guide you through creating a nearly invisible finish using a slip stitch, ensuring your perfectly altered trousers look professionally done.
Using a Slip Stitch for a Nearly Invisible Hem
Looking for that nearly invisible hem? Try the slip stitch—a handy trick for hand sewing enthusiasts.
It’s like magic! This stitch sneaks in between fabric layers, keeping the thread hidden.
To get started, you’ll need the right tools, such as a slip stitch needle, available at online marketplaces like slip stitch needles online.
Remember to match thread color and keep stitch tension just right.
This technique is excellent for hem pants, especially when a sewing machine isn’t around.
Sewing With Small, Even Stitches
Nail those small, even stitches by focusing on stitch consistency. Picture yourself mastering needlework as you keep your needle size steady and thread tension just right.
- Practice techniques like counting each stitch.
- Use a thimble to protect your fingers.
- Match thread color for seamless blending.
- Adjust hem allowance for perfect results.
- Smile—it’s just sewing magic!
Tips for Hand Sewing a Hem
When hand sewing a hem, use these tips to tackle your project like a pro.
Choose the right needle size and thread choice, keeping stitch length even.
A blind hem stitch makes nearly invisible stitches.
Master hand sewing tools, and pay attention to hem allowance.
These sewing tips help your pants hem look polished and professional.
| Item | Tip |
|---|---|
| Needle size | Match fabric thickness |
| Thread choice | Complementary or matching color |
| Stitch length | Keep even and small |
| Hem allowance | Avoid too little or too much |
| Hand sewing | Utilize a comfortable grip |
Shortening Pants Without Sewing
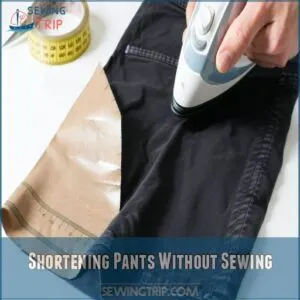
Shortening pants without sewing is easier than you think, thanks to no-sew hacks like hemming tape.
You can achieve perfectly adjusted trousers by simply cutting the tape to size and using a hot iron to secure it.
This spares you from the needle-and-thread dance.
Using Hemming Tape for Softer Fabrics
Think of hemming tape as your no-sew secret weapon, especially for softer fabrics.
It sticks like magic, holding your pants hem in place without a needle in sight.
Tips for a smooth finish:
- Choose the right type: Make sure the tape matches your fabric.
- Check durability: Test on a small area first.
- Mind application: Use a hot iron carefully.
Cutting The Tape to Fit The Hem
First, grab your hemming tape and measure its length against the hem width and fabric type of your pants, considering the type of no sew tape suitable for your fabric.
Then, carefully cut the tape to fit exactly where it’s needed.
Table: Cutting Hemming Tape
| Consideration | Description |
|---|---|
| Tape Length | Matches hem width |
| Fabric Type | Affects tape adhesion |
| Edge Finishing | Prevents fraying |
Pressing With a Hot Iron to Fuse The Tape
Got your hemming tape ready? Now it’s time to make magic happen. Here’s your game plan for fusing that tape:
- Protect your fabric with a thin pressing cloth
- Set your iron to the recommended heat setting
- Press firmly and evenly across the entire hem
- Hold the iron in place for 10-15 seconds per section
This technique transforms your DIY hem from amateur to pro in minutes.
Alternative Methods for Shortening Pants
Without breaking out the sewing machine, you’ve got quick alternatives to shorten those pants.
Iron-on hem tape offers a slick, no-sew solution for fabric transformation.
Safety pins can work in a pinch, while fabric glue provides another temporary fix.
Hemming clips give you a clean look without threading a needle.
These methods let you customize your pants’ length with minimal effort.
Hemming Pants and Keeping The Original Bottom Hem
Want to keep your original pants hem while shortening the length? You’ll love this clever technique that preserves the professional factory-finished look while giving you perfectly fitted trousers.
Marking The Desired New Length
After exploring no-sew methods, you’ll want precision when marking your pants’ new length.
The right approach can make or break your hemming project.
Here’s how to nail it:
- Stand tall and confident
- Embrace your inner tailor
- Trust your measurement skills
Slip on your favorite shoes, stand in front of a mirror, and carefully pin the desired length, ensuring both legs match perfectly.
Marking The Pants Length Guide
When hemming pants, grab your trusty marking tools and get ready to nail that perfect length.
Measure twice, mark carefully using tailor’s chalk or a fabric pencil.
Place pins strategically to guide your hem depth, ensuring accuracy across different fabric types.
Your goal? A crisp, precise length that makes your pants look like they were custom-tailored just for you.
Stitching The Original Hem
Mastering the stitch for preserving your original hem requires precision and patience.
You’ll want to secure the existing bottom edge with carefully placed stitches that maintain the professional look of your pants.
- Feel the satisfaction of a perfectly altered garment
- Reclaim confidence in your clothing
- Experience the pride of DIY fashion repair
- Develop your inner tailor with each careful stitch
Match your thread color exactly to blend seamlessly with the original fabric.
Folding and Trimming Excess Fabric
Carefully fold the excess fabric along the fabric grain, ensuring a crisp, clean edge.
Trim any uneven or fraying sections with sharp fabric scissors, leaving about 1/2 inch of allowance.
This prevents ragged edges and gives you room to work.
Double-check your measurements to avoid cutting too much, keeping the original hem’s integrity intact.
Troubleshooting Common Hemming Issues
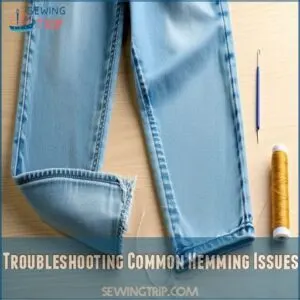
Even the most careful hemming can lead to unexpected challenges that might make you want to toss your pants aside in frustration.
Don’t worry—with a few simple techniques, you’ll be able to tackle common hemming issues like uneven legs, frayed edges, or loose stitching, turning potential clothing disasters into perfectly fitted trousers.
Fixing Pants That Are Too Long
Got too-long pants cramping your style? No sweat.
For a nearly invisible hem, try using hem tape, which can be found at a hem tape solution online.
Grab a seam ripper and carefully unpick the original hem to give yourself extra fabric to work with.
By preserving the factory-finished bottom, you’ll maintain that professional look while gaining precious inches for adjustment.
Pro tip: Always measure twice and cut once to avoid a fashion faux pas.
Ensuring Pant Legs Are Even
When your pants look like they’ve been hemmed by a tipsy tailor, it’s time to level up your game.
Ensuring even pant legs isn’t rocket science—it’s an art form.
Here’s your foolproof approach:
- Pin both legs while wearing shoes
- Use a full-length mirror
- Check leg alignment from multiple angles
- Measure inseam and outseam precisely
Trust your eyes and hands—they’re your best hemming allies.
Dealing With Frayed or Unraveled Hems
If your pants hems look more frazzled than a last-minute homework assignment, you’re not alone.
Frayed edges can make even designer trousers look worn out fast.
Preventing unraveling starts with understanding your fabric – delicate materials need gentler handling, while sturdy denim can handle more robust repair techniques.
Serging the raw edges gives your pants a professional, polished finish that stops fraying in its tracks.
Repairing Hems That Have Come Undone
Frayed hems don’t have to spell disaster for your favorite pants.
To avoid further damage, consider the common causes of unraveling seams, such as wear and tear, improper stitching techniques, or poor quality thread.
Grab a seam ripper and carefully remove the loose threads, identifying what caused the unraveling in the first place.
To ensure a professional-looking hem, use quality materials and techniques, such as mastering key sewing techniques, then reinforce the hem by choosing a matching thread and using a tight, secure stitch on your sewing machine or by hand.
Your pants will look good as new in no time.
Tips and Variations for Hemming Pants
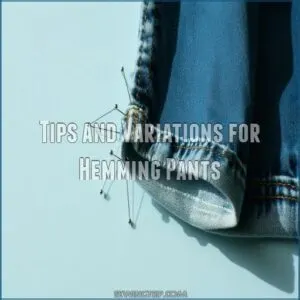
Once you’ve mastered the basic hemming techniques, you’ll want to explore creative ways to customize your pants’ look and fit.
From using a hem gauge for precision to adding unique decorative stitches,
these tips will help you transform your trousers from ordinary to outstanding.
Using a Hem Gauge for Consistent Hem Allowances
Got a hem gauge? It’s your secret weapon for nailing consistent pants alterations like a pro. These handy tools bring precision to your hemming game, helping you measure with laser accuracy.
Here’s why you’ll love a hem gauge:
- Eliminates guesswork in measuring
- Makes sure uniform hem length
- Works on multiple fabric types
- Saves time and frustration
Measuring twice might save you from cutting once!
Adding Decorative Stitches or Embellishments
After mastering your hem gauge, why not jazz up your pants with some personality?
Embroidery, lace trim, or fabric paint can transform a basic hem into a statement piece.
Hand-stitched beads or unique buttons add that custom touch.
With a sewing machine or nimble fingers, you’ll turn plain trousers into a fashion canvas that screams "you’ve got style!
Hemming Pants With Different Fabric Types
Because different fabrics demand unique hemming techniques, you’ll want to adjust your approach carefully.
To determine the best technique, consider the type of fabric you’re working with and the desired length, as the right hem length can greatly enhance the style impact of your pants, as explained in what is hemming pants.
Denim requires sturdy machine stitching with heavyweight thread, while delicate silk needs a gentle hand-sewn blind hem stitch.
Stretch fabrics like yoga pants call for a zigzag or serger stitch to maintain flexibility.
Linen and velvet each have their own quirks, so choose your method wisely to preserve the fabric’s integrity.
Creating a Custom Hem for a Unique Look
Want to transform your pants from basic to bold?
Create a custom hem that screams your unique style.
Try adding a contrasting fabric cuff, rolling up denim with decorative topstitching, or experimenting with asymmetrical lengths.
Your creativity isn’t just about fit—it’s about making a statement.
Personalize those pants and watch heads turn with your DIY fashion flair.
Advanced Hemming Techniques
You’ve mastered basic hemming and now you’re ready to level up your pants alteration skills with advanced techniques.
These pro-level methods will transform your DIY clothing repairs from amateur to expert, giving you the confidence to tackle even the trickiest hemming challenges.
Using Fusible Interfacing for a Temporary Hem
Looking to save yourself a permanent commitment?
Fusible interfacing is your secret weapon for temporary hems.
You can easily find a wide variety of fusible interfacing options online at fusible interfacing products.
This magical material lets you adjust your pants without leaving lasting marks.
Simply slide the interfacing between fabric layers, press with a hot iron, and voila!
You’ve got a crisp, removable hem that gives you the freedom to experiment with length without breaking a sweat.
Creating a Blind Hem Stitch by Hand
After mastering fusible interfacing, hand-sewing a blind hem stitch elevates your pants alteration game.
This sneaky hand-sewing technique keeps stitches hidden like a secret agent.
Here’s how to nail it:
- Choose a fine, sharp needle
- Match thread color precisely
- Take tiny, barely-visible stitches
Catch fabric’s back side with microscopic pickups, creating an invisible finish that looks professionally finished.
Using a Serger for a Professional Finish
If you’re ready to level up your hemming game, a serger is your secret weapon for professional-looking pants. This magical machine trims and finishes edges in one smooth pass, preventing fraying like a textile superhero.
| Serger Advantage | Why It Matters |
|---|---|
| Clean Edges | Prevents unraveling |
| Fast Finishing | Saves time |
| Professional Look | Elevates garment quality |
| Versatile | Works on multiple fabric types |
Mastering serger techniques transforms amateur alterations into refined perfection.
Hemming Pants With a Lining or Interfacing
When tackling lined pants, your secret weapon is understanding interfacing.
To achieve a professional finish, consider the fabric weight and properties of your pants when selecting the right interfacing type, such as choosing fusible interfacing.
Choose lightweight, fusible interfacing that won’t bulk up your hem.
Carefully separate the lining from the outer fabric, ensuring you don’t catch extra material.
Pin and mark the new length, then trim both the outer fabric and lining separately to maintain a clean, professional finish that looks refined and polished.
Frequently Asked Questions (FAQs)
How do you Hem pants?
Did you know that 82% of people struggle with ill-fitting pants?
You’ll nail a perfect hem by measuring carefully, marking the length, cutting excess fabric, folding precisely, and sewing or using hemming tape for a crisp, professional finish.
Can You Hem dress pants yourself?
You can totally hem dress pants yourself with some basic sewing skills, a few tools, and patience, especially when using a blind hem stitch. You can totally hem dress pants yourself with some basic sewing skills, a few tools, and patience.
Grab a seam ripper, measuring tape, pins, and thread to transform those pants from baggy to perfectly fitted.
How do you Hem pants without a sewing machine?
To master the art of hemming, it’s crucial to consider the fabric type when determining the allowance width, as explained in the guide on how to hem pants on a sewing machine. About 40% of DIY fashion enthusiasts hem pants without a sewing machine.
You’ll love how easy it’s to transform your pants using hemming tape or fabric glue.
Just measure, cut, and press for a crisp, professional-looking hem in minutes.
How long does it take to hem pants?
Hemming pants typically takes 15-45 minutes, depending on your skill level.
If you’re a beginner, set aside an hour.
With practice, you’ll speed up, turning a tedious task into a quick wardrobe fix that’ll have your pants looking sharp.
Which hem is best for a pant?
The best pant hem depends on your style and shoes.
Dress pants typically have a 1-inch hem, while jeans work well with a 1/2-inch hem.
Choose based on your look and comfort for that perfect, fitted fit.
Can You Hemming pants at home?
Ever wrestled with pants that drag like an old mop?
You can totally hem them at home!
Grab some basic sewing tools, measure carefully, and with a little patience, you’ll rock perfectly fitted pants in no time.
How do you hem pants easily?
Want perfectly fitted pants without a tailor’s bill?
Grab pins, scissors, and an iron.
Measure twice, cut carefully, fold neatly, and press.
With a few simple steps, you’ll rock professional-looking hems that’ll make your clothes look custom-made.
How to hem pants without stitch showing?
To achieve professional-looking results, mastering the basics of a sewing machine, including the understanding sewing machine parts, is crucial. You can achieve an invisible hem by using a blind hem stitch on your sewing machine.
You can also achieve an invisible hem by hand-sewing with small, nearly invisible stitches that catch just a thread of the fabric’s surface.
This creates a seamless finish.
How to shorten pant legs without sewing?
Grab hemming tape or double-sided fabric tape to quickly shorten your pants.
Simply trim the excess length, fold up the bottom edge, and press with an iron or stick the tape for a no-sew, crisp hem.
What is the rule for hemming pants?
When hemming pants, aim to have the back of your pants hover 1/2 inch above the floor while wearing shoes.
This prevents fabric drag and keeps your trousers looking crisp and well-tailored.
It also prevents unnecessary wear and tear.
Can I hem pants without a sewing machine?
Hemming pants without a sewing machine is a breeze.
Hemming pants without a sewing machine is a breeze.
Grab hemming tape or fabric glue, measure carefully, fold and press the fabric, then use an iron to create a crisp, professional-looking hem that’ll have everyone fooled.
How much should I cut off?
Like a tailor’s secret weapon, measure precisely while wearing your shoes.
Aim to cut pants so they hover just 1/2 inch above the floor.
This guarantees a crisp, professional look that won’t drag or bunch.
What if I mess up hemming?
If you mess up hemming, don’t panic!
Unpick the stitches carefully, trim excess fabric gradually, and re-pin your pants.
Take your time, measure twice, and remember that practice makes perfect.
You’ve got this!
Do different fabrics need special hemming?
Different fabrics demand unique hemming approaches.
You’ll want to match your technique to the fabric’s weight and stretch.
Delicate silks need gentle handling, while denim requires sturdy stitching.
Always test your method on a scrap piece first.
How long do professional hems last?
Just as a well-crafted sail weathers countless voyages, a professionally hemmed pair of pants can last 2-3 years with proper care.
Proper care will extend their life by avoiding rough surfaces and cleaning them gently.
Conclusion
Picture perfectly fitted pants that make you look sharp and feel confident.
By mastering how to hem pants, you’ve gained a valuable DIY skill that saves money and transforms your wardrobe.
Whether you choose machine sewing, hand stitching, or no-sew techniques, you’ll now tackle hemming with ease.
Practice makes perfect, so don’t get discouraged.
With patience and the right techniques, you’ll soon be hemming pants like a pro, giving every pair a custom, refined look.

