This site is supported by our readers. We may earn a commission, at no cost to you, if you purchase through links.
 Hemming sweater sleeves is easier than it sounds!
Start by trying on the sweater and marking your desired sleeve length with chalk or pins. Lay the sweater flat, then measure and cut the excess fabric, leaving about half an inch for the hem.
Fold the edge under twice to avoid fraying, pin it in place, and either sew by hand using a stretch stitch or fire up your sewing machine with a ballpoint needle and a zigzag or twin needle stitch.
Keep the fabric smooth and relaxed—no stretching! For tricky knit fabrics, stabilizer helps.
Want pro tips for perfect results? Read on!
Table Of Contents
- Key Takeaways
- Hemming Techniques for Sweaters
- Steps to Hem Sleeves on a Sweater
- Preparing Sweater Sleeves for Hemming
- Choosing The Right Hemming Method
- Essential Tools and Materials for Hemming
- Machine Sewing Techniques for Hemming Knits
- Hand Sewing Methods for Hemming Knits
- Special Techniques for Different Knit Fabric Types
- Troubleshooting Common Hemming Issues
- Finishing Touches and Care Instructions
- Frequently Asked Questions (FAQs)
- Conclusion
Key Takeaways
- You’ll need the right tools—like ballpoint needles, matching thread, and stretch stitches—to successfully hem sweater sleeves without damaging delicate knit fabrics.
- Your hemming technique should match your fabric type, using zigzag or stretch stitches for lightweight jerseys and specialized methods like twin needle or serger techniques for thicker knits.
- You can choose between machine and hand sewing methods, with each offering unique advantages like the machine’s speed or hand sewing’s precision for achieving a professional-looking sleeve hem.
- You’ll want to prep your sweater carefully by washing, blocking, and pressing the fabric before hemming, which ensures a smoother, more accurate alteration and helps maintain the garment’s shape and integrity.
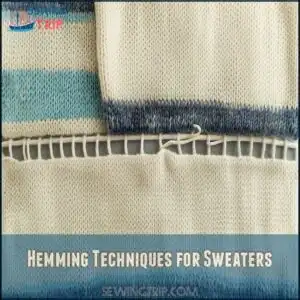
Hemming Techniques for Sweaters
Hemming sweater sleeves is all about choosing the right technique for your fabric and skill level.
Mastering sweater hemming turns too-long sleeves into perfectly polished, cozy wear tailored just for you.
Whether you’re using a machine or sewing by hand, small adjustments can make a big difference.
Types of Hemming Techniques
When hemming sweater sleeves, several techniques can help you achieve a polished look.
A Folded Hem is simple and versatile, while a Blind Hem offers an almost invisible finish.
For stretchy fabrics, a Stretch Hem is ideal.
A delicate Rolled Hem works well with lightweight knits, and a Whipstitch provides a secure, hand-sewn option for precise sweater hemming.
Many sewers find folded hems versatile for various projects.
Choosing The Right Hemming Technique
To choose the right hemming technique, think about your sweater’s fabric type, desired hem appearance, and your skill level.
It helps guarantee a durable and professional finish when your sweater sleeves are too long.
Here’s a quick guide:
- For stretchy fabrics, use a zigzag or stretch stitch.
- Hand-sew delicate fabrics using a blind hem stitch.
- Thick knits need durable machine stitches for hem durability.
Many resources discuss various hemming methods for sweaters.
Tools and Materials Needed
Don’t start without the right tools!
You’ll need fabric scissors for a clean cut, a measuring tape for accurate sleeve lengths, and thread types like polyester for durability.
Sewing needles, pins, and stabilizer options guarantee precision.
Add pressing essentials like an iron for smooth results.
To achieve a professional finish, consider investing in high-quality cutting tools.
These tools make hemming easier, keeping your sweater looking polished! Accurate sleeve lengths
Steps to Hem Sleeves on a Sweater
Hemming sweater sleeves might seem tricky at first, but breaking it into clear steps can make the process simple and manageable.
From measuring and marking to sewing the final seam, each step guarantees a clean, professional finish you’ll be proud of.
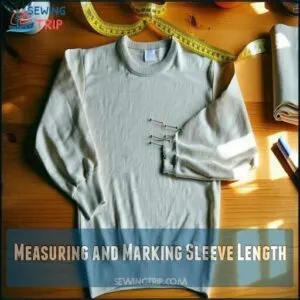
Measuring and Marking Sleeve Length
Getting the perfect length for your sweater sleeves starts with accurate measurements. Grab a measuring tape and measure from the shoulder seam to your desired length.
Measure twice, hem once—accurate sleeve lengths make all the difference for a clean, professional finish every time!
Precision here guarantees sleeve symmetry and prevents unevenness, so don’t rush this step.
Once measured, use pins or chalk to mark the hemline. These marking methods will guide your stitching later, keeping everything neat.
Accuracy isn’t just about looks—it’s the secret to an effortless professional look.
Here’s what to keep in mind:
- Double-check your measurements for consistent results.
- Use contrasting chalk for clear marks on darker fabrics.
- Keep the sweater flat while marking to avoid warping.
- Aim for straight, even lines when pinning or chalking.
Measure twice—you’ll only need to hem once!
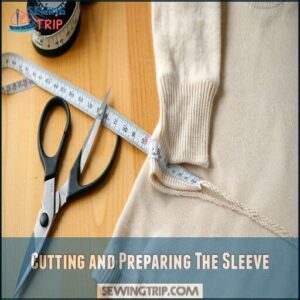
Cutting and Preparing The Sleeve
Now that your sleeve length is marked, it’s time to trim with precision and care.
Cut about one inch below the mark for a neat hem allowance. Use sharp fabric scissors or a rotary cutter if working with stretchy knits.
To prevent fabric fray, cut cleanly at an angle, and for delicate materials, place tissue paper underneath.
This step guarantees symmetry maintenance and smooth edges, making hemming or altering sweater sleeves simpler and professional-looking, even if they feel too long.
Folding and Pinning The Hem
To guarantee a polished sweater sleeve hem, turn the sweater inside out for precise folding and pinning.
Fold the fabric up 1/2 to 1 inch for consistent alignment and accurate folding.
Pin perpendicular to the edge, maintaining even tension.
- Secure the fold with flat-head pins.
- Space pins evenly for proper seam allowance.
- Double-check hem alignment before proceeding.
- Confirm the fold is smooth and symmetrical for professional hemming sleeves.
Sewing The Hem With a Machine or by Hand
To sew sweater sleeves, decide between hand sewing or a machine hem.
Use ballpoint needles and matching thread for smooth seams.
With machine hemming, apply steady pressure and stretch stitches.
For precision, try hand sewing with consistent stitches.
A serger finish creates durability, while a twin needle offers a polished look.
Remove pins and take your time for flawless sweater hemming.
Preparing Sweater Sleeves for Hemming
Before you start hemming, it’s important to prep your sweater sleeves properly for the best results.
This means washing, pressing, and removing old hems so the fabric is smooth and ready for accurate adjustments.
Washing and Blocking The Sweater
Before hemming sweater sleeves, proper care makes all the difference.
Wash it first to avoid unexpected shrinkage and maintain shape.
Here’s how you can do it:
- Fill a basin with cool water and mild detergent.
- Gently swish to remove dirt.
- Rinse thoroughly, then press out excess water.
- Lay it flat on a towel.
- Block carefully to retain fibers.
Ironing or Steaming The Sleeves
After washing the sweater, it’s time to smooth those pesky wrinkles and prep the fabric for hemming.
Whether you’re team steam or iron, follow these steps for perfect results:
- Test heat settings on a scrap piece to avoid fabric damage.
- Use a pressing cloth to shield delicate fibers.
- Gently press, focusing on stubborn creases.
- Steam lightly for natural reshaping, ensuring a smooth, crisp finish without overstretching or distortion.
Removing Existing Hems or Cuffs
After steaming your sweater sleeves, it’s time for cuff removal.
Flip the sweater inside out for better control, then grab a seam ripper to carefully undo the chain stitch or serged edge without damaging the knit.
Use small scissors for stubborn threads, making sure to work patiently.
This step is essential for a clean hem alteration and allows precise knit deconstruction.
One should also consider preserving button placement when altering sleeves with buttons.
By salvaging yarn and removing existing hems, you’ll prepare your sweater for seamless sleeve hemming and adjustment.
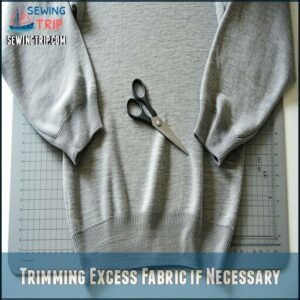
Trimming Excess Fabric if Necessary
After removing cuffs, it’s time to trim excess fabric from sweater sleeves.
Grab sharp scissors and cut smoothly for clean edges.
Maintain a 1-inch seam allowance for comfort and flexibility during hemming.
Careful trimming reduces fabric waste and supports fray prevention.
- Lay flat: Confirm sleeves are even.
- Cut in layers: Prevent uneven edges.
- Pause often: Double-check hem allowance.
Choosing The Right Hemming Method
When hemming sweater sleeves, it’s important to pick a method that matches your fabric and skill level.
Consider whether hand-sewing or machine techniques will give you the best balance of durability and flexibility.
Machine Sewing Techniques
When using a sewing machine to hem sweater sleeves, start by choosing the right needle, like a ballpoint, for smooth knit stitching.
Adjust fabric tension and use a zigzag or stretch stitch to maintain flexibility.
Let the sewing machine’s feed dogs guide the fabric evenly.
For neat seam finishes, calibrate stitch length, sew slowly, and practice control.
Hand-Sewing Alternatives
Hand sewing sweater sleeves offers control and precision.
For an invisible hem sweater, try these techniques if sweater sleeves are too long:
- Catch stitch for stretchy knits.
- Blind hem stitch for formal wear elegance.
- Running stitch for a basic method.
- Whip stitch for seamless results.
- Elastic bands or stylish pins as no-sew, temporary fixes—perfect for quick sweater alteration.
Factors to Consider When Choosing a Method
When deciding how to hem your sweater sleeves, focus on fabric type, desired look, skill level, hem durability, and time commitment.
Lightweight fabrics pair well with a blind hem for an invisible finish, while thick knits benefit from visible zigzag stitches.
For stretchy sweater knits, a twin needle makes certain flexibility, while ribbed knits need stretch stitches for a textured finish.
Match thread color to your sweater for seamless results, and choose between a sewing machine for speed or hand sewing for precision.
Mastering proper hemming techniques guarantees durable, professional results, even if it’s your first attempt at sweater hemming!
Essential Tools and Materials for Hemming
To hem sweater sleeves like a pro, you’ll need the right tools and materials to guarantee accuracy and a polished finish.
From sharp scissors to matching thread, having these essentials on hand will make the process smooth and frustration-free.
Sewing Machine and Appropriate Needles
Let’s set up your sewing machine for sweater sleeves. Choosing the right needle is like picking the perfect tool for a delicate job—it makes all the difference. For knit fabrics, always go with a ballpoint or stretch needle to avoid snags and skipped stitches.
Here are your key steps:
- Needle Types: Use ballpoint or stretch needles; they glide between fibers smoothly.
- Stitch Settings: Opt for a zigzag stitch for flexibility or try a stretch stitch for added durability.
- Tension Adjustment: Fine-tune thread tension and presser foot pressure to prevent puckering.
Keep your sewing machine maintained, and you’ll breeze through hems with clean, professional results.
Thread Selection for Knit Fabrics
Choosing the right thread for knit fabrics guarantees a strong hem.
Opt for polyester or polyester-wrapped cotton threads for their stretch compatibility.
Match thread fiber and weight to your fabric: use 50-60 weight for light knits or 30-40 for heavier ones.
Pairing thread color slightly darker than your sweater creates a polished.
For durable results, combine thread selection with a stretch stitch or zigzag stitch on your sewing machine, using appropriately paired sewing needles. Durable results
Stabilizers and Interfacing
Stabilizers and interfacing are game-changers in sweater hemming, providing support and polish to your finished edges.
Using lightweight fusible options like Pellon SF101 makes certain a crisp, stable hem without losing flexibility—perfect for knits.
For a knit hem tutorial, wash-away stabilizers also work well, adding control during sewing while disappearing after washing.
Don’t skip testing these materials on fabric scraps first to make certain they don’t affect your sweater’s stretch or drape.
For edge support and hem reinforcement, stabilizers keep fabric from puckering or stretching out.
They might sound technical, but using them is simple and boosts your results drastically—think pro-level hemming techniques that last.
Pressing Tools and Techniques
How do you make your sweater sleeves look professionally hemmed?
Start with the right pressing tools! Set your iron to a medium iron temperature and add steam for smooth, crisp results.
Always use a pressing cloth to protect delicate fabrics.
For curved areas like sleeve seams, a seam roll or tailor’s ham works wonders.
- Iron temperature affects fabric softness—don’t go too hot!
- Steam relaxes wrinkles, making fabric easier to shape.
- Stabilize seams by pressing before sewing for cleaner lines.
Proper pressing makes certain smooth, polished hems every time!
Machine Sewing Techniques for Hemming Knits
Machine sewing is a quick and reliable way to hem sweater sleeves while maintaining flexibility in the fabric.
With techniques like stretch stitches, twin needles, and sergers, you’ll get a durable and professional-looking finish in no time.
Using a Stretch Stitch or Zigzag Stitch
How do you hem sweater sleeves for both flexibility and durability?
Use a stretch stitch or zigzag stitch on your sewing machine.
These stitches provide excellent knit compatibility and prevent popped seams.
Set the stitch length to 2.0-2.5mm and width at 1.0-1.5mm for smooth results.
Adjust tension carefully to prevent puckering.
This method guarantees seam durability, allowing your sweater sleeves to feel natural while staying strong, especially if they’re too long.
Twin Needle Hemming Method
The twin needle method gives sweater sleeves a polished, store-bought look.
Use a twin needle (2.5-4.0mm) with proper Needle Size for your fabric. Adjust Tension Settings and Fabric Feed for knits.
Remember to use stretch or jersey needles to prevent skipped stitches.
Follow these steps:
- Thread two spools and bobbin.
- Set Stitch Length (2.5mm works well).
- Sew the knit sleeve hem steadily.
- Enjoy the sleek Topstitching Effect!
Coverstitch Machine Technique
A coverstitch machine is your best friend for hemming sweater sleeves like a pro.
Set the coverstitch settings to a stitch length of 3mm, adjust the differential feed for smooth fabric flow, and use wooly nylon in the looper for stretch.
The chain stitch creates clean parallel lines on top, while looper tension forms a zigzag underside—perfect for durable, decorative applications.
Serger Rolled Hem Option
For a clean, professional finish on sweater sleeves, a serger rolled hem is a game-changer.
Master these three steps:
- Adjust serger settings like Differential Feed and Tension for your fabric.
- Use the Rolled Hem Foot to guide precise stitches.
- Experiment with thread types for decorative or subtle edges.
This fast, reliable technique guarantees smooth, unravel-proof hems!
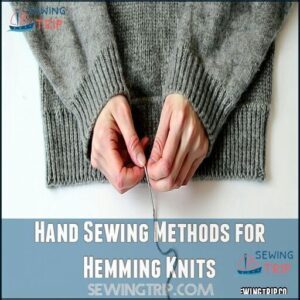
Hand Sewing Methods for Hemming Knits
Hand sewing is a great option for hemming knits, especially if you want to maintain control and a soft finish.
With techniques like the catch stitch, blind hem, or stretch hand sewing, you can create durable and flexible hems that look professional.
Catch Stitch Hemming Technique
The catch stitch uses overlapping X-shaped stitches for invisible hemming and securing knits.
This hand-sewing technique creates flexible hems, perfect for hemming sweater sleeves.
To start, fold your sweater’s sleeve, pin it, and sew with gentle, diagonal needle motions. It’s an easy way to avoid puckering!
Holds fabric steady
Blind Hem Stitch for an Invisible Finish
The blind hem stitch is perfect for invisible seams on sweater sleeves, giving a polished look.
- Fold and pin the sleeves, ensuring alignment for even edges.
- Use matching thread to make small, hidden stitches along the sleeve’s edge, securing blind hems delicately.
- Maintain tension while stitching to prevent puckering and preserve stretch, perfect for hemming curved edges seamlessly. For best results, consider using a blind hem presser foot for machine sewing.
Stretch Hand Sewing Method
Stretch hand sewing is a reliable way to hem sweater sleeves, especially when they’re too long.
Start by choosing polyester thread for flexibility and matching your needle type to the fabric. Maintain proper stitch tension for smooth, secure results.
Use a Blind Hem or Slip Stitch technique if you want a nearly invisible finish.
For precise hem placement, fold the fabric evenly and pin it. Work carefully for fabric stability, stitching in small, even lengths to prevent puckering.
Stretch hand sewing makes certain comfortable, durable sleeve shortening while preserving the sweater’s stretchiness and style.
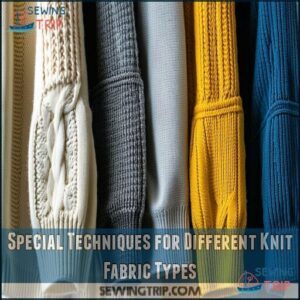
Special Techniques for Different Knit Fabric Types
Each knit fabric type has unique traits, so it’s important to adjust your hemming method to suit the material.
Whether you’re working with lightweight jersey, bulky knits, or ribbed fabrics, using the right techniques guarantees a clean, professional finish.
Hemming Lightweight Jersey Knits
Hemming lightweight jersey knits can be tricky, but it’s all about technique.
To hem sweater sleeves successfully, start by picking the right tools—your Jersey Knit Selection and Needle Type Matter here. A ballpoint needle prevents runs, and a walking foot keeps your edges smooth.
For Stretch Flexibility, a zig-zag or stretch stitch works best.
Want polished Hem Finishes? Try a twin needle for parallel topstitches and zig-zag underneath.
- Handle fabric gently to avoid wavy edges.
- Avoid pulling while sewing, keeping the sleeve’s shape intact.
- Press seams lightly for clean sleeve shortening results.
Perfect hems take patience and care!
Dealing With Thick or Bulky Knit Fabrics
Handling thick or bulky knit fabrics can feel like wrestling a friendly bear—you’ll need a careful strategy to keep things smooth.
Start with the right needle: a 100/16 size works best for piercing through dense material. Don’t forget a walking foot on your sewing machine; it’s like having an extra pair of hands guiding those layers evenly.
Stabilize your sweater sleeves with lightweight fusible interfacing to prevent stretching or slipping.
Adjust your sewing machine’s tension to a sweet spot around 3 or 4 for better control of heavy knits.
Reduce fabric layers where possible to avoid unnecessary bulk and puckering.
Pressing tools like a tailor’s ham are perfect for shaping the seams without crushing the textured patterns.
Techniques for Ribbed Knits and Sweater Knits
When hemming ribbed knits and sweater sleeves, precision is key to maintaining flexibility and a clean finish.
Focus on rib alignment and gauge matching to prevent distortion or uneven seams.
Use blocking methods to pre-shape fabrics before sewing.
For stability, go with a stretch stitch and guarantee tension control on your sewing machine.
One consideration is that knit fabrics offer elasticity, so be careful not to stretch the material as you sew.
- Keep folds light to avoid bulky edges.
- Avoid pulling fabric; let the machine guide it naturally.
- Finish edges with a zigzag stitch or serger for durability.
Maintain care, and your sweaters will look professionally hemmed.
Troubleshooting Common Hemming Issues
Hemming sweater sleeves can sometimes come with challenges like wavy edges, skipped stitches, or curling fabric.
Understanding these common issues helps you fix mistakes quickly and achieve a smooth, professional finish.
Preventing Wavy or Stretched-out Hems
Wavy or stretched-out hems can be frustrating, but they’re easy to avoid with a few edge control techniques.
Follow these steps for smooth, professional results:
- Tension Adjustments: Keep your stitch tension in the middle range to prevent sagging or puckering. Test on scrap fabric first.
- Knit Stabilizers: Use lightweight stabilizers or knit stay tape to stop fabric stretching during sewing.
- Proper Pressing: Press the finished hem with steam to relax fibers and flatten wavy edges.
With these tricks, your hem will stay perfectly in place!
Fixing Skipped Stitches and Thread Tension Problems
Skipped stitches on your sweater sleeves can be frustrating, but they’re usually a sign your sewing machine setup needs tweaking.
It’s like your machine is waving a tiny flag that says, “Something’s off!”
First, double-check your needle type—a fresh ballpoint needle is perfect for knits. This helps the needle glide smoothly through the fabric without causing skips.
Next, look at your thread tension—set the upper dial between 4 and 5 for most projects. If your fabric is still puckering, try loosening the presser foot pressure or adjusting the stitch settings.
Low-quality thread or bobbin issues might also be culprits. Swap in high-quality polyester thread and clean the bobbin area to remove lint.
Always do a test run on a scrap piece to fine-tune adjustments before tackling the real hem!
Dealing With Curling Edges
Curling edges on your sweater sleeves can be frustrating, but they don’t have to ruin your hemming project. With a few smart tricks, you can prevent that curl and achieve polished, professional results.
Start by using an edge stabilizer strip along the hemline. It keeps the fabric steady and reduces the chance of wavy or stretched-out hems.
Pair this with a slightly looser knit tension and a ballpoint needle for smooth stitching. A double-needle hem also adds a clean, professional finish while maintaining the flexibility of your sweater.
Press your fabric with steaming solutions—work from the center outward for a flat, even hem.
For extra curl control, add lightweight fusible hem tape for stability or sew in hem weights for stubborn fabrics.
- Combat curling edges effortlessly.
- Enjoy smooth, flawless sweater sleeves.
- Use pressing techniques for sharper finishes.
- Create hems with professional confidence.
Finishing Touches and Care Instructions
Once you’ve sewn the hem, pressing it properly guarantees a smooth, polished look. Taking care of your sweater’s new hem will keep it looking neat and lasting longer.
Pressing Your Finished Hem
To finish your hem like a pro, pressing is a must. A carefully pressed hem enhances the look and makes it seem professionally done.
Follow these steps:
- Set the iron to the appropriate iron temperature for your fabric type; test it on a discreet area to avoid scorching.
- Use a pressing cloth over the sweater sleeves to shield the material from direct heat.
- Apply gentle pressure and steam usage in smooth strokes to shape the hem cleanly.
- Place a seam roll beneath curves to maintain a smooth hem shape and avoid creases.
- Double-check seams and give them extra attention to make certain the hem lays flat.
These simple ironing techniques make certain your hem looks polished every time.
Reinforcing High-stress Areas
Once your hem is pressed, let’s reinforce sweater sleeves to make them last longer.
Focus on key stress points like cuffs, elbows, and seams.
For seam reinforcement, stitch an extra row along high-strain areas like cuffs—these spots handle daily wear, especially when pulling sleeves up.
Use a zigzag stitch for knit stabilizing and durable hems.
Got fraying edges? Double-stitch to secure fabric.
If elbows show wear, patch them with soft, flexible material.
Stress point techniques like adding support tape at shoulder seams prevent strain over time.
Properly reinforcing high-stress areas makes certain your sweater finishing stands the test of wear.
Caring for Your Hemmed Knit Garments
To protect your hard work and keep your hemmed sweater looking sharp, proper garment maintenance is a must.
Follow these fabric care tips to guarantee your sweater stays cozy and polished.
Start with washing instructions: use a gentle cycle with cold water and turn the sweater inside out. This minimizes wear on the hem.
Avoid the dryer—air drying prevents shrinkage and preserves elasticity.
Next, focus on storage solutions. Always fold sweaters flat and store them in a cool, dry place.
Hanging might stretch the cuffs and undo your handiwork. A drawer or storage bin works wonders.
For upkeep, try these repair techniques: fix snags with a crochet hook and go easy on fabric softeners.
They can weaken fibers, leading to pilling.
With the right garment maintenance, you’ll enjoy your hemmed knit garment for years, keeping it as fresh as the day you finished sewing!
Frequently Asked Questions (FAQs)
How do you Hem a sweater sleeve?
Think of a sleeve as a story waiting to be adapted.
To hem it, measure carefully, mark the length, fold evenly, pin securely, sew with matching thread, and press for a clean finish.
How do you knit a sweater Hem?
To knit a sweater hem, pick up stitches along the edge, then knit evenly for a few rows.
Use a stretchy bind-off for flexibility.
This creates a neat, custom finish without compromising comfort or design.
How do you Hem a knit sleeve?
Sometimes, sleeves seem to love growing longer overnight.
To fix knit sleeves, measure your desired length, fold neatly, and secure with pins.
Use stretch stitches or a zigzag pattern to maintain flexibility while sewing.
How do you fold a sweater Hem?
Fold the hem by turning the sweater inside out.
Measure and mark evenly, then fold up the fabric to your desired length.
Press the fold with an iron, and pin securely to maintain alignment.
How do you Hem a curved sweater?
Curve, clip, and crease!
When hemming a curved sweater, trim uneven edges, clip tiny notches along the curve for smooth folding, and press gently.
Use stretch-friendly stitches for flexibility while ensuring the hem lays flat. Use stretch-friendly stitches for flexibility while ensuring the hem lays flat.
How do you sew a sweater?
Start by measuring your sweater’s length, mark where you want the hem, and fold it neatly.
Use a sewing machine with a stretch stitch or hand sew carefully.
Finish by pressing for sharp edges.
How to hem a sweater sleeve?
Measure the desired length, mark with fabric chalk, then fold the sleeve edge inward.
Pin securely, and use a matching thread to sew a stretch or zigzag stitch.
Finish by pressing for a polished look.
How do you Hem a sweater?
Turn your sweater inside out, mark the desired length, then fold and pin the fabric.
Use a sewing machine or hand-stitch along the edge with matching thread.
Finish by pressing for a polished look.
Can You Hem a knitted sweater?
Threads of transformation whisper hope: you can hem a knitted sweater with careful technique.
Delicate stitches and precise measurements allow you to reshape your garment, maintaining its cozy essence while achieving your desired fit.
How to make a sweater shorter?
You’ll want to carefully fold and pin the sweater to your desired length, then sew a stretchy hem using a zigzag or twin needle stitch.
Press with an iron for a crisp, professional finish that maintains the sweater’s flexibility.
Conclusion
Remarkably, hemming sweater sleeves isn’t just a skill—it’s a transformative craft that empowers you to customize your wardrobe.
By mastering how to hem sleeves on a sweater, you’ll save money and breathe new life into cherished garments.
Whether you’re a beginner or seasoned DIY enthusiast, these techniques will help you achieve professional-looking results.
Remember, practice makes perfect, and each hem you create builds confidence in your sewing abilities.

