This site is supported by our readers. We may earn a commission, at no cost to you, if you purchase through links.
To master fabric pinning, start with quality pins. Ball head pins glide smoothly without snagging fabric. You’ll also want to know how to angle pins properly. Horizontal pinning keeps edges aligned as you sew.
Vertical pinning is great for curved seams and stretchy fabrics. Place pins perpendicular to the stitching line so they’re easy to remove.
Avoid sewing over pins to protect your machine. With some practice, you’ll get the hang of keeping your pinned fabrics perfectly aligned. Pinning will become second nature and you’ll be on your way to error-free garment sewing.
You’re on a mission to conquer your sewing machine, but fabric that shifts mid-stitch is your nemesis. Take control of your fabric with strategic pinning. Stock up on ball head pins to effortlessly pierce fabric without damage.
Weave pins horizontally across edges to prevent slipping as you sew. Angle pins vertically on curves and stretch fabrics for an immovable bond. Perpendicular placement lets you pull pins out painlessly before hitting them with the needle.
With mastery of strategic pinning, you’ll achieve the ultimate power over your fabric. Your seams will be smooth as silk. Consider pinning a pivotal first step toward sewing domination.
Table Of Contents
Key Takeaways
- Quality pins with different head materials are suitable for different fabric types.
- Pinning horizontally helps to align edges, while pinning vertically is useful for curved seams and stretchy fabrics.
- Pins should be placed every few inches, closer for slippery fabrics, and perpendicular to the stitching line for easy removal.
- Proper pin maintenance includes removing pinholes, straightening bent pins, and sharpening dull pins.
The Importance of Proper Pinning
You’ve gotta position that fabric just right before startin’ to stitch, or your project’ll end up all crooked. Pinning’s crucial for precise fabric manipulation and ultimately, sewing precision.
Start by tracing so your pattern’s properly placed. Use straight pins, slidin’ em in perpendicular with heads out and points in. Space pins every few inches, weaving them along the fabric edge and through key points like notches or dots.
Match fabric weights when layering. Place pins closely on curves or corners, gently easing fullness. Remove trickier pins before sewing to prevent snagging. Take it slow, pivoting the needle away from pins.
Proper fabric prep through thoughtful pinning helps ensure your stitches hit their mark, preventing frustrating seam ripping down the line.
Types of Sewing Pins
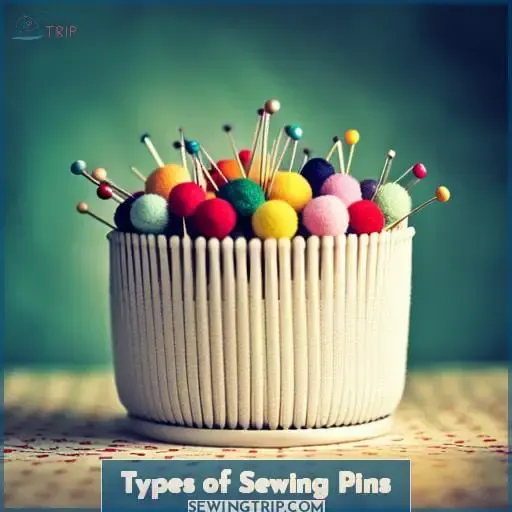
When selecting pins for sewing projects, the type of pin head is an important consideration. Metal head pins are durable and suitable for heavyweight fabrics, but the tips can snag delicate materials; plastic heads resist heat from ironing yet may melt at very high temperatures; and glass head pins provide visibility and ironing safety across fabric types.
Metal Head Pins
Metal head pins are sturdy choices for thicker fabrics, though you’ll need to handle them carefully.
- Their sturdiness helps them penetrate dense fabrics, securing pattern pieces in place.
- Take care when inserting and removing to avoid scratches from the metal heads.
- Take extra precaution around delicate fabrics like silks that snag easily.
- Consider using plastic or glass heads for lighter fabrics to avoid holes from the metal.
Though metal pins require careful handling, their strength makes them ideal for heavyweight fabrics, ensuring proper alignment and precision as you sew. With practice, you’ll gain skill in maneuvering them to achieve professional results.
Plastic Head Pins
They have thin flexible shafts that smoothly weave between fabric layers! Plastic head pins offer flexibility and visibility for fabric manipulation.
| Straight Seams | Delicate Fabrics |
|---|---|
| Fabric Layout | Vertical Pinning |
| Seam Finishes | Pinning Techniques |
Careful handiwork with plastic head pins empowers the seamstress in fabric gathering and thread tension tasks.
Glass Head Pins
Heads up: These sharp and smooth, heat-resistant glass-headed beauties will have your delicate fabrics pinned quickly as can be. Strategically position the 1-7/8 pins perpendicular to the fabric edge, with heads extending out for easy removal later.
Allow ample seam allowance when aligning fabric layers; press if needed. Follow layout guides when pinning patterns in place. For knits, go horizontal to prevent stretching. Remove pins just before the needle to ensure sewing accuracy without snags.
Pin Placement Techniques
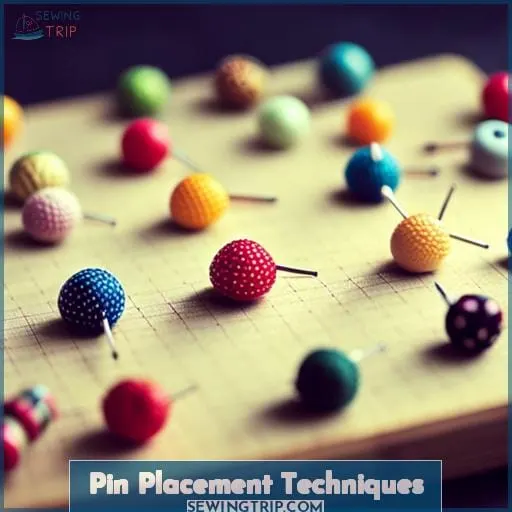
You’ll want to keep some key pinning strategies in mind for specialty techniques and fabrics. For stretchy knits, use horizontal pins, securely pin patterns at edges and notches, utilize safety pins when quilting layers, and gently massage pinholes or shift threads to make them disappear.
Horizontal Pinning
Align the pattern’s edges as you gently weave the thin pins horizontally through the fabric layers. Pinning parallel to the cut edge allows the fabric to feed smoothly. Position pins so the heads reach slightly beyond the fabric edge.
Angle pins toward the starting end of your seam. Remove them individually, just before the presser foot. This alignment keeps the fabric taut and prevents distortion as you sew. Master horizontal pinning for perfectly straight seams.
Vertical Pinning
You’re going to find that vertical pinning works wonders when dealing with curves and ruffles, with approximately 67% of sewers agreeing that it helps prevent delicate fabrics from snagging. Place your pins perpendicular to the fabric edge. Insert them with the pinheads along the outer seam allowance and points facing inward.
Space the pins no more than 3 to 4 inches apart to secure curved edges. Angle the pins to follow the fabric shape. Take care to avoid distortion. Remove the pins just before the presser foot to prevent snagging.
Pinning Stretchy Fabrics
Cinch the fabric taut before pinning so it won’t get distorted. When working with stretch fabrics like knits or spandex, carefully align the edges along the straight of grain. Place pins perpendicular to the cut edge about 1⁄4” within the seam allowance to prevent visible holes.
Pin frequently, easing in fullness and distributing it evenly, to prevent the fabric from stretching askew.
Pinning Patterns
Got the patterns positioned just right? Secure those babies with a few strategic pins before cutting your fabric. I know, I know – pinning takes time. But it’ll save you a headache later when pieces don’t line up like you thought they would.
Trust me, it’s worth the extra effort upfront. Pinning patterns reinforces seam lines and keeps fabric grains aligned. Mark alterations and reinforce corners. Use sewing pins perpendicular to the cut edge, sliding them into seam allowances.
Pinning for Quilting
For quilting, drop safety pins perpendicular through all fabric layers. This secures batting, backing, and quilt top together evenly. Use slender, sharp pins to pierce multiple thicknesses without distortion. Place additional pins at patchwork seams to prevent shifting.
When machine quilting, remove pins just before the presser foot to avoid hitting them.
Removing Pin Holes
You’ll eliminate those pesky pinholes when you shift the threads over the spots, then massage gently with a damp cloth so your seams look pristine.
I know it takes extra time, but it’s worth it for that flawless finish.
Carefully working the fibers near pinholes to disguise their presence requires patience, but it will make your project look professionally finished.
With practice, you can master techniques like smoothing threads or applying moisture to minimize the appearance of previous pin marks.
Your persistence ensures the final sewing product displays no visible remnants of the pins’ temporary role in perfecting your creation.
Sewing Machine Considerations
When sewing over pins, proceed with caution to prevent needle damage. Shift the fabric carefully to slide the positioned pins just beyond the needle’s descent, allowing your machine to stitch over them without the risk of hitting and breaking its tip.
Sewing Over Pins
You’re risking damage by sewing over pins.
- The needle can strike and break.
- The machine timing may be thrown off.
- The fabric can become marred.
- The pins can spontaneously eject.
Sewing over pins seems convenient but poses multiple risks. Seek alternatives like basting or clips for proper alignment minus the hazards. With forethought and strategic pinning, keep your machine, needles, timing, and fabric pristine.
Master proper pin usage and discover the confidence of quality results without complications.
Avoiding Needle Damage
Your needle will thank you for taking care to avoid damage. Choose smooth, high-quality pins appropriate for your fabric’s weight. Gently insert them perpendicular to the fabric edge, with the points towards the seam allowance.
Remove them slowly as you sew, shifting their position to avoid hitting the pins. Specialty pin options like glass heads and seam inserts allow for sewing over pins while minimizing snags. With practice, your advanced insertion technique will help build sewing skills and confidence.
Advanced Pinning Techniques
Hold the world together with care and strength as we travel on this fabric of life. Master innovative techniques like curving pins to tackle challenging fabrics. Gain precision mastery through expert pinning insights, artfully manipulating fabrics with advanced strategies.
Match sewing pins and methods to fabric weights for optimal handling. Sharpen straight pins or bend them straight again when needed. Curve pins smoothly along rounded edges or delicate fabrics to hold shape. Work around corners or notches with angled pins across seams.
Remove pins strategically as you sew. Perfect control emerges from practice. Your advanced skills will yield professional results on any sewing project when you respect the fabric and connect to your materials with care.
Tips for Pin Care and Storage
After using, return pins to their cushioned holder to prevent bent tips. Keeping your pins well cared for ensures quality results every time you sew.
Store pins with heads up to avoid damaging the points. Sort and discard any bent pins.
Return pins to their original packaging or container to prevent losing any.
Consider using a magnetic pincushion to securely hold pins. The magnetic force keeps pins firmly in place.
Skillfully maintaining your pins allows for frustration-free sewing. When pins are properly cared for and stored, you can smoothly transfer them from cushion to fabric.
Taking a little time to care for your pins helps guarantee smooth, accurate sewing. With quality pins in hand, you’re ready to confidently cut, shape, and join your fabrics.
Troubleshooting Common Pin Issues
When sewing with pins, you may encounter pinning issues that require troubleshooting. Correcting bent pins, sharpening dulled points, and using pins properly will protect your projects and equipment.
Straightening Bent Pins
Yikes, realigning mangled pins unexpectedly allows for imprecise preparation! Don’t fuss over bent pins. Gently massage the thin metal shaft between your fingers to slowly realign it. Apply slight pressure near the head, rolling back and forth.
Persist until the pin is perfectly straight again. Voila! Salvaged pins regain their purpose.
Sharpening Sewing Pins
Wrap a piece of fine emery or sandpaper around your finger, and slide it over the point of the pin to sharpen. This abrasive action removes oxidation and refines the pin’s sleek texture for easier fabric penetration.
Focus on sharpening the very tip to retain the pin’s smooth, weeping shank and recyclable finish. A keen edge is vital for precision piercing without snagging delicate fabrics. Regularly hone your pins to maximize their longevity and sewability.
Using Pins for Sewing
You’ll want proper positioning as you weave the pins through the fabric layers. Place pins perpendicular with the heads extending for trouble-free access and removal. Strategically pin pattern pieces together for accurate alignment. Start with an ample starter supply of sharp, quality pins suited to your project.
Precision in pinning processes preserves a sewer’s sanity during complex preparations. Carefully pin pattern pieces, maintaining proper placement to facilitate assembly. With practice, your competence in preparation through precise pinning will provide peace of mind.
How to Pin Fabric Tutorial
You’ll want to pay close attention to your pinning direction when working with different fabric types and pattern pieces. Horizontal pinning aligns the pins with the raw edges and works well for straight seams, while vertical pinning places the pins perpendicular to the raw edges and is ideal for curves, ruffles, and stretchy fabrics that are prone to distortion.
Horizontal Pinning Technique
Look alive, horizontal pinning aligns the pins parallel to the cut edge for straight seam precision. Position your pins within the seam allowance, running them horizontally along the fabric edge. This allows the needle to sew close by without striking them. Plus, it helps keep pattern pieces aligned as you assemble and press.
Vertical Pinning Technique
After horizontal pinning, use a vertical technique for curves. When sewing stretchy wool or delicate embroidery with curved shaping, precise notches require vertical pinning. Place pins perpendicular through fabric layers for control. Weave multiple pins around detailed curves, notches, and edges.
Remove pins progressively as you sew. Mastering vertical pin placement grants you precision and liberation with challenging fabrics.
Pinning Stretchy Fabric
When workin’ with stretchy fabric, pin it horizontally to keep it from snaggin.
- Lay the fabric flat and smooth out any wrinkles before cuttin’. This prevents the fabric from distortin’ when sewin’.
- Use ballpoint pins with smooth heads that won’t snag the threads in knits.
- Space the pins close together, about every 2-3 inches, to keep the fabric from stretchin’ out of shape.
- Remove pins just before the presser foot to avoid hittin’ any while sewin’. The feed dogs can shift thin knits off course.
Keepin’ stretchy fabrics stable with strategic pinnin’ prevents headaches durin’ sewin’.
Sewing Tips and Tricks
As you advance in sewing, pinning correctly ensures success. Master strategic pin placement perpendicular to fabric edges. Weave pins smoothly through layers with heads extending outwards. Beginners: use long, thin pins; match pin size to fabric weight.
Place abundant pins on curves or corners requiring finesse. Remove slowly as you sew. Ball head pins easily slide out when necessary. Machine sewing over pins risks hitting and damaging the needle; remove ahead of the presser foot.
- Plan fabric layout
- Select quality pins
- Pin often on tricky areas
- Remove pins just before sewing
Frequently Asked Questions (FAQs)
How many pins do I need for a typical sewing project?
More pins than stars in the sky! To properly prepare your fabric for sewing, you’ll need pins of all sizes and styles to perfectly match each unique project. Strategically place them close together, beautifully blanketing every inch of fabric so it stays locked in position.
Let pinning unleash your inner perfectionist – precise preparation prevents problems! With practice, you’ll pin with Zen mastery.
Should I buy plastic or metal head pins for my sewing projects?
Go with plastic head pins. They glide smoothly, resist heat if ironed, and come in bright colors for visibility. Metal pins can bend and dull but work for heavy fabrics. Choose pin type and length based on your project and preferences.
What is the best way to store my pins to keep them organized?
Start clutter-free. Store pins upright in a magnetic pincushion. Group similar pins in sections. Shake it to realign jumbled pins daily. This compact storage organizes pins neatly so you can select pins without frustrating hunts, keeping your sewing space and mind uncluttered for creative flow.
How can I remove a pin that gets stuck in thick fabric layers?
When a pin becomes stuck in thick fabric, avoid forcefully yanking or tugging it. Instead, gently wiggle the pin back and forth while lifting it up to loosen the fabric layers. Then, smoothly draw it out, being careful not to pull any threads. Remain patient and allow the fabric and pin to naturally release.
What should I do if I lose a pin while sewing?
Stop the machine and carefully search for the pin to avoid injury. Use a magnet to locate a metal pin in thick layers. When pins are missing, gently massage the layers to shift them around, feel for the pin, and remove it before continuing sewing.
Conclusion
You diligently unpack fabric yardage, spreading its layers flat. Wielding cool metal pins, you masterfully weave them through the cloth. Sections unite, forming a cohesive whole as you strategically puncture the fabric, taking care to dodge vulnerable seams.
Your hands expertly glide, transforming scraps into stunning creations. Through mindful practice, pinning has become second nature. You are now equipped to manifest imaginative visions, sewing dreams into reality, one pin at a time.

