This site is supported by our readers. We may earn a commission, at no cost to you, if you purchase through links.
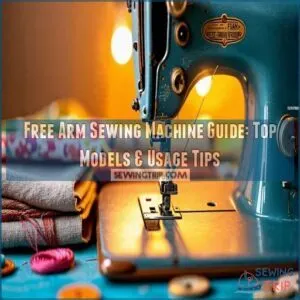 A free arm sewing machine is like having a secret weapon in your craft arsenal.
It gives you the edge when working on tricky, curved areas like sleeves or pant legs.
With its removable arm, you can easily maneuver fabric, ensuring every stitch lands perfectly.
For instance, the Janome Fastlane and Singer Start 1304 are popular choices because they handle small, detailed jobs with ease.
Whether you’re hemming a pair of jeans or creating doll clothes, a free arm sewing machine lets you sew with precision and flair.
And who doesn’t want a little magic in their sewing toolkit?
Table Of Contents
- Key Takeaways
- What is a Free Arm Sewing Machine
- When to Use a Free Arm Sewing Machine
- Top 8 Free Arm Sewing Machines
- 1. Janome Fastlane Fuschia Sewing Machine
- 2. Singer Start 1304 Sewing Machine
- 3. Brother ST371HD Sewing Machine
- 4. Singer Tradition 2259 Sewing Machine
- 5. Brother 35 Stitch Convertible Sewing Machine
- 6. Janome 2206 Sewing Machine
- 7. Singer Easy Free Arm Sewing Machine
- 8. Janome 2212 Sewing Machine Bonus Bundle
- Choosing The Right Free Arm Sewing Machine
- Tips for Using a Free Arm Sewing Machine
- Frequently Asked Questions (FAQs)
- Conclusion
Key Takeaways
- You’ll find a free-arm sewing machine essential for working on tubular items like sleeves, pant legs, and cuffs, as its removable flatbed allows fabric to slide smoothly around the arm.
- You can choose between vintage machines with narrower arms for tight spots, or modern options offering features like automatic needle threading and multiple stitch patterns – popular brands include Singer, Brother, and Janome.
- You’ll need proper lighting and an ergonomic workspace setup to get the most from your free-arm machine, while regular maintenance of the bobbin area and tension settings prevents common issues.
- You’re not limited to small projects – free-arm machines can handle everything from basic mending to quilting, though you’ll want to match the arm size and features to your typical sewing needs, as certain sewing tasks may be better suited for portable mini sewing machines, but free-arm machines can handle everything from basic mending to quilting, though you’ll want to match the arm size and features to your typical sewing needs.
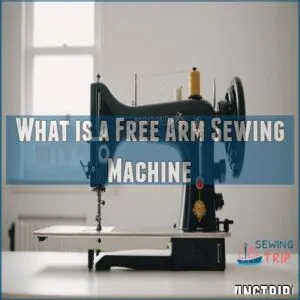
What is a Free Arm Sewing Machine
A free arm sewing machine features a suspended bed that lets you easily sew tubular items like sleeves and pant legs without wrestling with the fabric.
You’ll appreciate the benefits of better control and cleaner finishes, making tricky projects a breeze.
Definition and Purpose
Imagine this: you’re trying to sew a pesky sleeve and realizing your regular sewing machine isn’t cutting it. Enter the free arm sewing machine! It’s like having your fabric slide over a suspended bed, perfect for sewing in the round. From sleeves to pant legs, this machine tackles smaller, tubular items like a champ.
The convertible sewing surface can easily be engaged for specific projects, opening up various sewing techniques.
- Sewing in the round made easy
- Great for tubular items
- Adjustable mechanisms
- Fits smaller sewing tasks
- Adaptable for various garments
Benefits of Using a Free Arm Sewing Machine
Free arm sewing machines offer incredible advantages. You’ll experience improved fabric control, leading to precise stitching and reduced thread snags. This handy feature makes garment handling easier, boosting your sewing speed. With a free arm, you can easily sew in the round, reducing the likelihood of fabric shifting and wobbly stitches, especially when working on tasks like sewing tubular pieces.
| Benefit | Description | Result |
|---|---|---|
| Improved Control | Easier to maneuver fabric around the arm | Precise stitching, fewer mistakes |
| Faster Sewing | Streamlines sewing of tubular items | Quicker project completion |
| Reduced Frustration | Fewer snags and tangles | Smoother sewing experience |
Sewing fabric in the round becomes a breeze. The free arm sewing surface is perfect for cuffs, sleeves, and pant legs. You’ll appreciate the increased control and the free arm length and diameter options. These sewing machine features are game-changers!
When to Use a Free Arm Sewing Machine
You’ll find a free arm sewing machine incredibly handy for tasks like hemming sleeves or attaching cuffs, where precision is key.
It’s perfect for stitching those small, awkward parts without feeling like you’re wrestling with an octopus—think doll clothes or pant legs!
Hemming Sleeves and Pant Bottoms
For hemming sleeves and pant bottoms, your free arm sewing machine is a game-changer.
Its compact arm lets you wrangle fabric with ease, tackling those tubular garments like a pro.
Opt for stretch needles and threads, and play around with hem width and stitch options to perfect your finish.
Enjoy experimenting—it’s like giving your clothes a tailor’s touch at home!
Adding Cuffs to Sleeves and Pant Legs
After mastering hems, let’s chat about adding cuffs to sleeves and pant legs.
A free arm sewing machine makes this a breeze—suddenly those pesky cuffs are no problem.
Experiment with cuff styles, fabrics, and widths.
Don’t forget some solid cuff sewing tips and finishing techniques.
It’s less frustrating and more fun, especially for beginners with extension tables.
Attaching Sleeves to Garments
Ever struggled attaching sleeves neatly?
That’s where a free arm sewing machine saves the day.
It simplifies sleeve placement, ensuring a smooth seam finish without breaking a sweat.
Remove the detachable sewing bed for those tight spots, mastering sleeve fitting like a pro.
Whether tackling fancy cuff styles or routine mending, this technique boosts your sewing projects with precision and ease.
Sewing Small Items Like Doll and Baby Clothes
Imagine this: you’re crafting adorable doll clothes or tiny baby outfits. A free arm sewing machine is your best friend here. Its compact design tackles miniature sewing, managing those tiny details with ease.
To perfect your doll clothes, choose simple designs with basic silhouettes and stable wovens for learning. Enjoy flexibility in fabric choices and explore creative project ideas without fuss.
- Doll clothes patterns
- Miniature sewing tips
- Portable sewing machines are a great option for those who want a compact and lightweight sewing solution, such as the small portable sewing machines discussed in portable sewing machine small. Portable sewing machines
- Fabric choices
- Project ideas
Mending Clothes
Switching from sewing tiny doll clothes to fixing life’s little fashion emergencies, a free arm sewing machine works wonders for mending.
When looking for one, you can check out online marketplaces like free arm sewing products.
Tackling patching, tears, or holes becomes a snap.
Embrace everyday sewing tasks like a pro.
The detachable sewing bed and thread cutter streamline the process, making repairs feel less like a chore and more like a creative act.
Top 8 Free Arm Sewing Machines
Ready to sew those tricky cuffs and pant legs? Here’s our pick of the top eight free arm sewing machines, each offering unique features to help you create amazing projects.
1. Janome Fastlane Fuschia Sewing Machine
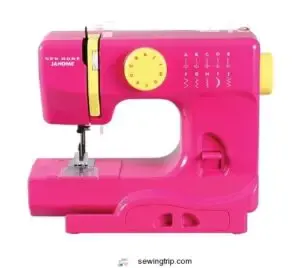
The Janome Fastlane Fuschia sewing machine, with its lightweight design and vibrant color, is perfect for both kids and beginners seeking to master sewing basics.
Its free arm feature makes tackling sleeves and pant legs a breeze, while the top drop-in bobbin makes threading easy.
This model is an excellent choice for those looking for a sewing machine with a free arm, similar to other options available at online marketplaces like Sewing Machines Online.
Although it hums a bit loudly and lacks a thread cutter, this machine makes up for it in portability and ease of use.
Just watch out, as it might be outgrown or feel limited for more advanced projects.
The Janome Fastlane Fuschia Sewing Machine is a great option for those looking to master basic stitches and techniques, such as those found in Sewing Machine Basics for Beginners. The Janome Fastlane Fuschia Sewing Machine is best for beginners and children looking to learn basic sewing skills.
- Lightweight and portable for easy transport.
- Easy to thread and wind the bobbin.
- Offers a free arm for sewing sleeves and pant legs.
- Limited stitch options may not be suitable for more complex projects.
- Lacks a thread cutter.
- May be outgrown by more experienced sewers.
2. Singer Start 1304 Sewing Machine
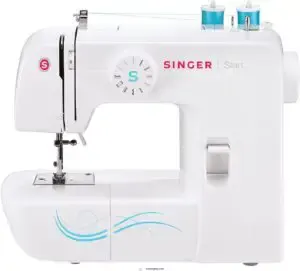
For anyone dipping their toes into sewing, the Singer Start 1304 is a trusty companion.
Weighing just 7 pounds, it’s easy to carry and perfect for small projects or quick fixes.
You’ll find six different stitch types pre-set for width and length, making it beginner-friendly.
Plus, the automatic bobbin winding is a lifesaver, although some users find it tricky.
With a handy accessory kit included, it’s like having a sewing toolbox right at your fingertips.
Just remember, the light might be dim!
Best For: The Singer Start 1304 is best for beginners and occasional sewers who need a lightweight, portable machine for basic projects.
- Easy to use and lightweight.
- Comes with a variety of useful accessories.
- Affordable price.
- Bobbin winding can be difficult.
- The light may be too dim.
- No written instructions, only pictures.
3. Brother ST371HD Sewing Machine
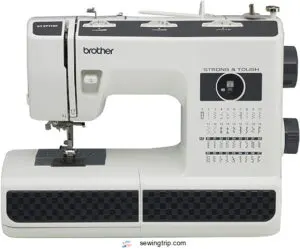
Brother ST371HD Sewing Machine is your trusty sidekick for tackling various sewing projects.
With 37 built-in stitches, you can craft anything from a simple hem to a dazzling buttonhole.
Its automatic needle threader spares you the eye strain, though it might need a little getting used to.
The free arm lets you easily maneuver those pesky pant legs.
It’s like having your cake and eating it too!
Just remember, the control buttons may take some practice.
Prepare for sewing adventures!
Best For: The Brother ST371HD Sewing Machine is best for beginners and those who want a versatile machine for various sewing projects.
- 37 built-in stitches, including an auto-size buttonhole
- Automatic needle threader
- Free arm for easy maneuvering
- Control buttons may be confusing
- Needle threader can be difficult to use
- No automatic thread cutter
4. Singer Tradition 2259 Sewing Machine
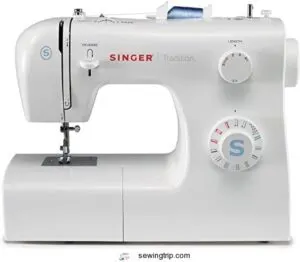
Get creative with the Singer Tradition 2259, your trusty sewing companion.
This portable machine, featuring 19 stitches and a seamless buttonhole process, simplifies your projects.
While it’s not the fastest runner, its lightweight design makes it surprisingly mobile, though watch out—it might jitter on your table at high speeds.
Ideal for beginners and pros alike, it comes with a foot pedal, a host of accessories, and an instruction DVD.
Perfect for those who crave affordability without skimping on durability.
Best For: This machine is perfect for beginners, professionals, and anyone looking for a low-cost portable option.
- Easy to use with a simple stitch selection and snap-on presser feet.
- Quiet, lightweight, and comes with a dust cover.
- Well-made with an all-metal bobbin casing and mechanism.
- Not as fast as some other models.
- Reverse stitch placement is unusual.
- Can move around on the table when sewing at high speeds due to its lightweight design.
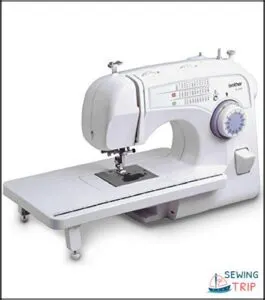
5. Brother 35 Stitch Convertible Sewing Machine
Ever feel tangled in threads?
The Brother 35 Stitch Convertible Sewing Machine might be your new best friend.
With its 35 stitches and 73 stitch functions, you’ve got every project covered, from simple mending to complex quilting.
It’s super user-friendly, featuring an automatic needle threader and one-step buttonholer, making intricate sewing a breeze.
Whether you’re crafting a quilt with its oversized table or sewing sleeves using the free arm, this machine offers the versatility and control you crave.
The Brother 35 Stitch Convertible Sewing Machine is a versatile model that features an automatic needle threader and buttonholer, making it a great option for those looking for easy to use sewing machines that simplify sewing tasks. The Brother 35 Stitch Convertible Sewing Machine is best for beginner sewers and those who want a versatile machine for a variety of projects.
- Easy to use with features like an automatic needle threader and one-step buttonholer.
- Versatile with its convertible flatbed and free arm, making it suitable for quilting and garment sewing.
- Includes a variety of accessories, including a quilting table, walking foot, and 7 presser feet.
- May not be suitable for sewing very thick or dense materials.
- The automatic needle threader can require some effort to ensure the thread goes through the hook properly.
- The quilting bed is smaller than what some quilters may require.
6. Janome 2206 Sewing Machine
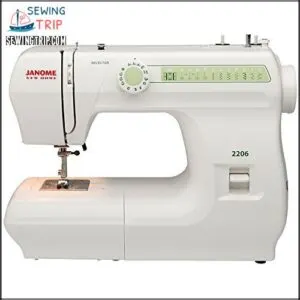
Janome 2206 offers a sewing experience that feels like crafting with an old friend—reliable and straightforward.
This machine sports a white, sturdy plastic build and runs at speeds up to 860 stitches per minute.
Newbies love its ease, featuring a front-loading bobbin and six built-in stitches, including a four-step buttonhole.
Sure, the limited stitch length mightn’t thrill precision fans, and velcro can be tricky.
However, it handles thick fabrics like faux fur with grace, making it a solid choice for basic tasks.
Best For: Beginners and those seeking a simple, reliable machine for basic sewing tasks.
- Easy to use, even for beginners.
- Handles thick fabrics like faux fur.
- Durable and reliable.
- Limited stitch length options.
- Some users have reported difficulty sewing velcro.
- May require costly servicing if malfunctions occur.
7. Singer Easy Free Arm Sewing Machine
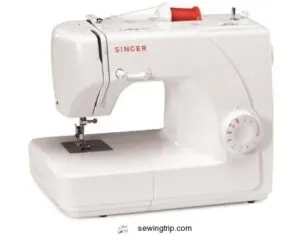
You’ll love the Singer Easy Free Arm Sewing Machine! It’s lightweight and easy to thread, making it perfect for beginners.
Its adjustable stitch length and width let you personalize your projects.
Eight built-in stitches, including a buttonhole, offer versatility.
The included snap-on presser feet expand your creative options.
It even comes with a handy cover to keep it dust-free.
While the foot pedal might take some getting used to, you’ll appreciate its quiet operation and sturdy build.
This machine is a solid choice for basic sewing needs, offering a great balance of features and ease of use.
It’s a fantastic starting point for your sewing journey.
Best For: The Singer Easy Free Arm Sewing Machine is best for beginners looking for a simple, lightweight, and easy-to-use sewing machine.
- Lightweight and easy to transport
- Easy to thread and use
- Quiet operation
- Foot pedal can be difficult to control
- Machine can jam easily
- Presser foot does not lift high enough for thick fabrics
8. Janome 2212 Sewing Machine Bonus Bundle
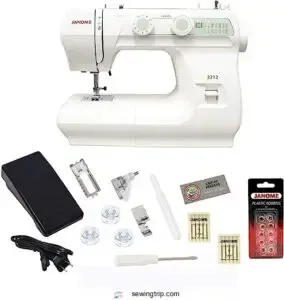
Considering both style and utility, the Janome 2212 Sewing Machine Bonus Bundle stands out as a solid choice for beginners.
It offers 12 built-in stitches, a four-step buttonhole, and adjustable stitch settings, giving you control over basic sewing tasks.
You won’t break the bank with this purchase either, as it’s quite affordable.
However, a needle threader isn’t included, which might be a hassle.
Keep an eye on the bundle contents, as sometimes not all items are included.
It’s a robust, lightweight machine that’s easy to manage.
Best For: The Janome 2212 Sewing Machine Bonus Bundle is ideal for those looking to start with simple projects, such as the easy sewing projects for beginners found at free sewing machine projects, which is best for beginners looking for an affordable, easy-to-use machine for basic sewing projects.
- Affordable price point
- Lightweight and easy to use
- Includes a comprehensive bonus bundle
- Needle threader not included
- Some users have reported issues with the bobbin case assembly
- The instruction manual may not be clear on all aspects of the machine
Choosing The Right Free Arm Sewing Machine
When you’re in the market for a free arm sewing machine, think about the projects you’ll tackle and the machine’s arm size to match.
Vintage machines might charm with their narrow arms, perfect for tight spots, while modern models offer unique features that could make your sewing smoother—just don’t get too distracted by all the buttons!
Considerations for Diameter and Length
Finding the perfect fit in a free arm sewing machine isn’t a walk in the park.
A smaller diameter tackles slim sleeves or cuffs beautifully, while a longer length handles bulkier projects.
Here’s what to keep in mind:
- Free Arm Size: Best for your project fit.
- Cuff Stitching Ease: Check length.
- Flatbed vs Free Arm: Balance between quilting and extension table needs.
Benefits of Vintage Vs Modern Machines
When debating between vintage free arm machines and modern sewing machines, durability and charm often sway folks.
Vintage models boast hefty builds and unique aesthetics, perfect for nostalgic souls.
Those who prefer modern options can even find portable machines online, such as a portable sewing machine model.
In contrast, modern ones offer cutting-edge features and easy repair options.
Let’s face it, the right choice depends on balancing style against the best sewing machines‘ innovative perks and price.
Additional Features to Consider
Modern machines bring sleek features; now let’s chat about what bells and whistles you need.
Check these out:
- Built-in Stitches: Variety helps you be creative.
- Needle Threader: Skip the eye strain.
- Foot Pedal Speed: Control is key for perfect stitches.
- Automatic Bobbin Rewind: No more tangles!
These make your free arm sewing machine a dream!
Tips for Using a Free Arm Sewing Machine
Using a free arm sewing machine lets you tackle those tricky tubular projects like a pro, but it can feel like juggling stitches without a net if you’re not prepared.
Ensuring you have good lighting and a spacious workspace can make all the difference, turning potential sewing chaos into a smooth, creative flow.
Lighting and Workspace Considerations
So, you’ve picked your perfect free arm sewing machine! Now, let’s talk about setting up your workspace. Good lighting is key; natural light is great, but an LED light is a fantastic backup.
Think ergonomics! A comfortable sewing table, maybe even one with storage, will save your back. Proper posture is important, don’t hunch over!
Consider adding a storage box for your sewing machine accessories, keeping everything organized. A well-lit, ergonomic space makes sewing easier and more enjoyable. You’ll appreciate the difference!
Remember, a happy sewer is a productive sewer. Investing in good lighting and a comfortable workspace is an investment in your creativity. Plus, it’ll help you avoid eye strain and backaches.
Troubleshooting Common Issues
Just when you’ve nailed your workspace lighting, pesky problems like needle jams and thread breakage can still crop up.
To smooth out these wrinkles, start with checking tension settings on your free arm sewing machine.
If stitches skip or threads snap, adjust the tension and thread the machine correctly.
Experiencing bobbin problems? Make sure the bobbin is clean and inserted properly.
For a sewing machine with automatic buttonholer, keep it free of lint.
Master these small tweaks, and you’ll soon stitch like a pro at home or tackle professional projects seamlessly!
Frequently Asked Questions (FAQs)
What is a free arm sewing machine?
Imagine sewing your sleeves and pant cuffs without wrestling with awkward bunches.
A free arm sewing machine helps you glide fabric smoothly, making those tricky tubular stitches a breeze.
Think of it as sewing’s secret weapon!
Can you sew using a free arm?
Sewing with a free arm is like steering a sailboat—smooth and precise.
It lets you easily stitch around tricky curves, perfect for hemming sleeves or pant legs.
You’ll appreciate the control and finesse it offers.
What can you do with a free arm machine?
With a free arm machine, you can easily hem sleeves, add cuffs, or sew small areas like baby clothes.
Its design lets you slide fabric over the arm, making tricky sewing tasks feel like a breeze!
What is the smallest free arm size for a sewing machine?
There’s no single answer; it depends on the machine’s model. Older machines often have smaller free arms, ideal for tiny projects. Newer models vary, so check the specs before buying!
What are the top-rated brands for free arm sewing machines?
You’re looking for the best, huh?
Singer, Brother, and Janome always top the charts for free arm sewing machines.
They’re reliable, versatile, and perfect for those tricky sleeves or pants!
You won’t regret investing in them.
Can all sewing machines be used for free arm sewing?
Not all sewing machines can tackle free arm sewing.
Models designed with a removable flatbed allow free arm use, making sewing sleeves and cuffs a breeze.
Check if your machine can transform for those tricky tubular tasks!
Which Janome sewing machines come with a free arm?
When choosing a free arm sewing machine, consider features like automatic needle threading and adjustable stitch settings for efficient projects, check out top free arm sewing machine picks. Check out the Janome 2206 and Janome 2212 sewing machines for free arm features.
They’re user-friendly and portable, making them perfect for various sewing needs.
Each model offers reliable performance to boost your sewing projects effortlessly.
What is the difference between a free arm and a flatbed sewing machine?
Fancy free arm sewing machines make sewing sleeves and cuffs a cinch with their suspended bed.
Meanwhile, flatbed machines flaunt a fixed platform, perfect for general sewing tasks, but lack the maneuverability for tubular items.
What are the benefits of using a free arm sewing machine?
Get smoother sewing with a free arm machine.
It eases the hassle of reaching tight spots like sleeves or pant hems.
You’ll enjoy better control, avoid fabric mishaps, and achieve precise, polished stitches effortlessly.
What is a free arm in a sewing machine?
Picture a tiny bridge on your sewing machine, letting fabric flow over like water in a stream.
This free arm design makes it easy to sew those tricky tubular items like sleeves and pant legs seamlessly.
What is an open arm sewing machine?
It’s a sewing machine with a removable flatbed, freeing up a cylindrical arm.
You’ll love it for sewing cuffs, pant legs, and other round items!
It gives you amazing control and precision.
What is a portable free arm sewing machine?
A portable free arm sewing machine is lightweight and easy to move.
It lets you slide fabric around the arm, making it perfect for sewing in the round on items like sleeves, cuffs, and pant legs.
Can you do free motion sewing on any machine?
While many sewing machines support free motion with the right accessories, you’ll need a machine that lets you drop the feed dogs and attach a darning foot.
Modern machines typically include these features.
How do I maintain a free arm sewing machine?
Keep your machine purring smoothly by cleaning the bobbin area regularly.
Oiling moving parts monthly will help keep your machine in tip-top shape.
Dusting the free arm surface is also important for maintaining your machine’s performance.
You’ll also want to check tension settings and replace needles after 8 hours of use.
What are the common issues with free arm machines?
Like a stubborn dance partner, free arm machines can tangle threads and jam when you’re working on cuffs.
You’ll also face challenges with arm diameter limitations and fabric bunching during circular sewing projects.
Can I quilt with a free arm sewing machine?
You can definitely quilt with a free arm machine!
Simply attach your quilting table for larger projects,
or use the free arm feature for detailed work on smaller quilted items and hard-to-reach areas.
What materials work best with free arm machines?
Gliding through fabric like a skilled dancer, your free arm machine works wonders with lightweight to medium-weight materials.
Cotton, linen, and stretchy knits flow smoothly.
Denim and canvas require careful handling.
How does a free arm differ from a flatbed?
Free arms elevate your sewing game by providing a narrow, suspended platform that lets you slip tubular items around it.
Flatbeds offer a solid surface that’s great for larger, flat projects.
Conclusion
Perfectly positioned to power up your sewing projects, a free arm sewing machine transforms tricky tasks into manageable moves.
You’ll wonder how you ever managed without one for those challenging curved areas and tight spaces.
Whether you’re hemming pants, adding cuffs, or crafting tiny doll clothes, these machines make precision work a breeze.
Consider your sewing needs, budget, and desired features when choosing your ideal free arm sewing machine.
Ready to tackle those hard-to-reach areas? Your perfect stitch awaits.
- https://threadistry.com/blog/free-arm-sewing-machine/
- https://sewguru.com/best-free-arm-sewing-machines/
- https://sewyoursoul.com/best-free-arm-sewing-machines/
- https://www.joann.com/brother-sm1704-17-stitch-free-arm-sewing-machine/15517311.html
- https://sergerpepper.com/free-arm-sewing-machines-explained/

