This site is supported by our readers. We may earn a commission, at no cost to you, if you purchase through links.
 To prevent your sewing machine from eating fabric, start by threading correctly and adjusting tension. It’s like finding the sweet spot on a guitar string – too tight, and you’ll snap; too loose, and you’ll warble.
Use the right needle for your fabric; a universal needle won’t cut it for every job.
Keep those feed dogs clean and at the proper height – they’re the unsung heroes of smooth sewing.
Don’t forget to clean your bobbin area regularly; lint buildup is a fabric-eater’s best friend.
Table Of Contents
- Key Takeaways
- Common Causes of Fabric-eating Sewing Machines
- Proper Threading Techniques to Prevent Fabric Snags
- Choosing the Right Needle for Your Fabric
- Adjusting Feed Dogs for Smooth Fabric Feeding
- Mastering Tension Control to Prevent Fabric Issues
- Techniques for Sewing Delicate and Slippery Fabrics
- Proper Fabric Handling to Avoid Machine Snags
- Machine Maintenance to Prevent Fabric-eating Issues
- Specialized Tools for Preventing Fabric Feeding Problems
- Troubleshooting Persistent Fabric-eating Problems
- Frequently Asked Questions (FAQs)
- Conclusion
Key Takeaways
- Master your threading and tension – it’s the secret sauce to smooth sewing. Get the thread path just right, and find the sweet spot between your top and bottom threads.
- Choose the perfect needle-fabric match. Use the right needle type and size for your material, and don’t forget to swap it out regularly. Your fabric will thank you!
- Tame those feed dogs – keep them clean and at the proper height. They are the unsung heroes of even fabric feeding. A straight-stitch needle plate can be a game-changer too.
- Maintain your machine like a pro. Regular cleaning, oiling, and professional tune-ups will keep your trusty stitcher purring instead of chomping on your precious fabrics.
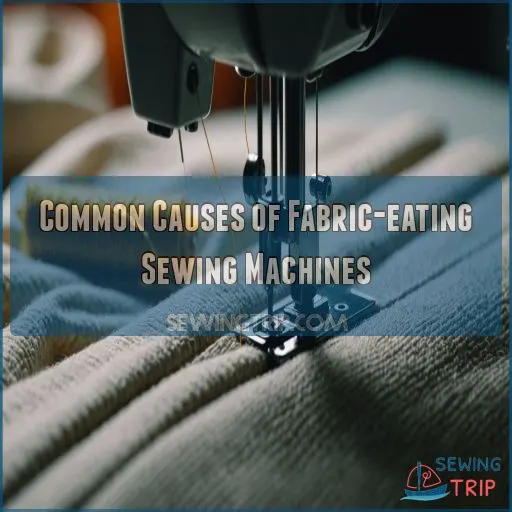
Common Causes of Fabric-eating Sewing Machines
Ever felt like your sewing machine’s on a fabric diet?
Let’s unravel the mystery behind why your trusty stitcher sometimes turns into a fabric-munching monster.
From threading mishaps to tension tantrums.
Incorrect Threading and Tension Issues
While threading your sewing machine might seem like a walk in the park, it’s often the culprit behind fabric-eating mishaps, commonly caused by issues like thread following the incorrect path and poor thread quality.
Don’t let tension troubles turn your project into a hot mess. Here’s why proper threading and tension matter:
- It’ll save you from pulling your hair out over snagged fabric
- You’ll avoid the heartbreak of ruining expensive material
- Your machine will purr like a kitten, not growl like a bear
Master your thread path and tension settings to keep your sewing on track.
Incompatible Needle and Fabric Combinations
You’ve mastered threading, but your fabric’s still playing hide-and-seek with your needle? Let’s talk about the perfect match-up between needles and fabrics. It’s like finding your sewing soulmate – get it right, and you’ll be stitching happily ever after.
Check out this handy guide to avoid any needle nightmares:
| Fabric Type | Ideal Needle |
|---|---|
| Lightweight | 8-10 Universal |
| Knits | 10-12 Ballpoint |
| Denim | 14-16 Jeans |
| Silk | 9-11 Microtex |
| Heavy-duty | 16-18 Heavy |
Remember, using the wrong needle is like trying to cut a steak with a butter knife – it just won’t work.
Feed Dog and Stitch Formation Problems
Now that we’ve tackled needle issues, let’s talk about those pesky feed dogs. They’re like the teeth of your sewing machine, and when they’re not behaving, your fabric might end up as an unintended snack.
- Feed dogs sitting too low, barely peeking through the plate
- Uneven feed dog alignment, causing fabric to skew
- Incorrect stitch length for your fabric type
- Feed dogs clogged with lint, unable to grip properly
Adjust your feed dog height and alignment to keep your projects on track.
Bobbin and Lint Management Challenges
Those pesky feed dogs aren’t the only culprits in fabric-eating mishaps.
Let’s talk about the bobbin area – it’s a lint magnet! Regular bobbin case cleaning is your secret weapon.
Lint buildup can wreak havoc on your stitches, so make it a habit to clean under the throat plate.
And here’s a pro tip: when winding bobbins, don’t overfill. A smooth, even wind prevents tension troubles and keeps your fabric safe.
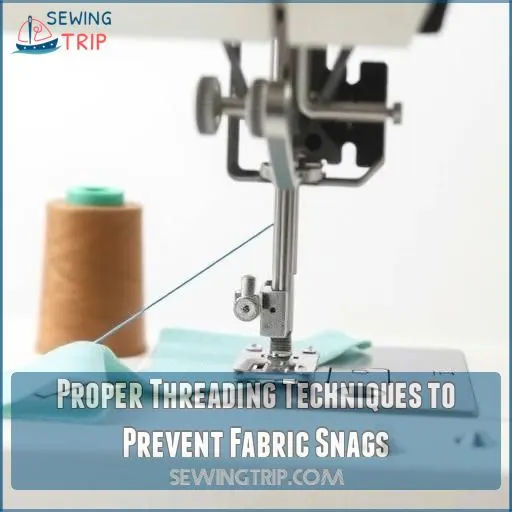
Proper Threading Techniques to Prevent Fabric Snags
You’re about to become a threading ninja, mastering the art of keeping your fabric from becoming sewing machine chow.
Get ready to learn the secret handshake between your thread, tension discs, and take-up lever that’ll have your machine purring instead of chomping.
Step-by-step Machine Threading Guide
Let’s unravel the mystery of proper machine threading – it’s the secret sauce to prevent fabric snags!
Start by placing your thread on the spool pin. Guide it through the top thread guide, then down and around the tension discs.
Create a U-shape by looping back up to the second guide. Finally, thread the needle from front to back.
Remember, a well-threaded machine is your ticket to smooth sailing!
Importance of Thread Take-up Lever Positioning
One important step in your sewing machine’s threading sequence is positioning the thread take-up lever correctly for proper thread tension
.
This little powerhouse controls tension and stitch formation, so getting it right is key to avoiding fabric-eating disasters.
Always make sure the lever’s at its highest point before threading.
It’s like giving your machine a good stretch before a workout – it sets you up for success and keeps your sewing project from becoming a tangled mess.
Correct Thread Placement in Tension Discs
Now that you’ve got your take-up lever sorted, it’s time to tackle those pesky tension discs.
Think of them as the gatekeepers of your thread’s journey. Properly placed thread in these discs is like threading a needle on the first try – satisfying and essential for smooth sailing.
Make sure you’re feeding the thread between the discs, not around them. A clean disc is a happy disc, so give them a gentle wipe now and then.
Proper Presser Foot Positioning During Threading
Threading your machine’s a breeze when you position your presser foot correctly. Here’s the golden rule: keep that foot up! With the foot raised, you’ll avoid those pesky tension issues that can turn your sewing dreams into a tangled nightmare.
Remember:
- Lift the presser foot before threading
- Adjust foot height for thick or stretchy fabrics
- Double-check foot alignment for decorative stitches
Think of it as giving your thread a red carpet to strut down!
Choosing the Right Needle for Your Fabric
You’re about to become a needle matchmaker for your fabric.
Picking the right needle isn’t just about size – it’s about finding that perfect partner that’ll dance smoothly through your material without leaving a trail of snags and tears.
Needle Types for Different Fabric Weights
Picking the right needle is like finding your fabric’s perfect dance partner. The needle gauge should match your fabric thickness – a delicate waltz for lightweight silks, a sturdy tango for denim.
For stretchy fabrics, opt for a ballpoint to glide between fibers without snagging.
Remember, the needle point and size can make or break your sewing success. It’s not just about threading – it’s about harmony between needle and fabric. (Source)
Importance of Regular Needle Replacement
You’ve got the right needle for your fabric, but don’t rest on your laurels!
Regular needle replacement is the unsung hero of sewing success. Like a chef sharpening their knives, you’ll want to keep your needle in tip-top shape.
- Boosts sewing quality
- Prevents fabric damage
- Extends machine life
- Improves project efficiency
Don’t let a worn-out needle be the thread in your side. Swap it out every 8-24 hours of sewing time.
Signs of a Damaged or Dull Needle
Just as a dull knife can turn slicing tomatoes into a messy ordeal, a damaged needle can wreak havoc on your sewing projects.
Keep an eye out for fabric tugging, thread breakage, and uneven stitches – they’re your machine’s way of crying for help (Source).
If you hear a worrying "thud" or notice skipped stitches, it’s time to swap that needle before it snaps and turns your sewing session into a needle-hunting adventure!
Using BERNINA Needle Search for Guidance
Now that you’re on the lookout for needle wear, let’s harness the power of BERNINA’s Needle Search tool. It’s like having a fabric whisperer at your fingertips! This nifty guide helps you find the perfect needle for your project, ensuring your fabric stays happy and hole-free.
- Matches needle types to specific fabrics
- Recommends sizes based on your project
- Provides color-coded needle identification
- Offers compatibility checks for your machine
- Includes handy sewing tips for best results
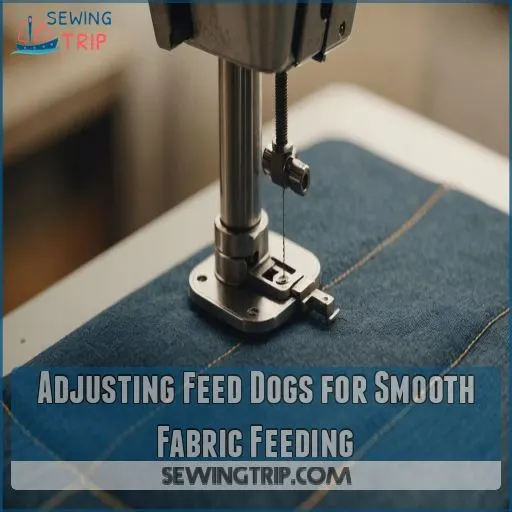
Adjusting Feed Dogs for Smooth Fabric Feeding
Ever felt like your sewing machine’s got a fabric appetite?
Adjusting your feed dogs can turn that fabric-chomping monster into a smooth operator, ensuring your projects glide through without a hitch.
Raising and Lowering Feed Dogs
Ever felt like your sewing machine’s got a mind of its own? Mastering feed dog control is your ticket to smooth sailing.
These little metal teeth are the unsung heroes of fabric feeding. For regular sewing, keep ’em raised and ready to roll. But when you’re feeling artsy and want to try freehand embroidery, lower those dogs and let your creativity run wild.
To avoid common issues like stuck feed dogs or uneven stitch lengths, make sure to clean the area under the needle plate regularly and set your stitch length to 2 or higher.
For more tips on troubleshooting feed dog problems, see common feed dog issues.
Cleaning and Maintaining Feed Dog Mechanisms
You’ve mastered raising and lowering your feed dogs, but let’s keep that fabric-eating monster at bay! Regular cleaning is your secret weapon.
Grab your lint brush and go to town on those metal teeth.
- Brush away lint daily
- Oil moving parts weekly
- Check alignment monthly
Think of it as a spa day for your sewing machine – it’ll thank you with silky smooth stitches!
Selecting Appropriate Stitch Length for Fabrics
After giving those feed dogs a good scrub, let’s talk stitch length – it’s like choosing the right dance step for your fabric.
Heavy denim? Go for longer stitches, about 3.5-4.0 mm. Light, flowy chiffon? Shorten those stitches to 1.5-2.0 mm.
Remember, the right stitch length can make or break your seam strength. Don’t be afraid to test on scraps – it’s your secret weapon for sewing success!
Benefits of Straight-stitch Needle Plates
When it comes to sewing wizardry, straight-stitch needle plates are your secret weapon for smoother fabric feeding.
They’re like a magical portal for your needle, offering a tiny round hole that keeps fabric in check.
You’ll notice:
- Less fabric movement for rock-solid stitching stability
- No more fabric diving into the needle hole at startup
- Straighter stitches, perfect for free motion quilting and precision piecing
Say goodbye to fabric drag and hello to stitch perfection. It’s like giving your sewing machine superpowers!
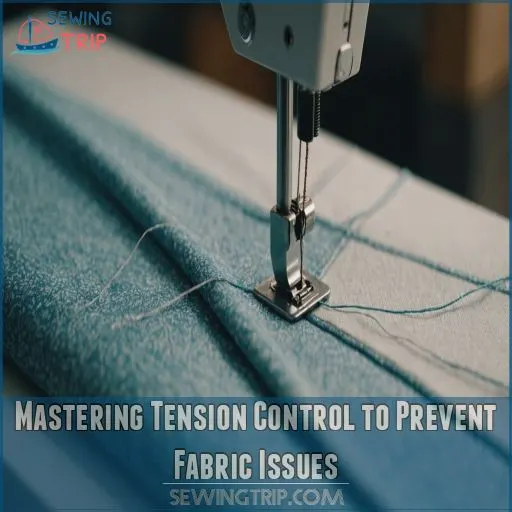
Mastering Tension Control to Prevent Fabric Issues
You’re about to become a tension-taming wizard, armed with the know-how to keep your fabric from becoming machine fodder.
Get ready to crack the code on upper and lower thread tension.
Adjust for different fabrics, and troubleshoot those pesky thread tension troubles that make your sewing machine hungry for cloth, particularly those pesky tension troubles
.
Understanding Upper and Lower Thread Tension
Now that your feed dogs are purring smoothly, let’s tackle the tension tango!
Think of upper and lower thread tension as dance partners – they need perfect balance to create beautiful stitches.
When they’re in sync, your fabric glides through without a hitch.
But if one’s too tight or loose, you’ll see loops or puckers.
Don’t worry, we’ll have you mastering this dance in no time!
Adjusting Tension for Different Fabric Types
You’ve mastered the basics, now let’s fine-tune your tension skills! Different fabrics demand different settings. Think of it as a tug-of-war between your top and bottom threads.
- Knits: Loosen up, they need room to stretch
- Wovens: Stay balanced, like a tightrope walker
- Silk and leather: Tread lightly, these divas need special care
Remember, your machine’s not picky – it’ll happily munch on any fabric if you don’t adjust properly!
Recognizing Signs of Incorrect Tension
Let’s sharpen your tension-spotting skills! Thread bunching, uneven stitching, and skipped stitches are like red flags waving at you.
Keep an eye out for loose seams or fabric puckering – they’re dead giveaways of tension troubles.
Think of your sewing machine as a finely tuned instrument; when the tension’s off, it’ll sing out of tune.
Your goal? A smooth, flat seam that’s music to your ears.
Troubleshooting Common Tension-related Problems
Tension troubles got you in knots? Don’t throw in the towel just yet!
Start by checking your thread quality – cheap threads can be a party pooper.
If you’re seeing loops on the underside, tighten that needle thread. Topside loops? Loosen the bobbin tension.
Remember, it’s like a tug-of-war between top and bottom threads. Keep tweaking until you achieve that perfect balance, and you’ll be stitching like a pro in no time!
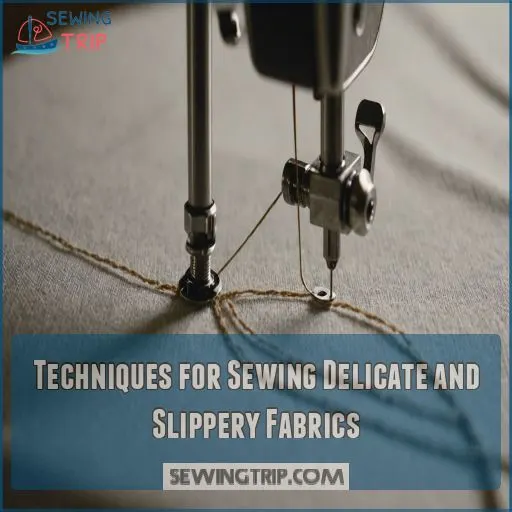
Techniques for Sewing Delicate and Slippery Fabrics
Taming delicate and slippery fabrics can feel like trying to wrangle a greased pig.
But don’t worry—you’ve got this!
With the right techniques, you’ll turn those tricky materials into beautiful creations without your sewing machine turning them into confetti.
Using Stabilizers and Backing Materials
Now that you’ve got your tension under control, it’s time to tame those tricky fabrics. Stabilizers and backing materials are your secret weapons against fabric-eating machines. They’re like a safety net for your delicate or slippery fabrics.
- Choose the right stabilizer based on fabric weight and project type
- Apply stabilizer before pinning and cutting for better control
- Use a walking foot to keep layers aligned and prevent stretching
Remember, with the right stabilizer, you’ll be sewing like a pro in no time!
Employing Tissue Paper as a Temporary Base
Tissue paper can be your secret weapon against fabric-munching machines! Place a layer between your delicate fabric and the feed dogs to give them something to grip. It’s like giving your fabric a safety net.
| Tissue Type | Best For |
|---|---|
| Gift wrap | Chiffon |
| Tracing | Knits |
| Pattern | Silk |
Just tear away the paper after sewing. You’ll feel like a fabric whisperer, taming even the slipperiest materials with ease!
Adjusting Presser Foot Pressure
You’ve got the power to tame those tricky fabrics. Adjusting your presser foot pressure is like finding the sweet spot between a bear hug and a gentle pat.
For delicate fabrics, lighten up that pressure to avoid stretching or damage. When sewing with slippery fabrics, consider using a walking foot attachment for smooth feeding, which can help to prevent shifting and make sure seams are even.
On thicker materials, crank it up a notch to keep things moving smoothly. Remember, it’s all about balance – too little pressure and your fabric might slip, too much and your fabric could bunch up or distort, similar to the way uneven feed dogs can cause shifting seams.
Implementing Hand-basting for Tricky Seams
Slippery fabrics can be as tricky as trying to nail jello to a wall.
For those pesky seams, hand-basting is your secret weapon. Thread a hand needle with a single length and use a long running stitch.
Lay your fabric flat to keep layers aligned perfectly. This technique works wonders for delicate knits too, saving you from the nightmare of picking out machine stitches later.
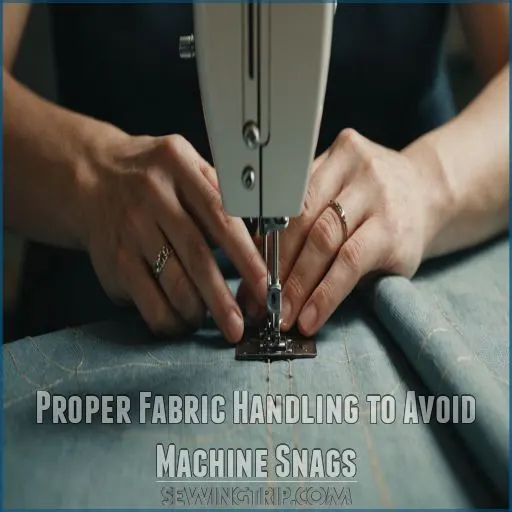
Proper Fabric Handling to Avoid Machine Snags
You’ve got the skills to sew, but your fabric’s getting eaten?
Let’s tackle those pesky snags with some pro handling techniques that’ll keep your projects smooth sailing.
From starting seams just right to using nifty tools like height compensators, you’ll be stitching like a boss in no time.
Starting Seams Away From Fabric Edges
Now that you’ve got the hang of handling delicate fabrics, let’s tackle another common issue.
Start your seams about a quarter-inch from the edge to avoid that dreaded fabric chomp . Think of it like easing into a pool – don’t just jump right in!
This technique works wonders for all fabric types, from silky charmers to sturdy denim. Remember, a little distance goes a long way in keeping your fabric safe and your seams secure.
Using the Height Compensating Tool
Ever feel like your sewing machine’s on a fabric diet?
Let’s tackle those tricky thick seams! The height compensating tool is your secret weapon against uneven stitching.
Pop this nifty gadget under your presser foot when you hit a bump. It’s like giving your machine a mini-lift, leveling the playing field for smooth sailing.
Remember, thick fabrics need thick solutions – your machine will thank you!
Employing Chain Stitching Techniques
Frequently, sewists overlook the power of chain stitching to prevent fabric-eating mishaps. This nifty technique is your secret weapon for smooth sewing.
- Saves thread and time
- Prevents edge fabric snags
- Perfect for delicate fabrics and curves
- Boosts sewing speed for beginners and pros
- Creates a steady rhythm for seam consistency
Don’t fret if you’re sewing through "nothing" – it’s all part of the chain stitching magic!
Avoiding Back-tacking on Fine Fabrics
While chain stitching keeps your fabric in line, back-tacking on delicate materials can be like trying to thread a needle with boxing gloves on – frustrating and potentially damaging.
To avoid fabric slippage and snags, start your seam about 10mm (3/8in) from the edge.
Instead of back-tacking, sew to the end, then flip your project over and stitch back to secure the thread.
It’s like giving your fabric a gentle handshake, instead of a bear hug, and this method prevents damage by not forcing the thread back through the fabric, making it a more precise and efficient way to secure the thread.
Machine Maintenance to Prevent Fabric-eating Issues
You wouldn’t drive your car without regular oil changes, so why neglect your sewing machine?
Keep your trusty stitching companion in top shape with routine cleaning, oiling, and professional check-ups.
Stop it from snacking on your precious fabrics.
Regular Cleaning of Bobbin Area and Feed Dogs
You’ve mastered fabric handling, but don’t let your guard down! A clean machine is your secret weapon against fabric-munching mishaps.
Let’s tackle the bobbin area and feed dogs – they’re like the stomach and teeth of your sewing machine.
Grab your trusty lint brush and channel your inner dentist. A quick clean after every project keeps those pesky lint gremlins at bay.
Your machine will purr with gratitude, and your fabric will glide through like butter on a hot skillet.
Proper Oiling and Lubrication Practices
Three drops of oil can keep your sewing machine purring like a contented cat. But don’t let that metaphor fool you – proper lubrication is serious business. Using the right sewing machine oil with the right viscosity is also important for peak performance, as specified in your machine’s manual.
You can find more information on oiling points and maintenance schedules in a detailed sewing machine cleaning tutorial.
- Apply oil sparingly – a little goes a long way
- Use the right lubricant type for your machine
- Focus on moving parts, avoiding belts and electrical components
- Run the machine without thread after oiling to distribute evenly
Remember, over-oiling is like overdressing – it’ll just make a mess!
Scheduling Professional Servicing Intervals
A stitch in time saves nine, especially when it comes to your sewing machine!
Don’t wait for fabric-eating disasters to strike. Schedule professional servicing every 4-5 months, or after 100 hours of sewing.
Regular tune-ups maintain warranty coverage and prevent costly repairs. While DIY maintenance is great, expert servicing catches issues you might miss.
Think of it as a spa day for your trusty machine – it’ll thank you with smooth, snag-free sewing!
Importance of Using High-quality Thread
Regular servicing keeps your machine humming, but don’t forget about thread quality! It’s the unsung hero of smooth sewing. High-quality thread isn’t just a luxury; it’s your secret weapon against fabric-eating mishaps.
- Boosts stitch strength and clarity
- Enhances colorfastness for long-lasting projects
- Improves sewing machine longevity by reducing lint
Think of good thread as your machine’s best friend – it’ll work happily without causing problems to your fabric!
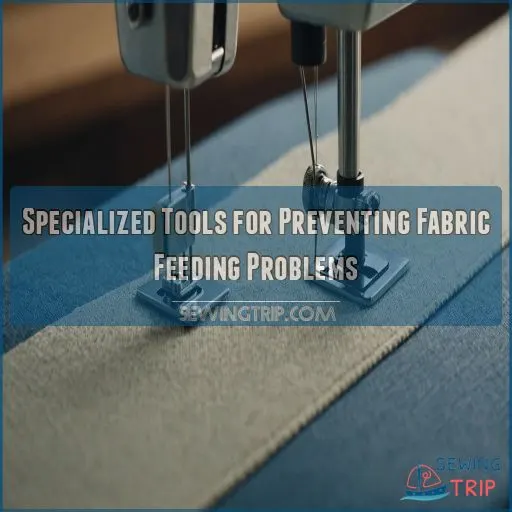
Specialized Tools for Preventing Fabric Feeding Problems
Ever felt like your sewing machine’s got a taste for fabric?
You’re not alone.
Let’s explore some nifty tools that’ll keep your machine from snacking on your latest project, from the game-changing walking foot to the straight-stitch plate, trusty tools that will aid in your sewing project.
Walking Foot Presser Foot Benefits
A walking foot is your secret weapon for smooth sewing.
This nifty attachment grips your fabric from above, working in tandem with the feed dogs below for even fabric feeding.
You’ll achieve consistent stitch lengths, even on tricky materials like quilts, leather, or slippery fabrics .
It’s like having an extra pair of hands guiding your project.
Say goodbye to puckered seams and hello to professional-looking results.
Straight-stitch and CutWork Stitch Plates
While walking feet are great, let’s talk about another game-changer: straight-stitch and CutWork stitch plates.
These nifty tools are like a security blanket for your fabric, preventing it from getting eaten by your machine.
With their smaller needle holes, they offer more support and stability, especially for delicate fabrics.
It’s like giving your fabric a safety net!
Pro tip: always engage your machine’s safety function to avoid needle breakage.
Jeans Foot No. 8 for Thin Materials
Don’t let the name fool you – Jeans Foot No. 8 isn’t just for denim. This versatile tool is your secret weapon for thin, slippery fabrics too. It’s like having a steady hand guiding your stitches, keeping everything smooth and even.
Plus, when paired with proper thread tension adjustment, as discussed in thread tension techniques, it’s a winning combination for preventing fabric feeding problems. Additionally, by ensuring your feed dogs are raised and positioned correctly, you’ll be able to maintain a smooth flow of fabric.
- Prevents fabric from getting "eaten" by your machine
- Glides over seams like butter on hot toast
- Adjustable pressure for delicate materials
- Perfect for straight stitching on lightweight fabrics
- Helps maintain consistent stitch length, even at varying speeds
Using Sticky Tape on Needle Plates
Taming fabric-eating machines can be as easy as pie with a little sticky tape magic.
Place a strip of painter’s tape over your needle plate, creating a smooth runway for your fabric.
This nifty trick works wonders on various plate types, from standard to straight-stitch.
Just remember to remove the tape gently after use.
For a pro touch, try blue painter’s tape – it’s the seamstress’s secret weapon !
Troubleshooting Persistent Fabric-eating Problems
Still wrestling with a fabric-eating machine?
Let’s tackle those stubborn issues head-on, from wonky stitch formation to bobbin snags that just won’t quit.
We’ll walk through common culprits and fix-it strategies, so you can get back to smooth sailing (or should we say, sewing) in no time.
Identifying and Addressing Stitch Formation Issues
When your trusty sewing machine turns into a fabric-eating monster, it’s time to play detective. Let’s unravel this stitchy situation together!
- Test your stitch length – it might need adjusting for different fabrics
- Check your needle type – make sure it’s compatible with your material
- Examine feed dog alignment – they should be up and ready to go
- Inspect your needle plate – a straight stitch plate can be a game-changer
Remember, even seasoned sewists face these hiccups. You’ve got this!
Resolving Bobbin-related Fabric Snags
Your bobbin’s acting up? Let’s nip that fabric-eating problem in the bud!
Start by giving your bobbin area a good clean – it’s like flossing for your sewing machine (Source). Check if your bobbin’s inserted correctly and spinning the right way.
If your bobbin concerns persist, try adjusting the bobbin tension.
Remember, a happy bobbin means happy sewing. Don’t be afraid to replace it if needed – out with the old, in with the new!
Tackling Machine Timing and Alignment Problems
Misaligned gears can turn your sewing machine into a fabric-eating monster. To tame this beast, check the timing belt for wear and proper tension.
Make sure your needle aligns perfectly with the needle plate hole. Adjust bobbin tension carefully – it’s a delicate dance.
Don’t forget about feed dog alignment; they should move smoothly and evenly. A well-tuned machine is like a purring cat – smooth and reliable.
When to Seek Professional Repair Services
Sometimes, even the most skilled sewists hit a wall.
If you’ve tried everything and your machine’s still acting like a fabric-hungry monster, it’s time to call in the pros.
Recurring problems, unusual noises, a burnt smell, or frequent jams are red flags.
Don’t let your trusty machine turn into a temperamental diva – a professional tune-up can work wonders. Remember, it’s not admitting defeat; it’s ensuring your sewing success!
Frequently Asked Questions (FAQs)
Why does my sewing machine keep eating my fabric?
Hungry machines gobble fabric for various reasons.
Check your stitch length, stabilize delicate materials, and make sure you have the right threading.
A straight stitch plate can be a game-changer.
Don’t forget to clean your bobbin area regularly.
How do I Stop my sewing machine from slipping?
Tackle slipping issues head-on by checking your needle’s condition and size.
Use a heavy-duty needle for thick fabrics.
Clean and adjust the stop motion clamp for better grip.
If problems persist, consider replacing worn handwheel parts.
What causes fabric feed problems?
Fabric feed issues often stem from improper settings or maintenance.
You’re facing a sewing speed bump! Check your stitch length, feed dog height, and presser foot pressure.
Clean out lint and make sure you’re using the right needle for your fabric.
Why does my sewing machine suck fabric under the needle plate?
Your machine’s pulling fabric under the needle plate? It’s like a fabric black hole!
Check your threading, tension, and bobbin first.
Consider using a straight stitch plate for better support, especially with delicate fabrics.
Why is my sewing machine gathering fabric?
Unwanted gathering often stems from tension issues.
Check your thread tension and adjust if needed. Make sure you’re using the right stitch length and not pulling the fabric.
A well-maintained machine’s like a trusty sidekick – it’ll keep things smooth sailing.
Why is fabric pulling on sewing machine?
Sewing machine pulling fabric can be a real head-scratcher.
Check that your stitch length matches the fabric type.
Threading’s spot-on, and feed dogs are up.
These simple tweaks usually bring harmony back to your sewing.
Why is my sewing machine snagging my fabric?
Needle nicks and thread tension often turn fabric dreams into snaggy nightmares.
Swap out the needle, especially for a ballpoint type on knits, and check thread quality and tension to keep seams smooth and frustration free.
How do I stop my sewing machine from stretching fabric?
Don’t fret, friend! Taming that stretchy fabric is a breeze.
Start with a walking foot to keep things steady, then dial down the tension and speed.
Voila – no more fabric-eating mishaps!
How does stitch length affect fabric feeding?
Your stitch length can affect fabric feeding by altering tension and material engagement.
A longer stitch might make thick fabrics feed smoothly.
While shorter stitches could cause drag or puckering, especially with stretchy or thin fabrics, this is also dependent on the fabric feeding.
Can tissue paper prevent fabric from getting eaten?
Tissue paper acts like a gentle buffer, stopping the sewing machine from munching on your fabric.
Slip a piece under your material to keep everything running smoothly.
It’s simple, clever, and you’ll feel like a sewing wizard.
Will a straight stitch needle plate help?
Imagine taming a wild beast with a small cage; that’s what a straight stitch needle plate does for your fabric.
It limits the opening, reducing fabric munching, but only works for straight stitches.
Does starting on double fabric prevent eating?
Starting on a double fabric layer can indeed help.
This technique is like giving your fabric a running start.
It reduces the chances of the fabric getting pushed down into the needle plate.
How can I adjust my machine for knit fabrics?
Adjust your machine for knits by lowering the presser foot pressure to reduce waviness.
Use a longer stitch length and a stretch stitch like zigzag.
A ballpoint needle can prevent fabric damage, ensuring smoother sewing.
Conclusion
Think of your sewing machine as a hungry monster – if you don’t keep it happy with proper care, it’ll gobble up your fabric.
To prevent your sewing machine from eating fabric, follow these pro tips: thread correctly, use the right needle, keep the feed dogs clean, and adjust tension.
Remember, like taming a wild beast, a little attention and maintenance can prevent chaos. So arm yourself with these strategies, and enjoy effortless sewing.
So, take the time to properly care for your machine, and it will reward you with proper care.

