This site is supported by our readers. We may earn a commission, at no cost to you, if you purchase through links.
You’ll need just a needle, thread, and scissors for most repairs.
Clean rips require simple straight stitches, while holes need patching or darning.
Torn seams are your easiest fix—just restitch along the original line.
Buttons pop off constantly, but reattaching takes only minutes with the right approach.
Don’t forget hemming skills for pants that suddenly seem too long, or strap repairs for bags and straps that give up.
Each technique builds your confidence and extends your wardrobe’s life substantially.
Table Of Contents
Key Takeaways
- You’ll master essential repair techniques with just basic tools – a needle, matching thread, and scissors can fix most clothing damage, from rips and holes to loose buttons and torn seams.
- Clean rips are your easiest repairs since you can simply align the torn edges and use straight stitches or backstitches, while holes require patching or darning for proper reinforcement.
- You can choose between hand stitching for precise control and portability, or machine stitching for speed and professional-strength repairs that’ll withstand regular wear and washing.
- These repair skills will extend your wardrobe’s life significantly while building your confidence – start with simple fixes like reattaching buttons, then progress to more complex mending projects as you practice.
How to Sew a Rip
When fabric tears strike, you’re facing either a clean rip or gaping hole.
First, assess the damage type and trim loose threads carefully. For clean rips, align torn edges and use thread matching techniques with appropriate stitch types like backstitch or running stitch.
Apply fabric reinforcement behind delicate areas using interfacing or patches. Master invisible mending by working from the garment’s interior, ensuring your repair torn fabric efforts blend seamlessly.
These essential sewing repair tips and tear repair methods will restore your clothing’s integrity while preventing future damage through proper rip prevention strategies.
Repairing Clean Rips
When you’re dealing with a clean rip in fabric, you’ve got two reliable repair options that’ll get your garment looking good as new.
You can either use your sewing machine for speed and strength, or hand stitch it for precise control and portability.
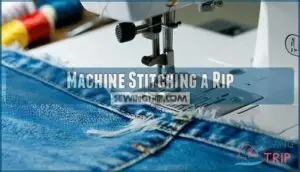
Machine Stitching a Rip
When your sewing machine becomes your repair partner, you’ll transform torn garments quickly and professionally.
Set your stitch length to 2.5mm for ideal control, and choose a universal needle type for most fabrics. For best results, consider needle size options for different materials.
Adjust thread tension to prevent puckering while ensuring proper fabric feed through the machine. Start stitching half an inch before the rip, using straight stitches for durability.
Backstitch at both ends to secure the repair, then apply appropriate seam finishes to prevent fraying and extend your fix, ensuring a professional result.
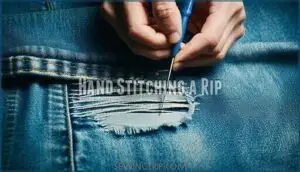
Hand Stitching a Rip
When your fabric tears along a clean line, hand sewing techniques offer precise control over the repair process.
Start by selecting the right needle—sharp-tip for woven fabrics, rounded-tip for knits—and match your thread color to mend clothing seamlessly.
Turn the garment inside out and align the torn edges carefully, maintaining proper fabric grain direction.
Use invisible stitches like a ladder stitch or slip stitch to fix seams, keeping consistent thread tension throughout, and pin or baste edges together for perfect edge alignment before beginning your stitch types.
These hand sewing methods help patch holes and achieve professional fabric repair results.
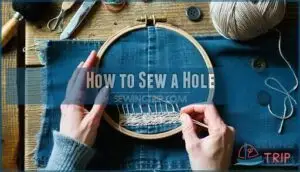
How to Sew a Hole
Holes in your clothes need different repair methods depending on their size and location.
You can fix small holes with simple hand stitches or tackle larger ones using patches and machine stitching for stronger, longer-lasting repairs.
Machine Stitching a Hole
When you discover a hole in your favorite garment, machine stitching offers the most durable and professional repair solution. Your sewing machine becomes a powerful ally for creating strong, long-lasting fixes that withstand regular wear and washing.
Needle Selection matters tremendously – use size 10-14 universal needles for most fabric weights. Match your thread tension properly to prevent puckering, and test on scraps first. Set stitch length to 2-2.5mm for straight stitches on woven fabrics.
Patch application behind larger holes provides essential structural support. Place matching fabric underneath, then secure with pins before stitching. Control your fabric feed evenly to avoid distortion while sewing.
Use straight stitches for clean holes in woven materials, or zigzag stitches for knits and stretch fabrics. Reinforcement stitching with backstitches at beginning and end prevents unraveling. Stitch slightly beyond hole edges for maximum security.
This sewing machine repair technique creates professional results that often outlast hand-sewn fixes, making it perfect for everyday garments requiring dependable hole repair solutions. To guarantee the best performance, consider the various needle types available.
- Feel the satisfaction of rescuing your beloved clothes from the donation pile
- Experience pride wearing perfectly mended garments that look professionally repaired
- Enjoy the confidence knowing your repair will last through countless washes
- Appreciate the money saved by extending your wardrobe’s lifespan substantially
Hand Stitching an Open Rip
An open rip requires careful attention to detail. Start by choosing thread that matches your fabric color and selecting the right needle for your material weight. Position the fabric edges together and secure with pins.
| Stitch Types | Best For | Technique |
|---|---|---|
| Backstitch | Heavy fabrics | Work backwards through each stitch |
| Running stitch | Light materials | Small, even forward stitches |
| Whipstitch | Frayed edges | Diagonal stitches over the edge |
| Blanket stitch | Knit fabrics | Loop thread under needle tip |
Begin stitching 3mm before the rip starts, using 18-24 inch thread length. Securing stitches properly prevents unraveling – tie knots at both ends. Consider fabric considerations like stretch and weight when planning your hand stitching approach. This clothing repair method restores strength while keeping the mending nearly invisible.
Fixing a Ripped Clothing Seam
A ripped seam doesn’t mean you need to throw away your favorite clothes.
You can easily fix most seam tears with basic sewing supplies and a few simple stitches that’ll make the repair nearly invisible.
Machine Stitching a Ripped Seam
Machine-stitched seam repairs offer quick, professional results when you follow proper sewing techniques.
Your sewing machine transforms torn garments into professionally repaired pieces with speed and precision.
Set your machine’s stitch length between 2.5-3.0mm and use polyester thread for durability.
Here’s your step-by-step approach:
- Seam Guide Alignment: Pin fabric every 1-2 inches, matching the original seam allowance
- Thread Tension Settings: Adjust tension to prevent puckering on different fabric weights
- Stitch Length Selection: Use 2.5-3.0mm for standard clothing repair and seam repair projects
- Needle Type Matters: Choose an 80/12 universal needle for most woven fabrics
- Reinforcement Stitching Techniques: Backstitch 3-5 times at each end for strength
Start stitching 0.5cm before the rip begins, overlapping existing stitches for security.
To prevent puckering, it’s essential to address uneven thread tension.
This method works perfectly for repair ripped jeans and other garments, creating durable repairs that’ll outlast hand sewing.
Hand Stitching a Ripped Seam
Precision transforms seam repair from frustrating to satisfying. Hand sewing restores your garment’s strength while giving you complete control over the process.
Essential preparation steps:
- Thread Knotting – Double your polyester thread and tie a secure knot, then trim excess for clean starts
- Seam Inspection – Turn garment inside-out and remove loose threads with scissors before beginning repairs
- Fabric Alignment – Pin torn edges together, ensuring proper positioning for accurate stitching
Choose your needle size based on fabric weight – thinner needles for delicate materials, thicker for heavy fabrics. Start your hand sewing half an inch before the rip using backstitch for maximum durability. This stitch type creates overlapping stitches that won’t fail under stress.
Take small, consistent stitches along the original seam line, maintaining even spacing. The running stitch works for lighter repairs, but backstitch delivers superior strength. Secure your work by stitching past the tear’s end, then knot firmly.
For added durability, consider using the backstitch technique.
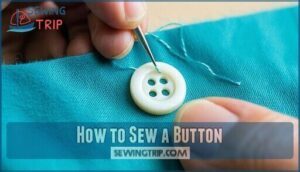
How to Sew a Button
Sewing on a button takes just three minutes when you know the right technique. Whether you’re dealing with different button types or need quick button replacement, mastering these sewing basics will save the day.
- Thread Selection: Use doubled thread matching your fabric color for invisible repairs and proper thread tension
- Button Placement: Mark position with chalk and choose between sew-through or shank buttons based on fabric weight
- Reinforcement Stitching: Create six passes through each hole, then wrap thread around the stem for durability
Start by anchoring your thread with small stitches at the marked position. Place your button and stitch through each hole, leaving a small gap between button and fabric. This creates a thread stem that makes buttoning easier.
Understanding the difference between sew-through and shank buttons is also important. Finish by wrapping thread around the stem three times and securing with a knot.
These essential sewing skills and sewing tips will keep your clothes looking professional.
How to Fix a Hem
When your hem comes loose, don’t panic—fixing it’s easier than you think.
Start by evaluating the damage and gathering your needle, matching thread, and iron.
- Blind Hemming: Use a slip stitch for invisible repairs by catching only a few threads of the outer fabric, making your hem repair nearly undetectable.
Choose appropriate Hem Types based on your fabric weight.
Measuring Hem accurately confirms even results.
Focus on Preventing Fraying by folding raw edges under before stitching.
Understanding how fabric type impacts curling can also influence your repair approach.
These sewing basics and clothing alterations will restore your garment’s polished look.
How to Reattach a Strap
After fixing your hem, you’ll often encounter broken straps that need reattachment. Don’t let a detached strap sideline your favorite garment. Strap Reinforcement starts with proper preparation and Hardware Options assessment.
When reattaching straps, focus on Fabric Stability and identifying Stress Points where the original failure occurred. Choose appropriate Attachment Methods based on your garment type and available tools.
Here are five sewing techniques for effective clothing repair:
- Backstitch Method: Create strong, overlapping stitches that won’t pull apart under pressure
- Box Pattern Reinforcement: Sew a square with an X inside for maximum durability
- Double-Thread Approach: Use reinforced thread or double strands for heavy-duty repairs
- Seam Integration: Insert strap ends at least 1.5 inches into existing seams
- Machine Back-Tacking: Lock stitches at start and finish points to prevent unraveling
This sewing tutorial transforms broken straps into secure attachments. Follow these sewing instructions in this sewing guide for lasting repairs that handle daily wear.
How to Darn a Sock
After securing that loose strap, you’ll want to tackle another common clothing casualty: holes in your favorite socks. Darning socks transforms worn-out pairs into long-lasting essentials using simple weaving techniques.
Darning Materials you’ll need:
- Matching yarn that complements your sock’s weight and color
- Darning needle with a large eye for easy threading
- Darning egg or lightbulb to create a firm working surface
- Sharp scissors for clean cuts and finishing touches
Start by creating a grid foundation across the hole using parallel threads. Then weave perpendicular threads through this base, alternating over and under each strand. This weave pattern recreates the sock’s original fabric structure.
Focus extra attention on heel reinforcement and toe repair areas since they endure the most stress. Master these knitwear repair and sewing techniques to extend your sock longevity substantially.
Frequently Asked Questions (FAQs)
Do you need a sewing machine to fix a ripped seam?
Your favorite shirt’s shoulder seam splits during an important meeting – embarrassing!
No, you don’t need a sewing machine for ripped seams.
Hand sewing with matching thread works perfectly well and creates durable repairs.
How do you fix a sewing hole?
Turn your garment inside-out, then pinch the hole’s edges together.
Thread your needle with matching thread, insert it 2mm from the edge, and backstitch across the tear until it’s completely closed.
How do you fix a torn seam on a sewing machine?
Set your machine to a straight stitch with medium tension. Align torn seam edges, pin together, then sew slowly over the original stitch line, backstitching at both ends for security.
How do you mend a ripped seam?
Pin fabric pieces together along the ripped seam.
Thread your needle with matching thread and knot it.
Start sewing half an inch before the tear using small backstitches, following the original stitch line until you’re past the rip.
How do you fix a tear in a sewing machine?
Like a delicate fabric requiring gentle hands, your sewing machine’s tear needs careful attention.
First, unplug the machine for safety.
Clean around the damaged area, then apply fabric glue or tape as a temporary fix until professional repair.
How do you fix a rip on a sewing machine?
First, you’ll disconnect power and remove the fabric carefully.
Next, assess the torn material’s extent and gather matching thread.
Pin fabric edges together, then use a backstitch to secure the repair from underneath.
How to fix a seam that is unraveling?
Like a fraying rope that needs reinforcing, you’ll strengthen that unraveling seam by removing loose threads, pinning fabric edges together, then backstitching along the original stitch line with matching thread.
What thread weight works best for stretchy fabrics?
Use medium-weight polyester thread for stretchy fabrics. It’ll stretch with the material without breaking. Cotton thread works too, but polyester’s elasticity matches knits better, preventing puckering when you move.
How do you prevent puckering when machine sewing?
Measure twice, cut once" applies to sewing too.
Adjust your machine’s tension settings, use the right needle size, and verify proper thread tension.
Don’t rush – sew slowly and steadily for smooth, pucker-free seams.
Can you repair leather or vinyl clothing items?
You can repair leather and vinyl clothing, but they need special techniques. Use leather needles, strong thread, and leather cement for best results. Consider professional repair for expensive items.
Conclusion
Yesterday’s discarded clothes contrast sharply with today’s repaired treasures.
Mastering how to repair sew transforms your relationship with clothing completely.
You’ve learned essential techniques for fixing rips, holes, buttons, hems, straps, and darned socks.
These skills save money, reduce waste, and build confidence.
Start with simple repairs like reattaching buttons or fixing small rips.
Practice regularly, and you’ll soon tackle complex mending projects.
Your wardrobe will last longer, and you’ll feel proud of your newfound self-sufficiency.
You will also enjoy the benefits of saving money.
- https://miniaturerhino.myshopify.com/blogs/news/repair-a-torn-seam-tutorial
- https://threadsmonthly.com/sewing-thread-types-uses/
- https://so-sew-easy.com/hand-sewing-stitches-for-making-clothes-by-hand/
- https://www.reddit.com/r/sewhelp/comments/1d5rq1p/first_time_sewing_need_some_advice_trying_to/
- https://www.youtube.com/watch?v=e4BxRkWfbf8

