This site is supported by our readers. We may earn a commission, at no cost to you, if you purchase through links.

Whether you’re a seasoned seamstress or a beginner eager to create something special, this guide will walk you through each step, ensuring your blanket is not just beautiful but also a testament to your care and skill.
Let’s dive into the world of sewing to create a treasure that offers comfort, warmth, and the sweetest of dreams.
Table Of Contents
Key Takeaways
- Pre-washing and ironing the fabric before cutting ensures the blanket maintains its size and appearance after future washes.
- Using a generous amount of pins, especially when attaching the satin binding, helps manage the fabric and binding alignment, making the sewing process smoother.
- Mitering the corners of the satin binding not only gives the blanket a professional finish but also prevents bulky corners, enhancing the blanket’s overall look and feel.
- Ironing the finished blanket, including the satin binding, adds a polished touch, making the blanket more appealing and comfortable for the baby.
Gather Your Materials
To begin crafting a baby blanket with satin binding, you’ll need to gather a few key materials.
Ensure you have:
- Two 1-yard pieces of Minky fabric
- Satin blanket binding that’s at least 140 inches long
- Thread
- A sewing machine
- An iron
- A straight-edged ruler
- A cutting mat
- A rotary cutter
With these items at hand, you’re ready to start your project with confidence and precision.
Two 1-yard Pieces of Minky Fabric
To start your baby blanket project with minky fabric, you’ll want to select two 1-yard pieces that speak to your heart. Imagine wrapping up a little bundle of joy in the soft embrace of minky, with its plush comfort that’s like a warm hug.
- Choose minky fabric that complements your nursery theme or tickles your fancy with its pattern or texture.
- Pick a satin binding that adds a touch of elegance and a silky-smooth edge for those tiny fingers to explore.
- Consider color coordination to create a visually soothing sanctuary for your little one.
- Think about personal embellishments or personalization ideas to make the blanket a cherished keepsake.
Satin Blanket Binding (140 Inches or Longer)
You’ll need satin binding to give your baby blanket that silky, comforting edge. Satin binding is a pre-packaged satin fabric, often found in lengths of 4 3/4 yards for a 2-inch single fold, perfect for snuggling up your little one’s blanket.
When choosing your satin binding, consider the fabric choices and color combinations to complement your blanket’s pattern possibilities.
Here’s a quick table to guide you through the binding options:
| Binding Type | Best For | Consideration |
|---|---|---|
| Pre-packaged Satin Binding | Convenience | May have limited color options |
| Bias Tape | Customization | Requires more work to prepare |
| Satin Fabric | Unique finishes | Must be cut and folded to size |
And here’s a tip: handle the cut ends of the satin binding with care to avoid fraying. If you’re up for a challenge, why not try making your own satin binding for a custom touch? It’s like wrapping your blanket in a hug – and who doesn’t love a good hug?.
Thread
When you’re ready to thread the needle and dive into your blanket project, remember that the devil is in the details—or in this case, the satin color and binding width.
You’ll want to choose a thread that not only matches your satin but also plays nice with your sewing machine’s tension. Too tight, and you’ll have puckers; too loose, and your stitches might play hooky.
Aim for a stitch length that’s just right—not too long, not too short, like Goldilocks’ porridge. And don’t forget, the right needle type can make or break your sewing experience. A sharp, new needle will glide through the satin like a hot knife through butter.
Keep those sewing pins handy, mark your cuts with tailor’s chalk, and let your rotary cutter and ruler dance across the cutting mat. It’s a symphony of sewing that, when done right, results in a blanket that’s a cuddle magnet.
Sewing Machine
To craft a cozy baby blanket, you’ll need a yard and a fourth of plush fabric, a yard and a half of satin for a luxurious touch, and 6 yards of 2″ prepackaged satin binding for a polished finish. Begin by squaring up your fabric, ensuring it hangs straight, and trimming off selvages.
For a neat edge, square up one side, then the other, and measure the width to square up the remaining side.
When binding the blanket, connect two packages of binding with a diagonal seam, wrap the binding around the blanket, and start stitching in the middle of the bottom. Miter the corners for a professional look and finish stitching down the sides. Finally, cut off the excess binding, turn under a quarter to a half inch, and sew down the binding for a complete look.
Consider additional projects like swaddle blankets, receiving blankets, or a patchwork baby quilt to complement your handmade creation. With these materials and steps, you’ll create a blanket that’s not only functional but also a stylish and comforting addition to any nursery.
Iron
After you’ve sewn your seams, it’s time to grab your iron and work some magic on your blanket.
- Set your iron to the correct heat setting for your fabric type—flannel and fleece need different care.
- Use ironing techniques that suit your fabric; for flannel, a gentle press without steam might do, while fleece might need a little more heat.
- Remember to fold the satin binding with precision, ironing the folds to keep everything in place before you stitch.
Ironing isn’t just about smoothing wrinkles; it’s about preparing your blanket for that final, cozy finish. So, crank up your favorite tunes and let the warmth of the iron transfer not just to your fabric, but to the heart of your craft.
Straight Edged Ruler
You’ll need a straight-edged ruler that’s up to the task for precision and ease when you’re crafting that cozy baby blanket.
Think of it as your trusty sidekick, guiding your rotary cutter like a ship’s captain navigating through a sea of plush fabric.
With grid lines for measuring accuracy and non-slip mats to keep everything in place, you’ll be cutting angles sharper than a stand-up comedian’s wit.
Cutting Mat
 View On Amazon
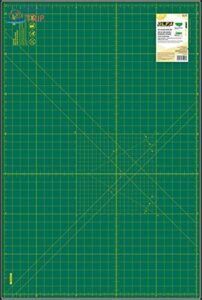
In the world of crafting and sewing, a cutting mat is your unsung hero, quietly saving the day (and your table) one cut at a time. Think of it as the trusty sidekick to your rotary cutter, offering a protective shield against potential surface damage.
But it’s not just about defense; these mats are the guiding light for precision cuts, thanks to their grid lines and measurements. They’re like the GPS for your fabric, leading you to the destination of perfect squares and straight lines without getting lost in the fabric jungle.
And let’s not forget their self-healing superpower, bouncing back from blade wounds like a crafting superhero. So, grab your cutting mat, and let’s embark on this creative journey together, where every cut is a step towards your masterpiece.
- Protects work surfaces from damage
- Self-healing feature prolongs mat and blade life
- Grid lines and measurements aid in precision cutting
- May require regular replacement with heavy use
- Can be bulky to store in small spaces
- Some materials may slide on less grippy mats
Rotary Cutter
 View On Amazon
In the world of sewing and crafting, a rotary cutter is your trusty sidekick, slicing through fabric with the grace of a ballerina and the precision of a surgeon. Imagine wielding a magic wand that glides effortlessly, transforming bulky fabric stacks into neat, ready-to-sew pieces.
That’s your rotary cutter – a game-changer in the crafting arena. It’s not just about cutting; it’s about crafting stories, one slice at a time. But remember, with great power comes great responsibility. Treat your rotary cutter with respect, and it’ll be your ally for years, turning daunting projects into pieces of cake.
- Precision and Speed: Cuts through multiple layers with unmatched accuracy, speeding up your projects.
- Ease of Use: Designed for comfort, reducing hand fatigue during long crafting sessions.
- Versatility: Ideal for a wide range of materials and projects, from quilting to garment making.
- Safety Concerns: Sharp blades require careful handling to avoid accidents.
- Maintenance: Blades need regular replacement to ensure clean cuts.
- Learning Curve: New users may need some practice to master smooth, precise cuts.
Prepare the Fabric
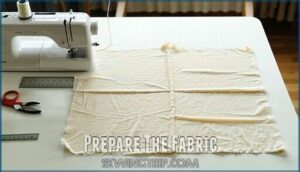
Before you start sewing, it’s essential to prewash your flannel or minky fabric to avoid any shrinkage later on.
Once that’s done, iron out any wrinkles to ensure a smooth surface for cutting your two 30 x 30 squares.
Pre-wash Flannel or Minky Fabric to Prevent Shrinkage
Before diving into your cozy blanket project, let’s tackle the pre-wash blues. Give that flannel or minky a good wash to dodge any future shrinkage surprises.
Think of it as a spa day for your fabric—out with the wrinkles, in with the smoothness.
Now, grab your ruler and play fabric detective, measuring and cutting to uncover the perfect 30 x 30 square. It’s like a culinary masterpiece, but instead of dicing veggies, you’re slicing fabric.
Square it up, and you’re ready to roll—or should I say, sew!
Iron Fabric to Remove Wrinkles
After pre-washing your flannel or minky fabric to avoid shrinkage, it’s time to tackle those pesky wrinkles. Ironing is more than just a chore; it’s the secret sauce to a professional-looking sewing project.
- Ironing techniques: Use the right heat setting for your fabric type to avoid scorch marks.
- Types of irons: Consider a steam iron for efficient crease removal, ensuring it’s safe for your fabric.
- Fabric care: Always iron on the reverse side or use a pressing cloth to protect delicate fabrics.
Measure and Cut Two 30 X 30 Squares
Once you’ve ironed out all the wrinkles from your minky or flannel, it’s time to measure and cut your fabric. You’re aiming for two 30 x 30 inch squares, so grab your straight-edged ruler and get precise.
This step is like setting the foundation for a house; it’s got to be spot on. And don’t forget, a well-measured and cut square is the secret handshake into the club of cozy baby blanket makers.
Attach the Binding
Once you’ve prepped your fabric, it’s time to attach the satin binding to your baby blanket.
Start by opening up the satin binding and folding the ends inward, then pin the binding over the blanket’s edge, beginning in the middle of one side.
Sew the binding in place, ensuring you catch both the top and bottom edges of the binding with your stitches.
Open Up the Satin Binding and Fold the Ends In
Alright, let’s tackle that satin binding with gusto!
First things first, unfurl that shiny ribbon of coziness and give those ends a good fold. This isn’t just about making it look neat; it’s about ensuring those pesky ends don’t unravel and cause a fraying fiasco.
When it comes to binding types, satin is the diva of the bunch, so handle with care and fold with flair. Remember, a well-folded end is like a well-tied knot—it’s the beginning of a beautiful friendship between fabric and binding.
Safety precautions are key here; those satin edges can be slippery little escape artists, so pin them down like a pro wrestler before they’ve a chance to wriggle away. And when selecting your material, think of it as choosing a dance partner for your blanket—the right match makes all the difference.
Now, fold that binding with the precision of an origami master and pin it in place, ready for the grand finale of stitching.
Pin the Binding Over the Edge of the Blanket
Now, let’s get that satin binding hugging the edge of your blanket like a cozy embrace.
First, ensure your fabric tension is just right—not too tight, not too loose, like a perfect handshake.
Slide the binding’s wider side under the blanket’s edge, aligning it with the fabric’s soul.
Fold the binding over the top, and it should cover the edge like a protective shield.
Pin it in place, making sure the pins are like little soldiers, evenly spaced and ready for action.
As you stitch, keep the distance from the edge consistent, as if you’re tracing the horizon with a steady hand.
The binding width should be your guide, a path to follow to the promised land of a beautifully finished blanket.
Keep the mood light, and don’t let the corners scare you; they’re just another turn on this sewing adventure.
Sew the Binding in Place, Starting in the Middle of One Side
Alright, let’s dive into the heart of sewing your blanket’s satin binding. Start by opening up the binding and folding the ends in. Now, here’s where the magic happens: begin in the middle of one side of your blanket, snugly wrapping the binding around the fabric’s edge.
As you pin, ensure the binding’s top and bottom edges are aligned like two peas in a pod. Set your sewing machine with a zigzag stitch, adjusting the thread tension and needle size as needed for a smooth sail.
Sew along the binding, letting the zigzag stitch catch the edge like a gentle wave lapping at the shore.
When you reach a corner, it’s time to show off your mitering skills. Fold the binding to create a neat, faux mitered corner, pin it in place, and continue your zigzag journey. Remember, the seam allowance is your secret ally, guiding you to a flawless finish.
Keep the process going until you’ve conquered all four sides. When you’re about to close the loop, cut the binding with a slight overlap, fold the ends under, and iron them down for a crisp edge. Pin and sew the final stretch, and voilà! You’ve just crafted a cozy cocoon for a lucky little one, with satin binding that’s as smooth as a lullaby.
Miter the Corners
Now, let’s tackle mitering the corners, a crucial step for a polished finish.
You’ll fold the binding at each corner to achieve a faux mitered look, ensuring to pin each corner securely before sewing.
Fold the Binding at Corners to Create a Faux Mitered Look
When it comes to giving your baby blanket that professional, polished look, mastering the art of folding the binding at the corners is key. This step transforms a simple blanket into a cherished keepsake. Let’s dive into the nitty-gritty of corner prep and binding length to ensure your blanket corners are nothing short of perfect.
First off, don’t let the thought of miter options intimidate you. Think of it as tucking your little one into bed—neat and snug. You want that binding to wrap around the blanket’s edge like a warm hug, with each corner forming a perfect point.
This isn’t just about aesthetics; it’s about creating a blanket that feels like a safe, cozy nest for your baby.
Now, stitch placement is crucial. Imagine you’re drawing a line in the sand. Where you place that line (or in this case, stitch) can make or break the look of your corner. It’s like hitting the bullseye in darts; precision is everything. But remember, even if you don’t get it right on the first try, every stitch you make is a step towards mastering this skill.
So, take a deep breath, and let’s tackle those corners with confidence and a dash of humor. After all, the best things in life, including sewing, come with a bit of trial, error, and laughter.
Pin Each Corner in Place Before Sewing
When it comes to sewing corners, ensuring miter accuracy is key. Before stitching, align your pins precisely at each corner fold.
This step not only enhances the finished look but also underpins the safety of your blanket. Remember, a little extra attention to detail in pin placement can make all the difference in achieving those perfectly crisp corners.
So, take your time and secure those folds!
Finishing Touches
Once you’ve attached the binding and mitered the corners, it’s time to give your blanket the final touches.
Trim any excess binding and thread, then iron the blanket for a sleek, finished look.
Trim Any Excess Binding and Thread
Once you’ve mitered those corners with finesse, it’s time for the grand finale.
Snip any wild threads and trim the binding with the precision of a seasoned tailor.
With your binding care and folding technique on point, your baby blanket is now a snuggly masterpiece.
Iron the Finished Blanket for a Polished Look
Once you’ve sewn the satin binding onto your baby blanket, it’s time to give it that final touch of love with a good ironing.
Crank up your iron to the appropriate setting for your fabric type—don’t let it play hot and cold with you! Gently press the binding, making sure it’s as smooth as a baby’s bottom.
This isn’t just about looks; it’s about giving your blanket a cozy, inviting finish that says, Come on in and snuggle! Whether it’s for tummy time or dreamland, your handcrafted blanket is now ready for all the cuddles and coos, wrapped up with the perfect blend of practicality and charm.
Frequently Asked Questions (FAQs)
Can I use a different type of fabric for the binding?
You can indeed switch it up and use a different fabric for the binding—just make sure it’s soft and washable for that snug-as-a-bug feel.
How do I prevent the satin binding from fraying?
To keep your satin binding from saying farewell at the edges, consider giving it a little hug with some fabric glue or a fray check solution.
It’s like telling those frays, Not today, my friend. This simple step will ensure your blanket remains a cozy, fray-free haven for snuggles.
What stitch length should I use for sewing satin binding?
For sewing satin binding, you’ll want to use a stitch length between 5 and Stick with a straight stitch to avoid puckering and ensure a smooth finish.
Can I machine wash a blanket with satin binding?
You might worry satin binding could fray, but rest assured, your blanket is machine washable—just handle the edges gently.
How do I attach a loop or tag to the blanket?
To attach a loop or tag to your blanket:
- Fold the tag in half.
- Place it between the blanket layers with the loop inward.
- Sew it in while stitching the edges.
Conclusion
Nearly 90% of people feel a special attachment to their childhood blankets, and now you’ve crafted a cozy keepsake that’s bound to be cherished.
You’ve learned how to sew a baby blanket with satin binding, creating a snug and stylish comfort for a little one.
Keep sewing, keep creating, and take pride in the joy your handmade gifts bring.


