This site is supported by our readers. We may earn a commission, at no cost to you, if you purchase through links.
 Learning how to sew a chapstick holder is surprisingly simple and takes just 30 minutes from start to finish.
You’ll need two fabric rectangles (roughly 3×4 inches), interfacing for structure, thread, and a keychain ring.
Cut your pieces, add interfacing to one piece for stability, then sew them together with right sides facing, leaving the top open.
Turn it right side out, press flat, and topstitch around the edges for a professional look.
Attach your keychain ring to a small fabric tab sewn into the side seam, and the result is a perfectly sized holder that keeps your lip balm secure and accessible.
With a few strategic adjustments to measurements and materials, you can customize this basic pattern for different chapstick sizes and personal style preferences.
Table Of Contents
Key Takeaways
- You’ll finish this simple sewing project in just 30 minutes using basic materials like fabric rectangles, interfacing, thread, and a keychain ring.
- You can customize the holder’s size by adjusting fabric dimensions – add width for larger tubes or increase length for taller containers using the formula provided.
- The project works perfectly for beginners since it’s forgiving and doesn’t require professional equipment, plus you can hand-sew it if you don’t have a machine.
- Your finished holder will be durable and washable when you use cotton fabric and proper construction techniques like backstitching at stress points.
Sewing Chapstick Holder Basics
You’ll discover that creating a keychain chapstick holder combines practicality with creativity in under an hour.
This simple sewing project transforms fabric scraps into organized storage that keeps your lip balm accessible wherever you go, making it a great example of practicality.
About The Maker
You’re joining a rich Sewing Heritage that spans generations, where every sewist’s Maker Story becomes part of the broader Crafting Community.
Whether you’re tackling your first DIY chapstick case or you’re a seasoned creator exploring sewing small pouches, this project connects you to a Family Legacy of makers who’ve transformed simple materials into treasured handmade items.
- Perfect introduction to sewing for beginners seeking confidence-building projects
- Builds skills for creating various handmade lip balm pouches and accessories
- Connects you to experienced sewists who started with similar small projects
- Develops techniques applicable to larger sewing endeavors and gift-making
- Creates opportunities to sew chapstick holder variations for friends and family
Uses for The Chapstick Holders
These versatile chapstick holders transform everyday lip balm into organized accessories.
You’ll discover endless possibilities for gifting and personal use. When considering fabric choices, understanding sustainable materials is essential for a successful sewing project.
| Category | Specific Uses |
|---|---|
| Gift Ideas | Teacher appreciation, birthday party favors, stocking stuffers, handmade gifts |
| Travel Accessories | Backpack attachments, purse keychains, luggage tags, camping gear |
| School Supplies | Student organizers, locker accessories, pencil case attachments, desk organizers |
| Personal Organization | Key ring holders, diaper bag clips, gym bag accessories, car keychain storage |
Whether you’re creating DIY accessories for friends or organizing your own lip balm collection, these holders keep essentials within reach while showcasing your sewing skills.
Other Handmade Gift Ideas
Chapstick holders open doors to countless handmade gifts that’ll make your friends smile.
Consider creating Gift Baskets filled with Sewn Bags, Handmade Jewelry, and Quilted Ornaments for special occasions.
Crochet Toys work perfectly for children, while personalized gifts like embroidered accessories show extra thoughtfulness.
These DIY accessories prove that handmade presents carry more heart than store-bought items, and are a great way to give handmade and personalized gifts.
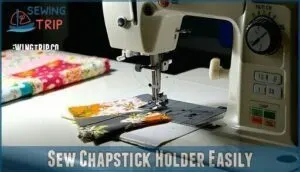
Sew Chapstick Holder Easily
Creating your chapstick holder doesn’t require years of sewing experience or professional equipment. This project sits perfectly in that sweet spot where beginners can achieve polished results while experienced sewers can whip one up during coffee breaks.
You’ll master this technique quickly, giving you the freedom to create personalized gifts for everyone on your list.
The beauty of this sewing chapstick keychain holder lies in its forgiving nature and practical application:
Simple projects like this prove that handmade doesn’t mean complicated—just thoughtful.
- Fabric Selection flexibility lets you use cotton scraps, quilting fabrics, or even repurposed materials
- Sewing Tips focus on maintaining consistent seam allowances for professional-looking results
- Chapstick Sizes accommodate standard tubes with room for slight variations in dimensions
- Holder Designs can be customized with decorative stitching or coordinating fabric combinations
- Sewing Machines aren’t mandatory—hand-sewing works perfectly for this chapstick pouch pattern
Understanding sustainable fabric choices is vital for reducing environmental impact.
Your lip balm holder sewing project transforms ordinary fabric scraps into functional accessories that keep essentials organized and accessible.
Gathering Supplies
Before you start stitching, you’ll need to gather a few basic supplies that’ll make this project quick and successful.
The material list is straightforward: cotton fabric pieces, fusible interfacing for structure, matching thread, and a split ring for the keychain attachment.
The supplies are essential for the project’s success, and having them ready will ensure a successful outcome.
Cutting Fabric Pieces
Now that you’ve got your sewing machine ready, let’s focus on precise fabric measurement and cutting techniques.
You’ll need two main pieces measuring 6 1/8″ × 1 7/8″ for your chapstick pouch pattern, plus one smaller tab piece at 1 1/2″ × 2″.
| Piece | Dimensions | Purpose |
|---|---|---|
| Main Body | 6 1/8″ × 1 7/8″ | Holder front/back |
| Tab | 1 1/2″ × 2″ | Keychain attachment |
When making your fabric selection, cotton works best for small pouch sewing projects.
Use sharp cutting tools and maintain a scant 1/4″ seam allowance throughout your chapstick bag sewing adventure.
To achieve clean cuts, for precise fabric cutting, use high-quality sewing scissors
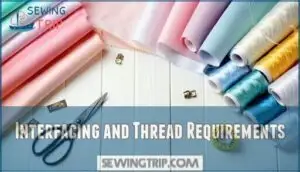
Interfacing and Thread Requirements
Beyond choosing your fabric, you’ll need lightweight fusible interfacing to give your chapstick holder structure and stability.
Match your thread color to your fabric selection for professional-looking seams that won’t distract from your sewing project.
When working with fusible interfacing, understanding the proper fusible interfacing techniques is essential for a successful project.
- Cotton Selection – Choose 100% cotton fabrics for durability and easy washing
- Interfacing Types – Select lightweight fusible interfacing that won’t add bulk to your sewing tutorial
- Thread Colors – Pick coordinating thread that blends seamlessly with your fabric choices
- Sewing Notions – Quality thread prevents frustrating breaks mid-project, keeping your sewing pattern on track
Keychain Ring Connectors
Several ring types work perfectly for your chapstick holder keychain project.
Standard split rings measuring 1-inch diameter offer the most secure attachment for your lip balm holder.
Key fobs with flat clamps provide extra durability, while quick releases make switching between bags effortless.
Choose nickel-plated metal rings for rust resistance—they’ll keep your keyring accessory looking sharp through countless uses.
For a successful DIY project, consider using a free sewing pattern to guarantee accurate measurements and assembly.
Assembling The Holder
Now you’re ready to put the pieces together and create your functional chapstick holder. Follow these four straightforward steps to transform your cut fabric into a handy keychain accessory.
Step 1 – Get The Free Chapstick Holder Pattern
Usually, downloading your chapstick holder pattern marks the real beginning of this rewarding handmade sewing project.
Visit the Pattern Download link to access your free sewing pattern, which includes precise measurements and Fabric Selection guidance.
This DIY sewing gifts template guarantees your lip balm holder fits standard tubes perfectly, making Crafting Tools preparation straightforward for successful handmade sewing projects.
The chapstick holder design often involves a pattern making process that requires careful consideration of the holder’s size and shape, which is a complete concept in itself.
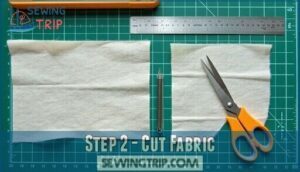
Step 2 – Cut Fabric
Two fabric pieces measuring 6 1/8″ × 1 7/8″ and one small piece at 1 1/2″ × 2″ form your chapstick holder foundation.
Cut precisely using sharp fabric scissors and a rotary cutter for clean edges.
Follow your sewing pattern measurements exactly—precision cutting guarantees professional results in small sewing projects like this DIY sewing gift.
Step 3 – Create The Fabric Tab
Once you’ve cut your fabric pieces, it’s time to create the sturdy tab that’ll connect your chapstick holder to your keychain.
Take your 1 1/2″ X 2″ fabric piece and fold it in half lengthwise. Press the fold with your iron for crisp edges.
Stitch along the open edge using a scant 1/4″ seam allowance, then turn right side out for a clean finish.
To achieve professional results, consider applying techniques for sewing patch pockets to reinforce your holder’s construction, which will help you create a reinforced holder.
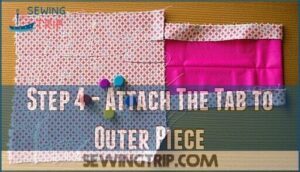
Step 4 – Attach The Tab to Outer Piece
Now you’ll position the completed tab on your chapstick holder’s outer fabric piece.
Place the tab’s raw edge flush with the top edge of one short end, centering it horizontally.
Pin securely in place before basting with a 1/8-inch seam allowance.
This tab attachment creates the foundation for your holder design, ensuring proper assembly tricks work smoothly when sewing small bags like this lip balm case, which requires smoothly executed steps and a good understanding of seam allowance.
Finishing Touches
You’ve completed the construction steps, but proper finishing details make your chapstick holder both functional and durable.
These final considerations will help you customize the size, maintain your creation, and troubleshoot common issues that might arise during use.
What is The Size of a Tube of Chapstick?
Standard chapstick dimensions matter when creating your DIY keychain holder. Getting the fabric requirements right guarantees your lip balm case fits perfectly without being too loose or tight.
Here are key chapstick dimensions to know:
- Tube Length: Most tubes measure 2.65-2.7 inches tall with cap
- Diameter: Standard width is approximately 0.6 inches (16mm)
- Capacity: Typical tubes hold 0.15oz (4.25g) of product
- Holder Size: Your sewing measurements should accommodate these standard dimensions
These sewing measurements help you create a chapstick holder pattern that works with most brands, making your lip balm pouch sewing project universally functional. When selecting materials, consider the lip balm tubes to guarantee the best fit for your DIY project.
How to Change The Size of The Keychain Chapstick Holder?
Adjusting your chapstick keychain holder for different sizes gives you freedom to accommodate various lip balm brands perfectly.
When scaling patterns, you’ll create custom fits that work beyond standard dimensions.
| Adjustment Type | Measurement Change |
|---|---|
| Standard ChapStick | 3" x 8" fabric pieces |
| Wider tubes (Labello) | Add 0.5" to width |
| Taller containers | Increase length by 2x height difference |
For holder modifications, measure your specific chapstick sizes first.
The general formula works: fabric height equals twice the balm height plus 5.5 inches, while width equals circumference plus 0.5 inches.
This approach guarantees your DIY pouch sewing project fits perfectly every time.
Can I Wash It?
With proper fabric care, your chapstick keychain holder becomes a long-lasting companion.
Machine wash using gentle cycles and cold water to preserve both fabric integrity and interfacing bonds.
Washing Instructions for lasting results:
- Fabric Care: Use mild detergent and avoid fabric softener residue
- Cleaning Tips: Pre-treat stains before washing your sewing accessories
- Laundry Safety: Place holder in mesh bag during machine cycles
- Stain Removal: Air dry completely to prevent mildew in your DIY pouch sewing project
This sewing lip balm case withstands 30+ wash cycles when properly maintained.
Helpful Tips and Info
Backstitching at stress points prevents your holder from falling apart after heavy use.
Choose thread colors that complement your fabric choices or create contrast for visual interest.
When using sewing machines, keep tension balanced to avoid puckering.
These sewing hacks work for other DIY projects like sewing cosmetic bags or lip balm cases.
Stock up on bagmaking supplies for future sewing tutorials—you’ll be hooked on making practical accessories.
Frequently Asked Questions (FAQs)
How to make a chapstick container?
Cut two fabric pieces (6⅛" x 1⅞"), one smaller piece (1½" x 2"), and fusible fleece (5½" x 1½"). Sew pieces together with scant ¼" seams, add keyring attachment, and you’ll have a handy chapstick holder.
How to sew a carrier bag holder?
Like organizing a cluttered purse, creating order from chaos brings instant relief.
You’ll cut two fabric rectangles measuring 15" x 6", sew them right sides together, turn inside out, and add a drawstring casing for easy closure.
How to sew a pencil organizer?
Start with fabric measuring 4×12 inches and fusible interfacing.
Create a rectangular tube, leaving one end open.
Add dividers by sewing vertical seams to create compartments.
Attach a closure like Velcro or snaps to keep pencils secure.
How long does it take to sublimate chapstick holders?
Sublimation takes 45-60 seconds at 400°F with medium pressure. You’ll heat-press your design onto the fabric before cutting and sewing your holder together for best results.
What fabric works best for durability?
Cotton fabric reigns supreme for chapstick holders.
You’ll want medium-weight quilting cotton that won’t fray easily.
Canvas or denim work brilliantly too, handling daily wear without breaking down like delicate fabrics would.
Can I make it without interfacing?
Absolutely mind-blowing results await.
You can definitely skip interfacing, but your holder won’t have that crisp, structured feel.
It’ll be softer and more floppy, which some folks actually prefer for flexibility.
How do I reinforce high-stress areas?
Reinforce stress points by double-stitching seams, backstitching at corners, and adding extra stitching where the keyring attaches. You can also use a zigzag stitch over raw edges for durability.
Will this fit lip balm tubes?
Most lip balm tubes measure roughly 7 inches wide, while this chapstick holder’s 3-inch width provides generous room.
You’ll easily accommodate standard tubes from Blistex, ChapStick, or Carmex with space to spare for easy insertion, making it a convenient option for carrying your favorite lip balm.
Can I add a snap closure?
Yes, you can easily add a snap closure to your chapstick holder.
Simply sew snap halves to the flap and body before final assembly, ensuring they align properly for secure closure.
Conclusion
Like finding your keys at the bottom of your bag, your chapstick always seems to disappear when you need it most.
With this simple project, you’ve created a practical solution that keeps your lip balm within easy reach.
Learning how to sew a chapstick holder transforms basic sewing skills into something genuinely useful.
The finished holder protects your chapstick from lint and damage while staying securely attached to your keys or bag, ensuring you’ll never lose another tube again, which is a very convenient feature.
- https://amerooniedesigns.com/wrist-strap-tutorial/
- https://amerooniedesigns.newzenler.com/courses/let-s-sew-friends-membership
- https://hellosewing.com/diy-chapstick-holder-keychain/
- https://www.applegreencottage.com/how-to-make-a-keychain/
- https://www.chapstick.com/blogs/news-nook/easy-ways-to-diy-a-chapstick-holder

