This site is supported by our readers. We may earn a commission, at no cost to you, if you purchase through links.
To sew a jacket, you’ll prepare and cut your fabric, then assemble the pieces, adding features like pockets and a collar.
As you work on your jacket, you’ll learn key techniques, such as serger-finishing and pressing, that will make your project look professional. With practice and patience, you’ll master the skills to create a custom-fit jacket, and that’s just the beginning of your sewing journey, with many more tips and tricks to discover.
Table Of Contents
Key Takeaways
- You’ll need to choose the right materials, like fabrics and threads, and select a pattern that suits your skill level to sew a jacket that fits well and lasts.
- Preparing your pattern and fabric is crucial, and you’ll need to cut pattern pieces accurately, straighten the fabric grain, and use a single-layer layout technique to guarantee precise construction.
- Assembling the jacket requires following a specific sequence of steps, including sewing the lining first, attaching the sleeves, and tackling collar construction, and you’ll need to press each seam flat and use proper seam pressing for crisp lines.
- Adding features and details, like bound buttonholes, pockets, and a collar, can transform your jacket from homemade to professional, and you’ll need to use techniques like serger-finishing and precision jacket pressing to achieve a polished look.
Materials & Supplies List
You’ll need the right materials and supplies to sew a jacket that fits well and lasts.
Gather the right materials for a jacket that fits and lasts.
Gather your fabric, interfacing, closures, thread, and needles before you start for the best results.
Fabrics
Anyone hoping to master sewing a jacket should keep fabric selection top of mind. The right jacket fabric transforms fit and comfort.
Here’s what to watch:
- Fabric Weight fits the season
- Fiber Content impacts breathability and structure
- Weave Types change feel and durability
- Print Selection sets your style
- Care Instructions matter—read that label before you sew
Choosing well at this stage makes sewing smooth and the end result spot-on. Consider how fabric weight impacts the garment’s drape and structure, which is crucial for a good fit.
Interfacing
Let’s talk interfacing—the unsung hero that gives your jacket real backbone.
Just after picking your fabric, your next power move is choosing the right interfacing weight. Fusible types stick with a press from your iron, while sew-in options offer softer shaping. Match interfacing weight to your fabric for best compatibility and avoid weird stiffness.
Understanding different interfacing options is essential for achieving the desired structure. Apply to collars, lapels, facings, and sometimes hems before any main sewing.
Here’s what to keep handy:
- Lightweight sew-in
- Medium-weight fusible
- Hair canvas
- Self-adhesive fusible
- Full coverage for lapels and collars
Closures (Buttons, Zippers)
When deciding on jacket closures, think beyond just function—Closure Placement and style go hand-in-hand.
Buttons suit classic looks, so explore Buttonhole Styles, from machine-sewn to bound. If ease matters, try a sturdy zipper; experiment with Zipper Types, like separating or invisible, especially for a clean jacket zipper install.
For flair, mix in Decorative Closures like toggles or snaps. Always pick closures for Closure Durability, matching your jacket’s weight and use.
Consider various zipper applications for ideal jacket design. The right choice will polish your sewing jacket project.
Thread and Needles
In the context of sewing a jacket, picking the right thread and needles makes all the difference.
Use strong polyester Thread Types, especially with a core spun in cotton, for durability and smooth stitches.
Match Needle Sizes to your fabric—sharps for woven, stretch for knit. Pay attention to Fabric Compatibility and Tension Adjustment on your sewing machine.
Specialty Needles help with thick seams. For your next project, consider high-quality jacket thread. Reliable thread and needles save headaches later and make your finished jacket look sharp.
Choosing The Right Pattern
You’re choosing a pattern to sew a jacket, and selecting the right one is vital to suit your skill level and style preferences.
You’ll want to weigh factors like the jacket’s length, details, and intended use to guarantee you pick a pattern that’s right for you, considering complete concepts.
Beginner-Friendly Patterns
You’re moving on from materials to choosing the right pattern. For a beginner, look for easy styles with simple closures, minimal interfacing, and basic fabrics.
Consider:
- Clear instructions
- Simple kimono styles
- Boxy shapes
- Lightweight fabrics
- DIY jacket sewing tutorials for guidance on your beginner jacket project.
Some patterns, like the New Look 6585, are ideal for beginners due to their minimal requirements.
Advanced Patterns
You’re taking on advanced patterns, featuring complex closures and customized fits.
Mastering pattern alterations and couture techniques, like fabric manipulation, will elevate your jacket sewing skills.
With advanced sewing techniques, create a custom, made-to-measure jacket using a precise jacket sewing pattern, embracing couture principles for a unique, high-end garment that requires precise jacket sewing pattern.
Preparing The Pattern and Fabric
Once you’ve selected your pattern, preparing it properly sets the foundation for a professional-looking jacket.
This essential step involves cutting pattern pieces accurately, straightening the fabric grain, and using single-layer layout techniques to guarantee precise construction.
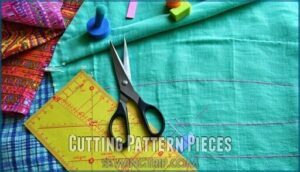
Cutting Pattern Pieces
Accurate fabric preparation starts with sharp fabric scissors and pattern weights for secure placement.
Begin jacket cutting by positioning pattern pieces according to grainline alignment on your prepared fabric.
Transfer notch accuracy marks using a fabric marker or small clips, and follow the cutting order specified in your jacket pattern instructions.
Work methodically from largest to smallest pieces, keeping fabric flat and smooth throughout the cutting process.
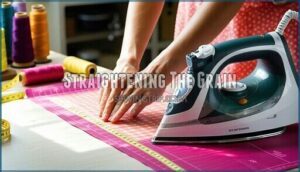
Straightening The Grain
Once your pattern pieces are cut, you’ll need to check your jacket fabric for grain imperfections. Pre-washing effects can create skewed fabric that throws off your entire project. Correcting grain issues now saves headaches later when sewing jacket pieces together.
Here’s how straightening grain transforms your sewing experience:
- Pull gently on the bias to realign crooked fabric grainlines
- Steam press while fabric is damp for easier grain correction
- Check selvage edges run parallel to confirm proper alignment
- Square up crosswise grain by pulling opposite corners simultaneously
Fabric grainlines affect how your finished jacket hangs and fits. Skewed fabric creates twisted seams and uneven hems that no amount of pressing can fix.
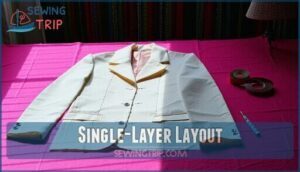
Single-Layer Layout
Once you’ve straightened the grain, adopt a single-layer layout approach. This method lets you maximize your jacket fabric while maintaining complete control over pattern piece placement.
Spread fabric across your cutting table setup with the right side facing up. Pre-washing helps with better fabric stability, which is key for garment construction.
| Layout Benefit | Single-Layer Advantage | Result |
|---|---|---|
| Fabric Control | No shifting between layers | Precise cuts every time |
| Pattern Visibility | See all markings clearly | Accurate transfer of details |
| Efficient Usage | Strategic piece positioning | Minimal waste, maximum yield |
| Grain Alignment | Perfect fabric grain control | Professional jacket construction |
Position each jacket pattern piece carefully, checking fabric grain alignment before pinning. Your sewing machine will thank you later when seams lie flat and the finished jacket drapes beautifully. This methodical approach prevents costly mistakes during sewing, ensuring a professional jacket construction with precise cuts and accurate transfer of details.
Sewing The Jacket
Once you’ve prepared your pattern and fabric, it’s time to start the actual construction process.
The key to a professional-looking jacket lies in following the proper sequence of assembly steps and taking your time with each phase, which is crucial for a successful outcome, emphasizing the importance of complete concepts.
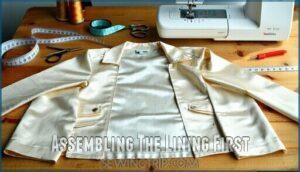
Assembling The Lining First
Once you’ve cut your fabric, start by assembling the lining first.
Focus on Lining Seam Order—sew the pieces in the order your pattern directs for the smoothest fit.
Use the right Lining Fabric Choice and don’t skip Interfacing the Lining where needed.
Carefully Attach Lining Facings, then choose a sturdy Lining Hemming Method to finish seams.
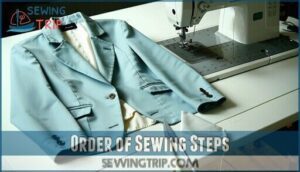
Order of Sewing Steps
Once your lining is assembled, lay out all the jacket pieces so you can see your path forward.
Start with the back and side-back panels—sew them together, paying attention to seam alignment. Continue with the front and side-front pieces, then join shoulders and side seams.
Press each seam flat, then open, using proper Seam Pressing for crisp lines. Attach the sleeves, then tackle Collar Construction.
Finish with Sleeve Insertion, edge finishing, and Hemming Order for a sharp, professional look. Choosing the right pattern is key, so consider an easy pattern for your first attempt.
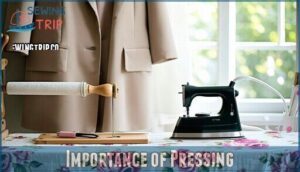
Importance of Pressing
Once you’ve mastered the order of sewing steps, keep your project looking sharp with precision jacket pressing. Seam shaping starts by pressing your seam allowances flat before opening them up.
Use a quality steam iron, sleeve board, and tailor’s ham for curved areas—these pressing tools make all the difference. Always check your iron’s heat setting to avoid fabric burns.
Smart pressing techniques help bond interfacing, protect fabric, and give you a professional finish.
- Press seam allowances flat
- Invest in pressing tools
- Use proper heat settings
- Shape seams for crisp edges
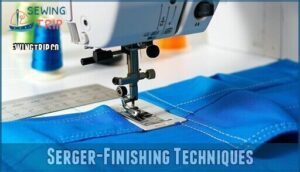
Serger-Finishing Techniques
After pressing creates sharp, professional lines, serger-finishing techniques take your jacket to the next level. Your serger creates overlock stitches that prevent fraying while reducing bulk inside seams.
Set your differential feed settings to 1.2 for woven fabrics to prevent stretching. Use rolled hem edges on sleeve cuffs for a polished look. Try flatlock seams on sporty jackets for strength and flexibility.
Regular serger maintenance keeps your sewing machine running smoothly throughout jacket assembling.
| Technique | Best Application |
|---|---|
| 4-thread overlock | Heavy jacket seams |
| 3-thread overlock | Lightweight linings |
| Rolled hem | Sleeve and jacket hems |
| Flatlock | Activewear jackets |
| Blind hem | Invisible hemming |
Adding Features and Details
Once you’ve completed the basic jacket construction, it’s time to add the finishing touches that transform your garment from homemade to professional.
These features—buttonholes, pockets, collars, and sleeves—require patience and precision but make all the difference in your final result.
Creating Bound Buttonholes
Before ever snipping into your jacket, make sure you’ve picked the right interfacing type and stabilized each buttonhole—this lends crispness to even tricky fabrics.
For perfect, corded buttonholes, accuracy is everything—measure twice, sew once.
Follow these steps:
- Mark placement with care (think: ruler and patience).
- Add interfacing for structure.
- Stitch the box and snip the center.
- Clip corners and turn out welts.
- Hand stitch bar tacks for sleek, secure finishing.
A precise welt width turns a jacket ordinary into extraordinary!
Sewing Pockets
Adding pockets to your jacket is where function meets style.
Think about Pocket Types; patch, welt, or flap pockets each lend a different look.
Placement Options matter—centered between seams keeps things neat.
Use Reinforcement Techniques like interfacing at openings and bartacks at corners so your pockets last.
Decorative Stitching adds personality without much effort.
Remember, Lining Pockets hides the stitches for a clean finish.
These jacket sewing techniques let you master adding pockets jacket fans love in every sewing jacket tutorial.
Attaching Collar and Lapel
A crisp collar and sharp lapel lift any jacket from homemade to handcrafted.
Crisp collars and sharp lapels elevate jackets to handcrafted perfection
Start by applying interfacing collars for support—think of it as the backbone for collar shaping and crisp lapel points.
Match notches, ease curves, and clip corners for smooth collar sewing techniques.
Understitching lapels is your secret weapon for clean, refined edges.
Experiment with collar stands for added height or structure.
Press along the roll line, but don’t rush—patience is key to a well-shaped jacket collar and lapel.
With firm, steady hands, you’ll see that well-done jacket lapel draw every eye, creating a truly handcrafted look.
Set-in Sleeves
Once your collar and lapel are set, focus on the sleeves.
For jacket sleeve sewing, line up your sleeve pieces and sew the side seam from hem to notch.
Press the seam flat—wrinkles aren’t welcome.
Grading the seam allowance at the sleeve cap keeps things tidy.
Use easing techniques to fit set-in sleeves to the armhole, pin notches and underarm gussets, and adjust for smooth rotation.
Stitch carefully, keeping an eye on fullness.
Press seams toward the sleeve for a clean finish.
Armhole shaping comes next—steam, then finger-press over a tailor’s ham, and you’re good to go.
Finishing Touches
You’re almost done, so focus on finishing details like hemming the jacket and attaching shoulder pads or sleeve heads.
These last steps will make your jacket look neat, polished, and ready to wear.
Hemming The Jacket
You’re now hemming the jacket, a final step.
Use blind hemming or decorative hems for a professional finish.
Consider curved hems or facing hems, and don’t forget vent placement.
With your sewing machine, employ various sewing techniques to achieve a flawless hem, completing your jacket with precision.
Attaching Shoulder Pads and Sleeve Heads
Now you’re ready to give your jacket that polished, professional finish. Start by positioning your shoulder pad along the armhole seam, matching its curves to the jacket’s natural lines.
There are two main Shoulder Pad Types: triangular pads for sharp structure and foam-covered pads for subtle craftsmanship. Use the stitch-in-the-ditch method for Pad Placement Tips—hand-baste the front edge first, then secure the back corners to your jacket’s lining with three strategic tacks.
For sleeve seams, consider that regular stitching works well on lightweight materials. For Sleeve Head Shaping, install sleeve head rolls before adding shoulder pads.
Line up the roll with your armhole seam, longer side facing front. Pin from center outward without pleating. This Securing Sleeve Heads technique creates Achieving Smoothness in your sleeves. These sewing techniques transform ordinary jacket sleeves into refined perfection.
Sewing Tips and Techniques
Master these essential techniques to elevate your jacket-making skills and achieve professional results. These tools and methods will streamline your construction process while ensuring precision and durability.
Using a Rotary Cutter
A sharp rotary cutter transforms jacket pattern sewing from tedious to swift.
Choose a 60mm blade for cutting multiple layers of heavy jacket fabric effectively.
Rotary Cutter Safety means always closing the blade guard after each cut—accidents happen fast.
Blade Size Matters when tackling thick materials like wool or canvas.
Replace dull blades immediately to maintain sharpness and prevent fabric snagging.
Ergonomic Rotary Cutters reduce hand fatigue during long cutting sessions.
Use firm, steady pressure while guiding along rulers for precise pattern pieces.
Store cutters properly to protect blade edges between sewing projects, ensuring Rotary Cutter Safety and maintaining Ergonomic design for efficient use, with a focus on Blade Size.
Marking Fabric With Hera Marker
After cutting your fabric pieces, you’ll need precise marking for accurate sewing.
A Hera marker becomes your best friend here.
This Japanese tool creates temporary creases without ink or chalk residue.
Simply press the pointed tip along your fabric to mark seam lines, dart placements, or pocket positions.
Hera advantages include working on all fabric types without leaving permanent marks.
The tool requires gentle pressure control – too light won’t mark, too heavy damages delicate fabrics.
Practice on scraps first to find the right touch.
For marking accuracy, use a ruler alongside the Hera marker for straight lines.
The creased marks remain visible until pressed flat with an iron, making erasing marks simple when you’re ready for the next sewing step in your jacket construction.
Basting With Curved Safety Pins
You’ll master basting with curved safety pins, a Pin Curve Advantage for efficient Fabric Handling.
This boosts Basting Efficiency, especially with Curved Pin Types.
When sewing your jacket, remember to remove pins as you go, ensuring smooth sewing machine operation and neat fabric handling, a key sewing tip.
Always prioritize sewing machine safety to prevent accidents, which is a crucial aspect of sewing machine safety.
Frequently Asked Questions (FAQs)
Can a beginner sew a jacket?
You can sew a jacket, even as a beginner, with 60% of users choosing intermediate patterns, indicating a gentle learning curve with the right guidance and tools.
Is it difficult to make a jacket?
You’ll find making a jacket challenging, but with the right pattern and techniques, it’s achievable, requiring patience, attention to detail, and practice to guarantee a professional-looking finish.
What is the most difficult thing to sew?
Like a puzzle, you’ll discover that sewing set-in sleeves or complex zippers can be the most difficult thing to tackle, requiring patience and precision to get it just right.
How hard is it to sew your own coat?
You’ll face challenges, but sewing your own coat can be rewarding, requiring patience, precision, and practice to achieve a professional-looking garment that fits perfectly.
What is ideal jacket length for petite frames?
You’ll want a jacket length that hits just above the hip, typically between 22-25 inches, to create a balanced silhouette on petite frames, elongating the body.
Can I use cotton for a winter jacket?
Rhetorically speaking, can cotton keep you cozy? You can use cotton for a winter jacket, but it’s not ideal, as it lacks warmth and insulation compared to wool or fleece.
How to prevent fabric from fraying easily?
You can prevent fabric fraying by using a serger or zigzag stitch on your sewing machine to finish seams, or applying fray-checking products to raw edges before sewing.
What thread color should I use for denim?
You’ll typically use a matching thread color for denim, such as blue or a neutral tone like beige, to blend seamlessly with the fabric.
Are silk jackets suitable for everyday wear?
Like a splash of elegance, silk jackets can be suitable for everyday wear, but you’ll need to think about durability and maintenance to make them last.
Conclusion
You’re now a sewing master, having learned how to sew a jacket.
With practice, you’ll perfect your skills, and sewing will become second nature.
You’ve got the basics down, from materials to finishing touches, so go ahead and give how to sew a jacket a try, you’ll be wearing your custom creation in no time.
- https://drive.google.com/file/d/1SaP5VzEqyNjS0a_JNOAG_s5CK0Qecumt/view
- https://www.youtube.com/watch?v=wCnVOcF39uc&t=38s
- https://www.linkedin.com/in/sophia-liu-a36927210/overlay/about-this-profile/
- https://www.massonlifestyle.com/blog/jacket-coat-patterns-for-beginners-intermediate-and-advanced-makers
- https://closetcorepatterns.com/collections/coat-patterns-jacket-patterns


